|
|

Table Of Contents
Understanding the CVDM-CSM Desktop
Understanding the Action Buttons
What Does the Home Page Show Me?
What Does the Setup Page Show Me?
Viewing the Running Configuration Information for a Device
Viewing the Device Transport Log
Delivering CLI Commands to the Switch/Module
Getting Started With CVDM-CSM
CiscoView Device Manager for the Cisco Content Switching Module (CVDM-CSM) enables users easily to configure content load-balancing services on their CSMs. CVDM-CSM is a task-based tool that allows users to control the versatility of their CSM by offering configuration, such as setting up virtual servers, creating server farms, and applying advanced policies. CiscoView Device Manager is a free embedded manager that resides in the Cisco Catalyst 6500 Series supervisor engine flash memory.
CiscoView Device Manager for the CSM (CVDM-CSM) supports server load balancing configuration on the CSM, including:
•
Configuring virtual servers.
•
•
•
Note
For enterprises and service providers to offer accelerated content delivery services in their data centers, an easy-to-use, web based, device-management GUI is required for CVDM-CSM.
This section contains the following topics:
•
•
•
Before You Begin
Before you begin using CVDM-CSM:
•
CVDM-CSM Readme contains important information regarding the following topics:
–
–
–
–
–
•
•
What's New
CVDM-CSM 1.1 provides support for Content Switching Module with SSL (CSM-S). CSM-S can look at decrypted data and make flow routing decisions. CSM-S allows you to launch CiscoView Device Manager for the SSL Services Module (CVDM-SSLSM). To do this, click on the SSL button in the homepage and configure the credentials for the CVDM-SSLSM. After they are validated CVDM-SSLSM launches. CVDM-SSLSM uses the Secure Socket Layer (SSL) protocol to enable secure transactions of data through privacy, authentication, and data integrity.
The new features in this release are:
•
•
•
•
•
•
•
•
•
•
•
•
•
•
•
Key Features in CVDM-CSM
The following table describes the key features of CVDM-CSM.
Dual Mode setup Wizard
Allows you to:
•
For more information, see Basic Setup Wizard, page 2-3.
•
For more information, see Advanced Setup Wizard, page 2-13.
VLAN setup
Allows you to configure client-side and server-side VLANs.
Virtual Server setup
Allows you to:
•
•
•
•
•
•
•
Server Farm
configurationAllows you to:
•
•
•
•
•
•
•
Real Server
configurationAllows you to configure the named real servers by their IP address and location. See, Chapter 6, "Managing Real Servers".
Policy configuration
Allows you to:
•
•
Map configuration
Allows you to:
•
•
Sticky Group configuration
Allows you to:
•
Health Monitoring Probes configuration
Allows you to:
•
See, "Managing Probes".
Fault Tolerant Group configuration
Allows you to:
•
•
Load Scripts
Allows you to:
•
•
View Environment Variables
Allows you to:
•
XML Configuration
Allows you to:
•
Starting CVDM-CSM
Step 1
Note
http://<ip-address>/flash/cv/applet.html?dynarchives=cvdm-csm-1.1.sgz&slotNo=<slot-number>
or
http://<ip-address>/flash/cv/applet.html?dynarchives=cvdm-csm-1.1_K9.sgz&slotNo=<slot-number>
(if you installed Cisco IOS Cryptographic software)
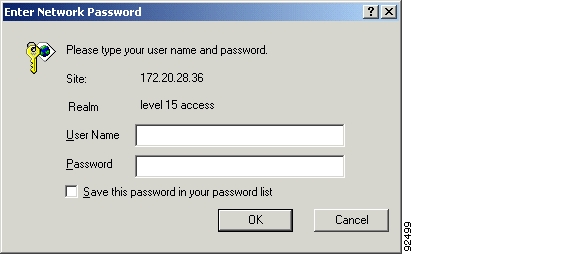
where <ip-address> is the IP address of the switch and <slot-number> is the slot number where CVDM-CSM resides. It may be useful to bookmark this URL for future use.Figure 1-1 Enter Network Password Dialog Box
Step 2
Note
Step 3
Step 4
Step 5
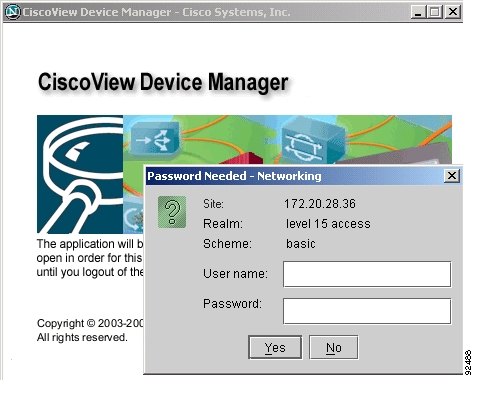
Figure 1-2 Splash Screen and Password Needed - Networking Dialog box
Note
The CVDM-CSM splash screen must remain open in order for the application to function properly. Do not close this window until you log out. CVDM-CSM will appear in a separate window.
Note
Step 6
Note
Step 7
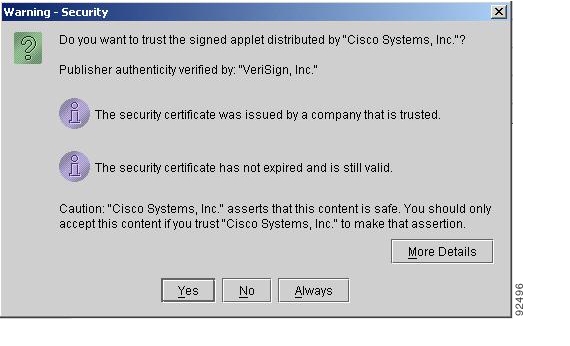
Figure 1-3 Warning - Security Dialog Box
Step 8
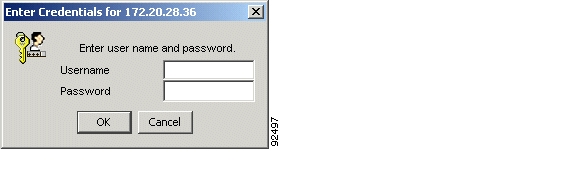
Figure 1-4 .Enter Credentials for <IP Address> Dialog Box (Username and Password)
Step 9
Step 10
Hostname
Hostname of the device.
Domain Name
Name of the domain to which the host belongs.
Key Length
SSH key length.
Step 11
Step 12
Step 13
The Enter Credentials for <IP Address> dialog box appears (see Figure 1-5). Enter your device user name and password.
Step 14
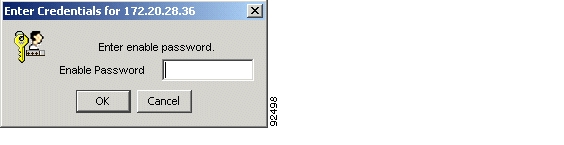
Figure 1-5 Enter Credentials for <IP Address> Dialog Box (Enable Password)
Step 15
Step 16
Navigating in CVDM-CSM
Before you begin using CVDM-CSM, you must understand the basic operation of the user interface, including the login procedure and user interface elements.
See the following sections for more information:
•
•
•
•
•
Understanding the CVDM-CSM Desktop
This section describes the main GUI elements of the CVDM-CSM application.
Figure 1-6 CVDM-CSM GUI Elements
Reference1
Menu bar
Provides File, Edit, View, and Help buttons.
•
–
–
–
•
–
–
•
–
–
–
–
–
1
Menu bar
•
–
–
2
Task bar
Provides access to CVDM-CSM functionality.
•
•
•
•
•
3
Page
CVDM-CSM working area in which you perform tasks.
4
Pane
One part of a divided page or dialog box.
5
Status bar
Provides the following information:
•
•
•
•
•
•
6
Selector
Hierarchy of the groups and objects available in the Switch or Services page that allows you to access specific functions for a Switch or Service object. See Selector for more information.
7
Setup pane
Contains buttons, under the Switch or Services page, that allow you to access switch or services functions.
Selector
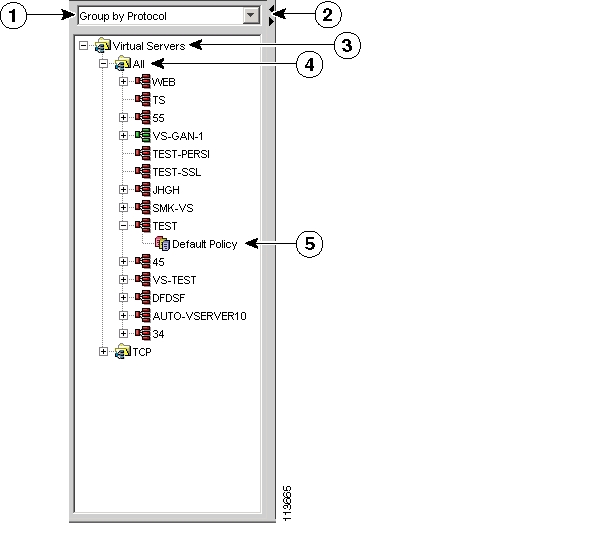
Figure 1-7 shows the selector; Table 1-1 describes the selector elements.
Figure 1-7 Selector
Table 1-1 Selector Elements
1
Group folder
Displays a group of objects. Click the plus (+) symbol to see the contents of this folder.
2
Selector handle
Click the handle to open and close the selector, or click the handle and drag it to resize it.
3
Subgroup folder
Displays a subgroup of objects. Click the plus (+) symbol to see the contents of this folder.
4
Object
Displays the individual entity contained in the group or subgroup. Click an object to open the page for that object.
Note
Understanding the Action Buttons
This section describes the action buttons that appear in CVDM-CSM dialog boxes and wizards.
•
•
Table 1-3 Dialog Box Action Buttons
OK
Saves your changes.
Cancel
Exits the dialog box without making any changes.
Help
Displays context-sensitive online help.
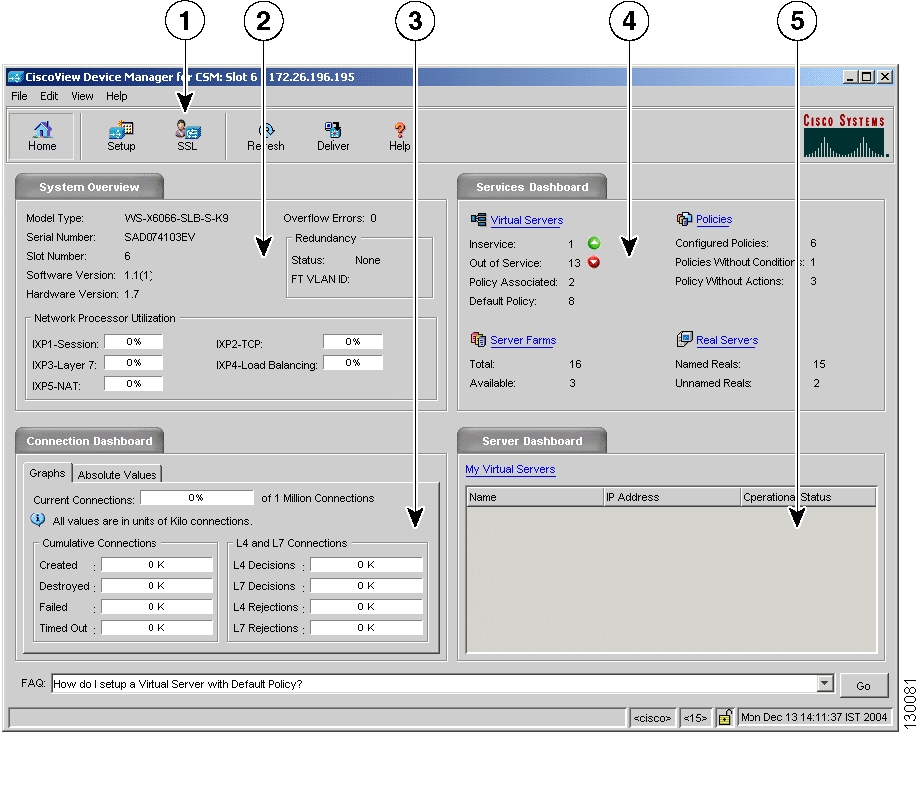
What Does the Home Page Show Me?
The home page is the first screen that comes up when you start CVDM-CSM. It provides an overview of CVDM-CSM (see Figure 1-8).
Figure 1-8 CVDM-CSM Home Page Components and Description
1
SSL Button
This button is visible only if you launch the CVDM-CSM for a CSM-S service module. It will not be visible if you launch CVDM-CSM.
When you click this button:
1.
2.
2
Model Type
Model type of the CSM.
Overflow Errors
Number of overflow errors for the system.
Serial Number
Serial number of the card.
Slot Number
Slot number of the CSM for which the application is open.
Software Version
Software version of the CSM module.
Hardware Version
Hardware version of the CSM module.
Status
Displays if the module is Active or Standby mode.
FT VLAN ID
The VLAN over which heartbeat messages are sent. Both CSMs must have the same VLAN ID.
The network processor utilization, in percentage, for IXP1-Session, IXP2-TCP, IXP3-Layer7, IXP4- Load-Balancing, and IXP5-NAT.
3
Graphs
Select this tab to view the Connection Dashboard details as graphs.
The graphs are indicated in units of kilo connections.
Absolute Values
Select this tab to view all the actual counter values.
Created
Number of connections at the specified moment. The units are kilo connections.
Destroyed
Number of connections destroyed. The units are kilo Connections.
Failed
Number of connections that failed. The units are kilo connections.
Timed Out
Number of connections that timed out. The units are kilo connections.
L4 Decisions
Number of Layer 4 load-balancing decisions made. The units are kilo connections.
L7 Decisions
Number of Layer 7 load-balancing decisions made. The units are kilo connections.
L4 Rejections
Number of Layer 4 load-balancing rejections made. The units are kilo connections.
L7 Rejections
Number of Layer 7 load-balancing rejections made. The units are kilo connections.
4
In Service
Number of virtual servers that are operational.
Out of Service
Number of virtual servers that are not operational.
Policy Associated
Number of virtual servers that have associated policies.
Default Policy
Number of virtual servers that have only the default policy.
Configured Policies
Number of policies that are configured in the CSM module.
Policies Without Conditions
Number of policies that do not have conditions.
Policies Without Actions
Number of policies that do not have actions.
Total
Number of server farms configured in the CSM module.
Available
Number of server farms with at least one operational real server.
Real Servers
Displays the administrative status of the real servers.
Named Reals
Number of named real server configured on the CVDM-CSM.
Unnamed Reals
Number of unnamed real server configured on the CVDM-CSM.
5
My Virtual Server
Selected virtual servers that are used in emergencies as critical servers. For more details, see What are My Virtual Servers?.
Name
Name of the virtual server.
IP Address
IP address of the virtual server.
Operational Status
Virtual servers that are out of service.
What are My Virtual Servers?
My Virtual Servers is a page you can access through a link on the home page, under the Server Dashboard.
Step 1
The My Virtual Servers page appears, displaying the following fields:
What Does the Setup Page Show Me?
The Setup page allows you to access the features in CVDM-CSM. You can launch wizards from this page or you can start working with VLANs, virtual servers, server farms, real servers, policies, fault tolerance, XML configuration, probe scripts from this page.
When you reach the Setup page, the following GUI elements appear in an outlook bar on the left side of the content window:
Wizard
Allows you to:
•
For more information, see Basic Setup Wizard, page 2-3.
•
For more information, see Advanced Setup Wizard, page 2-13.
VLANs
Allows you to configure client-side and server-side VLANs.
Virtual Servers
Allows you to:
•
•
•
•
•
•
•
Server Farms
Allows you to:
•
•
•
•
•
•
•
Real Servers
Allows you to configure the named real servers by their IP address and location. See, Chapter 6, "Managing Real Servers".
Policies
With the object selector, you can make the following selections:
•
–
–
See, Chapter 7, "Managing Policies".
•
–
–
–
See, Chapter 8, "Managing Maps".
•
Probes
Allows you to configure specific types of health probes, such as FTP, HTTP, ICMP, SMTP, TCP, Telnet, UDP, and Script health probes to administer your network.
See, "Managing Probes".
Miscellaneous
With the object selector, you can make the following selections:
•
–
–
See, Understanding Fault Tolerance, page 11-1.
•
–
–
See, Understanding Scripts, page 11-6.
•
See, Viewing Environment Variables, page 11-13.
•
Configuring SSL Credentials
CVDM-CSM uses the device credentials to log into the SSL daughter card and extract the details to launch the CiscoView Device Manager for the SSL Services Module (CVDM-SSLSM).
•
The Enter Credentials-SSL:slot number dialog box appears. Enter the appropriate values.
After you enter the credentials, they are validated and the CVDM-SSLSM launches. Once the credentials are validated you cannot edit them. When you select Edit > Credentials from the menu bar and invoke the Edit Credentials-SSL:slot number dialog box, you can only view the validated credentials.
Editing Preferences
Step 1
Step 2
Show CLI Preview for Wizards check box
Select this check box if you want CVDM-CSM to display the CLI commands to be delivered to the device after you have completed a wizard.
When you select this check box and click Finish in a wizard, the Deliver Configuration to the Switch/Module(s) dialog box opens and displays the CLI commands.
For more information, see Delivering CLI Commands to the Switch/Module.
Show CLI Preview on Delivery check box
Select this check box if you want CVDM-CSM to display the CLI commands to be delivered to the device.
When you select this check box and click Deliver, the Deliver Configuration to Switch/Module(s) dialog box opens and displays the CLI commands.
For more information, see Delivering CLI Commands to the Switch/Module.
Confirm before exiting check box
Select this check box if you want CVDM-CSM to confirm with you before exiting the application.
Select the Always display this dialog box before exiting check box if you always want CVDM-CSM to confirm that you want to exit the application.
Refresh after Delivery check box
Select this check box to refresh CVDM-CSM after delivering accumulated CLI commands for the device.
Viewing the Running Configuration Information for a Device
Step 1
•
•
•
Note
Step 2
You can click the Save to File button to save this information as a text file.
Viewing the Device Transport Log
Step 1
Step 2
You can do either of the following:
•
•
Refreshing CVDM-CSM
You can refresh CVDM-CSM at any time to obtain the latest service module information and update the CVDM-CSM data. You do not have to refresh the application after delivering accumulated CLI commands for the device; the application is automatically refreshed.
Step 1
•
Or
•
Step 2
Delivering CLI Commands to the Switch/Module
You must deliver accumulated CLI commands to the device before any changes you make in CVDM-CSM will be applied. The Deliver Configuration to Switch/Module(s) dialog box displays the accumulated CLI commands to be delivered to the device.
Step 1
The Deliver Configuration to Switch/Module(s) dialog box appears if you have configured CVDM-CSM to display the accumulated CLI commands when you click the Deliver button.
Note
Step 2
Deliver button
Click to send the accumulated CLI commands to the device.
Save to File... button
Click to save the CLI commands as a text file.
Close button1
Close the dialog box without delivering any CLI commands.
Deliver Later button2
Click to deliver the wizard CLI commands to the device at a later time.
Refresh after Delivery check box
Select this check box to refresh CVDM-CSM after delivering accumulated CLI commands for the device.
1 This button is available only in the Deliver Configuration to Switch/Module(s) dialog box that is displayed after you click Deliver at the top of the window.
2 This button is available only in the Deliver Configuration to Switch/Module(s) dialog box that is displayed after you click Finish in a wizard.
Note
![]()
![]()
![]()
![]()
![]()
![]()
![]()
![]()
Posted: Sun Apr 17 22:13:13 PDT 2005
All contents are Copyright © 1992--2005 Cisco Systems, Inc. All rights reserved.
Important Notices and Privacy Statement.