|
|

Table Of Contents
Managing Other Features in CVDM-CSM
Editing Fault Tolerance Configuration
Understanding XML Configuration
Managing Other Features in CVDM-CSM
CVDM-CSM provides the following features that you can access from the Miscellaneous page:
•
Understanding Fault Tolerance
•
•
Understanding Fault Tolerance
From the Fault Tolerance dialog box, you can do the following:
•
•
In the secure (router) mode, the client-side and server-side VLANs provide the fault-tolerant (redundant) connection paths between the CVDM-CSM and routers on the client side, and the servers on the server side. In a redundant configuration, two CSMs perform active and standby roles. Each CSM contains the same IP, virtual server, server pool, and real server information. From the client-side and server-side networks, each CSM is configured identically. The network sees the fault-tolerant configuration as a single CSM.
Two CSMs can be configured in a fault-tolerant mode to share state information about user sessions and provide connection redundancy. When the active CSM fails, open connections are handled by the standby CSM without interruption, and users experience hitless failover.
Fault-tolerant configuration can be done with two CSMs in two Cisco Catalyst 6500 Series devices or in a single chassis. Configuration can also be done in either the secure (router) mode or non-secure (bridge) mode.
Configuring fault tolerance requires the following:
•
•
•
•
•
Related Topics:
•
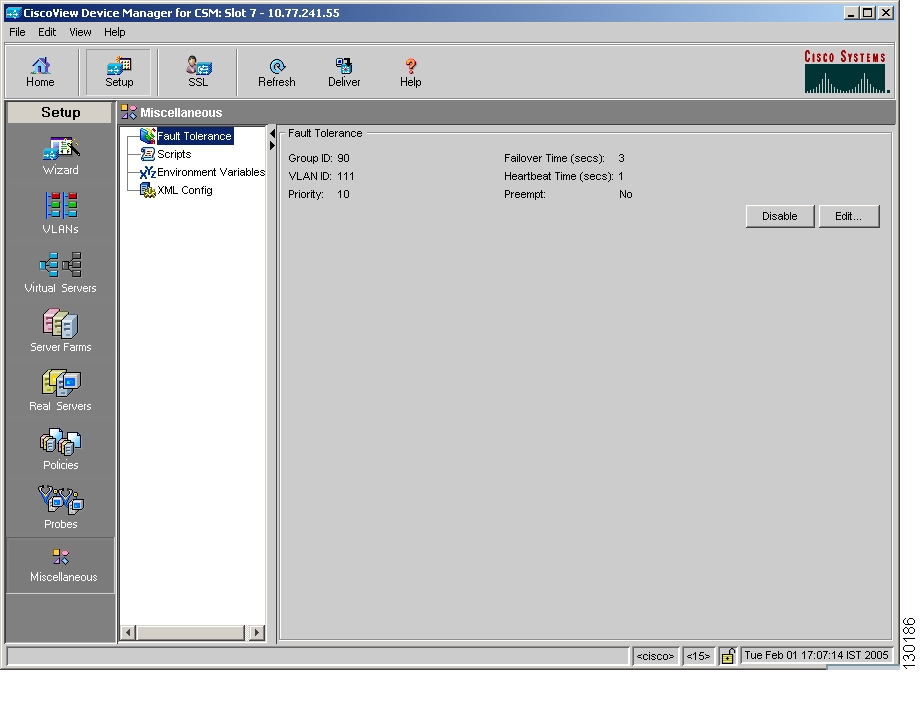
Configuring Fault Tolerance
Note
Figure 11-1 Fault Tolerance Window
Step 1
Step 2
From this dialog box, you can do the following:
•
•
Editing Fault Tolerance Configuration
Note
Step 1
Step 2
Step 3
Understanding Scripts
CVDM-CSM allows you to upload and execute Toolkit Command Language (TCL) scripts. You can customize scripts to develop health probes or standalone tasks. The CVDM-CSM executes the scripts at regular intervals.
There are two basic types of scripts in CVDM-CSM:
•
•
Related Topics:
Viewing Scripts
You can load scripts onto the CVDM-CSM through script files. A script file may contain zero, one, or more scripts.
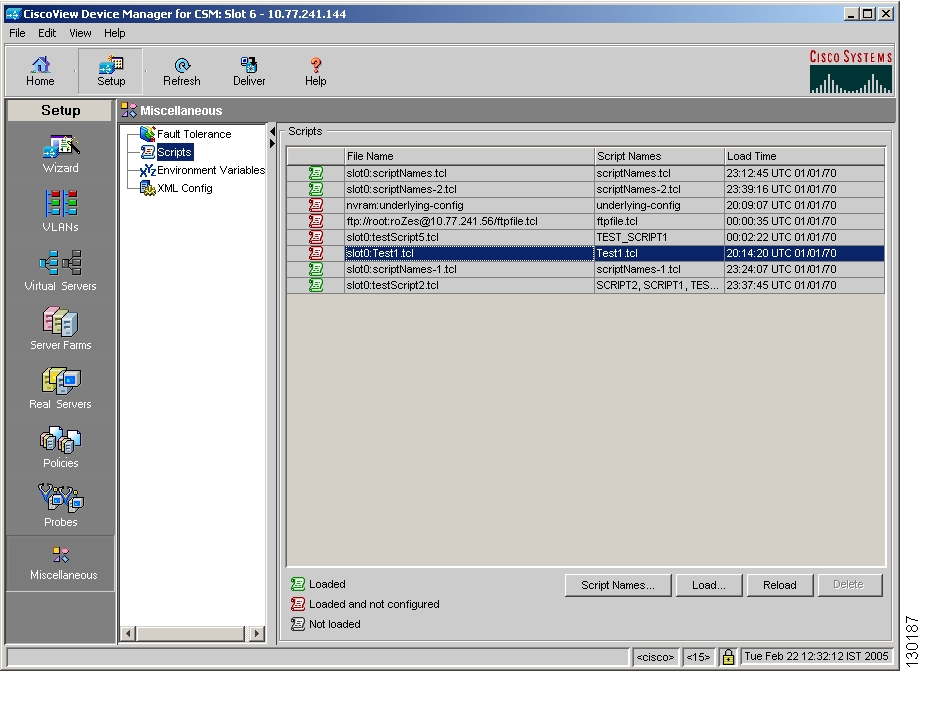
Figure 11-2 Scripts Window
Step 1
Step 2
State column (far-left column)
Displays the state of the script. Depending on its state the color of the icon beside the script will change. For more details on what the color of the icon represents, see Table 11-1.
Filename
Specifies the filename of the script
Script Name
Specifies the scripts in the file.
Load Time
Specifies the time at which you loaded the script.
Table 11-1 describes the status of the scripts based on the color of the icons.
From this dialog box, you can do the following:
•
•
•
When you reload the scripts which are in the green and/or red state, CVDM-CSM prompts you for confirmation and reloads the corresponding scripts.
Based on the commands in the CLI, CVDM-CSM will first remove the configuration of the script and then reconfigure it.
•
Note
When you click Delete, CVDM-CSM prompts you for confirmation and disables the corresponding script.
Loading Scripts
You can load scripts from the switch or from network devices like FTP, TFTP or RCP servers. A script file may contain zero, one, or more scripts. A script remains in the system after you load it. You cannot remove them but you can modify them.
Note
Step 1
Step 2
Step 3
•
•
Switch Tab
Step 1
Do one of the following:
•
•
•
•
The following columns appear under the Switch tab:
File
Specifies the filename of the script.
Load
Select this check box to load the required script.
Network
Step 1
The different server types are:
•
•
•
Step 2
•
•
•
FTP
To load a script from a FTP server, you have to enter the following information:
TFTP
To load a script from a TFTP server, you have to enter the following information:
TFTP Server IP Address
IP address of the TFTP server.
Filename
Specifies the filename of the script
RCP
To load a script from an RCP server, enter the following information:
RCP Server IP Address
IP address of the RCP server.
Username
Name of the credentials user.
File Name
Specifies the filename of the script
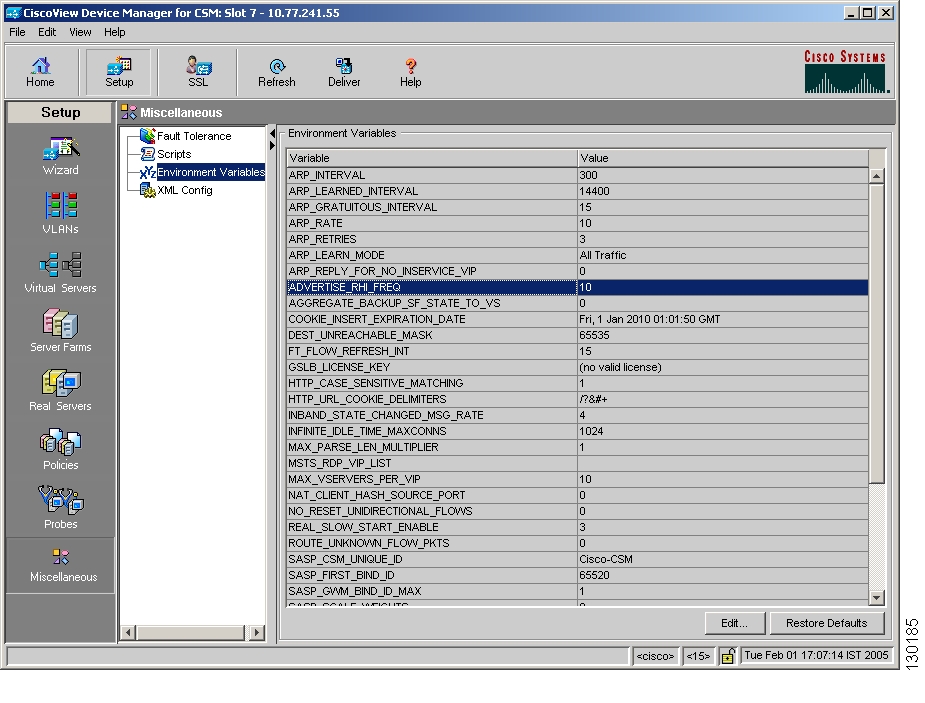
Viewing Environment Variables
You can configure CVDM-CSM environment variables and see the values of the configured variables.
Figure 11-3 Environment Variables Window
To see the list of environment variables used by the CVDM-CSM:
Step 1
Step 2
The Environment Variables dialog box appears with the following variables.
From this dialog box, you can do the following functions:
•
•
Understanding XML Configuration
With XML, you can configure the CVDM-CSM using a Document Type Definition (DTD) rather than the IOS command line interface (CLI).
Related Topics:
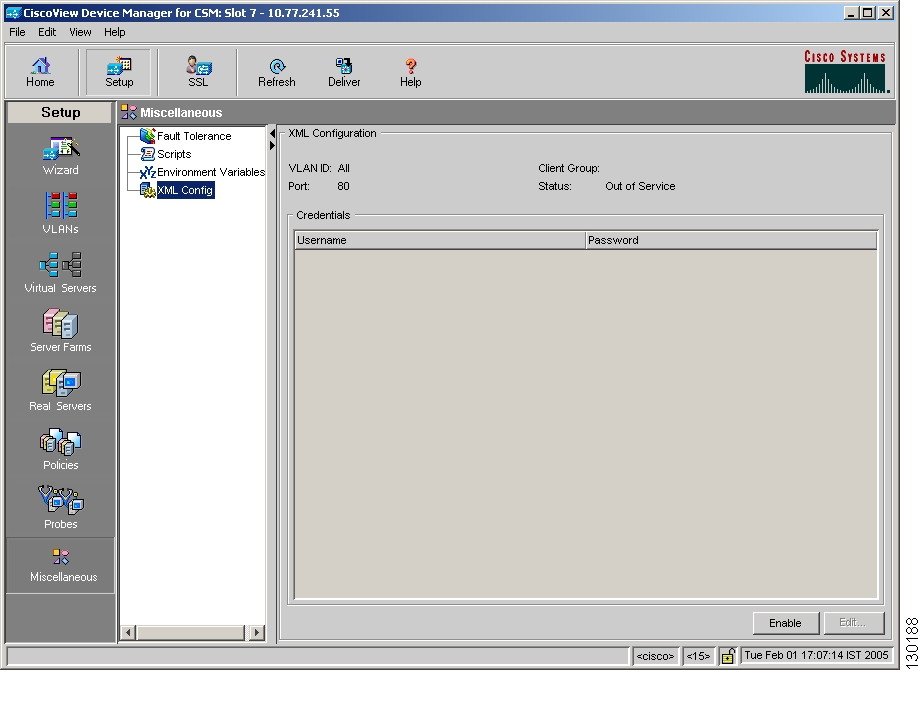
Viewing XML Configuration
Note
Figure 11-4 XML Configuration Window
Step 1
Step 2
The XML Configuration dialog box appears, displaying the following columns.
From the XML Configuration dialog box, you do the following:
•
•
Editing XML Configuration
Note
To edit the XML configuration:
Step 1
Step 2
Step 3
From this dialog box, you can do the following:
•
•
![]()
![]()
![]()
![]()
![]()
![]()
![]()
![]()
Posted: Fri Apr 15 02:30:09 PDT 2005
All contents are Copyright © 1992--2005 Cisco Systems, Inc. All rights reserved.
Important Notices and Privacy Statement.