|
|

Table Of Contents
Using the Service Configuration Editor
Managing Service Configurations
Opening the Service Configuration Editor Tool
Adding New Service Configurations
Opening Existing Service Configurations
Saving the Current Service Configuration
Saving the Current Service Configuration to the File From Which It Was Loaded:
Closing Service Configurations
Exporting Service Configuration Data
Importing Service Configuration Data
Applying and Retrieving Service Configurations
Using the Service Configuration Editor
To configure a Service Control Engine (SCE) platform to handle traffic, you must define a service configuration and apply it to the platform. Use the Service Configuration Editor tool to create, define, and manage service configurations.
This module describes how to use the Service Configuration Editor tool.
•
Managing Service Configurations
Service Configurations
A service configuration is a data structure that defines how the SCE platform analyses network traffic, what rules apply to the traffic, and what actions the SCE platform takes to enforce these rules.
This module describes how to use the Service Configuration Editor tool.
Managing Service Configurations
This section explains how to:
•
•
•
Opening the Service Configuration Editor Tool
If no service configurations are open when you open or switch to the Service Configuration Editor tool, a No Service Configuration Is Open dialog box appears.
Figure 6-1
•
•
The Configuration option is included in the main menu only when at least one service configuration is open.
You can have many service configurations open at one time; each is displayed in its own view, and you click a view to make that view's service configuration active.
When a service configuration has unsaved changes, an asterisk precedes its name on the view.
Adding New Service Configurations
You can add a new service configuration whenever necessary.
Note
To add a new service configuration.
Step 1
( New Service Configuration).
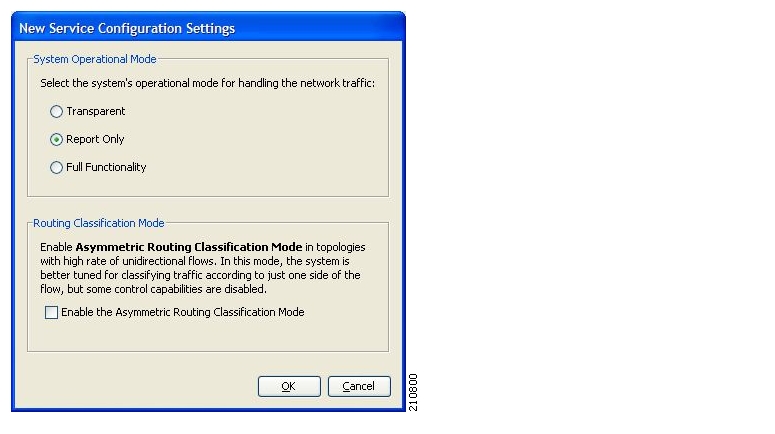
A New Service Configuration Settings dialog box appears.
Figure 6-2
Step 2
Step 3
Enabling asymmetric routing classification mode gives more accurate protocol classification in topologies with a high rate of unidirectional flows. Several classification, reporting, and control features are not supported when this mode is enabled (see Asymmetric Routing Classification Mode ).
Step 4
•
Figure 6-3
•
•
The new service configuration is added to the Console window, open on the Network Traffic tab, and becomes the active service configuration.
Figure 6-4
When a new service configuration opens, it contains the default service configuration supplied with SCA BB. This includes a default package, which contains a default service rule.
Opening Existing Service Configurations
You can open a saved service configuration for viewing or for editing, or to apply it to an SCE platform.
Service configuration files have the extension PQB.
To open a service configuration file:
Step 1
•
•
( Open A Service Configuration File).
An Open dialog box appears.
Step 2
Step 3
The Open dialog box closes.
Step 4
Figure 6-5
•
•
The service configuration is loaded into the Console:
•
•
Saving the Current Service Configuration
You can save the active service configuration.
To save the current service configuration to a service configuration file:
Step 1
A Save As dialog box appears.
•
Step 2
Step 3
Step 4
The service configuration is saved to the selected file. If the file exists, it is overwritten.
During processing, a Saving Service Configuration File message appears.
Saving the Current Service Configuration to the File From Which It Was Loaded:
Step 1
( Save).
If the current service configuration was not loaded from a PQB file (that is, if it is new, or it was retrieved from an SCE platform), the Save As dialog box opens as in the previous procedure.
Closing Service Configurations
Step 1
( Close).
•
•
Figure 6-6
Step 2
•
•
Enter a name for the service configuration and click Save.
The Save As dialog box closes, the changes are saved, and the service configuration view closes.
Exporting Service Configuration Data
You can export service configuration data from the current service configuration to CSV files. The CSV file formats are described in the "CSV File Formats" chapter of the Cisco Service Control Application Suit for Broadband Reference Guide .
To export one type of service configuration element to a CSV file:
SUMMARY STEPS
1.
2.
3.
4.
5.
6.
7.
8.
9.
10.
11.
12.
13.
DETAILED STEPS
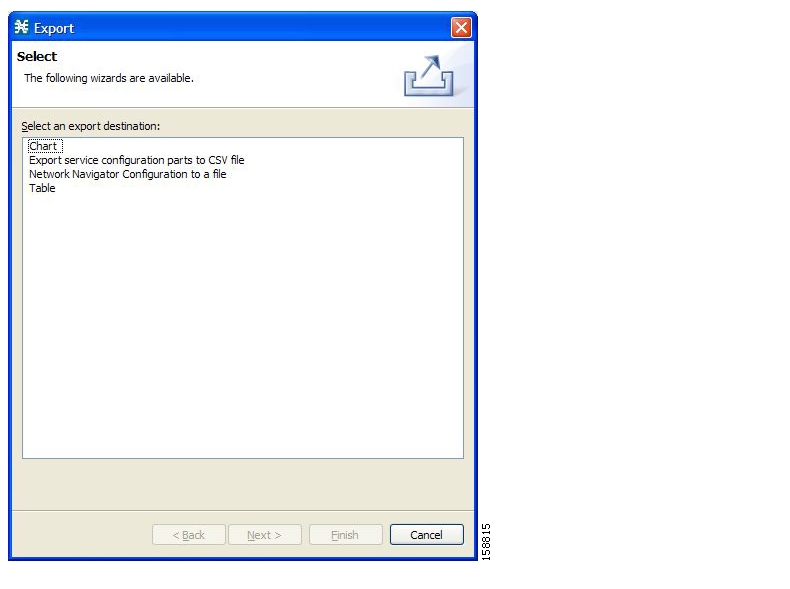
Step 1
The Export dialog box appears.
Figure 6-7
Step 2
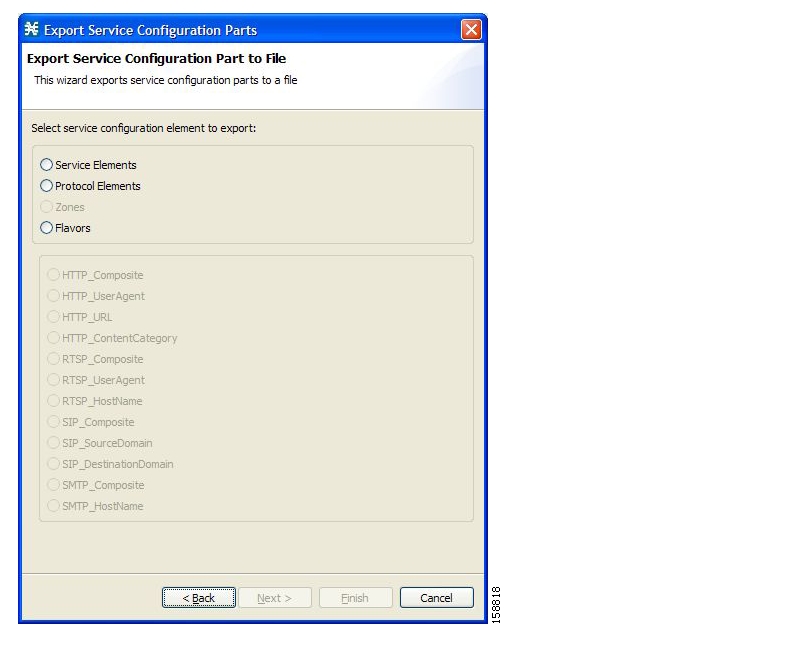
Step 3
The Export Service Configuration Parts dialog box appears.
Figure 6-8
Step 4
•
•
•
•
If you select Flavors, the flavors in the flavor area of the dialog box are enabled.
Note
Step 5
Step 6
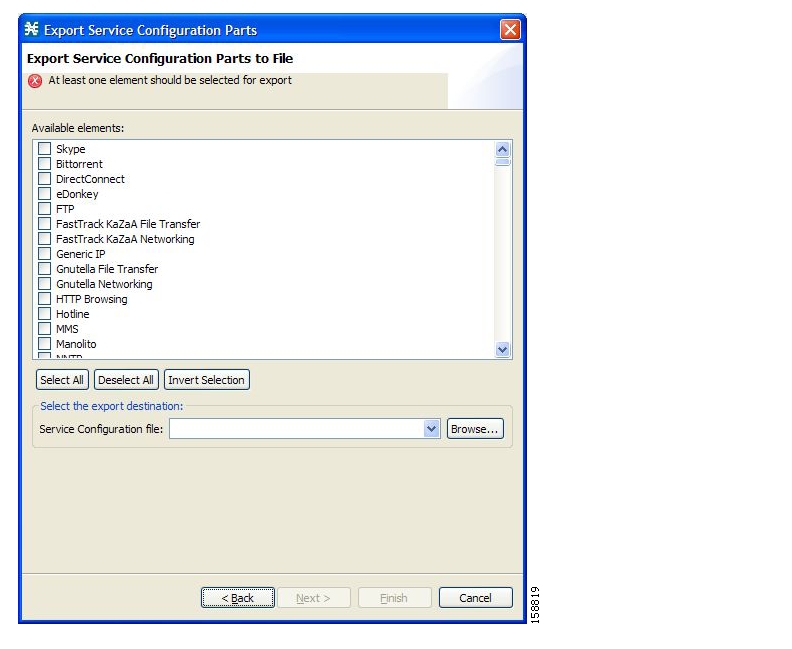
The second screen of the Export Service Configuration Parts dialog box opens.
Figure 6-9
The Available elements pane lists all elements in the service configuration of the selected type.
Step 7
Step 8
An Open dialog box appears.
Step 9
Step 10
Step 11
If the file exists, it will be overwritten.
The Open dialog box closes.
Step 12
The selected service configuration elements are exported to the file.
An Export Complete message appears.
Figure 6-10
Step 13
The Export Service Configuration Parts dialog box closes.
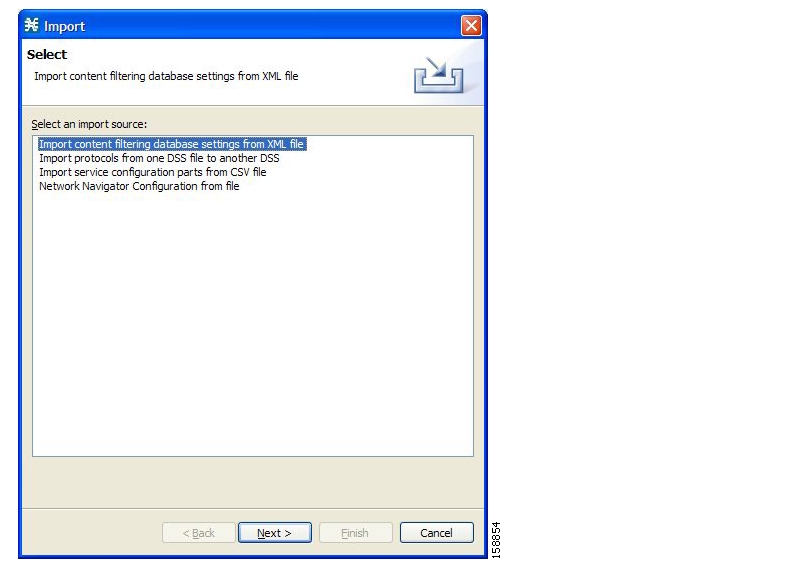
Importing Service Configuration Data
You can import service configuration data to the current service configuration from CSV files. The CSV file formats are described in the "CSV File Formats" chapter of the Cisco Service Control Application Suit for Broadband Reference Guide .
To import one type of service configuration element from a CSV file:
SUMMARY STEPS
1.
2.
3.
4.
5.
6.
7.
8.
9.
10.
11.
DETAILED STEPS
Step 1
The Import dialog box appears.
Figure 6-11
Step 2
Step 3
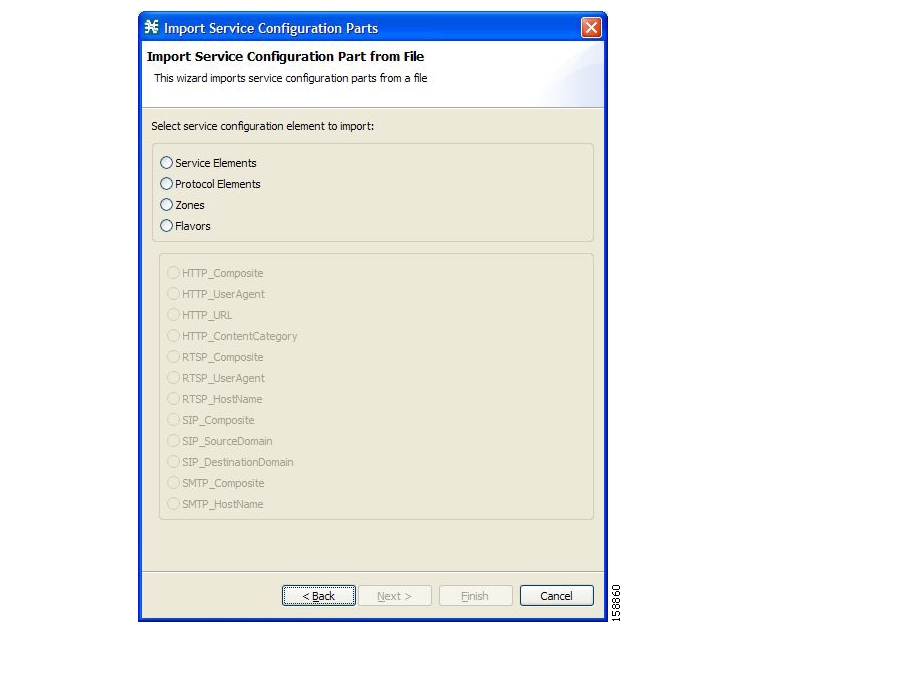
The Import Service Configuration Parts dialog box appears.
Figure 6-12
Step 4
•
•
•
•
If you select Flavors, the flavors in the flavor area of the dialog box are enabled.
Step 5
Step 6
The second screen of the Import Service Configuration Parts dialog box opens.
Figure 6-13
Step 7
An Open dialog box appears.
Step 8
Step 9
The Open dialog box closes.
Step 10
The configuration elements are imported from the file.
An Import Complete message appears.
Figure 6-14
Step 11
The Import Service Configuration Parts dialog box closes.
Applying and Retrieving Service Configurations
For a new or edited service configuration to take effect, you must apply it to the SCE platform. Until you do, the SCE platform continues to enforce the previous service configuration.
You can use the Service Configuration Editor to apply a service configuration to an SCE platform, but not to retrieve a service configuration.
You can apply or retrieve a service configuration using:
•
Validating the Current Service Configuration
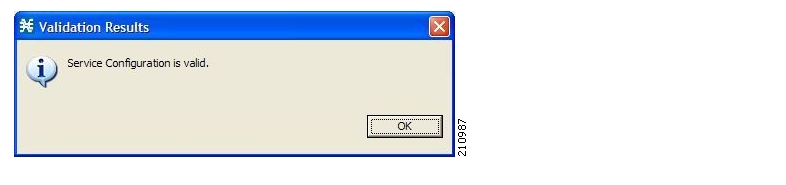
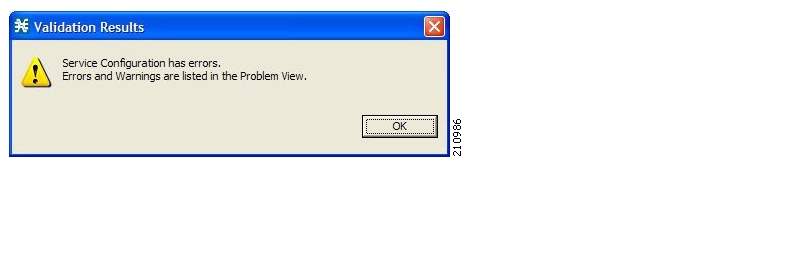
Use the Validate option to validate the new or updated service configuration currently displayed. The validation process checks for overall service configuration coherence, and points out possible pitfalls in the service configuration.
The Validate process runs automatically when you select Apply Service Configuration to SCE devices. The Validation Results dialog box appears only if the procedure found errors or issued warnings about the current service configuration.
To validate the current service configuration:
Step 1
The Validation Results dialog box appears.
Figure 6-15
Figure 6-16
Any problems with the service configuration are listed in the Problems view.
Step 2
The Service Configuration Validation dialog box closes.
Applying a Service Configuration to SCE Platforms
When you click Apply Service Configuration to SCE Devices, the validation process runs automatically on the current service configuration.
Note
To apply the current service configuration to SCE platforms:
Step 1
( Apply Service Configuration to SCE Devices).
The Select SCE Devices dialog box appears.
Figure 6-17
All SCE platforms defined in the Network Navigator are listed in the dialog box.
Step 2
Step 3
A Password Management dialog box appears for each platform selected.
Step 4
Step 5
The Password Management dialog box closes.
An Applying service configuration to SCE progress bar appears for each SCE platform selected.
The validation process runs on the service configuration.
•
•
![]()
![]()
![]()
![]()
![]()
![]()
![]()
![]()
Posted: Wed May 30 12:29:24 PDT 2007
All contents are Copyright © 1992--2007 Cisco Systems, Inc. All rights reserved.
Important Notices and Privacy Statement.