|
|

Table Of Contents
Adding a Site to the Site Manager
Adding Database Devices to a Site
Working with Network Navigator Configuration Files
Exporting a Network Navigator Configuration
Importing a Network Navigator Configuration
Using the Network Navigator
To manage a network entity—Service Control Engine (SCE) platform, Subscriber Manager (SM), or Collection Manager (CM)—from the Console, you must first define it as a device in the Network Navigator.
This chapter describes how to use the Network Navigator tool to create a simple model of all local and remote sites and devices that are part of the Cisco Service Control solution, and how to manage the devices remotely.
•
Network Settings Requirements
•
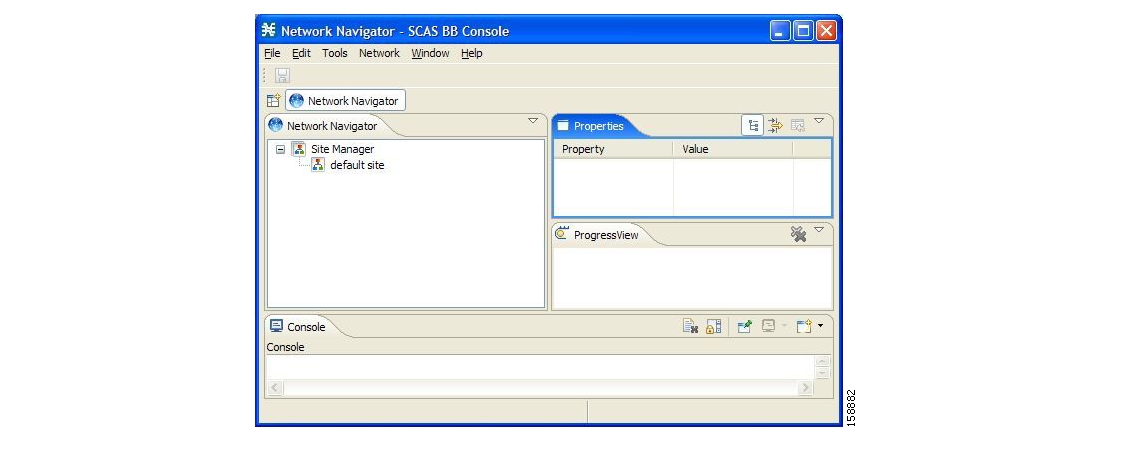
The Network Navigator Tool
The Network Navigator tool contains four views:
•
•
•
•
Figure 5-1
Network Settings Requirements
Firewall/NAT Requirements
The following table lists the firewall/NAT open port settings required for the Network Navigator to operate properly.
The SCA Reporter may have additional requirements for connecting to the database. See the Cisco Service Control Application Reporter User Guide for more information .
User Authentication
User authentication is performed when a PRPC connection is made to an SCE platform, a CM, or an SM. For authentication to succeed, a PRPC server must be running at the destination, and you must know the username and password of a user of the server.
You define the username and password using a command-line utility in the SM and CM, or the user/password mechanism in the SCE platform.
For more information about defining users, see the following:
CM—"Managing Users" in the "Managing the Collection Manager" chapter of the Cisco Service Control Management Suite Collection Manager User Guide
•
•
Managing Sites
You can manage an SCE, SM, or CM from the Console only if the network entity is defined as a device in the Network Navigator. After a device is added to the Network Navigator, you can perform management and monitoring operations on the device.
You can also perform operations on a group of devices. For example, you can apply the same service configuration to a group of SCE platforms. The Network Navigator allows you to group devices by adding them under the same site. A site is a group of devices that can be managed together. At installation, the Network Navigator contains a default site with no devices. You can add devices to this site or add additional sites, as described in the following sections.
Grouping devices in sites can also help to manage the passwords for these devices (see Password Management ).
Adding a Site to the Site Manager
Before adding devices, you must add your sites to the Site Manager.
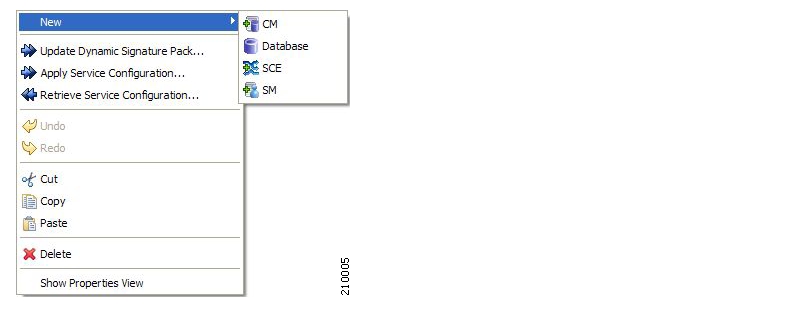
Step 1
A popup menu appears.
Figure 5-2
Step 2
A new Site node is added to the Site Manager.
Step 3
Step 4
Adding Devices to a Site
You can add SCE, SM, CM, or database devices to a site.
Adding SCE Devices to a Site
To use the Network Navigator to configure, monitor, and update the software of an SCE platform, you must first add the SCE platform to a site.
To add an SCE device to a site:
SUMMARY STEPS
1.
2.
3.
4.
5.
DETAILED STEPS
Step 1
A popup menu appears.
Figure 5-3
Step 2
The Create New SCE wizard appears.
Step 3
Step 4
Step 5
The Create new SCE wizard closes.
The new device is added to the site.
Adding SM Devices to a Site
To use the Network Navigator to configure, monitor, and update the software of an SM, you must first add the SM to a site.
To add an SM device to a site:
Step 1
A popup menu appears.
Step 2
The Create New SM wizard appears.
Step 3
Step 4
Step 5
The Create new SM wizard closes.
The new device is added to the site.
Adding CM Devices to a Site
To use the Network Navigator to monitor a CM, you must first add the CM to a site.
To add a CM device to a site:
Step 1
A popup menu appears.
Step 2
The Create New CM wizard appears.
Step 3
Step 4
Step 5
The Create new CM wizard closes.
The new device is added to the site.
Adding Database Devices to a Site
To use the Reporter tool to produce reports, you must first connect to a database.
To add a database device to a site:
SUMMARY STEPS
1.
2.
3.
4.
5.
6.
7.
DETAILED STEPS
Step 1
A popup menu appears.
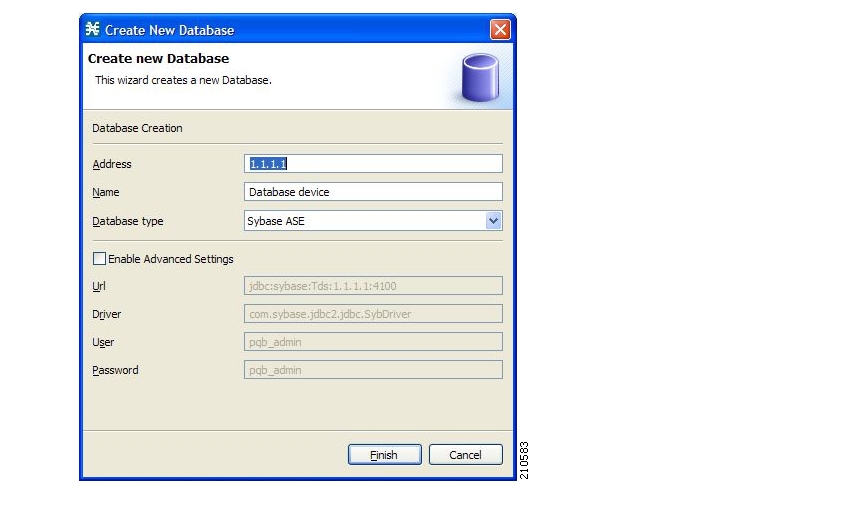
Step 2
The Create New Database wizard appears.
Figure 5-4
Step 3
Step 4
Step 5
Step 6
Step 7
The Create New Database wizard closes.
The new device is added to the site.
Deleting Devices
To delete a device:
Step 1
A popup menu appears.
Step 2
The device is deleted and removed from the Site Manager tree.
Deleting Sites
To delete a site:
Step 1
A popup menu appears.
•
Step 2
The site and all its devices are deleted and the site is removed from the Site Manager tree.
Managing Devices
The Network Navigator allows you to manage SCE, SM, CM, and database devices.
Password Management
Normally, before you can access a device (SCE, SM, CM, or database), you must enter its password. When you try to perform any operation on a site device, the Network Navigator first asks for the device username and password. (Repeating the same operation on the same device does not always require a second entry of the password.)
When performing operations on multiple devices, password entry can become tedious. The Site Master Password can help you remember some or all of your element's usernames and passwords by storing them as part of the site's data, and entering them for you automatically when you connect to an element.
The Site Master Password protects saved usernames and passwords in the password manager. The Console prompts you for the site's master password when you wish to activate the site password manager. If you have multiple sites, each site will require a separate master password.
Figure 5-5
For each site, when the Password Management dialog box appears, check the Enable Site Master Passwordcheck box.
Managing SCE Devices
•
•
•
Generating Tech Support Info Files for SCE Devices
This operation generates the SCE platform's support file, for the use of Cisco technical support staff.
To generate a techsupport info file for an SCE:
SUMMARY STEPS
1.
2.
3.
4.
5.
6.
7.
8.
9.
10.
11.
DETAILED STEPS
Step 1
A popup menu appears.
Figure 5-6
Step 2
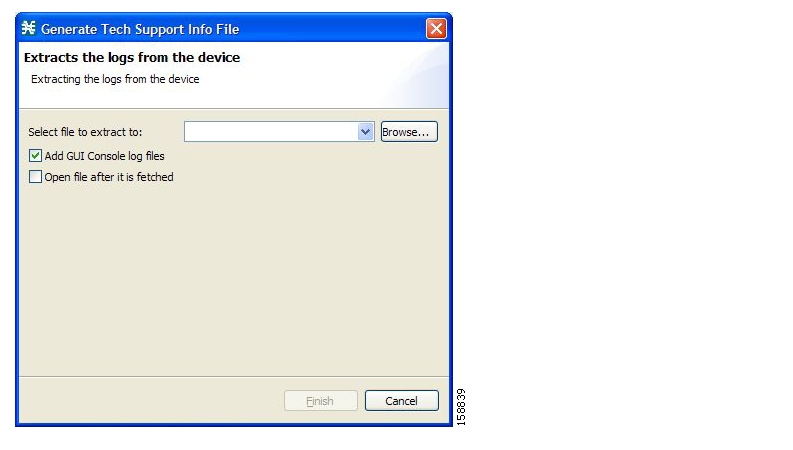
The Generate Tech Support Info File dialog box appears.
Figure 5-7
Step 3
A Select File dialog box appears.
Step 4
Step 5
Step 6
If the file exists, it will be overwritten when you generate the tech support info.
The Select File dialog box closes.
Step 7
Step 8
Step 9
The Generate Tech Support Info File dialog box closes.
A Password Management dialog box appears.
Step 10
Step 11
The Password Management dialog box closes.
A Generate tech support info file progress bar appears.
The file is generated.
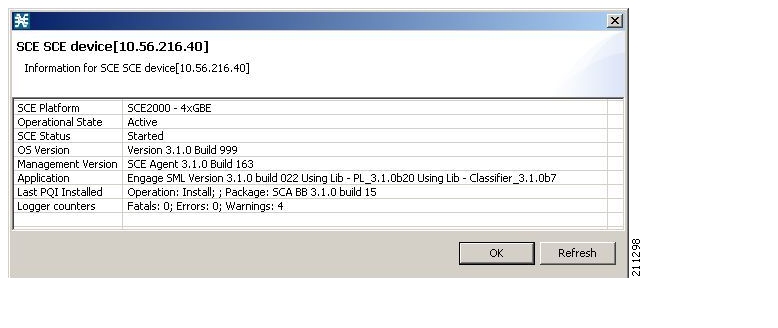
Retrieving the Online Status of SCE Devices
This operation provides information about the SCE platform's current software version and operational status.
To retrieve the online status of an SCE device:
SUMMARY STEPS
1.
2.
3.
4.
DETAILED STEPS
Step 1
A popup menu appears.
Step 2
A Password Management dialog box appears.
Step 3
Step 4
The Password Management dialog box closes.
An Extracting info progress bar appears.
The SCE online status is retrieved.
Figure 5-8
Installing Protocol Packs on SCE Devices
You can install a protocol pack on a single SCE platform, on selected SCE platforms, or on all SCE platforms at one or more selected sites (see How to Install Protocol Packs ).
•
•
•
•
•
•
Applying Service Configurations to SCE Devices
You can apply a service configuration to a single SCE platform, to selected SCE platforms, or to all SCE platforms at one or more selected sites.
Note
To apply a service configuration to a single SCE platform:
SUMMARY STEPS
1.
2.
3.
4.
5.
6.
DETAILED STEPS
Step 1
A popup menu appears.
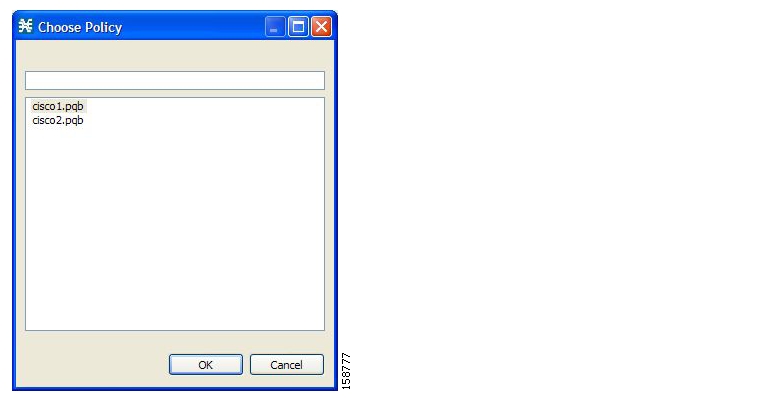
Step 2
The Choose Policy dialog box appears, listing all service configurations that are open in the Service Configuration Editor.
Note
Figure 5-9
Step 3
Step 4
A Password Management dialog box appears.
Step 5
Step 6
The Password Management dialog box closes.
An Applying service configuration to SCE progress bar appears.
The service configuration is applied to the selected SCE platform.
Applying Service Configuration to Multiple SCE Platforms:
To apply a service configuration to multiple SCE platforms:
Step 1
Step 2
The Choose Policy dialog box appears, listing all service configurations that are open in the Service Configuration Editor.
Note
Step 3
A separate Password Management dialog box appears for each SCE device that you have selected.
Step 4
Step 5
Retrieving Service Configurations from SCE Devices
You can retrieve service configurations from a single SCE platform, from selected SCE platforms, or from all SCE platforms at one or more selected sites.
To retrieve a service configuration from a single SCE platform:
Step 1
A popup menu appears.
•
Step 2
A Password Management dialog box appears.
Step 3
Step 4
The Password Management dialog box closes.
A Retrieving from SCE progress bar appears.
The service configuration is retrieved from the SCE platform and opened in the Service Configuration Editor.
Retrieving Service Configurations from Multiple SCE Platforms:
To retrieve service configurations from multiple SCE platforms:
Step 1
Step 2
A separate Password Management dialog box appears for each SCE device that you have selected.
Step 3
The service configuration is retrieved from each SCE platform in turn, and is opened in the Service Configuration Editor.
Installing PQI Files on SCE Devices
This operation installs the Cisco Service Control Application for Broadband (SCA BB) on the SCE platform. For more information, see How to Install SCA BB.
Note
To install a PQI file on an SCE device:
SUMMARY STEPS
1.
2.
3.
4.
5.
6.
7.
8.
DETAILED STEPS
Step 1
Step 2
The Update Software dialog box appears.
Figure 5-10
Step 3
A Select file dialog box appears.
Step 4
Step 5
The Select file dialog box closes.
Step 6
A Password Management dialog box appears.
Step 7
Step 8
The Password Management dialog box closes.
An Updating software to SCE progress bar appears.
The PQI file is installed on the selected SCE.
Installing the SCE OS Software Package on SCE Devices
This operation installs the SCE OS software package (the operating system software and firmware of the SCE platform).
For more information, see "Upgrading SCE Platform Firmware" in the "Operations" chapter of the Cisco Service Control Engine (SCE) Software Configuration Guide.
To install an operating system (OS) file on an SCE device:
Step 1
Step 2
The Update OS dialog box appears.
Figure 5-11
Step 3
A Select file dialog box appears.
Step 4
Step 5
The Select file dialog box closes.
Step 6
A Password Management dialog box appears.
Step 7
Step 8
The Password Management dialog box closes.
An Updating software to SCE progress bar appears.
The PQI file is installed on the selected SCE.
Managing SM Devices
•
•
•
Generating Tech Support Info Files for SM Devices
This operation generates the SM's support file, for the use of Cisco technical support staff.
To generate a tech support info file for an SM:
Step 1
A popup menu appears.
Figure 5-12
Step 2
The Generate Tech Support Info File dialog box appears.
Step 3
A Select File dialog box appears.
Step 4
Step 5
Step 6
If the file exists, it will be overwritten.
The Select File dialog box closes.
Step 7
Step 8
Step 9
The Generate Tech Support Info File dialog box closes.
A Password Management dialog box appears.
Step 10
Step 11
The Password Management dialog box closes.
A Generate tech support info file progress bar appears.
The file is generated.
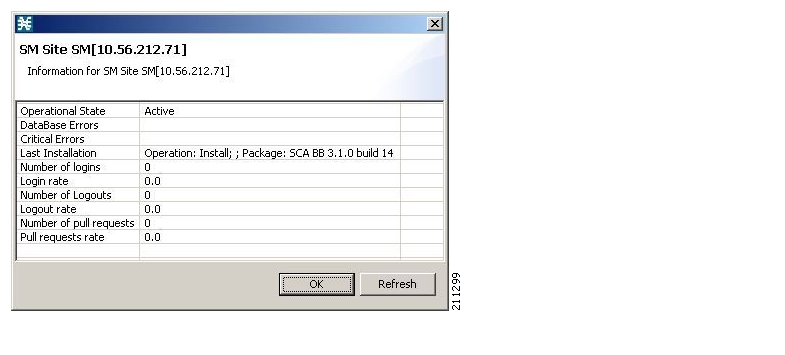
Retrieving the Online Status of SM Devices
This operation provides information about the SM's current software version and operational status.
To retrieve the online status of an SM device:
Step 1
A popup menu appears.
Step 2
A Password Management dialog box appears.
Step 3
Step 4
The Password Management dialog box closes.
An Extracting info progress bar appears.
The SCMS-SM online status is retrieved.
Figure 5-13
Connecting to SM Devices
In order to manage subscribers using the SM GUI tool, you must connect to an SM device.
Note
To connect to an SM device:
Step 1
A popup menu appears.
Step 2
A Password Management dialog box appears.
Step 3
Step 4
The Password Management dialog box closes.
A Connecting to progress bar appears.
You connect to the SM, and the Console switches to the SM GUI tool.
See Using the Subscriber Manager GUI Tool for an explanation of how to proceed.
Installing PQI Files on SM Devices
Note
To install a PQI file on an SM device:
Step 1
Step 2
The Update Software dialog box appears.
Figure 5-14
Step 3
A Select file dialog box appears.
Step 4
Step 5
The Select file dialog box closes.
Step 6
A Password Management dialog box appears.
Step 7
Step 8
The Password Management dialog box closes.
An Updating software to SM progress bar appears.
The PQI file is installed on the selected SM.
Managing CM Devices
•
Retrieving the Online Status of CM Devices
This operation provides information about the CM's current software version and operational status.
To retrieve the online status of a CM device:
Step 1
A popup menu appears.
Figure 5-15
Step 2
A Password Management dialog box appears.
Step 3
Step 4
The Password Management dialog box closes.
An Extracting info progress bar appears.
The SCMS-CM online status is retrieved.
For an example of a retrieved online status window (for an SCE platform), see Retrieving the Online Status of SCE Devices.
Managing Database Devices
Making Databases Accessible to the SCA Reporter
Note
To make databases accessible to the SCA Reporter:
SUMMARY STEPS
1.
2.
3.
4.
5.
6.
7.
8.
9.
10.
11.
DETAILED STEPS
Step 1
A popup menu appears.
Figure 5-16
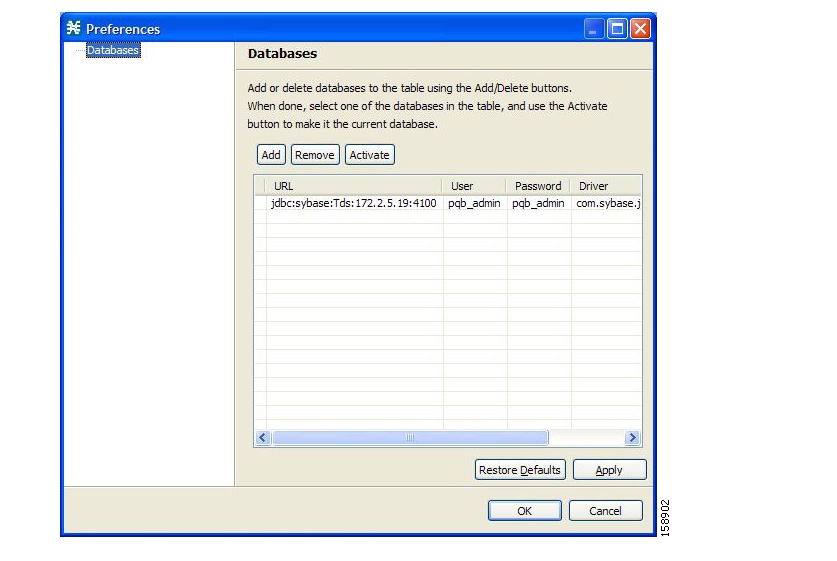
Step 2
The Preferences dialog box appears.
Figure 5-17
Step 3
The Add Database wizard appears.
Figure 5-18
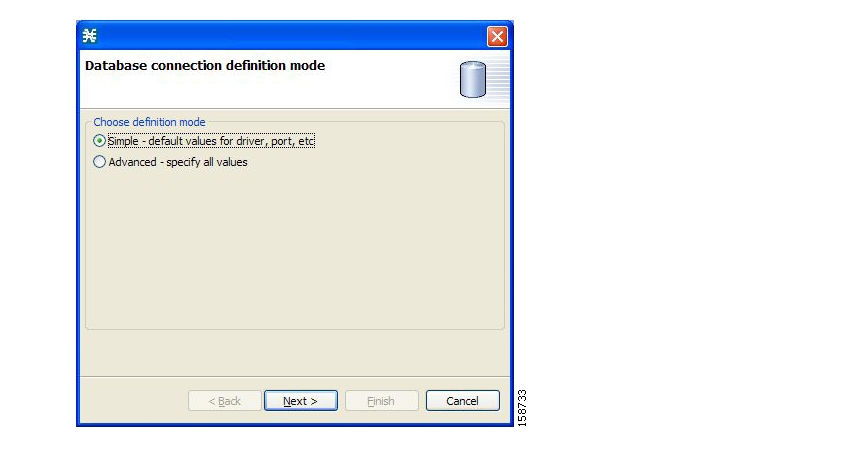
Step 4
•
•
Step 5
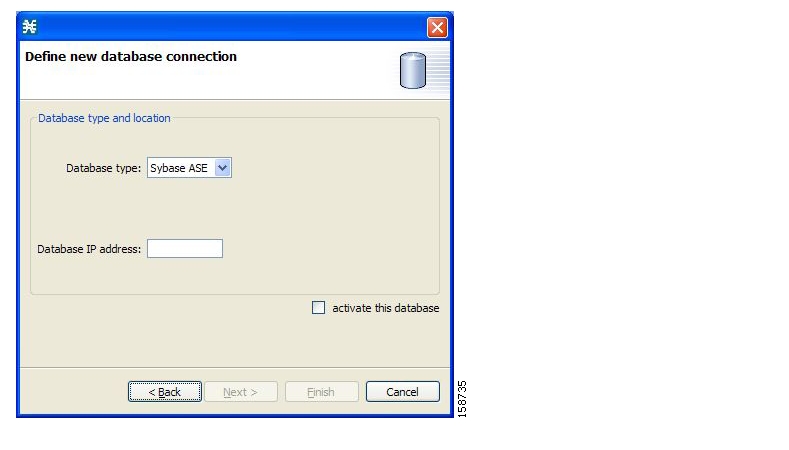
The Define new database connection screen of the Add Database wizard opens.
If you selected Simple in step 4, the Define new database connection screen looks like this:
Figure 5-19
If you selected Advanced in step 4, the Define new database connection screen looks like this:
Figure 5-20
Step 6
Step 7
The Add Database wizard closes.
The definition of the database is added to the list in the Preferences dialog box.
Step 8
Step 9
Step 10
Step 11
The Preferences dialog box closes.
Working with Network Navigator Configuration Files
After you add sites and devices to the Network Navigator, you can export this data to a file to back up your settings and to share them with other users, who can import your Network Navigator settings into their Console.
If you use the Site Master Password to store the passwords of the network devices, the passwords are also exported, in encrypted form. This means that other users who import this data need only provide the Site Master Password to access the devices.
•
•
Exporting a Network Navigator Configuration
To export a Network Navigator configuration to a file:
SUMMARY STEPS
1.
2.
3.
4.
5.
6.
7.
8.
9.
DETAILED STEPS
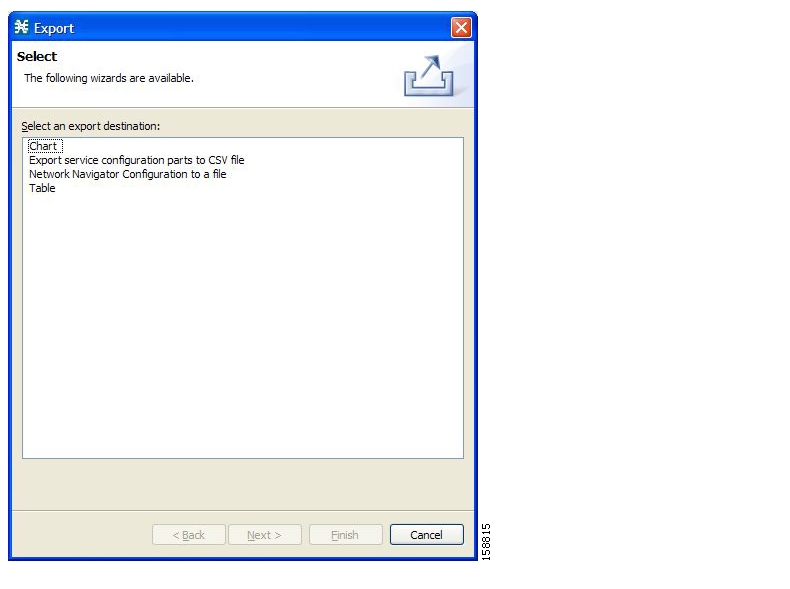
Step 1
The Export dialog box appears.
Figure 5-21
Step 2
Step 3
The Export Network Navigator Configuration to a file dialog box appears.
Figure 5-22
The Available sites pane lists all of the sites in the configuration.
Step 4
Step 5
An Open dialog box appears.
Step 6
Step 7
Step 8
Note
The Open dialog box closes.
Step 9
The Export Network Navigator Configuration dialog box closes.
The configuration is saved to the file.
Importing a Network Navigator Configuration
To import a Network Navigator configuration to a file:
SUMMARY STEPS
1.
2.
3.
4.
5.
6.
7.
DETAILED STEPS
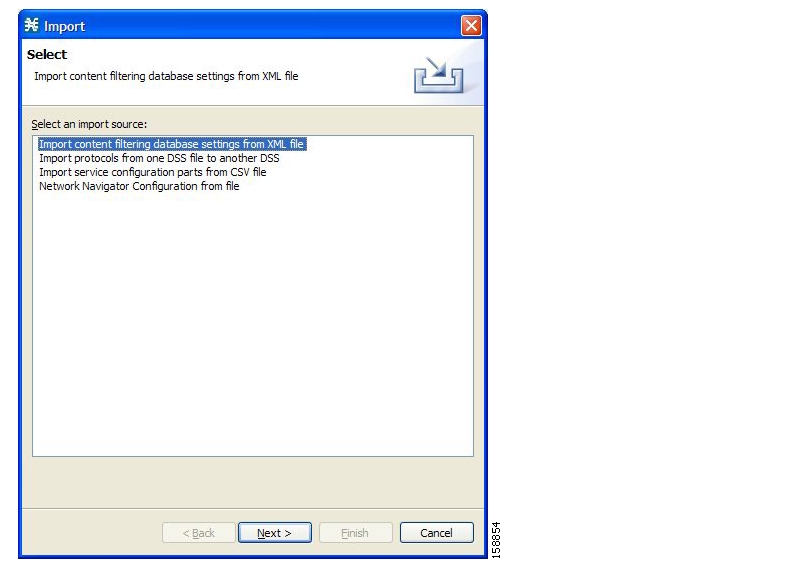
Step 1
The Import dialog box appears.
Figure 5-23
Step 2
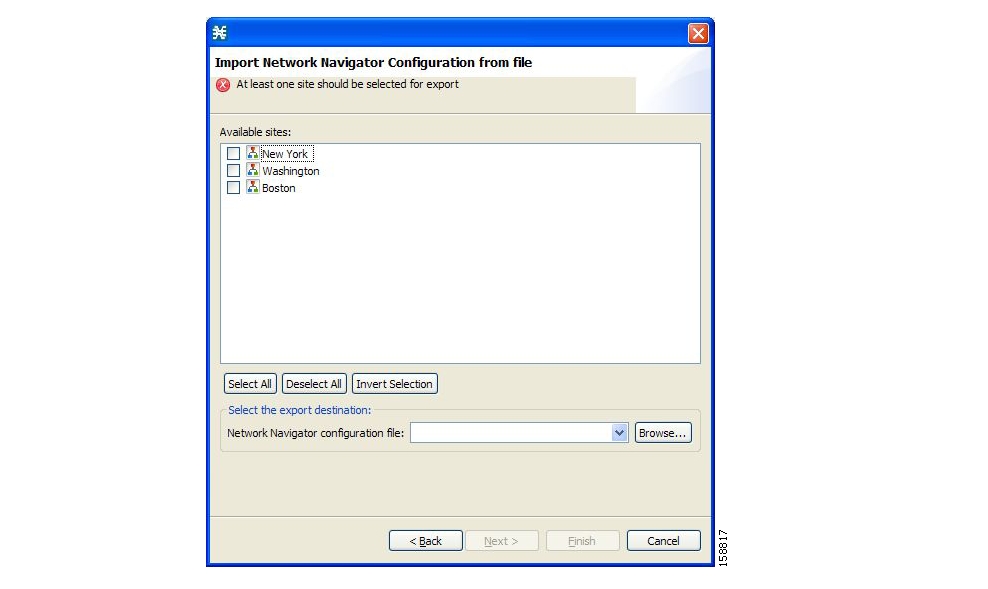
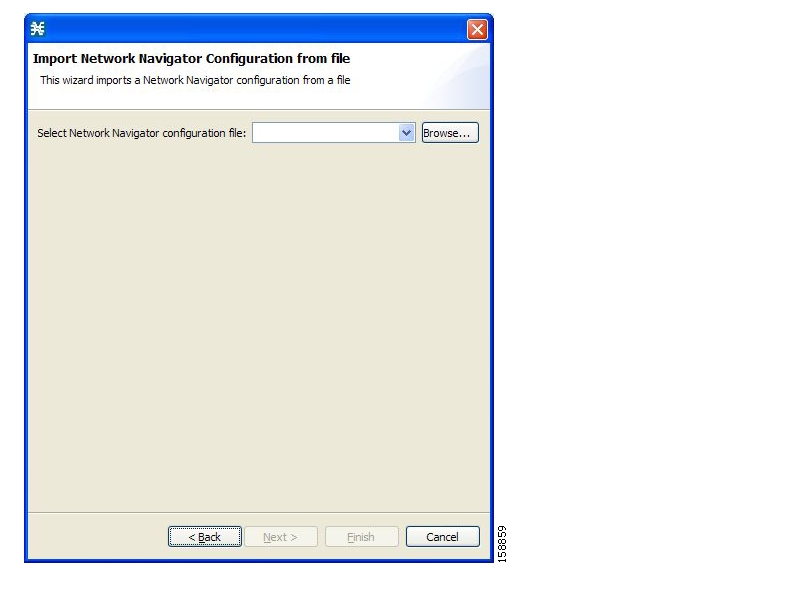
Step 3
The Import Network Navigator Configuration from file dialog box appears.
Figure 5-24
Step 4
An Open dialog box appears.
Step 5
Step 6
The Open dialog box closes.
Step 7
The Import Network Navigator Configuration dialog box closes.
The configuration is imported from the file.
![]()
![]()
![]()
![]()
![]()
![]()
![]()
![]()
Posted: Wed May 30 12:25:02 PDT 2007
All contents are Copyright © 1992--2007 Cisco Systems, Inc. All rights reserved.
Important Notices and Privacy Statement.