|
|

This chapter provides information you need to do the following:
Before you create or modify primary tunnels, you must understand the Traffic Engineering (TE) link parameter values. See "Viewing and Modifying TE Parameters."
To understand how to manage primary tunnels, you need to understand the following concepts:
For the purpose of bandwidth protection, a primary tunnel is an MPLS tunnel that can be protected by Fast Reroute (FRR).
FRR is a mechanism for protecting MPLS TE label-switched paths (LSPs) from link and node failures by locally repairing the LSPs at the point of failure. The repair allows data to continue to flow on them while their head-end nodes attempt to establish new end-to-end LSPs to replace them. FRR locally repairs the protected LSPs by rerouting them over backup tunnels that bypass failed links or nodes.
The head-end node is the router that originates and maintains a given LSP. This is the first node in the LSP's path.
All paths for a given tunnel must have the same destination. The tail-end node of a tunnel is set when the tunnel is created. There can be several different paths that the tunnel could use to reach the tail-end node. If you do not use any explicit paths, Shift-click a node to specify that it is the destination for the dynamic path.
An explicit path is a list of IP addresses, each representing a node or link. For information about IP addresses, see the Cisco IOS IP Configuration Guide, Release 12.2.
Static routes are administered manually. A network administrator enters it into the router's configuration. The administrator must manually update this static route entry whenever an internetwork topology change requires an update. Static routes are private; by default, they are not conveyed to other routers as part of an update process. You can, however, configure the router to share this static route.
When Tunnel Builder Pro signals an LSP for a backup tunnel, Tunnel Builder Pro uses the setup priority to determine what existing tunnels can be preempted.
The hold priority determines if a backup tunnel should be preempted by other LSPs that are being signaled.
The setup priority and the hold priority can be 0 to 7, where a lower number indicates a higher priority. An LSP with a setup priority of 0 can preempt any LSP with a non-0 priority. The setup priority cannot be better (numerically smaller) than the hold priority. The setup priority and hold priorities are typically configured to be equal.
Affinity bits are an MPLS label distribution tunnel's requirements on the attributes of the links the tunnel will cross. The tunnel's affinity bits and affinity mask must match up with the attributes of the various links carrying the tunnel.
Autoroute Announce is used to instruct the Interior Gateway Protocol (IGP) to use a tunnel in its Shortest Path First (SPF)/next-hop calculation if the tunnel is up.
Autobandwidth automatically resizes a tunnel, based on its utilization. Autobandwidth decides whether to resize a tunnel at a specified collection frequency. The collection frequency is the number of seconds between samples of the tunnel output rate.
This section contains the following procedures:
To create a primary tunnel, perform the following steps:
Step 1 Click the Tunnels tab. The Tunnels window shown in Figure 6-1 appears.
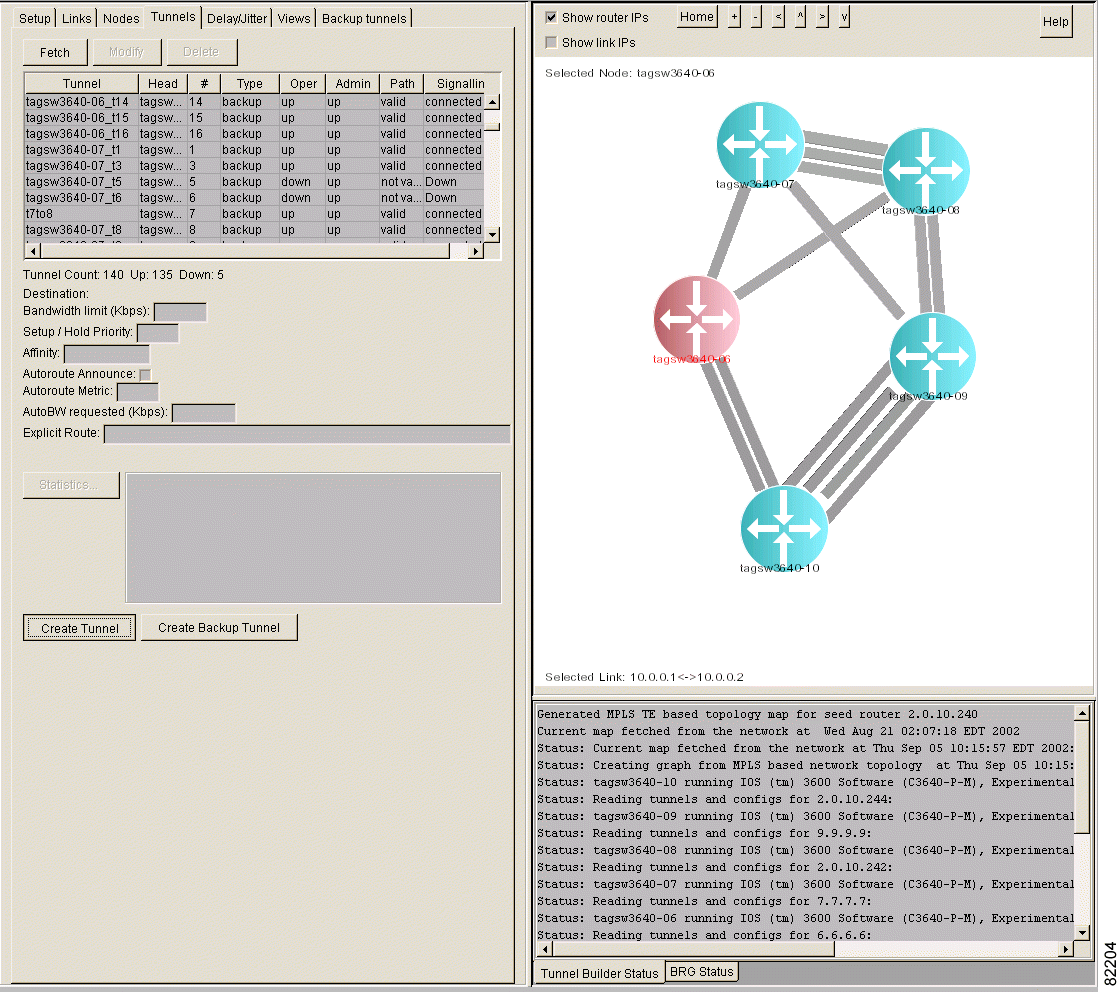
Step 2 In the network map, do one of the following:
The Create Tunnel window shown in Figure 6-2 appears. The Dynamic path option and the explicit paths are listed in the Explicit Paths list box.
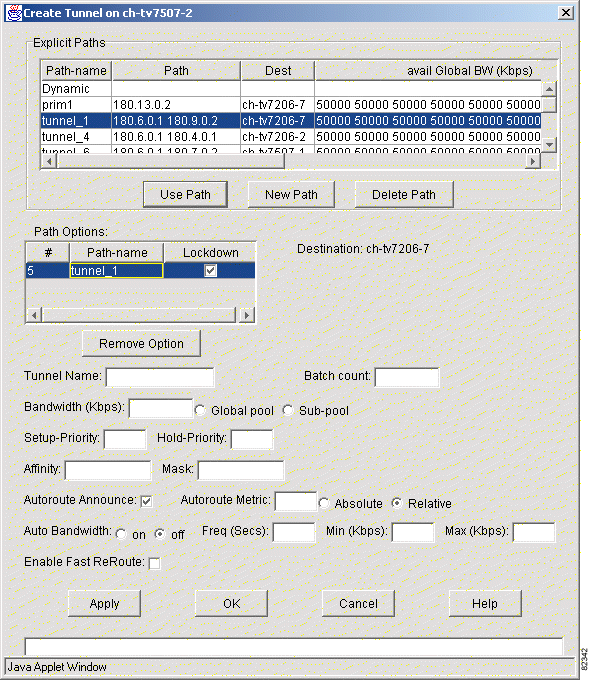
Step 3 Perform the appropriate action:
Step 4 To use a dynamic path, perform the following steps:
a. In the Explicit Paths list box, select Dynamic.
b. Click Use Path. The path is listed in the Path Options list box.
c. In the network map, Shift-click the node that you want to be the tail-end node for the dynamic tunnel.
d. Click OK.
Step 5 To use an existing explicit path, perform the following steps:
a. In the Explicit Paths list box, select a path.
b. Click Use Path. The selected path is listed in the Path Options list box for the tunnel. Each path is assigned an option number in the # column. The node will try to use path options in numeric order, from lowest to highest.
 |
Note All explicit paths selected must terminate at the same tail-end node. |
c. (Optional) To prevent the explicit path from being reoptimized, check the Lockdown check box associated with it in the Path Options list box. This is the default.
d. Repeat Steps a and b until you have selected all the desired explicit paths.
e. (Optional) To reorder the path preferences, edit the numeric value in the # field.
f. (Optional) To delete an explicit path from the Path Options list box, select the path in that list box and click Remove Option.
Step 6 To create a new explicit path, perform the following steps:
a. Click New Path. The Create Explicit Path window shown in Figure 6-3 appears.
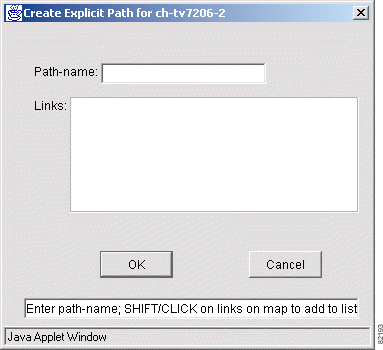
b. In the Path-name field, enter a name for the explicit path.
c. In the network map, hold down the Shift key and click each successive link, starting with the selected head-end node and ending with the tail-end node. The selected links, which make up the explicit path, turn green.
d. Click OK. The informational message shown in Figure 6-4 appears, unless you previously disabled the message.
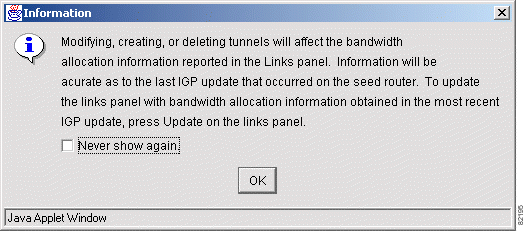
The Create Tunnel window appears with the selected links specified in the Explicit Paths list box. See Figure 6-5.

e. In the Explicit Paths list box, select the explicit path.
f. Click Use Path. The selected path is listed in the Path Options list box. The path is assigned an option number in the # column. The node will try to use path options in numeric order, from lowest to highest.
g. (Optional) To reorder the path options, edit the numeric value in the # field.
Step 7 (Optional) To delete an explicit path, select the path in the Explicit Paths list box, and click Delete Path.
Step 8 To define additional tunnel parameters, enter values into the following fields:
 |
Note If you do not enter a value for the Bandwidth, Setup-Priority, Hold-Priority, Affinity, or Autoroute Metric field, the tunnel is configured with the default values specified on the head-end node. |
Step 9 If you want the primary tunnel to be fast reroutable, click Enable Fast ReRoute.
 |
Note If you click Enable Fast ReRoute, a dialog box gives you the option to compute backup tunnels for the nodes and links on this tunnel. See "Protecting Your Network." |
Step 10 To create the tunnel and close the window, click OK. To create the tunnel but leave the window open so that you can create another tunnel, click Apply. The informational message shown in Figure 6-4 appears, unless you previously disabled it.
There are two ways to direct traffic onto an existing tunnel with the Tunnel Builder Pro application:
To forward traffic by using the Autoroute Announce field, perform the following steps:
Step 1 Click the Tunnels tab. The Tunnels window shown in Figure 6-6 appears.
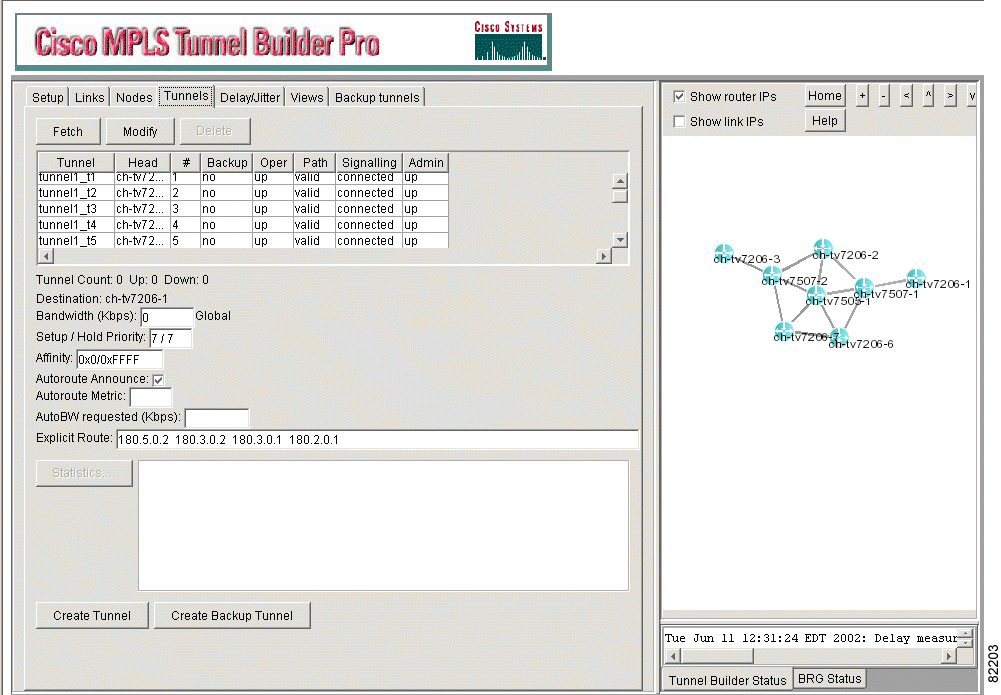
Step 2 Select the tunnel.
Step 3 Click Modify.
Step 4 (Optional) Change the setting of the Autoroute Announce button.
 |
Note For more information about how to modify a tunnel, see "Viewing and Modifying TE Parameters." |
Step 5 Click Apply or OK.
To delete a primary tunnel, perform the following steps:
Step 1 Click the Tunnels tab. The Tunnels window shown in Figure 6-7 appears.

Step 2 Click Fetch. The tunnels are listed in the list box as shown in Figure 6-8.
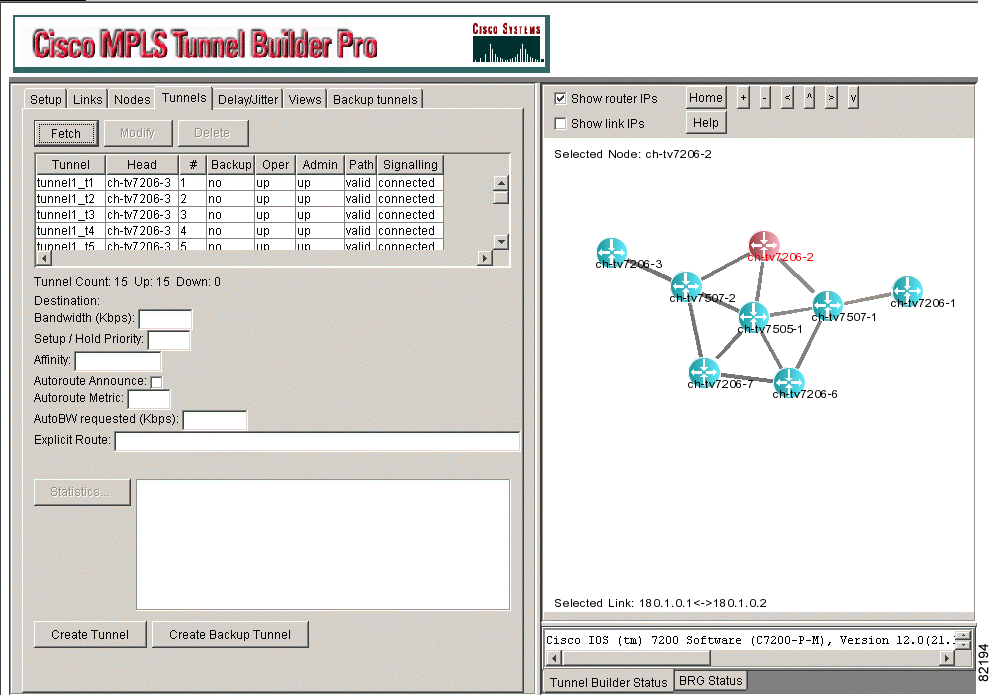
Step 3 Select one or more tunnels in the Tunnel table.
Step 4 Click Delete or press the Delete key on your keyboard.
 |
Note When you delete a tunnel that uses an explicit path or static route, the explicit path and static route are not automatically removed. |
To make your changes permanent, see "Make Your Changes Permanent" in "Using Tunnel Builder Pro for the First Time."
![]()
![]()
![]()
![]()
![]()
![]()
![]()
![]()
Posted: Fri Oct 11 11:16:54 PDT 2002
All contents are Copyright © 1992--2002 Cisco Systems, Inc. All rights reserved.
Important Notices and Privacy Statement.