|
|

This chapter provides information you need to do the following:
To set up Tunnel Builder Pro, you need to understand the following concepts:
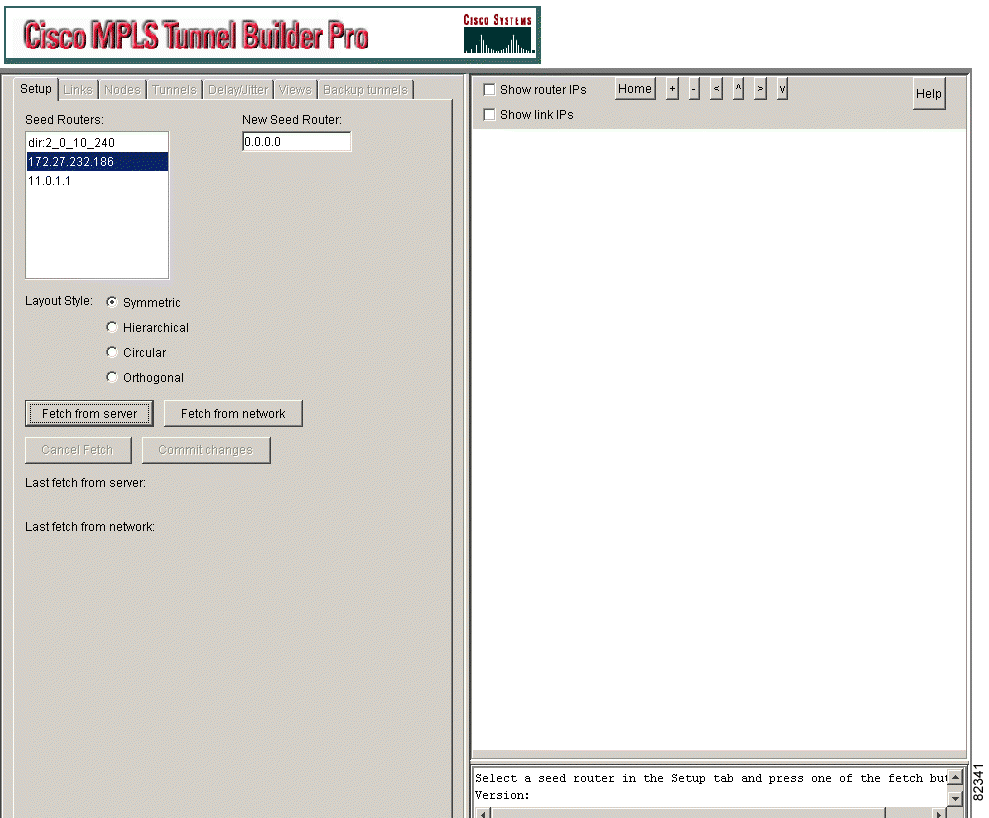
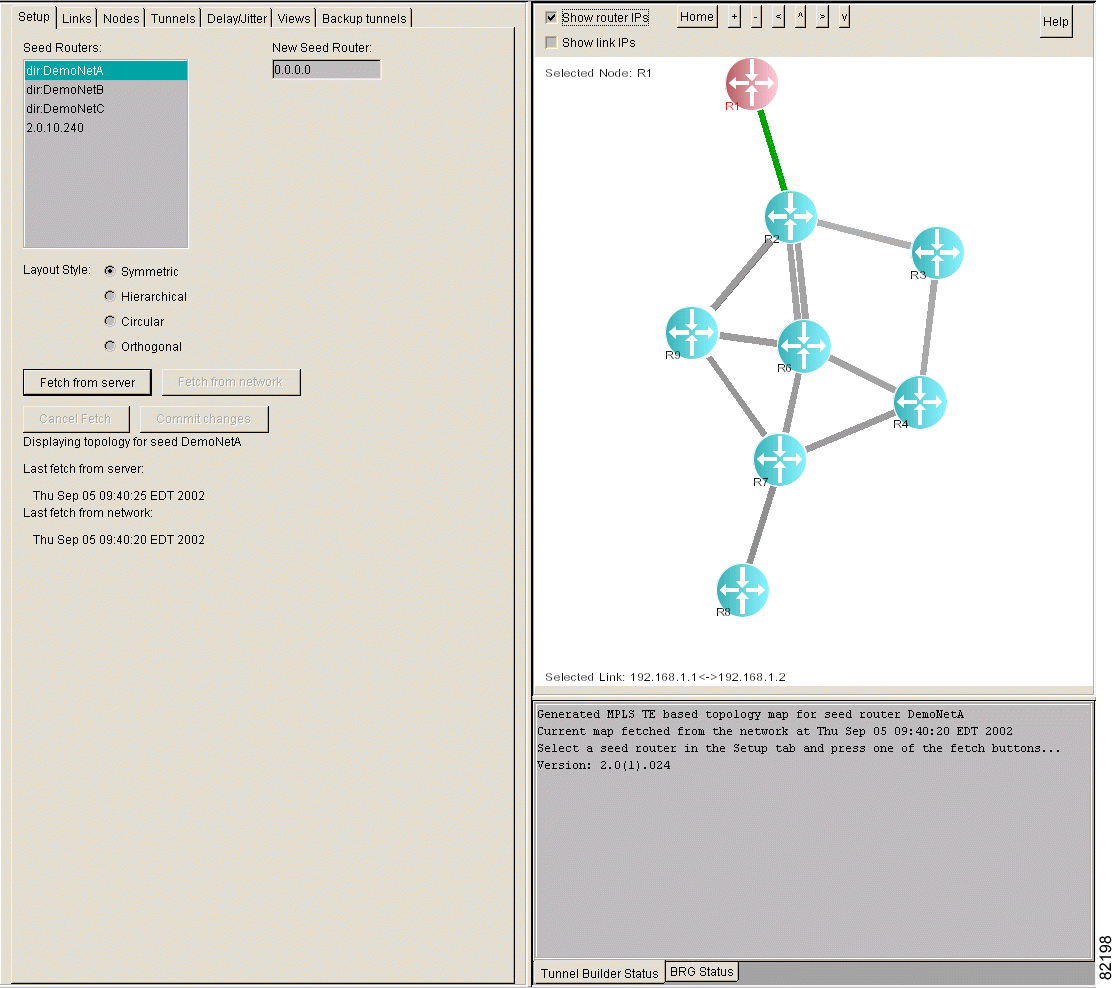
Tunnel Builder Pro displays a network map on the right side of the browser window. The map includes a topology based on the MPLS TE topology. Tunnel Builder Pro generates a map consisting of network nodes and links based on the MPLS TE topology read from the seed router. Tunnel Builder Pro maintains a list of known seed routers. You can add new seed routers or delete seed routers from the Seed Routers list.
Based on the generated list of nodes and links, Tunnel Builder Pro accesses each device to read device configuration information. Using the generated information, Tunnel Builder Pro can manage the devices, links, and MPLS TE tunnels that make up the network map.
Primary tunnels are displayed with head-end routers in red and individual links in purple. Fast Reroute backup tunnels are displayed in the same colors as primary tunnels, except that the elements they are protecting are highlighted in gold. When a node is selected, it is red. When a link is selected, it is green.
A status message window below the network map displays server and device informational messages, and the status of BRG requests.
The Cisco MPLS Tunnel Builder Pro application provides a means to ensure security when you access nodes. The application uses a combination of a user name, login password, and enable password to authenticate a user on a selected seed router. Tunnel Builder Pro uses the user name, password, and enable password combination that you entered as the default authentication information for all other nodes in the network map. All nodes are accessed using the same user name. If a node does not require a user name when you log in, then the user name is not sent to the node. However, the server uses the user name for client identification.
The Tunnel Builder Pro server performs this authentication process and returns a message to the Tunnel Builder Pro client indicating whether the authentication was successful. Only users who are successfully authenticated can fetch the MPLS topology to construct a network map.
 |
Note When you enter a command that changes the configuration of a node, for example, creating a tunnel, modifying a tunnel, deleting a tunnel, or modifying a link, and starting SAA, Tunnel Builder Pro uses your authentication information and the additional passwords found in the password file to make the change. If a user performs a fetch from server on a network map that has already been fetched from the network by another user, the Tunnel Builder Pro server will perform the authentication process for the new user. The new user will receive the cached network map that was actually read from the network using the first user's authentication information and password file. |
You cannot make changes to a node without having valid password information.
You can use different login and enable passwords on different nodes through the use of a separate password file. This password file contains one line for each node using any passwords that are different from those in the default authentication information. You have the option of creating this password file when you access the Tunnel Builder Pro application.
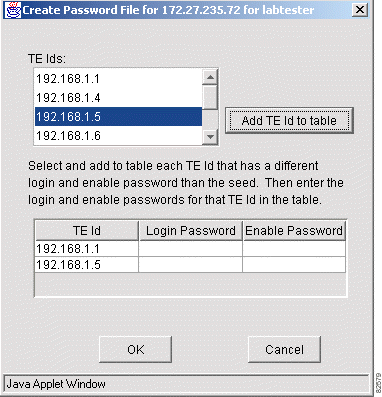
The nodes are defined in the password file using their TE Ids. You can select and add a TE Id and enter its associated login password and enable password in the Create Password File dialog box. The format of the file is as follows:
#comment - the passwords for node 2.2.2.2
TEId:2.2.2.2:password:red:enablepw:blue
# the passwords for node 3.3.3.3
TEId:3.3.3.3:password:yellow:enablepw:green
# this router uses the same enable password as the default
TEId:4.4.4.4:password:brown
# if the router requires a null password
TEId:5.5.5.5:password::enablepw:gray
The password file uses the filename username_1_2_3_4.txt, where username is the user name and 1.2.3.4 is the IP address of the seed router.
This section contains the following procedures:
To display a network map, perform the following steps:
Step 1 Click the Setup tab. The window shown in Figure 3-1 appears.
Step 2 Do one or both of the following:
Step 3 At Layout Style, select one of the following based on your personal preferences for your topology:
Step 4 Click one of the following:
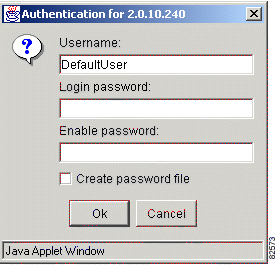
Step 5 Enter the following information:
a. At username, enter your user name.
b. At login password, enter the login password of the seed router.
c. At Enable password, enter the enable password needed to connect to the seed router.
d. If you use different user names or different passwords on different routers, click Create password file and see "Use Different User Names or Passwords in Your Network".
After your login is authenticated, the following actions occur:
Step 6 (Optional) To display node and link labels on the map, click one or both of the following:
Figure 3-3 illustrates a sample network map.
 |
Note To adjust the relative size of the left and right panes, place the cursor over the vertical line between the panes and drag the line left or right. |
 |
Note To change a map layout that is currently displaying, select a new layout style and then click Fetch from server or Fetch from network. You can click Fetch from server to obtain a new map layout without regenerating the network map. |
To create a password file, perform the following steps:
Step 1 Check the Create password file check box in the Authentication login screen shown in Figure 3-4.

Step 2 Click OK. The Create Password File dialog box appears for the seed router for the username (see Figure 3-5).
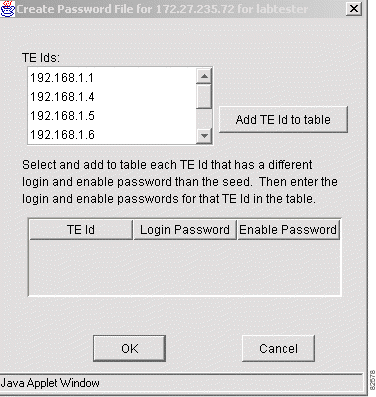
Step 3 Select each TE Id that requires a different login password and enable password.
Step 4 Click Add TE Id to table. Figure 3-6 shows a sample resulting display.
Step 5 At Login Password, enter the login password for each TE Id.
Step 6 At Enable Password, enter the enable password for each TE Id.
Step 7 Click OK.
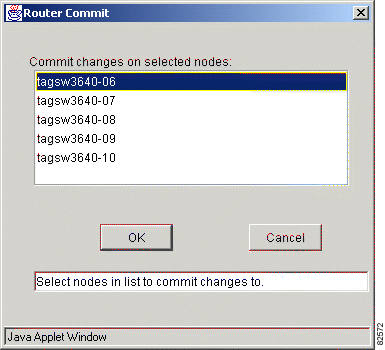
To make your changes permanent, do one of the following:
After setting up Tunnel Builder Pro, determine if your network is protected. See "Determining if Your Network is Protected."
![]()
![]()
![]()
![]()
![]()
![]()
![]()
![]()
Posted: Fri Oct 11 11:13:25 PDT 2002
All contents are Copyright © 1992--2002 Cisco Systems, Inc. All rights reserved.
Important Notices and Privacy Statement.