|
|

This chapter provides detailed instructions on migrating from NSP Release 2.0 on the mainframe, which is stage three of the ISM installation process. This stage is optional. This chapter includes the following sections:
For the MVS systems programmer responsible for installing ISM 3.0 on the mainframe, complete the following tasks before you continue to migrate data from NSP Release 2.0:
If, after you have migrated the NSP Release 2.0 data to ISM 3.0, you decide that you no longer want to maintain the previous release of NSP on your mainframe, you can remove the NSP Release 2.0 version from the host. For more information about removing NSP Release 2.0, see the "Deinstalling NSP Release 2.0" chapter.
When you migrate your NSP Release 2.0 installation, you convert a copy of your existing NSP Release 2.0 data files to the new VSAM key structures and new VSAM data sets that are supported in ISM Release 3.0.
Once you have installed ISM Release 3.0, you are ready to convert your NSP Release 2.0 files.
SOLVE:Netmaster provides a migration facility for ISM installation to automatically convert the following types of records:
The migration facility updates the NSP Release 2.0 files to year-2000 compatibility during the conversion process.
 | Caution If you want to convert your NSP Release 2.0 files, you need to do so before you start using ISM. Otherwise, you cannot migrate your system parameters, as they will conflict with existing system parameter records. |
To convert the NSP Release 2.0 files, complete the following tasks:
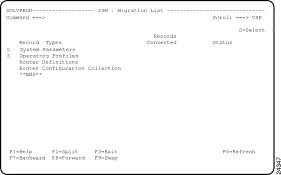
Step 1 From OCS, type the EXEC CISCALL ACTION=MIGRATE command and press Enter. The ISM : Migration List panel (Figure 4-1) is displayed, showing a multiple selection list of the types of record that you can select for migration.

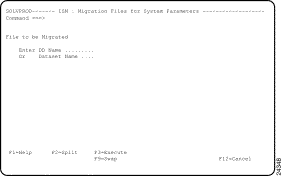
Step 2 Type S next to one or more record types and press Enter. The ISM : Migration Files panel (Figure 4-2) is displayed for the selected record type.

Step 3 To specify the file to be migrated, type a dataset name in either the DD Name field or the Dataset Name field.
Use the NSP 2.0 DD NSPCFGA data set to migrate system parameters, operator profiles, and router definition records. Use the NSP 2.0 DD NSPHISTC data set to migrate router configuration collection records.
Step 4 Press F3 to migrate the specified file.
If you selected more than one record type to convert, then the ISM : Migration Files panel for each of the selected types is displayed in turn, so that you can specify the file to be migrated for each record type.
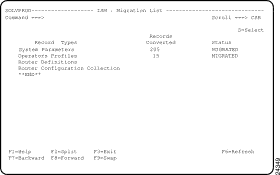
When you have specified the file for each selected record type and pressed F3 for the last one, the ISM : Migration List panel (Figure 4-1) is displayed again, showing the results of your migration request for the selected record types.

Step 5 For further information about this panel, press F1.
When you use the migration facility to convert NSP Release 2.0 files, ISM automatically reinitializes if the conversion is successful.
After you have converted your NSP Release 2.0 files, you must do the following:
1. Back out any changes to the SOLVE:Netmaster MSGPROC member that were made when implementing Enabling Automatic Status Updates and/or Alternate Message Automation Option.
2. Amend your existing NSCNTL records to conform with the ISM Release 3.0 records, and ensure that the Process-ID definition for NMVT generic alerts from ISM specifies a Post Logging Intercept procedure of CISEV51Z and not NSPALRT (see the "Updating NSCNTL Records From NSP Release 2.0" section).
Once you have migrated your NSP Release 2.0 data to ISM Release 3.0, you may wish to configure the ISM setup options. For more information about setting up ISM, see the "Configuring ISM" chapter.
After you have migrated your NSP Release 2.0 data to ISM Release 3.0 and decide that you no longer want to maintain the previous release on your mainframe, you can remove NSP Release 2.0 from the mainframe. For more information about removing NSP Release 2.0, see the "Deinstalling NSP Release 2.0" chapter.
![]()
![]()
![]()
![]()
![]()
![]()
![]()
![]()
Posted: Tue Aug 24 08:56:14 PDT 1999
Copyright 1989-1999©Cisco Systems Inc.