|
|

Table Of Contents
Navigating the Cisco EPOM Interface
Overview of the Cisco EPOM Application Window
About Adding a Cisco BTS 10200 EMS Server
Adding a Cisco BTS 10200 EMS Server
Adding Domains, Groups, and Users
Adding Groups and Assigning Them to Domains
Adding Users and Assigning Them to Groups
Setting Up Cisco EPOM
This chapter contains the following topics:
•
Navigating the Cisco EPOM Interface
•
Navigating the Cisco EPOM Interface
Navigating the Cisco EPOM interface is described in these topics:
•
•
Overview of the Cisco EPOM Application Window
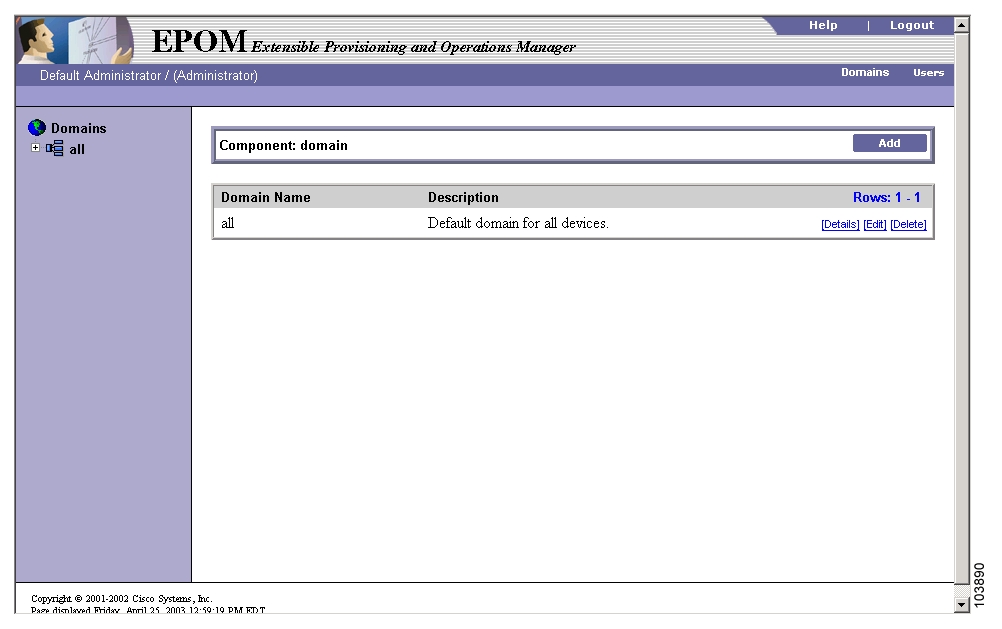
This is an example of the Cisco EPOM application window:
Standard Window Elements
Identifies the current window, such as Component: domain management.
Displays the application name and includes the Help and Logout buttons.
Displays the current user name, user type (Administrator or User). This menu bar also includes main menu buttons to switch between domain management and user administration.
Displays the currently selected component, if any, and buttons for major operations on that component.
This submenu bar also has the Reports, Config, Edit, and Delete buttons. These buttons are duplicated in the BTS10200 Details pane. They have the same function whether you click them in the submenu bar or the Details pane.
The submenu includes a highlighted link to the selected Cisco BTS 10200 EMS server. Click the link to go to the index for the selected server, where you can access reports or Help.
Displays a tree view you can use to display the structure of the current view, such as the Domains tree, the User/Groups tree, the inventory device Configuration tree, the Reports tree, and navigate through tree objects.
When you select a Cisco BTS 10200 EMS server and click on Config, icons (in the Configuration tree) identify the main object types and the default action that occurs when you click on the tree object. The available actions depend on the object type.
A main component, expandable to view subcomponents.
Click to show the component or list of components of that type, and access other operations such as adding a new component of that type or searching for components.
Click to search for components of this type.
Click to check or change status.
Click to diagnose the component.
Displays information about the object selected in the navigation pane. The display changes if you select a different object or click a command button, such as Add or Edit.
This pane includes a title box across the top, containing a description of the current object and command buttons for actions that apply to it. Management windows display a list of the managed objects and buttons applicable to the object, such as Edit or Delete.
These windows include standard elements and navigation features as shown in this example.
•
•
•
•
About Standard Cisco BTS 10200 Operations
In the managed object window, you can carry out any operation supported for the selected object type. The operation appears as an underlined blue link. Operations are executed in real time. These Cisco BTS 10200 operations are available in Cisco EPOM:
•
•
•
•
You cannot delete a component if other components depend on it. For example, you cannot delete a subscriber profile until you have deleted all the subscribers that are associated with it.
•
•
•
•
•
•
Reset the CIC if there are errors in the communication on that trunk.
•
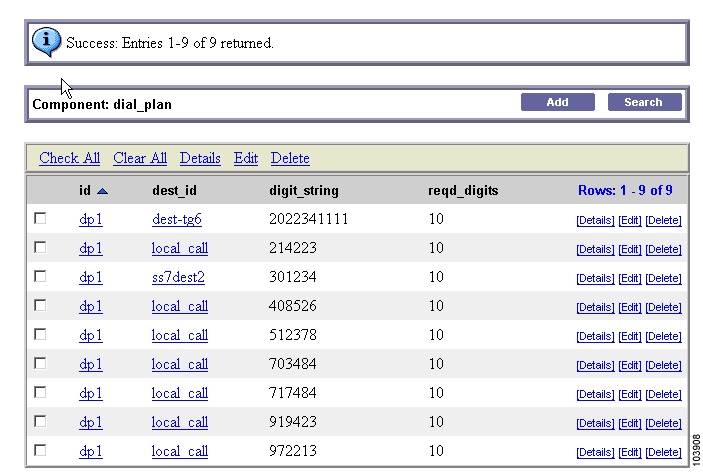
Fill in the search criteria, then click Search. For example, in the subscriber window, to find a list of subscribers using a particular media gateway, in mgw_id enter the gateway id, then click Search. A list of matching subscribers appears.
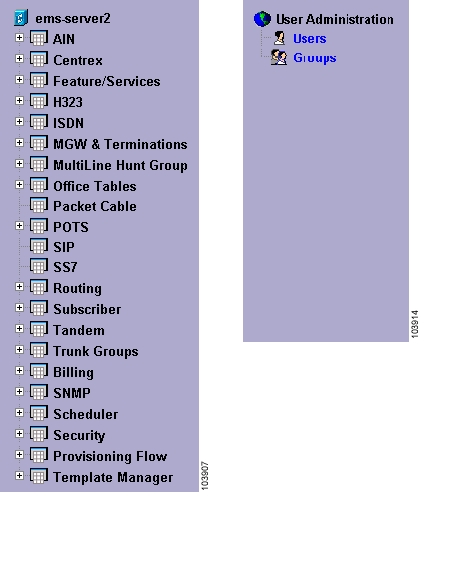
About Main Cisco EPOM Windows
Cisco EPOM's two main windows are Domain Management and User Management. From Domain Management you access all device-related functions. From User Management, Cisco EPOM administrators can access user and group access functions, and Cisco EPOM users can access their own user record, for example, to change their password.
This table describes the main Cisco EPOM windows in each category. The Access With column gives an example of how to access the window, but as in any web application, there are many links between windows that can shortcut hierarchical navigation.
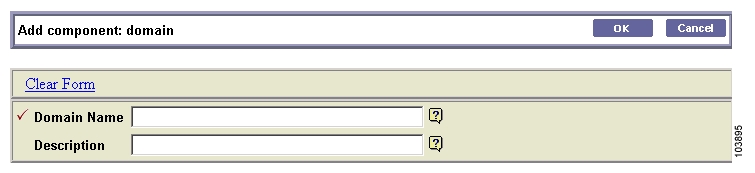
About Cisco EPOM Forms
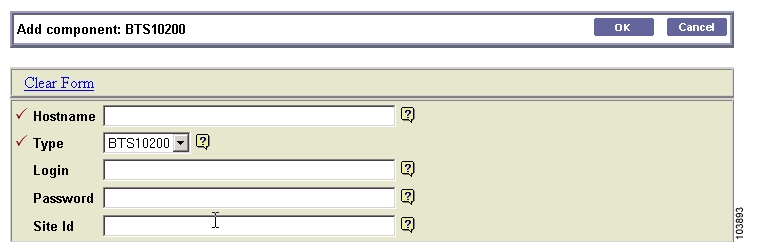
You can use Cisco EPOM forms to add, view, and change information on inventory components, domains, users, and groups, to specify report parameters, to search for devices, and so forth. The Add component form is an example:
About Form Actions
In a form, you can do the following:
•
•
•
•
Adding Multiple Components with Common Properties
In Component Add forms, you can use Apply to add multiple components with the same properties. For example, in the Subscriber Add form, enter common properties and fill in the ID for the first subscriber of that type, then click Apply. The subscriber is added and the form stays open. Fill in the id for the next subscriber and click Apply. Repeat for each subscriber of this type.
About Field Types
There are five field types:
•
For many text fields, you need to know the correct value to enter, such as the hostname of a
Cisco BTS 10200 EMS server.•
•
Click to select a single value, or Ctrl+click to select multiple values. Selected values are highlighted.
•
Click
to open the Selection Helper window. Make your choices, then click OK.
•
Click
to open a form to define the subelement, then click OK to save the changes and return to the previous form, or Apply to save the changes and keep working in the subelement form.
View-only fields have a gray background and cannot be edited.
About Field-Level Help
For help on a field, point to
in order to view a short description of the field and any requirements, such as minimum or maximum number of characters.
For parameter fields, click
to open the Selection Helper window.
About Moving Between Windows
Use the application buttons or the various tree views in the navigation pane to move between windows.
If you simply want to move back to the previous window, use the Cisco EPOM Cancel button, if available, or another application button.
Setting Up a Network
Setting up a network is described in these topics:
•
•
About Adding a Cisco BTS 10200 EMS Server
The first step is to add a Cisco BTS 10200 Softswitch EMS server to the Cisco EPOM inventory.
Before you begin, obtain this information about the Cisco BTS 10200 EMS server:
•
•
•
Determining a Cisco BTS 10200 EMS Server Site ID
This server ID enables Cisco EPOM to communicate with the Cisco BTS 10200 EMS server via the CORBA interface.
Step 1
Step 2
grep SITEID /etc/opticall.cfg
SITEID=rtpvtc2
Adding a Cisco BTS 10200 EMS Server
With this procedure, you can add a Cisco BTS 10200 EMS server to the "all" domain and set up the initial configuration.
Step 1
Cisco EPOM opens to the Domain Management window.
Step 2
The Modify component: Domain window opens.
Tip
Step 3
The Add component window opens.
Note
Step 4
Tip
symbol to access field-level help, such as the range of characters allowed for a response.
•
•
•
•
•
Step 5
The specified Cisco BTS 10200 EMS server is added to the "all" domain.
Adding Domains, Groups, and Users
By using the user, group, and domain administrative tools in Cisco EPOM, you can set up read and write or read-only access for Cisco EPOM users to any Cisco BTS 10200 EMS server network. Use domains to organize networks into logical groups that are accessible to specific user groups. Use groups to organize users based on the domains to which you want users to have access. You can also assign a
Cisco BTS 10200 user login name and password to a Cisco EPOM user group to further control access to the Cisco BTS 10200 EMS server (see Chapter 6, Managing Security with Cisco EPOM).Procedures to add domains, groups, and users are described in the following topics:
•
•
Adding Domains
Add a domain to create a logical network group that is accessible to specific user groups. A domain definition includes a Cisco BTS 10200 EMS server (which may have been already defined in another domain, or can be defined when you add the domain) and groups with access to the domain.
Step 1
Step 2
Step 3
a.
b.
c.
Step 4
Step 5
•
a.
The Inventory Edit window opens listing existing Cisco BTS 10200 EMS servers.
b.
c.
d.
Or
•
a.
b.
c.
d.
You return to the Domain Management window.
Step 6
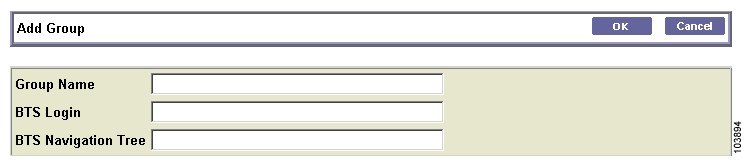
Adding Groups and Assigning Them to Domains
A domain definition specifies user groups with read/write or read-only access to that domain. Add groups to organize users according to what domains they should have access to.
Step 1
Step 2
Step 3
Step 4
Step 5
Tip
Step 6
Step 7
Under XYZ Domain Groups you see a list of groups that currently have access to this domain.
Step 8
Step 9
•
•
•
Step 10
Deleting Groups
You can delete obsolete groups. For example, you can delete a group if you delete the domain it is associated with.
Note
Step 1
Step 2
Step 3
Step 4
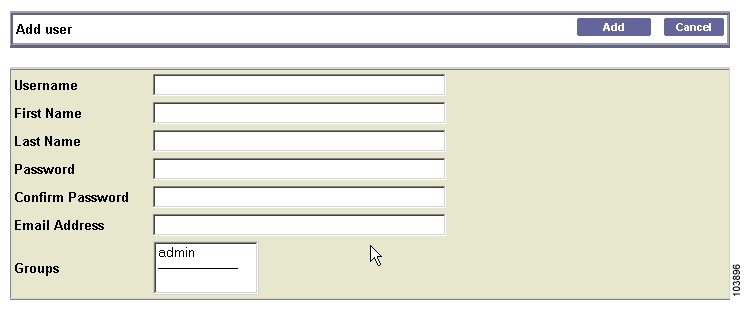
Adding Users and Assigning Them to Groups
Step 1
Step 2
Step 3
•
•
•
•
•
•
•
To deselect a group, point to the group, and press Ctrl+click.
Step 4
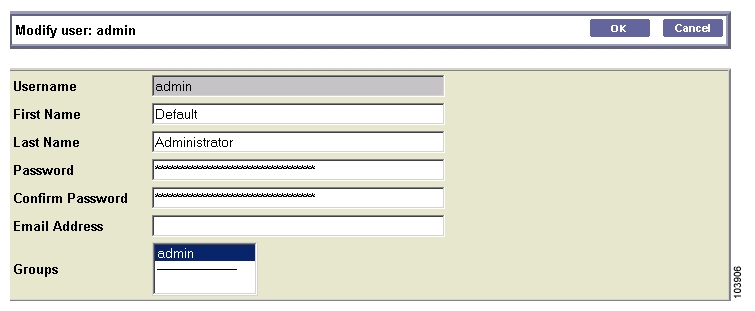
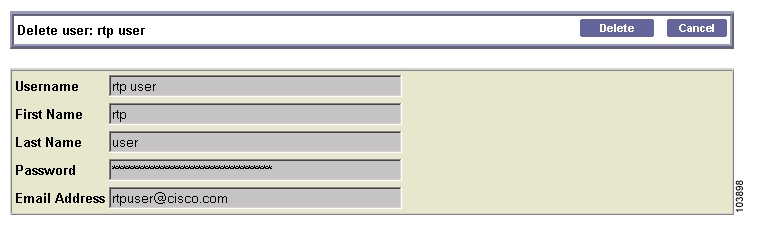
Modifying and Deleting Users
If you are a member of the admin group, you can modify user information, including group membership, or you can delete users who no longer require Cisco EPOM access. (If you are not a member of the Admin group, you can change your password, name, and email, but not your userid or group association.)
Step 1
Step 2
•
a.
The Edit User window opens. .
b.
c.
d.
e.
Changing Your User Information
As a user, you can change your password, email address, and first name/last name information. You cannot change your user name, group membership, or domain access, which can be changed only by the Cisco EPOM administrator.
Step 1
Step 2
Step 3
•
•
•
•
Step 4
![]()
![]()
![]()
![]()
![]()
![]()
![]()
![]()
Posted: Wed Dec 8 16:14:24 PST 2004
All contents are Copyright © 1992--2004 Cisco Systems, Inc. All rights reserved.
Important Notices and Privacy Statement.