|
|

Table Of Contents
Managing Security with Cisco EPOM
Setting Up Cisco EPOM Security
Creating Custom Navigation Trees
Activating the Navigation Tree
Managing Security with Cisco EPOM
This chapter contains the following topics:
•
Setting Up Cisco EPOM Security
•
The Cisco EPOM security management system extends the functionality of the Cisco BTS 10200 security system which controls and monitors access to the Cisco BTS 10200 Softswitch from outside sources. This security system is important in preventing:
•
•
•
Internal security functions include:
•
•
•
•
•
•
•
•
•
About Cisco EPOM Security
With Cisco EPOM, you can assign a Cisco BTS 10200 login name and password to a Cisco EPOM group. This allows Cisco EPOM to restrict a user's access to that of the assigned Cisco BTS 10200 login. A combination of user identity and command tables determines if access is granted or denied.
When a user logs in to Cisco EPOM, the user's group is examined for an associated Cisco BTS 10200 login. If Cisco EPOM finds an association, Cisco EPOM queries the Cisco BTS 10200 user table for that user's assigned security level and work groups. Cisco EPOM caches the command table for each Cisco BTS 10200 EMS server. The command table defines valid noun-verb combinations as well as required security level and work groups to run those combinations. By using the login security level and workgroups, Cisco EPOM determines if the user has permission to enter a command. This check is done for every request. If the user does not meet or exceed permission requirements, a "permission denied" message appears.
Note
Tip
•
•
Setting Up Cisco EPOM Security
Step 1
Step 2
Step 3
Step 4
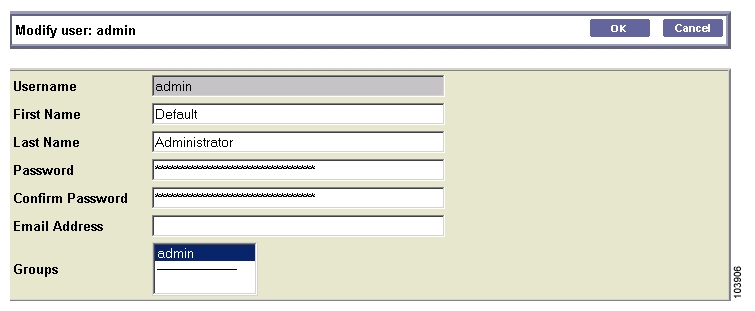
The Modify User window appears.
Step 5
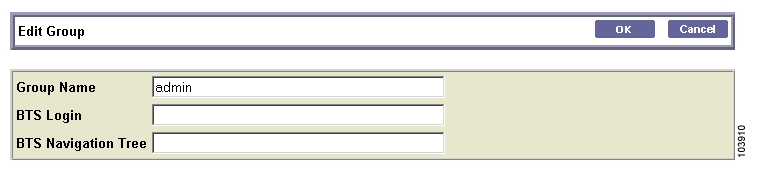
Step 6
The Edit Group window appears.
Step 7
Step 8
Note
Step 9
The assigned login appears.
Creating Custom Navigation Trees
With Cisco EPOM, you can create custom navigation trees that define how Cisco BTS 10200 objects (such as media gateways, subscribers, and call agents) are presented. These trees are defined by an .xml file that follows simple syntax rules. The tree is then assigned to a Cisco EPOM user group. Customized trees allow administrators to define and limit navigation functionality based on a user's job function.
Example of a Navigation Tree
The defaulttree.xml file shown here is located in: /opt/CSCOepom/tomcat/webapps/ROOT/xml/bts/navigation.
You can use this file as a template for defining new trees.
<tree name="default"><baseurl name="bts"><urlprefix><![CDATA[/bts/btscomp.jsp?_inv=[_inv]&_noun=]]></urlprefix></baseurl><baseurl name="btssearch"><urlprefix><![CDATA[/bts/btscompsearch.jsp?_inv=[_inv]&_noun=]]></urlprefix></baseurl><baseurl name="btsstatus"><urlprefix><![CDATA[/bts/btscompstatus.jsp?_inv=[_inv]&_noun=]]></urlprefix></baseurl><baseurl name="btsdiag"><urlprefix><![CDATA[/bts/btscompdiag.jsp?_inv=[_inv]&_noun=]]></urlprefix></baseurl><baseurl name="btswizard"><urlprefix><![CDATA[/bts/btswizard.jsp?_inv=[_inv]&_noun=]]></urlprefix></baseurl><baseurl name="images"><urlprefix>../images/treemenuimage</urlprefix></baseurl><imagepath><url base="images"/></imagepath><image name="BTS10200"><url base="images">16x16_BTS_10200_Softswitch_Blue.gif</url></image><image name="tablegrp"><url base="images">table16_window.gif</url></image><image name="bts"><url base="images">table16.gif</url></image><image name="btssearch"><url base="images">table16_basicquery.gif</url></image><image name="btsstatus"><url base="images">table16_show.gif</url></image><image name="btsdiag"><url base="images">table16_diag.gif</url></image><image><url base="images">menu_folder_open.gif</url></image><image><url base="images">menu_folder_closed.gif</url></image><image><url base="images">menu_corner.gif</url></image><image><url base="images">menu_corner_plus.gif</url></image><image><url base="images">menu_corner_minus.gif</url></image><image><url base="images">menu_bar.gif</url></image><image><url base="images">menu_link.gif</url></image><cssclassmap type="branch" class="parent_node"/><cssclassmap type="node" class="child_node"/><imagemap type="branch" image="tablegrp"/><imagemap type="node" image="bts"/><root name="[_hostname]" class="parent_node" image="BTS10200"><url base="btsstatus"><![CDATA[system&_cmd=do_status]]></url><branch name="bts.head.ain"><node name="bts.ani_wb_list"<url base="bts">ani_wb_list</url></node><node name="bts.cust_grp"<url base="bts">cust_grp</url></node><node name="bts.dn2cust_grp"<url base="bts">dn2cust_grp</url></node><node name="bts.ii_restrict_list"<url base="bts">ii_restrict_list</url></node></branch></root></tree>Activating the Navigation Tree
Step 1
Step 2
Step 3
The Edit Group window appears.
Step 4
Step 5
Note
![]()
![]()
![]()
![]()
![]()
![]()
![]()
![]()
Posted: Wed Dec 8 16:55:31 PST 2004
All contents are Copyright © 1992--2004 Cisco Systems, Inc. All rights reserved.
Important Notices and Privacy Statement.