|
|

Table Of Contents
Configuring Cisco BTS 10200 Components
Configuring a Cisco BTS 10200 EMS Server
Creating a New Cisco EPOM Template
Creating a Template from an Existing Template
Designating a Default Cisco EPOM Template
Deleting a Cisco EPOM Template
Adding a Component to the Cisco BTS 10200 Configuration
Applying a Cisco EPOM Template
Editing a Component in the Cisco BTS 10200 Configuration
Deleting a Component from the Cisco BTS 10200 Configuration
Checking the Status and Controlling Components
Configuring Cisco BTS 10200 Components
This chapter contains the following topics:
•
Configuring a Cisco BTS 10200 EMS Server
•
•
•
•
Configuring a Cisco BTS 10200 EMS Server
Use this procedure after you have added a new Cisco BTS 10200 EMS server to the Cisco EPOM inventory. (See the "Adding a Cisco BTS 10200 EMS Server" section on page 3-9.)
Step 1
a.
b.
You see the Cisco BTS 10200 EMS servers currently in the inventory. In this example, there are two servers: ems server and ems server 3.
Step 2
Step 3
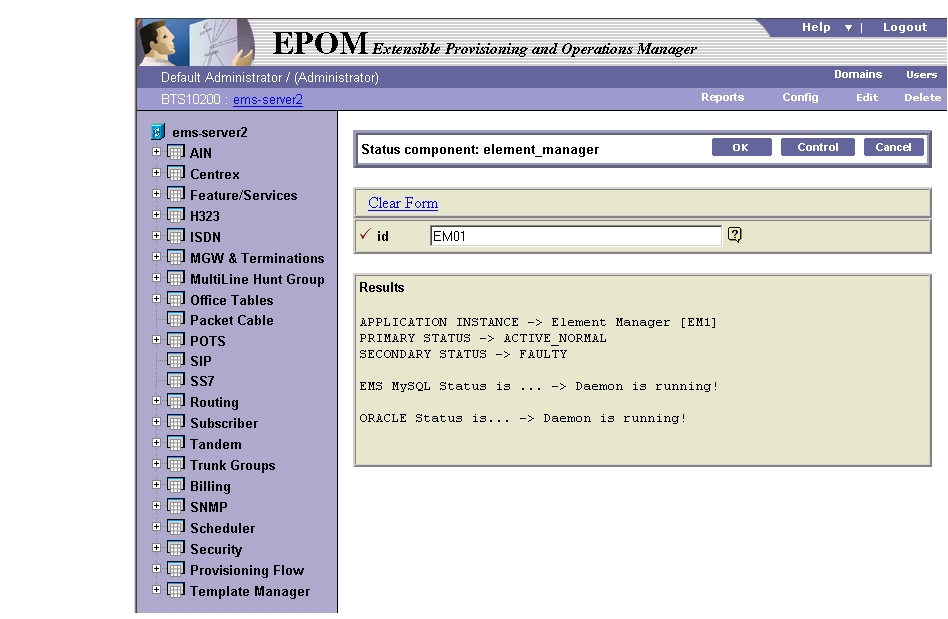
The navigation pane shows the Configuration tree, and the content area shows the status of the selected Cisco BTS 10200 EMS server.
Note
Step 4
About Cisco EPOM Templates
Cisco EPOM templates allow you to create and save templates that can be used later for creating Cisco BTS 10200 Softswitch objects (that represent Cisco BTS 10200 Softswitch components). With a template you can add several similar objects to the Cisco BTS 10200 EMS server without having to repeatedly select configuration items for each individual device.
•
•
•
•
•
Creating a New Cisco EPOM Template
Note
You can either specify a value in the ID field to be used as a prefix, or leave a blank field that forces the user to specify a valid, unique ID.
Step 1
Step 2
The Cisco BTS 10200 Component Status window opens.
Step 3
The Cisco BTS 10200 Component window opens showing a list of call agents.
Step 4
Note
Step 5
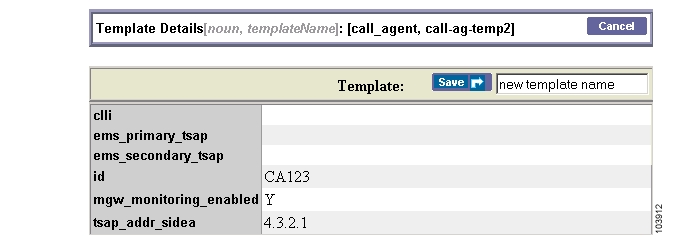
The template that you created contains field information from the Details Component window.
Creating a Template from an Existing Template
Note
You can either specify a value in the ID field to be used as a prefix, or leave a blank field that forces the user to specify a valid, unique ID.
Step 1
Step 2
The Cisco BTS 10200 Component Status window opens.
Step 3
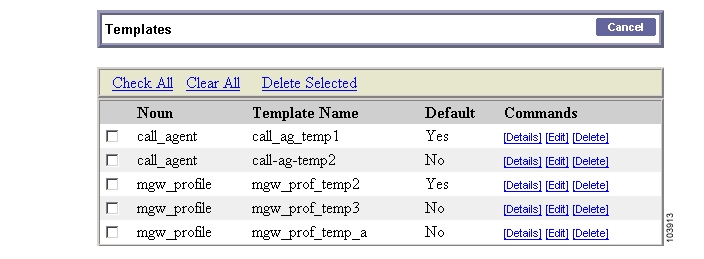
A list of templates appears.
Step 4
Step 5
The new template is stored under the specified name.
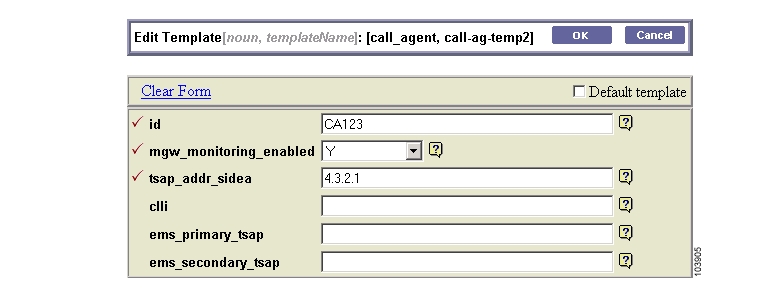
Editing a Cisco EPOM Template
Step 1
Step 2
The Cisco BTS 10200 Component Status window opens.
Step 3
A list of templates appears.
Step 4
The Edit Template window appears.
Step 5
Step 6
Designating a Default Cisco EPOM Template
Step 1
Step 2
The Cisco BTS 10200 Component Status window opens.
Step 3
A list of templates appears (see the "Editing a Cisco EPOM Template" section).
Step 4
The Edit Template window appears.
Step 5
Step 6
Deleting a Cisco EPOM Template
Step 1
Step 2
The Cisco BTS 10200 Component Status window opens.
Step 3
A list of templates appears.
Step 4
After a verification message, the template is deleted.
Adding a Component to the Cisco BTS 10200 Configuration
Tip
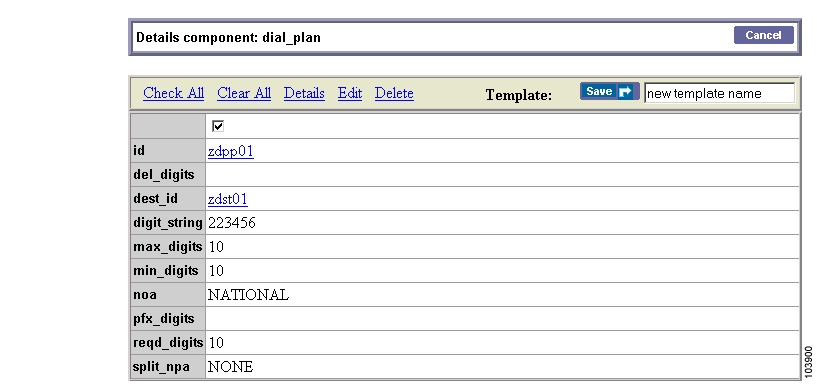
Add components to the Cisco EPOM inventory to build a managed network. The device information includes static and dynamic selections to other parts of the configuration. Follow this example to add a dial plan.
Step 1
Step 2
The Cisco BTS 10200 Component Status window opens.
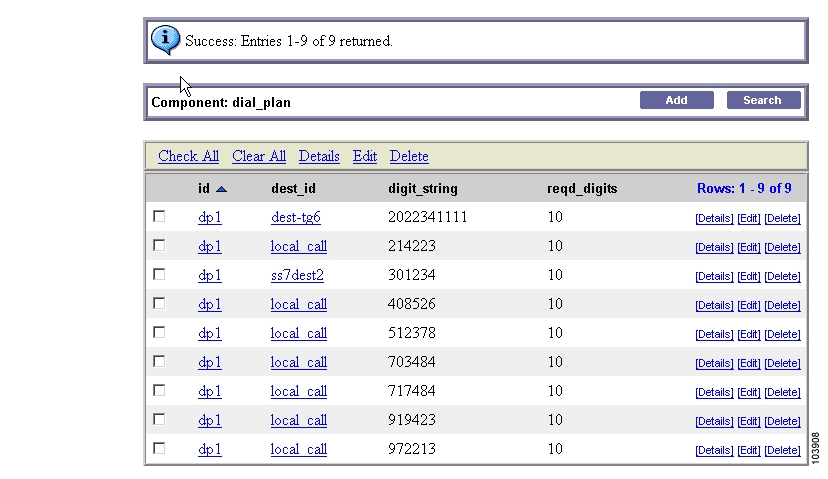
Step 3
The Cisco BTS 10200 Component window opens showing a list of dial plans. If this is the first dial plan (or device of this type) that you are adding, the list is empty.
Step 4
The Cisco BTS 10200 Component Add window opens.
Step 5
Step 6
•
•
You return to the Cisco BTS 10200 Component window. The new dial plan is added to the list.
To edit a single component, see the "Editing a Component in the Cisco BTS 10200 Configuration" section; to delete a single component, see the "Deleting a Component from the Cisco BTS 10200 Configuration" section.
To add, edit, or delete multiple components with a single operation, see the "Bulk Command Provisioning" section.
Applying a Cisco EPOM Template
Step 1
Step 2
The Cisco BTS 10200 Component Status window opens.
Step 3
The Cisco BTS 10200 Component window opens showing a list of dial plans. If this is the first dial plan (or device of this type) that you are adding, the list is empty.
Step 4
The Cisco BTS 10200 Component Add window opens.
Step 5
Step 6
Step 7
•
•
You return to the Cisco BTS 10200 Component window. The new dial plan is added to the list.
Note
You can either specify a value in the ID field to be used as a prefix, or leave a blank field that forces the user to specify a valid, unique ID.
Note
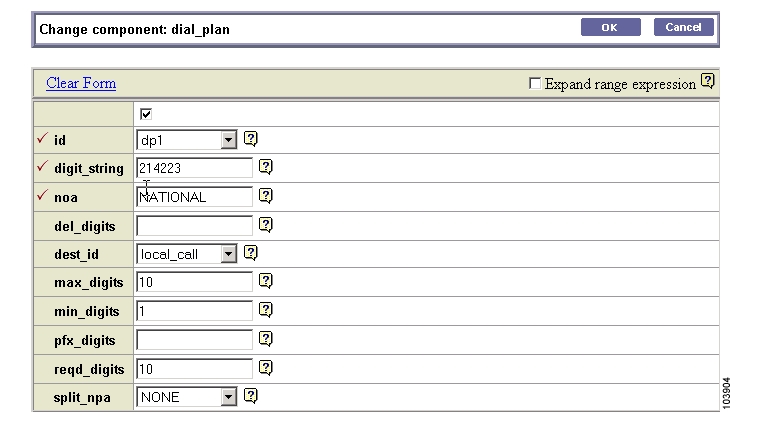
Editing a Component in the Cisco BTS 10200 Configuration
Step 1
Step 2
The Cisco BTS 10200 Component Status window opens.
Step 3
The Cisco BTS 10200 Component window shows a list of currently configured dial plans.
Step 4
Step 5
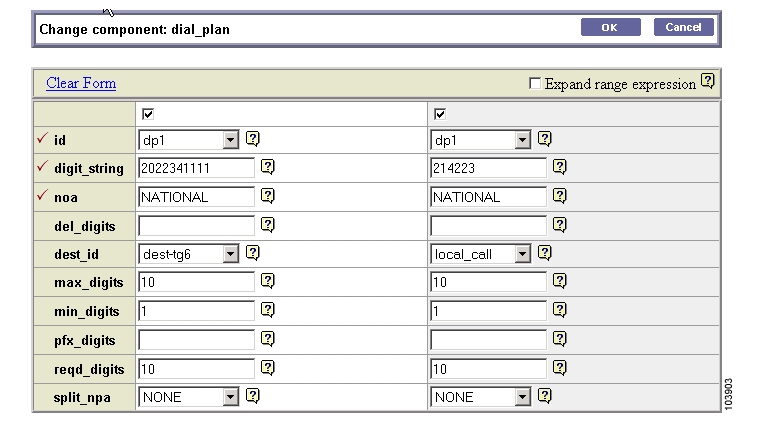
The Change component window appears.
Note
Step 6
Step 7
You return to the Cisco BTS 10200 Component window. The edited dial plan appears in the list.
To add a single component, see the "Adding a Component to the Cisco BTS 10200 Configuration" section; to delete a single component, see the "Deleting a Component from the Cisco BTS 10200 Configuration" section.
To add, edit, or delete multiple components with a single operation, see the "Bulk Command Provisioning" section.
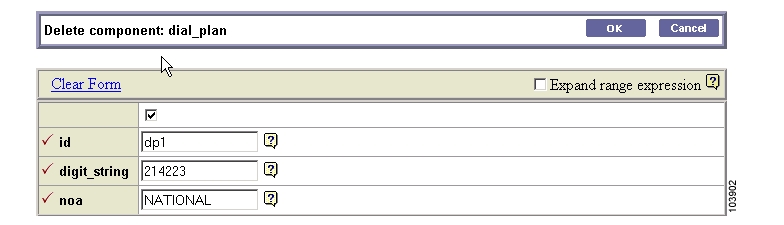
Deleting a Component from the Cisco BTS 10200 Configuration
Step 1
Step 2
The Cisco BTS 10200 Component Status window opens.
Step 3
The Cisco BTS 10200 Component window shows a list of currently configured dial plans.
Step 4
Step 5
The Delete component window with the requested deletion appears.
Note
Step 6
To add a single component, see the "Adding a Component to the Cisco BTS 10200 Configuration" section; to edit a single component, see the "Editing a Component in the Cisco BTS 10200 Configuration" section.
To add, edit, or delete multiple components with a single operation, see the "Bulk Command Provisioning" section.
Bulk Command Provisioning
Cisco EPOM allows you to perform add, delete, and edit commands on multiple components with a single operation. You can only perform bulk provisioning commands on the same type of devices. For instance, if a group of subscribers use the same media gateway and subscriber profile, you can add or edit these subscribers by using a single command.
Adding Multiple Components
Step 1
The Component:name window appears.
Step 2
The Add component window appears.
Step 3
If you fail to select this check box, you get an error message when you enter a range expression.
Tip
symbol next to the Expand range expression field.
Step 4
For example, to add a group of 10 dial plans with the id prefix dp001_new, enter dp001_new[01-10]. Doing so adds dial plans dp001_new01, dp001_new02, through dp001_new10.
Step 5
Step 6
•
•
You have now added multiple components to the Cisco BTS 10200 EMS network.
Editing Multiple Components
Step 1
The Component:name window appears.
Step 2
Step 3
The Change component window appears.
Note
Step 4
Step 5
You have now edited multiple components in the Cisco BTS 10200 EMS network.
Deleting Multiple Components
Step 1
The Component:name window appears.
Step 2
Step 3
The Delete component window appears with the requested deletions.
Note
Step 4
You have now deleted multiple components in the Cisco BTS 10200 EMS network.
Checking the Status and Controlling Components
You can check the status of a component and you can control its status. For example, you can change status of a Cisco BTS 10200 EMS server from Normal to Forced Active Standby.
Note
Step 1
Step 2
Step 3
Step 4
Step 5
Step 6
Step 7
![]()
![]()
![]()
![]()
![]()
![]()
![]()
![]()
Posted: Wed Dec 8 16:02:49 PST 2004
All contents are Copyright © 1992--2004 Cisco Systems, Inc. All rights reserved.
Important Notices and Privacy Statement.