|
|

This chapter describes the DNS server and the tasks you must perform before your CDDM or Cisco Server Suite 1000 system can communicate with the DNM service and provide DNS (Domain Name System) services. It includes the following sections:
DNS is a name resolution protocol. It converts host names to IP addresses and vice-versa.
DNS is a hierarchical database, meaning the data is structured in a tree, much like the directory structure of a UNIX or Windows file system. The root domain, ".", is at the top, and various subdomains branch out from the root. On the Internet, for example, the first branches coming out of the root are the top-level domains such as .com, which is a domain containing all commercial organizations, .edu, which contains all educational organizations, and the various country codes, like .au for Australia, .ca for Canada, and so on.
Under each of these top-level domains are more branches containing other domains, such as cisco.com, aol.com, and microsoft.com under the .com domain, and stanford.edu and ucsc.edu under the .edu domain. Each of these domains may, in turn, have their own subdomains, such as engineering.cisco.com and sales.cisco.com under the cisco.com domain. Figure 6-1 shows this structure.

Host names are organized based on the tree structure of DNS. The individual node name comes first, followed by the domain where it resides, followed by the domain in which the domain resides, and so on, with each level separated by a dot. So, for example, when we see the host name host1.engineering.cisco.com, we know that the node host1 is in the engineering subdomain of the cisco domain, which in turn is in the com domain, which is under the root domain of the Internet.
Each domain has its own name server, a server which contains the host name information about the hosts and sub-domains within its domain. The cisco.com domain, for example, has a name server that stores address information about all of the hosts and subdomains in the cisco.com domain. However, authority for a subdomain, such as engineering.cisco.com, can be passed to a name server that has authority for that subdomain. When a name resolution request comes to the cisco.com name server, it just passes the request off to the engineering.cisco.com name server. In this way, DNS is truly distributed across the Internet, with each domain maintaining only the information that is pertinent to that domain.
Because DNS is distributed across domains, when a name server receives a request for name resolution for a host that is outside of its domain, it may not have address information for that host. Because DNS is hierarchical, it does not need that information, the name server just needs to know how to access the root name server. It forwards the name resolution request to the root name server, which then delegates the request to the appropriate domain beneath it, and this process continues until a name server which has address information for the host is reached, and the information is retrieved.
In order to reduce the length of time of name resolution, and to reduce traffic on the network, important concept of DNS is that of caching. Whenever a name server receives address information for another host or domain, it stores that information for a specified period of time. That way, if another name resolution request for that host or domain is received, the name server has the address information ready, and does not need to send another inquiry across the Internet.
The length of time address information is stored on the name server is determined by the Time-To-Live (TTL) value entered in the domain Start of Authority (SOA) resource record.
Each name server stores information about its domain in the form of several different kinds of resource records, each of which stores a different kind of information about the domain and the hosts in the domain. Resource records are traditionally text entries stored in different files on the domain name server. The Cisco DNM Browser lets you edit these records via a graphical interface, reducing the chance of errors in the text files. A description of the different record types available on the DNM Browser is shown in Table 6-1.
| Record Type | Description |
|---|---|
| Start of Authority (SOA) | Required for every domain. Stores information about DNS itself for the domain. |
| Name Server (NS) | Stores information used to identify the name servers in the domain that store information for that domain. |
| Address (A) | Stores the host name and IP address of individual hosts in the domain. This is the record used to translate host names to IP addresses. |
| Canonical Name (CNAME) | Stores additional host names, or aliases, for hosts in the domain. |
| Mail Exchange (MX) | Stores information about where mail for the domain should be delivered. |
| Pointer (PTR) | Stores the IP address and host name of individual hosts in the domain. Used to translate IP addresses into host names. |
| Host Information (HINFO) | Stores information about the hardware for specific hosts. |
| Well Known Services (WKS) | Stores information about the various network services available from hosts in the domain. |
| Text Information (TXT) | Stores up to 256 characters of text per line. |
| Responsible Person (RP) | Stores information about the person responsible for the domain. |
This has been a very brief overview of DNS. For more information about DNS, please refer to the book DNS and Bind by Paul Albitz and Cricket Liu, published by O'Reilly and Associates.
This section describes how to use the CSM to start, stop, and restart the DNS server.
To configure the DNS server to start automatically whenever a request is received on the server port or to control access to the DNS server, see Chapter 3, "Starting the Master Server."
To start the DNS server:
Step 1 Start the CSM.
Step 2 Choose DNS from the Available Services list.
Step 3 Click Start.
To stop the DNS server:
Step 1 Start the CSM.
Step 2 Choose DNS from the Available Services list.
Step 3 Click Stop.
To restart the DNS server:
Step 1 Start the CSM.
Step 2 Choose DNS from the Available Services list.
Step 3 Click Restart.
Although the majority of DNS server management involves changing information about the zones for which the server is authoritative, you must also configure the DNS server to handle queries for data in other zones. You must:
All name servers require access to root name servers to help resolve names not within their authority. The CDDM provides a file, bind.ca in the CDDM config/bind directory, that contains a list of root name servers on the Internet. This root name server file is known as a cache file. Your DNS server can query these root name servers if a DNS resolver asks the server for DNS information that is neither within its authority nor cached in memory.
To specify a cache file in place of the default cache file:
Step 1 Start the CSM.
Step 2 Choose DNS from the Available Services list.
Step 3 Select the Config tab.
Step 4 Enter the pathname of the desired cache file in the Cache File field.
Unless you plan to obtain or create your own cache file, enter the standard CDDM cache file:
MultiNet\config\bind.ca.
CSCOcddm/config/bind.ca.
where installation_dir is the directory in which you installed the CDDM. In both cases, you must specify an absolute pathname.
To create a custom cache file, see the section, "Creating Custom Cache Files."
Step 5 To save the configuration, choose Save Configuration from the File menu.
Your changes take effect the next time you start the DNS service.
DNS cache files are zone files that describe the root zone ("."), which advertises name servers for top-level domains such as com, edu, gov, and org. You can download a current copy of the cache file, bind.ca, from the InterNIC via anonymous FTP at the following URL:
ftp://ftp.rs.internic.net/domain/named.root
The cache file is in standard BIND zone file format and includes records that identify the names (via NS records) and addresses (via glue A records) of the root name servers. A glue record is an "A" record used to glue the DNS tree together. A zone transfer of a root zone includes (in the root zone) the "A" records for the name servers in a subdomain of the root even though these records really belong in the subdomain. Such records that are returned out of place are called glue records.
If you do not want to manually edit a cache file, you can edit it using the DNM Browser:
Step 1 Start the DNM Browser (see Chapter 5, "Managing Zones with the DNM Browser").
Step 2 Copy the existing cache file to the DNM Browser host.
Step 3 Import the cache file with the DNM Browser Import Zone File function, and specify the root domain (".") in the Domain field.
Step 4 Open the resource record window of the root domain.
Step 5 Select the Authority tab.
Step 6 Add, modify, or remove entries in the Name servers area as needed.
Step 7 To save your changes, click OK.
 | Caution If your DNS server does not have Internet access or is behind a firewall that blocks DNS packets, it will be unable to contact the root name servers, but will still need to know the IP address of a host that can access the root name servers. In this situation, configure a forwarder (see "Specifying Forwarders"). The DNS server can also be configured to send queries to a host "acting" as a root name server. In this situation, you can configure a "fake," or internal, root name server. |
If you do not configure the DNS server to be authoritative for any domains, it can still act as a caching-only name server by querying other name servers to resolve host names to IP addresses. The answers received from the inquiry are cached and used in subsequent name resolver requests without querying the remote name server.
Although the DNS server usually sends queries directly to the name server that contains the answer, you can configure it to redirect these queries to a central name server, called a forwarder, that functions as a second-level cache. The central name server then queries the name server that contains the answer, and caches a copy.
Specify forwarders to:
You can specify multiple forwarders. If the first forwarder does not respond within eight seconds, the DNS server queries each remaining forwarder in sequence until it receives an answer or it exhausts the list. If the DNS server receives no answer to a forwarded query, it sends the query to the advertised name servers for that domain as if no forwarder is present.
To forward queries to other name servers:
Step 1 Start the CSM.
Step 2 Choose DNS from the Available Services list.
Step 3 Select the Config tab.
Step 4 For each name server you want to use for forwarded queries:
(a) Enter the IP address of a server that accepts recursive queries from other servers in the lower field in the Forwarders area.
(b) Click Add in the Forwarders area.
Step 5 To remove one or more name servers from the Forwarders list:
(a) Select the IP addresses in the Forwarders list.
(b) Click Delete.
(c) When prompted, confirm the deletions one at a time by clicking Yes, or all at once by clicking Yes to All.
Step 6 To prevent the server from sending non-recursive queries to other name servers, enable the Slave Mode checkbox.
Step 7 Choose Save Configuration from the File menu.
Your changes take effect after you stop and restart the DNS server.
When you install the CDDM or the Cisco Server Suite 1000, the DNS server is configured with default parameters appropriate for most DNS environments, which are shown in Table 6-2.
| Parameter | Description | Default Value |
|---|---|---|
| Bootfile | Name of the file in which the CSM stores DNS server configuration data. | config\bind.cnf (Windows NT) or config/bind.conf (UNIX) in the directory in which you installed the software. |
| Cachefile | File in which cached DNS data is stored. | log\dns.cache (Windows NT) or log/dns.cache (UNIX) in the directory in which you installed the software. |
| Debugfile | File in which the DNS server stores debugging messages. | disabled. |
| Dumpfile | File in which DNS data in memory is stored in response to a dump command. | \log\dns.dmp (NT) or /log/dns.dmp (UNIX) in the directory in which you installed the software. |
| Log-lame-delegation | When enabled, the DNS server logs failed attempts to direct queries to advertised name servers that do not provide authoritative answers. | disabled. |
| Statsfile | File in which the DNS server writes statistics. | \log\dns.stats (NT) or /log/dns.stats (UNIX) in the directory in which you installed the software. |
To change these defaults:
Step 1 Start the CSM.
Step 2 Choose DNS from the Available Services list.
Step 3 Select the StartUp tab.
Step 4 Select the Parameters tab.
Step 5 Change the defaults as needed.
Step 6 Choose Save Configuration in the File menu.
Your changes take effect the next time you start the Master Server.
Once your DNS server is configured for basic name service (see "Configuring Basic Name Service"), you must make it authoritative for each zone you plan to manage.
To make the DNS server authoritative you must:
Each DNS server can be authoritative for many zones, primary for some, and secondary for others. Traditionally, network administrators configure at least one primary name server and two secondary name servers for each zone. Because the DNM Server provides zone transfers traditionally provided by primary name servers, you must configure all name servers as secondary name servers for zones managed by the DNM Server.
You can use both a DNM Server and zone files as zone data sources on the same CDDM system.
To make the DNS server authoritative for a zone:
Step 1 Start the CSM.
Step 2 Choose DNS from the Available Services list.
Step 3 Select the Config tab.
Step 4 Make sure the Cache File field contains the name of a file that lists a set of root name servers (see "Specifying the Root Name Server File").
Step 5 Look for existing entries for the zone in the Primary and Secondary lists. You can modify existing entries, or delete them and add new ones. For example, if your DNS server is already secondary for yoyodyne.com, you can change the existing entry's Backup File parameter; but to make the DNS server primary, you must delete the secondary entry and add a new primary entry.
Step 6 To remove an existing entry for the zone in the Primary or Secondary Zone lists:
(a) Select the entry you want to delete.
(b) Click Delete in the corresponding area (Primary or Secondary).
Step 7 If you will manage the zone via a local zone file:
(a) If the zone is already listed in the Primary Zones list, scroll to that entry.
(b) To add a new entry, click Add in the Primary area, and scroll to the new blank entry.
(c) Enter the zone name in the Primary Zones field.
(d) Enter the zone file name, including the directory, in the Primary Source field.
(e) If the Primary Source Directory field is blank, enter the directory containing your zone files.
Step 8 If you will manage the zone via a DNM Server or via another DNS server:
(a) If the zone is already listed in the Secondary Zones list, scroll to that entry.
(b) To add a new entry, click Add in the Secondary area, and scroll to the new blank entry.
(c) Enter the IP address of the DNM or DNS server that will provide zone transfers for this zone in the Secondary Source field, followed by a slash and the Port on which that DNM or DNS server is running. For example (192.41.228.72/53). The default is port 53, so if no port is specified, 53 is used. You must specify a zone transfer port other than 53 if your DNS server obtains zone data from a DNM Server configured to perform zone transfers on another port to accommodate a co-resident DNS server. For more information, see "Specifying the Zone Transfer Port."
(d) Enter the name of the file into which you want to save zone data after each zone transfer.
Step 9 To save the new configuration, choose Save Configuration from the File menu. Your changes take effect the next time you start the DNS server.
Step 10 To start the DNS server, click Start. The DNS server loads zone data from files and zone transfers according to the new configuration. When it finishes loading its zone data, it can start answering DNS queries.
Step 11 If you have not already done so, advertise your DNS server for the zone. For details, see "Advertising Your DNS Server."
Step 12 Test your DNS server with nslookup or a similar utility.
When you configure the Cisco DNS server to be secondary for a zone, the DNS server requests zone transfers on port 53 unless you specify otherwise. You must specify a zone transfer port other than 53 if your DNS server obtains a zone's data from a DNM Server that is configured to perform zone transfers on another port to accommodate a co-resident DNS server (see "Specifying DNM Service Ports" in Chapter 4).
You can specify zone transfer ports for each zone in your DNS server's Secondary Zones list. If your DNS server needs to use port 53 for a specific zone (the default), you do not have to specify a zone transfer port.
To specify the zone transfer port for a specific zone:
Step 1 Start the CSM.
Step 2 Choose DNS from the Available Services list.
Step 3 Select the Config tab. The DNS server configuration screen appears.
Step 4 Locate the desired entry in the Secondary Zones list.
Step 5 Append a slash (/) and the desired port number to the IP address in the Zone's Source field.
For example, if the Source field contains 192.41.228.72 and the DNM Server on 192.41.228.72 is configured to perform zone transfers on port 705, enter 192.41.228.72/705 in the Source field.
Step 6 To save the new configuration, choose Save Configuration from the File menu. Your changes take effect the next time you start the DNS server.
Step 7 To restart the DNS server, click Restart. The DNS server loads zone data from files and zone transfers according to the new configuration. When the DNS server finishes loading its zone data, it can start responding to DNS queries.
Although you can configure a name server to be authoritative for any domain, in reality it is only useful to do so if other name servers advertise (delegate) it. To advertise a name server, you can either:
You must advertise your DNS server in:
In Figure 6-2 below, there are two domains, yoyodyne.com and sales.yoyodyne.com. Within the sales.yoyodyne.com domain, there are two name servers, ns3.sales.yoyodyne.com and ns4.sales.yoyodyne.com, which are both authoritative forsales.yoyodyne.com.

When you add Name Server records with the DNM Browser, the DNM Server automatically delegates authority for the domain to its parent. For example, if you add Name Server records to sales.yoyodyne.com, the DNM Browser automatically adds Name Server and glue IP address records to the yoyodyne.com domain. Doing this lets the name server for yoyodyne.com locate the name servers for sales.yoyodyne.com.
A glue record is an "A" record used to glue the DNS tree together. A zone transfer of a root zone includes in the root zone the "A" records for the name servers in a subdomain of the root even though these records really belong in the subdomain. Such records that are returned out of place are called glue records.
Similarly, to advertise hosts ns1 and ns2 as authoritative name servers for yoyodyne.com, you would add Name Server records as shown in the following 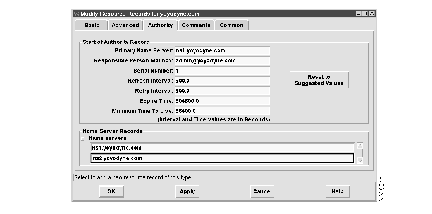
example.
If you add Name Server records as shown here, the DNM Server will also add Name Server records to the com domain, for which it is probably not authoritative. In this situation, you must contact the administrative contact for the parent domain, and ask to have your domain delegated to your name servers. When you make such a request, you must supply the fully qualified names and IP addresses of the authoritative name servers of your domain.
In this example, you would ask the administrator for the com domain to add name server (NS) records for ns1.yoyodyne.com (10.1.1.1) and ns2.yoyodyne.com (10.1.1.2) to the yoyodyne.com domain. If you use the DNM Browser's Export Zone feature, the output file would include the following records:
IN      NS   ns1.yoyodyne.com
IN      NS   ns2.yoyodyne.com
ns1        IN      A    10.1.1.1
ns2        IN      A    10.1.1.2
|
|