|
|

Table Of Contents
Using the Subscriber Manager GUI Tool
How to disconnect from the current SCMS-SM
Working with Subscriber CSV Files
How to import subscriber information from a CSV file
How to export subscriber information to a CSV file
Finding and Selecting Subscribers
How to delete a subscriber from the database
Using the Subscriber Manager GUI Tool
This chapter describes how to use the Subscriber Manager (SM) GUI tool to configure subscribers in the Cisco Service Control Management Suite (SCMS) Subscriber Manager (SM) database.
The SM GUI tool is especially useful when the SCMS-SM holds a static list of subscribers. It is not applicable when the Cisco Service Control Application for Broadband (SCA BB) is operating in subscriberless mode or in anonymous subscriber mode.
•
Working with Subscriber CSV Files
Using the SM GUI Tool
The SM GUI tool allows you to manage subscribers on an SCMS-SM. The SCMS-SM functions as middleware software that bridges between the OSS and the Service Control Engine (SCE) platforms. SCE platforms use the subscriber information to provide subscriber-aware functionality, per-subscriber reporting, and policy enforcement. Subscriber information is stored in the SCMS-SM database and can be distributed between multiple platforms according to actual subscriber placement.
You can use the SM GUI tool to import and export subscriber files, and to perform operations on individual subscribers, such as adding a new subscriber, editing parameters of an existing subscriber, and deleting a subscriber.
Note
The SM GUI tool provides only a subset of the functionality that is provided by the SM Command-Line Utility. For more information about the SCMS-SM, see the Cisco Service Control Management Suite Subscriber Manager User Guide .
•
Connecting to an SCMS-SM
You can connect to an SCMS-SM:
•
•
•
Note
•
•
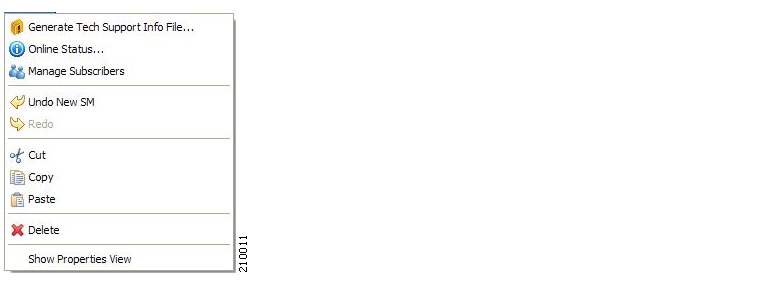
How to Connect to an SCMS-SM from the Network Navigator
Step 1
A popup menu appears.
Figure 11-1
Step 2
A Password Management dialog box appears.
Step 3
Step 4
The Password Management dialog box closes.
A Connecting to progress bar appears.
The system connects to the SCMS-SM.
( Import subscribers from CSV file),
( Export subscribers to CSV file), and
( Disconnect from SM) are enabled.
Figure 11-2
How to connect to an SCMS-SM from the Console
Note
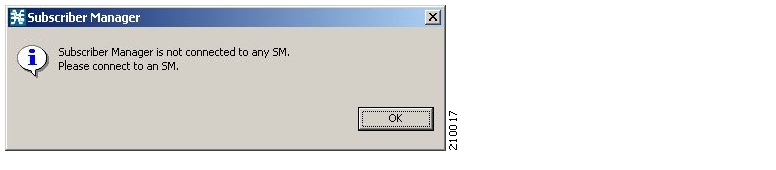
Step 1
The SM GUI tool opens.
A Subscriber Manager is not connected message appears.
Figure 11-3
Step 2
The Subscriber Manager is not connected message closes.
Step 3
( Connect to an SM).
If more than one SCMS-SM device is configured in the Network Navigator, the Choose SM Devices dialog box appears.
Figure 11-4
Step 4
A Password Management dialog box appears.
Step 5
Step 6
The Password Management dialog box closes.
A Connecting to progress bar appears.
The system connects to the SCMS-SM.
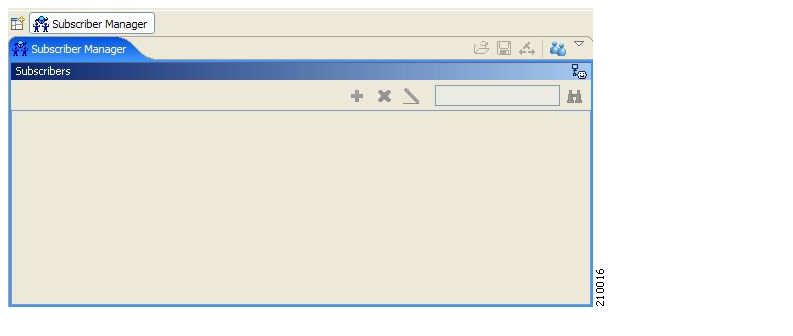
How to disconnect from the current SCMS-SM
Step 1
The Console disconnects from the SCMS-SM, but the SM GUI tool remains open.
The subscriber list is empty.
Figure 11-5
Working with Subscriber CSV Files
Because of the large number of subscribers that must be introduced into the system, it is not feasible to enter subscriber information manually. Subscriber information is usually generated by a RADIUS server (or some similar source) and imported into the SM GUI tool.
You can also export updated subscriber information to a CSV file.
The format of subscriber CSV files is described in the "CSV File Formats" chapter of the Cisco Service Control Application for Broadband Reference Guide .
•
•
How to import subscriber information from a CSV file
You can import subscriber data that was exported to a CSV file into the SM GUI tool.
Step 1
An Import from File dialog box appears.
Step 2
An Import Warning message appears.
Figure 11-6
Step 3
The Import from File dialog box closes.
The selected file is imported into the SM GUI tool; the imported subscribers are listed in the subscriber list.
How to export subscriber information to a CSV file
You can export subscriber information to a CSV file (for example, when data in the SCMS-SM database is updated).
Step 1
Step 2
An Export to File dialog box appears.
Step 3
Step 4
Step 5
The Export to File dialog box closes.
The selected subscribers are saved to the CSV file.
Managing Subscribers
After importing subscribers into the system, you can maintain and update the database.
You can perform the following operations:
•
•
•
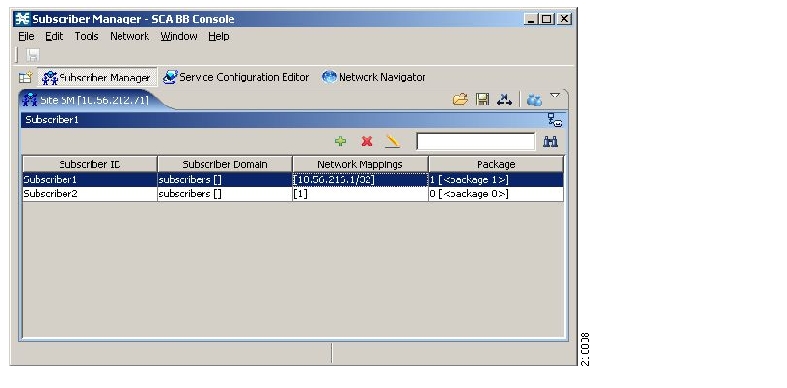
Subscriber Information
All subscribers currently introduced into SCA BB are displayed in a list in the SM GUI tool. Use this list to manage individual subscribers or groups of subscribers. Use the Find function to display a subset of the subscribers (see How to find a subscriber or group of subscribers ).
The subscriber list has the following columns:
•
•
•
•
Figure 11-7
Finding and Selecting Subscribers
For ease of use, the SM GUI tool incorporates two standard features:
•
•
How to find a subscriber or group of subscribers
Use this feature to find a specific subscriber or a group of subscribers according to a subscriber ID prefix. This is useful for editing the parameters of either a specific subscriber or a group of subscribers (see Editing Subscriber Details )
Step 1
Figure 11-8
Step 2
Only those subscribers that match the specified prefix are displayed in the subscriber list.
Selecting Subscribers
You can edit, export, or delete a group of subscribers at one time by selecting subscribers displayed in the subscriber list. The group may be either of the following:
•
•
How to select a range of subscribers
Step 1
Step 2
All subscribers in the range are selected.
You can combine this function with the search function; search to display specific subscribers and then select the entire range.
How to select a number of noncontiguous subscribers
Step 1
You can combine this function with selecting a range of subscribers; first select the range of subscribers and then select additional subscribers.
How to add a subscriber
You can add additional individual subscribers to the SCMS-SM.
To add large number of subscribers, export their information from a RADIUS (or DHCP) server to a CSV file, and then import the CSV file (see Working with Subscriber CSV Files )
Step 1
( Add Subscriber).
The Add A New Subscriber dialog box appears.
Figure 11-9
Step 2
Step 3
Step 4
The contents of the list depend on the selected subscriber domain.
Step 5
If you are not going to define network mappings for this subscriber, continue at step 11.
Step 6
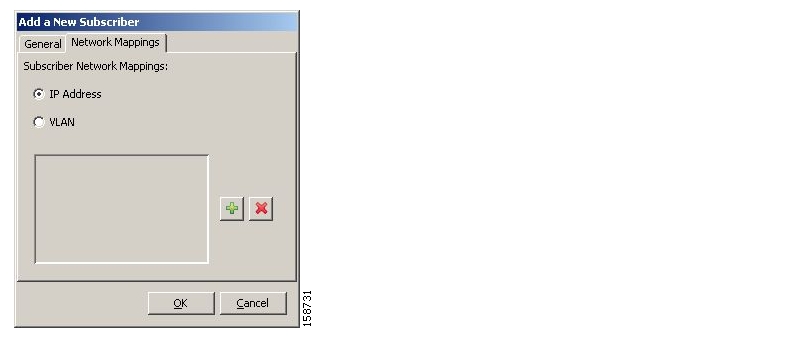
The Network Mappings tab opens.
Figure 11-10
The system supports either IP addresses or VLAN tags as network identification for subscribers.
Step 7
•
•
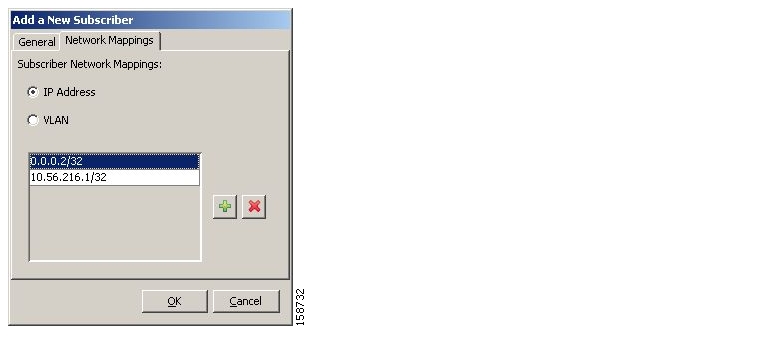
Step 8
A new network-mapping entry is added to the subscriber network mappings list, displaying a default value.
Step 9
Figure 11-11
Step 10
Step 11
The Add A New Subscriber dialog box closes.
The new subscriber is added to the database, and to the subscriber list displayed in the SM GUI tool.
Editing Subscriber Details
You can edit parameters of single or a group of subscribers.
•
•
How to edit details for Single Subscribers
Step 1
Step 2
( Edit Subscriber).
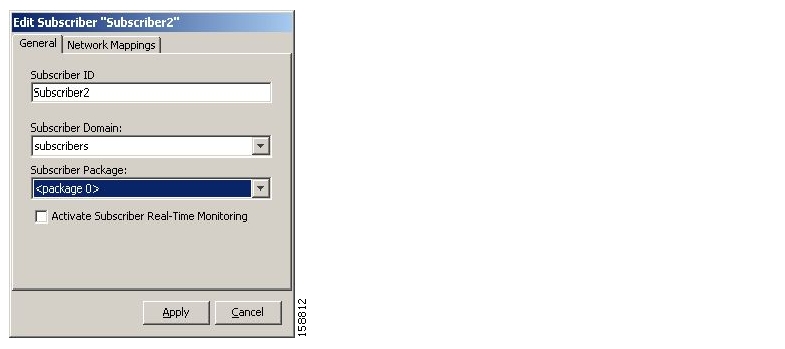
The Edit Subscriber dialog box appears.
Figure 11-12
Step 3
•
•
•
The contents of the list depend on the selected subscriber domain.
•
If you are not editing the network mappings for this subscriber, continue at step 6.
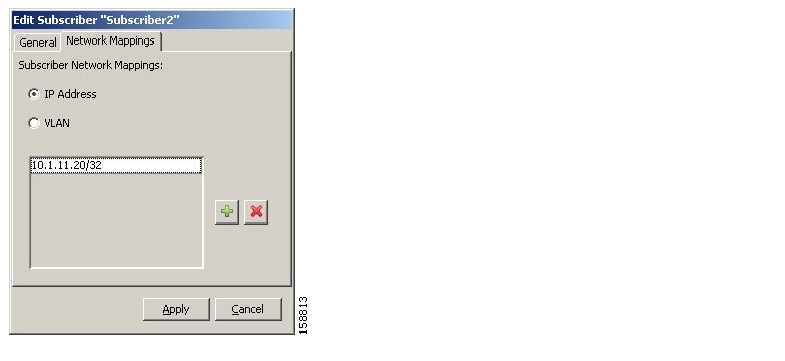
Step 4
The Network Mappings tab opens.
Figure 11-13
Step 5
a.
•
•
b.
c.
( Delete).
Step 6
The Edit Subscriber dialog box closes.
The modified subscriber information is saved to the database and displayed in the subscriber list in the SM GUI tool.
How to edit details for a group of Subscribers
You can assign the same package or domain to many subscribers at one time.
Step 1
Step 2
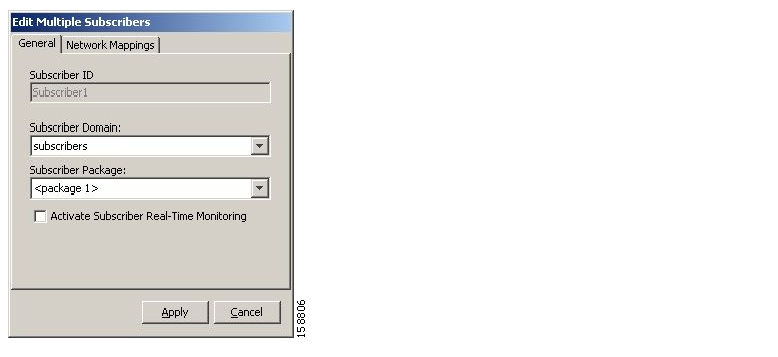
The Edit Multiple Subscribers dialog box appears.
Figure 11-14
The Subscriber ID field is dimmed and the Network Mappings tab is disabled.
Step 3
•
•
The contents of the list depend on the selected subscriber domain.
•
Step 4
The Edit multiple Subscribers dialog box closes.
The modified subscriber information is saved to the database and displayed in the subscriber list in the SM GUI tool.
How to delete a subscriber from the database
Step 1
Step 2
The system asks for confirmation before deleting the selected subscribers:
Figure 11-15
Step 3
The selected subscribers are deleted from the database and removed from the subscriber list displayed in the SM GUI tool.
![]()
![]()
![]()
![]()
![]()
![]()
![]()
![]()
Posted: Wed May 30 12:41:09 PDT 2007
All contents are Copyright © 1992--2007 Cisco Systems, Inc. All rights reserved.
Important Notices and Privacy Statement.