|
|

This chapter provides the logon procedures and explains the basic features of the user interfaces. You use the following user interfaces when managing networks of Cisco MGX 8260 Media Gateways:
Cisco MGM uses the Cisco EMF user interface and security features. In order to gain access to Cisco MGM features, start a Cisco EMF user session.
 |
Note The Cisco EMF server should already be running. If, upon starting, you receive a message that Cisco EMF is not running, contact your system administrator. |
host# <CEMF_ROOT>/bin/cemf session
where <CEMF_ROOT> is the root directory for Cisco EMF installation (for example, /opt/cemf).
The Cisco EMF Login window opens.
Step 2 Enter your user name and password, then click OK to proceed.
The Cisco EMF Launchpad window opens (see Figure 3-1).
The icons on the Launchpad represent applications provided by this Cisco EMF installation. The icons appear in a frame identified by the package name.
The area at the bottom of most windows displays status information. When you double-click in this area, the Status Dialog window opens. This window lists previous status messages.
From the Cisco EMF Launchpad, click on the desired application icon. The selected application is launched. A "busy" icon and a message in the status bar is displayed during launch. More than one instance of an application can be opened simultaneously.
 |
Note If an application is already open, it appears in the Windows list. Select Window and choose the application from the dropdown menu. |
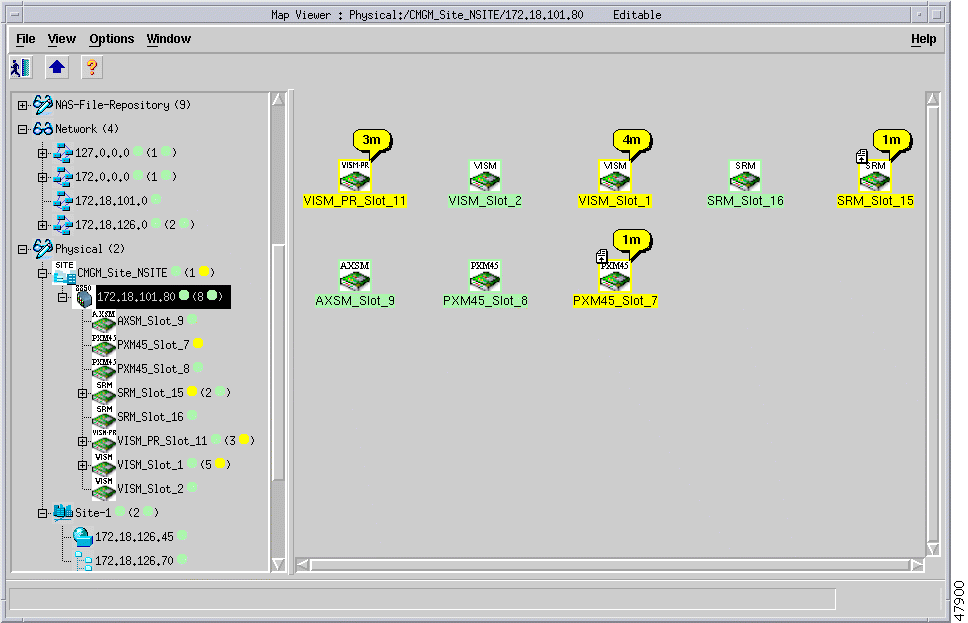
For Cisco MGM, the Map Viewer application displays information about the Cisco MGX 8260 Media Gateway nodes, cards, and other network equipment (see Figure 3-2).

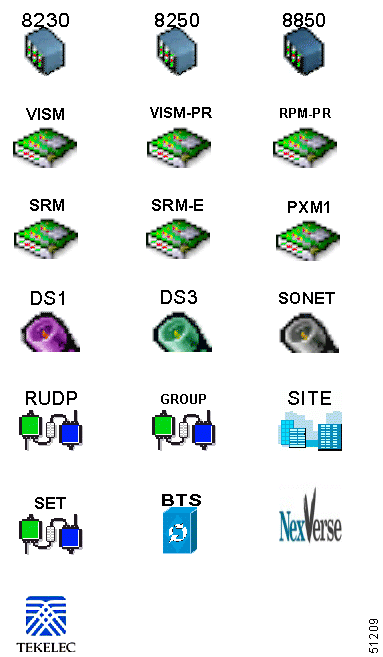
Cisco MGM displays Cisco MGX 8260 Media Gateway components as icons (see Figure 3-3).

 from the Toolbar.
Step 2 A dialog box asking, Do you wish to quit the CEMF Manager System? is displayed. Click Yes to quit the session.
All active applications are closed, and the session terminates.
Before you can configure the Cisco MGX 8260 Media Gateway, you must log on as a user with the privileges necessary to change system parameters. You need SuperUser privileges to change most system-level settings.
This section explains how to log on and use Cisco WebViewer to manage Cisco MGX 8260 Media Gateway chassis and subchassis components.
To log on, follow these steps:
The WebViewer login screen opens.
Step 2 In the User Name field, type the name of a valid MGX 8260 account name. On a new system, use SuperUser.
Step 3 In the Password field, type the account password. On a new system, use cisco or the new password you assigned to this account.
Step 4 Click Log On. Grant requests for additional privileges, if necessary.
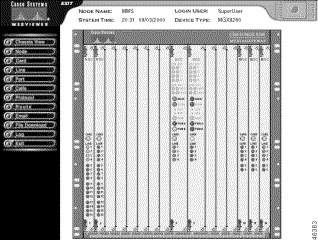
The Cisco MGX 8260 Media Gateway displays the chassis view (see Figure 3-4).

Step 5 From the navigation pane on the left, select the operation you want to perform. For example, to set node parameters click Node and then click a submenu item.
Every Cisco WebViewer screen has three panes:
1. System information
2. Navigation
3. Display and control
The Cisco WebViewer presents Cisco MGX 8260 status and configuration information in the following views:
The Chassis View shows the Cisco MGX 8260 front panel, including the installed cards and their LED states. The cards and LEDs are active areas on the screen, so you can get more information about an LED indication by clicking it. To view configuration information about a card, click elsewhere on the desired card.
In the Chassis View, the following LEDs are displayed and updated in real time:
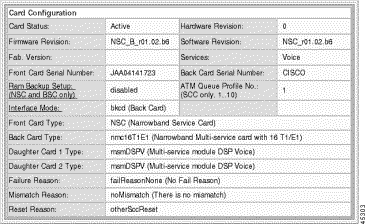
Status screens display a summary of installed cards, configured services, or other information. Figure 3-5 shows an example of a screen that displays card configuration and status information.

Many status screens contain buttons that open other configuration screens. For example, the plus icon links to the form for adding a card.
The table below shows the icons used to launch line configuration tasks:
| Icon | Task |
|---|---|
- | Delete one or more lines. |
i | Display alarm and configuration information. |
C | Display error counters and performance alarms. |
A | Set the performance alarm thresholds. |
P | Display performance statistics or SONET path information. |
S | Display DS0 details or SONET section information. |
L | Display DS1 details or SONET line information. |
+ | Add a line. |
R | Reset a card. |
The first six icons in Table 3-1 are displayed in the Select column for each line on the line configuration forms. Click on the desired icon to perform the specified line configuration task.
Along the top of the line configuration forms is another row of icons, some of which are active buttons. Use the + and - icons in this group to add or delete lines. The rest of these icons are legends for the icons in the Select column.
Use configuration forms to define the parameters for a given card or service. Figure 3-6 shows an example of a card configuration form.

The configuration forms contain both pre-set and user-defined fields. In some cases, the fields contain hyperlinks to additional configuration forms. Because of security restrictions, not all users can access configuration forms.
To log out and quit a Cisco WebViewer session, click the Exit button at the top of the navigation pane. The logon screen opens.
To initiate a telnet session, follow these steps:
The telnet screen opens.
Step 2 At the User prompt, type the name of a valid MGX 8260 account name. On a new system, use SuperUser.
Step 3 At the Password prompt, type the account password. On a new system, use cisco or the new password you assigned to this account.
![]()
![]()
![]()
![]()
![]()
![]()
![]()
![]()
Posted: Thu Jul 18 00:27:14 PDT 2002
All contents are Copyright © 1992--2002 Cisco Systems, Inc. All rights reserved.
Important Notices and Privacy Statement.