|
|

Table Of Contents
Configuring the Cisco Unified Media Engine
Uploading and Activating a Media Firmware License
Uploading and Activating a Text-to-Speech License
Configuring the Media Server Password and Firmware Address
Configuring Speech Recognition Parameters
Configuring the Cisco Unified Media Engine
This chapter describes how to configure the Cisco Unified Media Engine from the management console and contains the following sections:
•
Uploading and Activating a Media Firmware License
•
•
•
Uploading and Activating a Media Firmware License
Each media engine requires a valid Host Media Processor (HMP) license. If an application requires media capabilities, then you must upload the appropriate license file when the media engine is first installed and configured.
Note
HMP licenses are bound to a valid MAC address on a network adapter on the server. If the MAC address of the server changes (for example, if a network adaptor is replaced), then you must request a replacement license for the new MAC address.
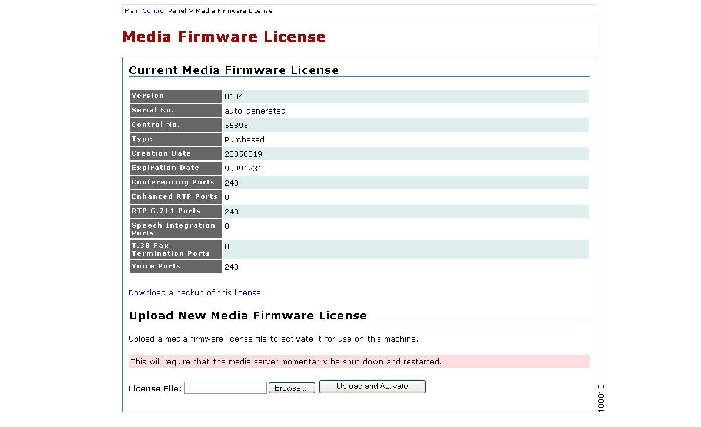
Open the Media Firmware License page ( Figure 4-1) to view information about the current license, download a backup of the current license, or upload a new license.
Figure 4-1 Media Firmware License Page
To upload a new license, follow these steps:
Procedure
Step 1
Step 2
Step 3
Step 4
Step 5
Step 6
To download a backup of the current license, follow these steps:
Procedure
Step 1
Step 2
Step 3
Step 4
Uploading and Activating a Text-to-Speech License
Each media engine requires a valid text-to-speech license if an application uses text-to-speech capabilities. If an application requires media capabilities, then you must upload the appropriate license file when the media engine is first installed and configured.
Note
Text-to-speech licenses are bound to a valid MAC address on a network adapter on the server. If the MAC address of the server changes (for example, if a network adaptor is replaced), then you must request a replacement license for the new MAC address.
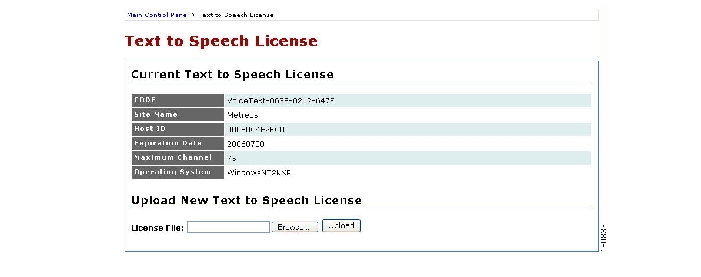
Open the Text to Speech License page ( Figure 4-2) to view information about the current text-to-speech license or upload a new text-to-speech license.
Figure 4-2 Text to Speech License Page
To upload a new text-to-speech license, follow these steps:
Procedure
Step 1
Step 2
Step 3
Step 4
Configuring the Media Server Password and Firmware Address
To configure a media engine to work with the application server, you must assign the media server password that the application server uses to deploy media files to media engines when an application is installed. The password is checked each time you add a media server entry by way of the Media Servers page in the management console. If the media server password is changed while an application server is controlling a media engine, then the password must be updated in the management console; otherwise the application may fail to execute.
You must also enter the default IP address and MAC address to which the media firmware will bind. Because the hardware running on the media engine can have more than one network adapter, these fields enable you to determine the network adapter to be used. If a different adaptor is needed, you should update both the IP address and MAC address fields. Changing the IP address causes the Realtime Transfer Protocol (RTP) streams sent to the media engine to use the new IP address, enabling you to assign different functions to different network adaptors on the media engine.
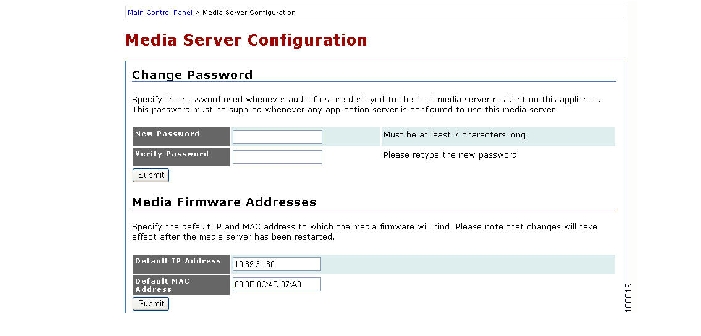
From the Main Control Panel, open the Media Server Configuration page ( Figure 4-3) to specify the media server password and media firmware addresses.
Figure 4-3 Media Server Configuration Page
To configure the media server settings, follow these steps:
Procedure
Step 1
Step 2
Step 3
Step 4
Step 5
Configuring Speech Recognition Parameters
The Cisco Unified Application Environment supports the Nuance Open Speech Recognizer (Nuance OSR) for speech recognition. If an installed application requires speech recognition capabilities, then you must identify the Nuance OSR servers. Whenever the application performs a speech recognition operation, the identified servers perform the operation.
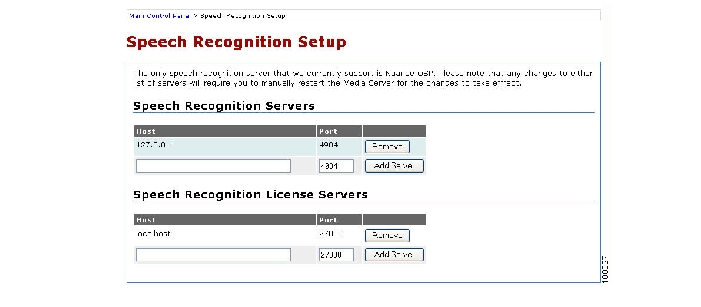
From the Main Control Panel, open the Speech Recognition Setup page ( Figure 4-4) to specify speech recognition servers and licenses for the Nuance OSR.
Figure 4-4 Speech Recognition Setup Page
To configure the speech recognition settings, follow these steps:
Procedure
Step 1
Step 2
Step 3
Step 4
Note
To remove a speech recognition server, follow these steps:
Procedure
Step 1
Step 2
Note
![]()
![]()
![]()
![]()
![]()
![]()
![]()
![]()
Posted: Tue Oct 17 10:00:05 PDT 2006
All contents are Copyright © 1992--2006 Cisco Systems, Inc. All rights reserved.
Important Notices and Privacy Statement.