|
|

This tutorial describes how to create baseline IPX connectivity requirements and modify router IPX attributes for "what-if" simulation. Checking and modifying connectivity requirements can be accomplished using the initial baseline scenario created when a baseline is opened and loaded. However, modifying router attributes for "what-if" simulation requires a new scenario to be created. This step is also described in this tutorial.
The following tasks are performed and described in this tutorial:
Step 1 From the Open Baseline window, select the tutorial_baseline baseline. Click on the OK button to open and load the baseline.
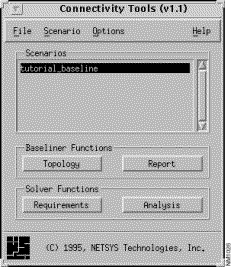
Refer to "Creating and Opening a Baseline" for information about creating and opening a baseline. In this tutorial, the baseline (tutorial_baseline) created in the first tutorial is used. Figure 10-1 shows the Connectivity Tools window after the tutorial_baseline baseline was opened and loaded. By default, when a baseline is opened, an initial baseline scenario is created. It has the same name given to the baseline and is displayed and selected in the Scenarios list.
Step 2 Click on the Topology button in the Connectivity Tools window.
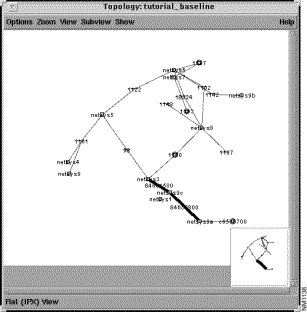
The tutorial_baseline scenario's topology is displayed in a campus view (the default) in the Topology window.
Step 3 Select the View>Flat menu option in the Topology window.
Display the topology in a flat IP view.
Step 4 Select the Subview>IPX menu option.
Display only the IPX routes in the topology window.
Step 5 Select the Show>All Object Labels menu option.
The network element names and/or address are displayed, as shown in Figure 10-2
Step 6 Click on the Requirements button in the Connectivity Tools window.
The Requirement Sets window, as shown in Figure 10-3, is displayed. The Requirements button is used to create, view, load, unload, delete, and undelete end system IPX connectivity requirements.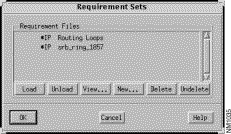
A list of existing connectivity requirement files is displayed in the Requirement Files list.
Requirement File entries preceded by an asterisk indicate connectivity requirements implicitly derived from the router configuration files. These connectivity requirement file sets can not be edited or deleted.
The implicitly derived Routing Loops requirement set is provided to find routing loops caused by IP redistribution. When you select the Routing Loops requirement set and then load it for analysis by clicking on the Load button followed by the OK button, a list of all the redistribution IP routing loops detected during analysis is displayed in the Requirements Analysis window. The results are a set of paths showing the identified routing loops. Each path displays a source address set to a port address of a router involved in the loop and a destination, which is a subnet or end point address, identifying the Routing Table destination involved in the routing loop. The path also shows a set of routers involved in a loop.
Step 7 Click on the New button.
The New Requirement Set window, shown in Figure 10-4, is displayed. A new set of protocol dependent (in this case IPX) connectivity requirements is created and saved to the file specified in this window.
Step 8 Specify ipx_test in the Name field.
A name must be assigned to the new set of IPX connectivity requirements.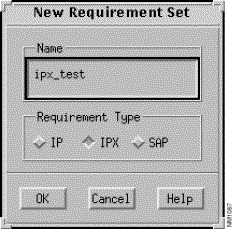
Step 9 Click on the IPX button, then click on the OK button.
Upon clicking on the OK button, the Requirements window is displayed. No entries are defined in the ipx_test requirement set, therefore the Requirements pane is empty.
Step 10 Click on the Add button in the Requirements window.
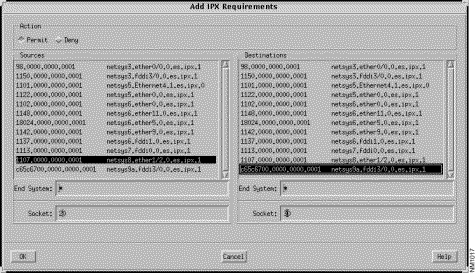
The Add IPX Requirements window, partially shown in Figure 10-5, is displayed. You create new requirements in the ipx_test requirements set using this window. Allow (Permit button selected) an IPX connection from socket 20 of source end system netsys8.ether1/2.0.es.ipx.1 (1107.0000.0000.0001) to socket 30 of destination end system netsys9a.fddi3/0.0.es.ipx.1 (c65c6700.0000.0000.0001).
Step 11 Click on the OK button to add the new requirements you just created to the ipx_test file.
The newly defined requirement entry is displayed in the ipx_test file's Requirements pane, as partially shown in the modified Requirements window in Figure 10-6.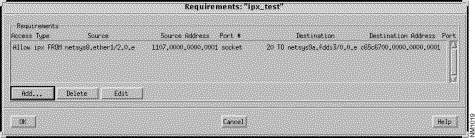
Step 12 Click on the OK button.
The Requirement Sets window is displayed. The ipx_test file set entry is displayed in the Requirement Files list, as shown in Figure 10-7.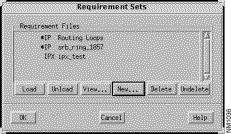
Step 13 Select the newly created ipx_test file set entry from the Requirement Files list, click on the Load button, then click on the OK button.
A requirement file set can also be loaded by double-clicking on an entry in the Requirement Files list. The ipx_test file set is now ready to have connectivity requirements analysis performed. The results of the analysis are viewed from the tutorial_baseline Requirements Analysis window, partially shown in Figure 10-8. That is, the status of each connectivity requirement entry loaded for analysis is shown. One existing path was found allowing the connection between the two end systems (netsys8.ether1/2.0.es.ipx.1 and netsys9a.fddi3/0.0.es.ipx.1).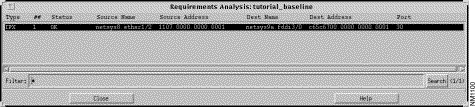
Step 14 Select the entry in the Requirements Analysis window.
The round trip path between the two end systems is highlighted in the Topology window, as shown in Figure 10-9. The thicker highlighted line represents the path from the source end system to the destination end system. The thinner highlighted line represents the return path from the destination end system to the source end system.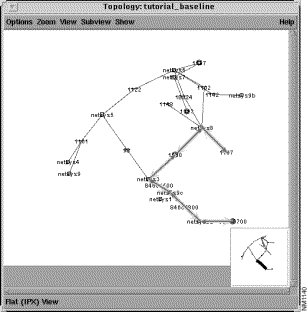
Step 15 Double-click on the selected connectivity requirement entry in the Requirements Analysis window.
A corresponding Round Trip Path window is displayed, as shown in Figure 10-10. This window provides the end system names, addresses, and sockets, the current status of the path, and a list of the devices and network elements that make up the path from the source end system to the destination end system, and back. Selecting an entry in the Round Trip Path list highlights that network component in the Topology window. Based on the information provided in this and the Topology windows, the current IPX connectivity requirements are identified from not only a component standpoint, but visually as well.
Step 16 Select the Scenario>Create New menu option in the Connectivity Tools window.
As you can not use the baseline scenario to modify router attributes, you must create a new scenario (tutorial_baseline+). Upon creating the new scenario, the Connectivity Tools window, shown in Figure 10-11, displays the tutorial_baseline+ scenario in its Scenarios list.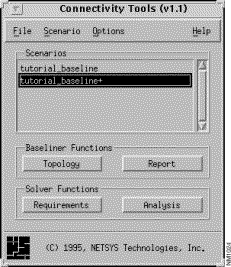
With the new scenario created, alter the current round trip path by applying an IPX network filter to an interface of an intermediate router along the path between the two end systems.
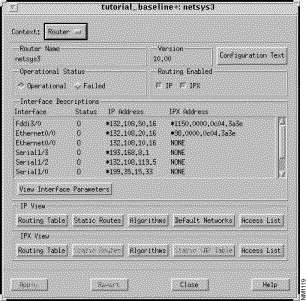
Step 17 Double-click on the netsys3 router icon in the Topology window.
The netsys3 Router Configuration window, shown in Figure 10-12, is displayed. You can also double-click on a netsys3 router entry in the Round Trip Path window or use the Find Device window to display the netsys3 Router Configuration window.
Step 18 Click on the IPX View Algorithms button.
The IPX Routing Algorithms window, shown in Figure 10-13, is displayed. RIP is the only IPX routing protocol currently supported in this Connectivity Tools release.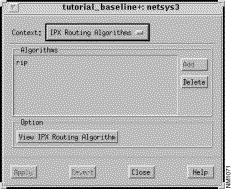
Step 19 Select the rip entry then click on the View IPX Routing Algorithm button.
The IPX RIP Routing Algorithm window, shown in Figure 10-14, is displayed.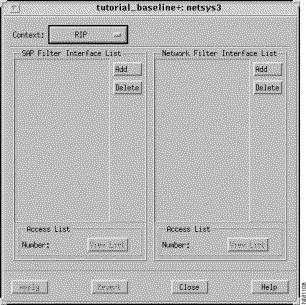
Step 20 Click on the Add button in the Network Filter Interface List pane.
The Edit IPX Network Filter List window, shown in Figure 10-15, is displayed. Create a network filter denying routing updates through the fddi3/0 interface. 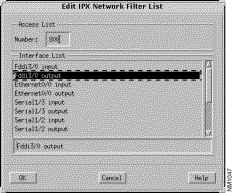
Step 21 Specify a standard IPX network filter access list number (800) in the Number field.
Valid standard IPX network filter access list numbers range from 800 through 899. Valid extended IPX network filter access list numbers range from 900 through 999.
Step 22 Select the fddi3/0 output entry from the Interface List, then click on the OK button.
The IPX network filter is added to the Network Filter Interface List in the IPX RIP Routing Algorithm window, as shown in Figure 10-16.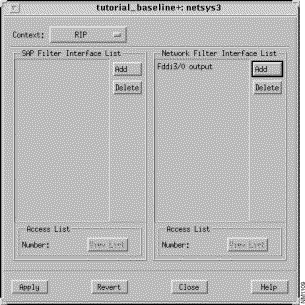
Step 23 Click on the Apply button.
The IPX network filter is applied to the current netsys3 router configuration.
Step 24 Select the new entry in the Network Filter Interface List, then click on the View List button.
The IPX Network Filter List window is displayed. The network filter parameters are displayed in this window. You are able to add, edit, or delete entries from this network filter access list from this window. You can click on the Close button when you are done viewing the network filter parameters to dismiss the IPX Network Filter List window or you can use the Context menu to return to a previously displayed window.
Step 25 Click on the Analysis button in the Connectivity Tools window.
Assess the status of the results in the tutorial_baseline+ Requirements Analysis window then check the Topology (Figure 10-18) and Round Trip Path windows to see the new, highlighted route taken. Notice the thicker path (source end system to destination end system) has changed its course (it bypasses the netsys3 router's fddi3/0 input interface.)
Next the IPX route is going to be prevented from using the netsys5 Ethernet0 output interface. Prior to disabling this interface, first check the IPX Routing Table for the netsys6 router.
Step 26 Click on the IPX View Routing Table button in the netsys6 Router Configuration window.
The netsys6 IPX Routing Table window, shown in Figure 10-19, is displayed. Verify the path to the destination router netsys5 (c65c6700) exists.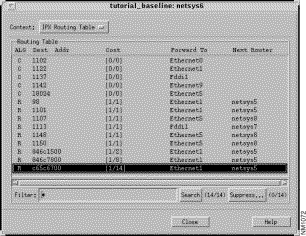
Step 27 Prevent the IPX connection from coming through the netsys5 output interface (Ethernet0) by applying a network filter on that interface.
Follow the steps described above (for netsys3)to prevent the use of the netsys5 Ethernet0 output interface.
Step 28 Click on the Apply button in the IPX RIP Routing Algorithm window.
The network filter is in effect on the netsys5 Ethernet0 output interface.
Step 29 Click on the Analysis button in the Connectivity Tools window.
The tutorial_baseline+ Requirements Analysis window, partially shown in Figure 10-20, displays information about the current route. Notice the status of the route is listed as NO ROUTE.
Step 30 Click on the entry in the Requirements Analysis window.
The Topology window, shown in Figure 10-21, displays the current path between the end systems. Notice a path no longer exists between the source end system and the destination end system. It stops at the netsys8 router.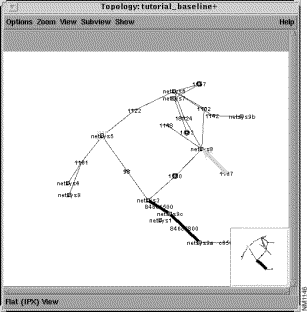
Step 31 Confirm a route to the destination network c65c6700 no longer exists in the netsys6 IPX Routing Table.
Figure 10-22 shows the modified netsys6 Routing Table.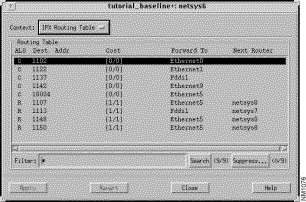
Step 32 Return to the netsys5 IPX RIP Routing Algorithm window.
Allow the path to come through the Ethernet0 interface by modifying the existing IPX Network Filter Interface List entry.
Step 33 Select the Ethernet0 output entry in the IPX RIP Algorithm window's Network Filter Interface List then click on the Access List View List button.
The IPX Network Filter List window is displayed.
Step 34 Click on the Add Before button.
The Edit Network Filter Access List window is displayed.
Step 35 Select the Permit button and set the Source Network and Node addresses to the values shown in Figure 10-23.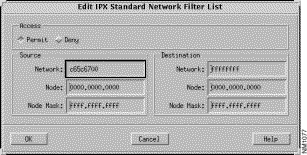
The new entry is added to the IPX Network Filter List window as shown in Figure 10-24.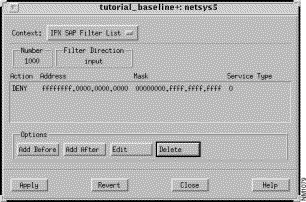
Step 36 Click on the Apply button.
Step 37 Click on the Analysis button in the Connectivity Tools window.
Verify the result from the Requirements Analysis window (a path now exists as partially shown in Figure 10-25) and confirm the result in the Topology and Round Trip Path windows.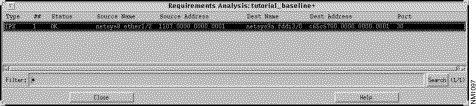
|
|