|
|

This chapter provides detailed instructions on installing and verifying ISM on the mainframe, which is stage two of the ISM installation process. In this chapter you will find information on the following tasks:
For the MVS systems programmer responsible for installing ISM Release 3.0 on the mainframe, be sure that you complete the following tasks before you install the ISM software:
Before you install the ISM software, complete the following tasks to plan the installation:
Read the following sections and corresponding tables to determine the amount of ISM DASD storage required for your site's installation of ISM:
The amount of storage that ISM requires for the installation data sets varies by the method that you use to install the software. The DASD storage requirements for the target libraries shown in Table 3-1 apply to both the direct method and SMP/E method of installation.
Table 3-1 lists the data set name and provides a brief description, along with the minimum storage requirements for the ISM installation target libraries.
| Data Set Name | Description | Space | Device |
|---|---|---|---|
| prefix.NSPN130V.NSPNINST | Installation jobs | 10 tracks | IBM 9345 |
| prefix.NSPN130V.NSPNLOAD | Load library; command modules and exits | 10 tracks | IBM 9345 |
| prefix.NSPN130V.NSPNCLST | CLIST and REXX routines | 15 cylinders | IBM 9345 |
| prefix.NSPN130V.NSPNPANL | Presentation panels | 3 cylinders | IBM 9345 |
| prefix.NSPN130V.NSPNSAMP | Sample installation and customization procedures | 5 tracks | IBM 9345 |
In addition to the storage requirements for the target libraries shown in Table 3-1, the SMP/E method requires about 20 more cylinders for the distribution libraries (Table 3-2).
Table 3-2 lists the data set name, a brief description of the data set, and the minimum storage required for the ISM installation distribution libraries when you use SMP/E to install the software.
| Data Set Name | Description | Storage | Device |
|---|---|---|---|
| prefix.NSPN130V.NSPNINST | Installation jobs | 10 tracks | IBM 9345 |
| prefix.NSPN130V.ANSPNLOA | Load library; command modules and exits | 10 tracks | IBM 9345 |
| prefix.NSPN130V.ANSPNCLS | CLIST and REXX routines | 15 cylinders | IBM 9345 |
| prefix.NSPN130V.ANSPNPAN | Presentation panels | 3 cylinders | IBM 9345 |
| prefix.NSPN130V.ANSPNSAM | Sample installation and customization procedures | 30 tracks | IBM 9345 |
Table 3-3 lists the recommended storage requirements for the ISM production members for NetView. The production storage requirements apply to both the direct installation and SMP/E installation methods.
| Name | Storage | Device |
|---|---|---|
| NETVIEW.USER.DSICLD (NSPNCLST or ANSPNCLS) | 15 cylinders | IBM 9345 |
| NETVIEW.USER.LOADLIB (NSPNLOAD or ANSPNLOA) | 10 tracks | IBM 9345 |
| NETVIEW.USER.CNMPNL1 (NSPNPNLS or ANSPNPAN) | 3 cylinders | IBM 9345 |
| NETVIEW.USER.DSIPARM (ISMTBL, ISMDMN, ISMCMD, and ISMOPF) | 2 tracks | IBM 9345 |
Table 3-4 lists the initial VSAM storage requirements for all of the data sets that ISM uses. The maximum storage required (when the data set is fully expanded by its 16 extents of secondary space allocation) is shown in parentheses. Some of the data sets are optional depending upon the ISM functions that you plan to implement at your site.
The first four required data sets may use 12 cylinders (up to 76 cylinders) of storage. Full implementation of the ISM functions and their corresponding data sets requires additional storage of 25 cylinders (up to 201 cylinders).
The VSAM storage requirements in Table 3-4 apply to both the direct installation and SMP/E installation methods.
| Data Set Name | Description | Storage | Device |
|---|---|---|---|
| prefix.ISMDSA | ISM management data | 5 cylinders (up to 37 cylinders) | IBM 9345 |
| prefix.ISMDSH | Router and Cisco mainframe channel connection archive data | 5 cylinders (up to 37 cylinders) | IBM 9345 |
| prefix.ISMDSM | Primary event log data | 1 cylinder | IBM 9345 |
| prefix.ISMDSN | Alternate event log data | 1 cylinder | IBM 9345 |
| Total: 12 cylinders (up to 76 cylinders) | |||
| Optional Data Sets | |||
| prefix.ISMDSI | Interface statistics and performance data | 5 cylinders (up to 37 cylinders) | IBM 9345 |
| prefix.ISMDSC | Router configuration data | 5 cylinders (up to 37 cylinders) | IBM 9345 |
| prefix.ISMDSR | SNA session data | 10 cylinders (up to 90 cylinders) | IBM 9345 |
| prefix.ISMDSD | Router memory dump data | 5 cylinders (up to 37 cylinders) | IBM 9345 |
| Total: 25 cylinders (up to 201 cylinders) |
Table 3-5 lists the number of VSAM records required for ISM configuration. Use this information to help you evaluate the size of the VSAM data sets for your site's installation.
The ISM installation files are distributed on a single IBM 3480-cartridge tape with an external label of NSP300. Table 3-6 describes the format and contents of the tape.
| Volume Serial Number | File | Name | Record Format | LogicalRecord Length | Block Size | Distribution Library |
|---|---|---|---|---|---|---|
| NSP300 | 1 | SMPMCS | FB | 80 | 6400 | - |
| NSP300 | 2 | NSP.NSPN300.F1 | FB | 80 | 8800 | JCLIN |
| NSP300 | 3 | NSP.NSPN300.F2 | U | 0 | 6144 | ANSPNLOAD |
| NSP300 | 4 | NSP.NSPN300.F3 | FB | 80 | 6160 | ANSPNSAMP |
| NSP300 | 5 | NSP.NSPN300.F4 | FB | 80 | 6160 | ANSPNCLST |
| NSP300 | 6 | NSP.NSPN300.F5 | FB | 80 | 6160 | ANSPNPANL |
| NSP300 | 7 | NSP.NSPN300.F6 | FB | 80 | 6160 | ANSPNINST |
Step 1 Unload the ISM installation data set.
Step 2 Install the ISM program using either the direct method or SMP/E method.
Step 3 Authorize the ISM load library, prefix.NSPN130V.NSPNLOAD.
Step 4 Allocate the VSAM data sets.
Step 5 Update VTAM.
Step 6 Update NetView by performing the following tasks:
Step 7 Verify the installation.
The following example shows the JCL that you can use to unload the ISM installation data set:
//UNLOAD   JOB (ACCT#),
//             'PGMRNAME',
//             NOTIFY=&SYSUID,
//             CLASS=A,
//             MSGCLASS=O,
//             MSGLEVEL=(1,1)
//****************************************************************
//****************************************************************
//*                                                             *
//* ISM 1.3 UNLOAD PROCEDURE                                    *
//*                                                             *
//* 1) CHANGE THE JOB CARD FOR YOUR SITE.                       *
//* 2) CHANGE dddddd TO THE CORRECT VOLUME SERIAL               *
//* 3) CHANGE ALL OCCURRENCES OF "SYSDA" TO THE UNIT TYPE OF    *
//*    YOUR OUTPUT DASD DRIVE.                                  *
//* 4) CHANGE prefix.NSPN130V TO YOUR HIGH LEVEL ISM            *
//*    QUALIFIER                                                *
//*
//****************************************************************
//****************************************************************
//UNLOAD  EXEC PGM=IEBCOPY
//SYSPRINT DD  SYSOUT=*
//TAPE     DD  DISP=OLD,DSN=NSP.NSPN130.F6
//         VOL=SER=NSP300,
//         UNIT=TAPE,LABEL=(7,SL)
//DISK     DD  DSN=prefix.NSPN130V.NSPNINST,DISP=(NEW,CATLG),
//         UNIT=SYSDA,
//         VOL=SER=dddddd,
//         SPACE=(TRK,(10,1,5)),
//         DCB=(RECFM=FB,BLKSIZE=6160,LRECL=80)
//SYSIN    DD  *
  COPY INDD=TAPE,OUTDD=DISK
/*
Table 3-7 provides a description of the members contained in the installation data set, prefix.NSPN130V.NSPNINST. If you are installing ISM directly, you need to use only the COPYISM member. The remaining members are used for an SMP/E installation of ISM.
| Member | Description |
|---|---|
| ACCISM | SMP/E accept procedure. |
| ALLOC | SMP/E allocate procedure. |
| APPISM | SMP/E apply procedure. |
| COPYISM | Direct installation procedure to copy installation files from tape to DASD. |
| ISMCSI | SMP/E procedure to delete, define, and prime the Virtual Storage Access Method (VSAM) data sets for global, target, and distribution zone CSIs. |
| ISMSMPA | Procedure to allocate the SMP/E temporary libraries that are needed if you set up a new global zone for ISM installation and maintenance. |
| ISMSMPS | Sample SMP/E cataloged procedure. |
| MOVISM | Procedure to move the SMP/E libraries from tape to DASD. |
| RECISM | SMP/E receive procedure. |
| RECISMD | SMP/E receive from DASD procedure. |
| REJISM | SMP/E reject procedure. |
| STEP1 | Record for priming SMP/E VSAM data sets. |
| UNLOAD | Sample job to unload the ISM installation data set. |
Two methods for installing ISM from its distribution tape are provided. After you have run the job to unload the ISM installation data set, prefix.NSPN130V.NSPINST, you can install the ISM program using either the direct method, or using SMP/E Release 7 or later.
If you have chosen to directly install the ISM program, run the sample job provided in the COPYISM member of the installation data set, prefix.NSPN130V.NSPINST.
COPYISM copies the following ISM data sets from the tape to DASD:
The following example is an excerpt of the COPYISM sample JCL that you can use to directly install ISM:
//COPYISM JOB ('ACCOUNTING INFO'),PGMRNAME,MSGLEVEL=(1,1),
//            MSGCLASS=A,CLASS=A,TIME=5
//*
//*****************************************************************
//*                                                               *
//*  ISM 1.3  COPY PROCEDURE                                      *
//*                                                               *
//*  THIS JOB WILL COPY THE ISM INSTALLATION DATASETS FROM        *
//*  THE DISTRIBUTION TAPE TO DASD.  MODIFY THIS JOB ACCORDING    *
//*  TO THE FOLLOWING INSTRUCTIONS, THEN SUBMIT THE JOB.          *
//*                                                               *
//*  1) CHANGE THE JOB CARD FOR YOUR SITE.                        *
//*  2) CHANGE ALL OCCURRENCES OF prefix.NSPN130V TO YOUR         *
//*     PRODUCTION DATASETS' HIGH-LEVEL QUALIFIER.                *
//*  3) CHANGE ALL OCCURRENCES OF "dddddd" TO YOUR OUTPUT DASD    *
//*     VOLUME SERIAL NUMBER.                                     *
//*  4) CHANGE ALL OCCURRENCES OF "TAPE" TO THE SYMBOLIC NAME     *
//*     FOR YOUR TAPE DRIVE.                                      *
//*  5) CHANGE ALL OCCURRENCES OF "SYSDA" TO THE UNIT TYPE OF     *
//*     YOUR OUTPUT DASD DRIVE.                                   *
//*                                                               *
//*****************************************************************
//*
//*
//LOAD1    EXEC PGM=IEBCOPY
//SYSPRINT DD SYSOUT=*
//SYSUT3   DD UNIT=SYSDA,SPACE=(CYL,(1,1))
//SYSUT4   DD UNIT=SYSDA,SPACE=(CYL,(1,1))
//TPE      DD UNIT=tape,DISP=(OLD,PASS),
//            LABEL=(3,SL),DSN=NSP.NSPN130.F2,
//            VOL=SER=NSP300
//DASD     DD UNIT=SYSDA,VOL=SER=dddddd,
//            DSN=NSP.NSPN130V.NSPNLOAD,
//            DISP=(NEW,CATLG),DCB=(RECFM=U,
//            BLKSIZE=6144),SPACE=(TRK,(10,1,25))
//SYSIN    DD *
     COPY INDD=TPE,OUTDD=DASD
/*
//LOAD2    EXEC PGM=IEBCOPY
//SYSPRINT DD SYSOUT=*
//SYSUT3   DD UNIT=SYSDA,SPACE=(CYL,(1,1))
//SYSUT4   DD UNIT=SYSDA,SPACE=(CYL,(1,1))
//TPE      DD UNIT=tape,DISP=(OLD,PASS),
//            LABEL=(4,SL),DSN=NSP.NSPN130.F3,
//            VOL=SER=NSP300
//DASD     DD UNIT=SYSDA,VOL=SER=dddddd,
//            DSN=prefix.NSPN130V.NSPNCLST,
//            DISP=(NEW,CATLG),DCB=(RECFM=FB,LRECL=80,
//            BLKSIZE=6160),SPACE=(CYL,(15,0,50))
//SYSIN    DD *
     COPY INDD=TPE,OUTDD=DASD
/*
//LOAD3    EXEC PGM=IEBCOPY
The remaining statements of the COPYISM job are similar and unload the rest of the ISM installation data sets.
To install ISM in the MVS zone (zone Z038) on your mainframe, use the following steps. These steps use the SMP/E installation samples in the ISM installation data set, prefix.NSPN130V.NSPINST, that you unloaded from tape.
Step 1 Use the sample SMP/E member named ALLOC, in prefix.NSPN130V.NSPNINST, to allocate your target and distribution libraries.
Step 2 Use the sample SMP/E member named RECISM, in prefix.NSPN130V.NSPNINST, to receive ISM.
Step 3 Use the sample SMP/E member named APPISM, in prefix.NSPN130V.NSPNINST, to apply ISM.
Step 4 Use the sample SMP/E member named ACCISM, in prefix.NSPN130V.NSPNINST, to accept ISM.
You have now completed loading the ISM program files from the distribution tape.
This section describes how to install ISM in a zone other than the MVS zone. For more information about creating a new zone, see the appendix "Creating a New Zone for ISM".
To install ISM in another zone, complete the following steps:
Step 1 Use the sample SMP/E member named ALLOC, in prefix.NSPN130V.NSPNINST, to allocate your target and distribution libraries.
Step 2 Submit the SMP/E member named MOVISM that is located in the prefix.NSPN130V.NSPNINST data set. This job copies the contents of the distribution tape to DASD.
Step 3 Edit the prefix.NSPN130.SMPMCS data set, changing the value of ++VER(Z038) to the preferred zone.
Step 4 Submit the SMP/E member named RECISMD, in the prefix.NSPN130V.NSPNINST data set, to receive ISM.
Step 5 Use the sample SMP/E member named APPISM, in prefix.NSPN130V.NSPNINST, to apply ISM.
Step 6 Use the sample SMP/E member named ACCISM, in prefix.NSPN130V.NSPNINST, to accept ISM.
You have now completed loading the ISM program files from the tape.
To authorize the ISM load library perform the following tasks:
Step 1 Add the data set prefix.NSPN130V.NSPNLOAD and its DASD volume name to your list of authorized program facility (APF) authorized data sets in SYS1.PARMLIB(IEAAPFxx) or SYS1.PARMLIB(PROGxx).
Step 2 Reload (IPL) MVS if necessary. If your system is set up to use dynamic APF services, you can avoid reloading MVS by using the SETPROG command to dynamically update the APF list. See the Initialization and Tuning Reference manual for your MVS/ESA system for more information about authorizing data sets.
There are six possible jobs that you use to allocate the VSAM data sets that ISM uses. Two of the six jobs are required and the remaining four are optional depending upon the ISM functions that your site plans to implement. For storage requirements see Table 3-4.
To allocate the VSAM data sets, modify and run each of the members (located in prefix.NSN130V.NSPNSAMP) described inTable 3-8
| Member | Description |
|---|---|
| ISMALLAH (Required) | Allocates the ISM management data set (ISMDSA) and router and Cisco mainframe channel connection archive data set (ISMDSH). |
| ISMALLMN (Required) | Allocates the ISM primary event log (ISMDSM) and alternate event log (ISMDSN). |
| ISMALLI (Optional) | Allocates the interface statistics and performance data set (ISMDSI). |
| ISMALLC (Optional) | Allocates the router configuration data set (ISMDSC). |
| ISMALLR (Optional) | Allocates the SNA session archive data set (ISMDSR). |
| ISMALLD (Optional) | Allocates the router memory dump data set (ISMDSD). |
This section describes the updates required in VTAM to support ISM, which include:
If you are not currently using your own ISTEXCCS exit routine, install the ISM version, as described in the section "Installing the VTAM XID Exit Routine".
If you have your own ISTEXCCS exit routine, or have installed the CiscoWorks Blue SNA View exit, call the Cisco Customer Technical Assistance Center (TAC) for instructions on modifying your existing routine to work with ISM Release 3.0.
Finally, the BEGIN vector is modified to indicate to VTAM that the exit should be called when VTAM receives an XID for defined PUs. When VTAM receives an XID for a defined PU the exit is once again invoked. The exit is passed information about the PU including the PU name, local and remote MAC and SAP addresses for the PU session, the IDBLK/IDNUM for the PU, and finally RIF data if present. All of this data is written to a message (NSP2015I) containing MAC, SAP, and RIF data (when available), each time that a switched PU connects into the network. The exit then returns a BUILD vector indicating that VTAM should allow the connection.
At VTAM termination, or when the exit is deactivated using the F NET,EXIT,ID=ISTEXCCS,OPT=INACT command, the exit is driven with the END vector. At this point the exit frees the allocated memory.
This process should produce minimal impact to VTAM connection performance.
Step 1 To install the ISM VTAM XID exit routine that was distributed with your ISM installation files, copy the member named NSPEMGR from the prefix.NSPN130V.NSPNLOAD data set, to SYS1.VTAMLIB.
Step 2 Use the sample member ISMMPF provided in the prefix.NSPN130V.NSPNSAMP data set to update the MVS system's MPF table in SYS1.PARMLIB. This allows the ISM message NSP2015I, which is created by the VTAM exit, to be automated by NetView.
Step 3 To verify that the VTAM XID exit is installed properly, run the following VTAM command:
When message NSP2015I is returned to the console, the exit is working correctly.
Step 4 After you have verified that the VTAM XID exit has executed properly, rename the NSPEMGR member to ISTEXCCS in SYS1.VTAMLIB.
Step 1 Modify the sample member NSPECCSL provided in the prefix.NSPN130V.NSPNSAMP data set as required for your site's exit name.
Step 2 Modify the sample member ASMEMGR provided in the prefix.NSPN130V.NSPNSAMP data set according to your site's requirements as specified in the beginning of the sample job. Be sure to assemble and link-edit the NSPEMGR exit into an authorized user library that is concatenated to SYS1.VTAMLIB (specified in the SYSLMOD statement).
This section describes the modifications that need to be made to the NetView data sets to use ISM, including the following procedures:
 Caution If you plan to migrate to ISM Release 3.0 and continue to support NSP Release 2.0 functions, be sure to concatenate the ISM Release 3.0 data sets ahead of the old NSP entries.
To update your existing NetView procedure, perform the following steps:
Step 1 Update the data set high-level qualifiers in the sample JCL provided in the ISMPROC member of the prefix.NSPN130V.NSPNSAMP library for the following DD names, according to your site's implementation of ISM.
The following data sets are required:
The following data sets are optional, according to the ISM functions that you plan to support at your site:
Step 2 Add the modified statements from the ISMPROC sample to your NetView procedure.
The following example shows an updated NetView procedure with the DD statements to support ISM:
//STEPLIB  DD   ---------------------------
//         DD   DISP=SHR,DSN=prefix.NSPNLOAD      ISM LOAD LIBRARY
//*
//DSICLD   DD   -------------------------
//         DD   DSN=SHR,DSN=prefix.NSPNCLST       ISM CLISTS
//*
//CNMPNL1  DD   ---------------------------
//         DD   DSN=SHR,DSN=prefix.NSPNPANL       ISM PANELS
//*
//* ISM VSAM DATA BASES
//* ISM V1R3 CONFIG DATA BASE
//ISMDSA   DD   DSN=prefix.ISMDSA,
//         DISP=SHR,AMP=AMORG
//* ISM V1R3 ROUTER HISTORY DATA BASE
//ISMDSH   DD     DSN=prefix.ISMDSH,
//         DISP=SHR,AMP=AMORG
//* ISM V1R3 DATA BASE FOR ISM EVENTS
//ISMDSM   DD   DSN=prefix.ISMDSM,
//         DISP=SHR,AMP=AMORG
//ISMDSN   DD   DSN=prefix.ISMDSN,
//         DISP=SHR,AMP=AMORG
//* ISM INTERFACE DATA BASE
//ISMDSI DD     DSN=prefix.ISMDSI,
//         DISP=SHR,AMP=AMORG
//* ISM V1R3 SESSION DATA
//ISMDSR DD     DSN=prefix.ISMDSR,
//         DISP=SHR,AMP=AMORG
//* ISM  V1R3 DATA BASE FOR ROUTER CONFIGURATIONS
//ISMDSC DD     DSN=prefix.ISMDSC,
//         DISP=SHR,AMP=AMORG
//* ISM  V1R3 DATA BASE FOR ROUTER MEMORY DUMPS
//ISMDSD DD     DSN=prefix.ISMDSD,
//         DISP=SHR,AMP=AMORG
Caution If you plan to migrate to ISM Release 3.0 and continue to support NSP Release 2.0 functions, be sure to add the %INCLUDE statements for ISM Release 3.0 members ahead of the old NSP entries.
To update the members of the NetView DSIPARM user data set to support ISM complete the following tasks:
Step 1 Copy the following members from the prefix.NSPN130V.NSPNSAMP data set to the NetView DSIPARM user data set:
Step 2 Enable the ISM commands by adding a %INCLUDE ISMCMD statement to the DSICMD or DSICMDU member.
Step 3 Enable the ISM VSAM tasks by adding a %INCLUDE ISMDMN statement to the DSIDMN or DSIDMNU member.
Step 5 Enable the ISM automation table entries by adding a %INCLUDE ISMTBL statement to the current production version of the NetView automation table (such as DSITBL01).
To update the members of the NetView DSIPRF user data set to support ISM, copy the following members from prefix.NSPN130V.NSPNSAMP to your DSIPRF user data set:
ISM provides three autotasks that you can use to start ISM automatically when NetView starts. It is recommended that one autotask be used for every 200 hundred routers that you plan to monitor using ISM. If you have more than 600 routers, you can add more autotasks to support them.
The following three autotasks are provided by ISM:
To have ISM automatically start when NetView starts complete the following tasks:
Step 1 Open your NetView initial CLIST (the NetView default is CNME1035) and, depending on the number of routers that you plan to monitor, add one or more of the following statements:
autotask opid=ismmgrautotask opid=ismmgraautotask opid=ismmgrbStep 2 Save and exit the CLIST.
Caution If you have NSP Release 2.0 installed at your site, then you need to replace the existing autotask values, with the new ismmgr values for the autotask opid commands.
When you restart NetView, the ISMMGR autotask will be started, which starts ISM. If you need to stop the autotask for any reason while NetView is running, you can use the command isminit reset (or nspinit reset if NSPMGR is still set up as the autotask command).
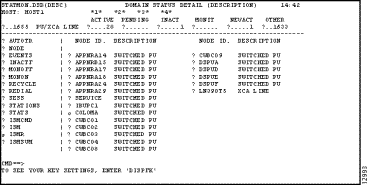
You can add ISM commands to the Command Menu in STATMON (Figure 3-1) by updating the DSICNM member in your NetView DSIPARM user data set. When you integrate the following ISM commands, you can go directly to certain areas of the ISM program from STATMON:
To integrate the ISM commands on the STATMON Command Menu:
Step 1 Enter Edit mode for the DSICNM member of your DSIPARM data set.
Step 2 Copy member ISMCNM from prefix.NSPN130V.NSPNSAMP after the C STATS statement.
Step 3 To enable the commands on the menu, type the following commands from a NetView command prompt and press Enter:
The following procedure verifies that the ISM commands have been added to the NetView procedure:
Step 1 From a NetView command prompt, type the following command and press Enter:
Step 2 Verify that the following text is displayed after you enter the DISPMOD NSPDS command. The data on the on the second line of the display might vary at your site depending upon your maintenance level.
To verify that the ISM tasks are working properly, complete the following steps:
Step 1 From a NetView command prompt, type the following command and press Enter:
Step 2 Verify that the following text is displayed after you enter the LIST NSPDSA command:
If this text does not appear, see the "Troubleshooting Stage Two: ISM Installation Problems" section in the "Troubleshooting" chapter.
Step 3 Repeat Steps 1 and 2 with the following commands and verify that the corresponding display for that task appears:
This section describes the procedure to verify that the member ISMCMD has been included in NetView.
To verify that the ISM commands and panels are available, complete the following steps:
Step 1 From a NetView command prompt, type the following command and press Enter:
Step 2 Verify that the following NSPMAIN CLIST is displayed:
NETVIEW.BRWS ------ BROWSE ISM (DSICLD ) --- LINE 00000 TO 00017 OF 00422
BNH082I ISM IS A COMMAND SYNONYM FOR NSPMAIN SCROLL ==> CSR
----+----1----+----2----+----3----+----4----+----5----+----6----+----7----+----
******************************** TOP OF DATA *********************************
NSPMAIN CLIST 00010000
CONTROL ERR 00020000
SUBCHAR UNIQUE CANCEL 00030000
********************************************************************* 00040000
* *** (C) Copyright Cisco Systems, Inc. 1996,1997,1998 * 00050000
* ISM Version: 1 Release: 3 * 00060000
********************************************************************* 00070000
* Description: Main menu for ISM * 00080000
* ----------------------------------------------------------------- * 00090000
* Parameters : None | option1 option2 * 00100000
* C Globals : PREFIX NSPSINIT * 00100100
* T Globals : CTRACE END ALL TRFLOW NSPMSG NSPXCHKRC * 00100200
* Output : Executes NSP Commands * 00100300
* Calls : NSPMGRA NSPCMDA3 NSPUSER3 NSPSETUF NSPHELP3 * 00100422
* : NSPMBLD NSPDMONF NSPCMON3 NSPHMSG NSPXCHK * 00100543
* : NSPSDISF NSPIDIS3 NSPSDMAC * 00100600
* Called by : Operator requested * 00100700
CMD==>
TO SEE YOUR KEY SETTINGS, ENTER 'DISPFK'
The following tasks verify that the member ISMOPF has been included in NetView:
Step 1 From a NetView command prompt, type the following command and press Enter:
Step 2 Verify that the following message is displayed after you enter the LIST ISMADMIN command:
If the message "DSI077A 'ISMADMIN' STATION NAME UNKNOWN" appears, then the ISM autotask has not been included in NetView. See the "ISM Task Not Known to NetView" section under the "Troubleshooting Stage Two: ISM Installation Problems" section in the "Troubleshooting" chapter.
Perform the following tasks to verify that the ISM VSAM commands are working correctly:
Step 1 From a NetView command prompt, type the following command and press Enter:
Step 2 Verify that the following messages are displayed:
Step 3 Repeat Step 1 replacing ISMTEST with ISMTEST1.
Step 4 Type the following command and press Enter to display the ISMTEST record:
Step 5 Verify that the following messages are displayed:
Step 6 Type the following command and press Enter to display the records:
Step 7 Verify that the following messages are displayed:
Step 8 Type the following command and press Enter to remove the records from the database:
Step 9 Verify that the following messages are displayed:
The following sections describe the next steps that you should perform to install ISM according to your site's current configuration.
If you are an existing NSP Release 2.0 site and you have completed the installation and verification procedures in this chapter, then you are ready to convert your NSP Release 2.0 files. To proceed with the NSP Release 2.0 migration task, see the "Migrating from NSP Release 2.0" chapter.
If this is the first time that ISM has been installed at your site and you have completed the installation and verification procedures in this chapter, then you are ready to configure the ISM program to manage your routers. To proceed with configuration of ISM, see the "Configuring ISM" chapter.
|
|