|
|

Table Of Contents
NCM and LMS Co-residency Installation
Co-residency Installation Summary
Detailed Co-residency Installation Procedures
Installing and Configuring LMS
Configuring LMS for Co-residency
Configuring NCM for Co-residency
Configuring for Cross Launch of NCM and LMS
NCM and LMS Co-residency Installation
This chapter describes the CiscoWorks NCM and LMS co-residency installation procedures on a Windows server and includes the following sections:
•
Co-residency Installation Summary
•
For complete information on how to use NCM, refer to the User Guide for Network Compliance Manager, 1.2.
Co-residency Installation Summary
The following is a summary of the steps to enable NCM and LMS co-residency.
Note
1.
a.
b.
2.
3.
a.
b.
c.
d.
e.
4.
a.
b.
c.
5.
a.
b.
c.
6.
a.
b.
c.
d.
e.
f.
7.
a.
–
–
–
b.
–
–
Note
c.
Table 2-1 lists the port modifications that you must make to avoid port conflicts when enabling NMC and LMS co-residency.
The following sections contain detailed information on NCM and LMS co-residency installation procedures.
Detailed Co-residency Installation Procedures
The following sections contain detailed instructions for enabling NCM and LMS co-residency. These sections include:
•
•
•
•
Stopping the Oracle Server
If you have the Oracle HTTP Server installed, you must temporarily stop it before installing NCM. To stop the Oracle server, do the following:
Step 1
A list of Local Services appears.
Step 2
Step 3
The Service Control window displays the message Windows is attempting to stop the following service on Local Computer.
Step 4
Installing and Configuring LMS
The next step in enabling NCM and LMS co-residency is to install and configure LMS. Do the following:
Step 1
Refer to the specific product documentation for instructions on installation.
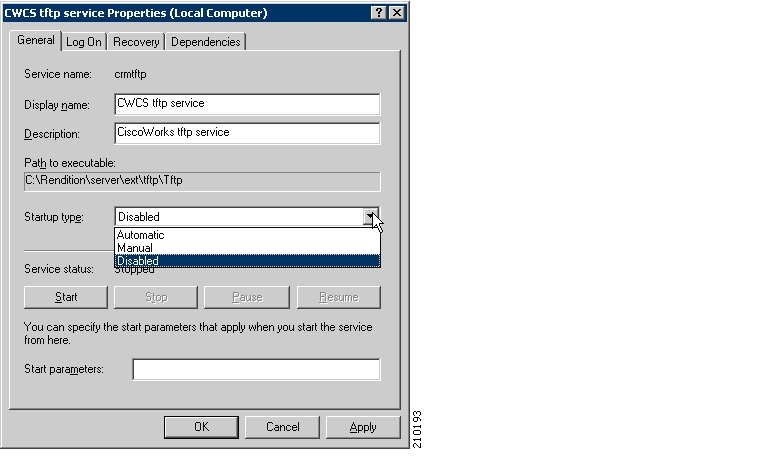
Step 2
a.
b.
c.
Figure 2-1 Disabling the CWCS tftp Service Window
d.
e.
Step 3
a.
b.
c.
d.
The service control window displays the message Windows is attempting to stop the following service on Local Computer....CiscoWorks Daemon Manager.
e.
Note
Step 4
a.
b.
c.
Note
Step 5
a.
b.
c.
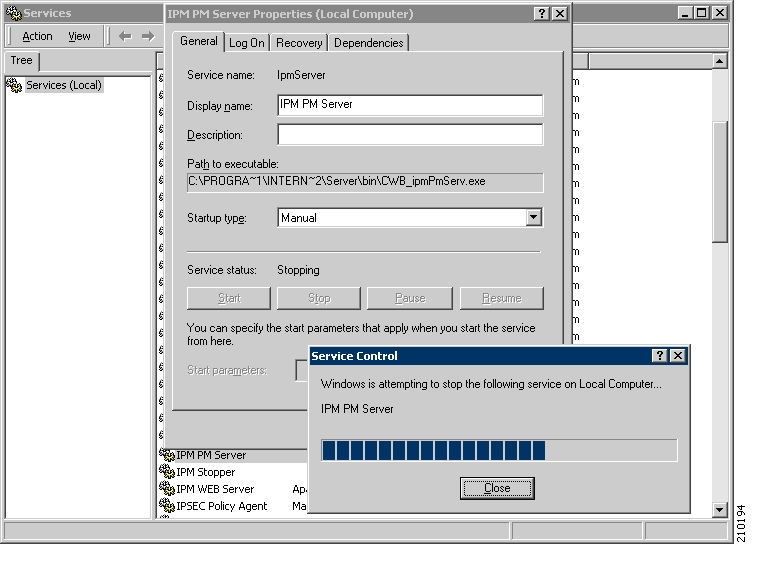
d.
The service control window displays the message Windows is attempting to stop the following service on Local Computer....IPM PM Server. See Figure 2-2.
Figure 2-2 IBM PM Server Properties Window
e.
Installing NCM
To install NCM, refer to the Quick Start Guide for CiscoWorks Network Compliance Manager, 1.2 for installation instructions.
Note
Once NCM1.2 is installed, do the following:
Step 1
a.
b.
c.
The service control window displays the message Windows is attempting to stop the following service on Local Computer....TrueControl Syslog Server.
d.
Note
Step 2
a.
b.
c.
The service control window displays the message Windows is attempting to stop the following service on Local Computer....TrueControl Management Engine.
d.
Note
Configuring LMS for Co-residency
To configure LMS for co-residency, do the following:
Step 1
a.
b.
c.
d.
e.
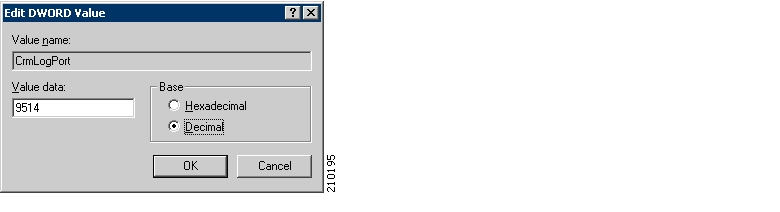
f.
The Edit DWORD Value window appears.
g.
h.
Figure 2-3 Edit DWORD Value Window
i.
Step 2
a.
b.
c.
d.
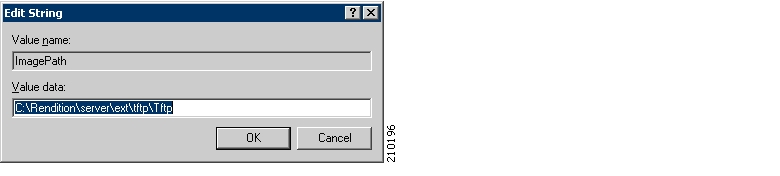
e.
The Edit String window appears.
f.
Figure 2-4 Edit String Window
g.
h.
i.
The Edit String window appears.
j.
k.
Step 3
a.
b.
c.
d.
Configuring NCM for Co-residency
To configure NCM for co-residency, do the following:
Step 1
a.
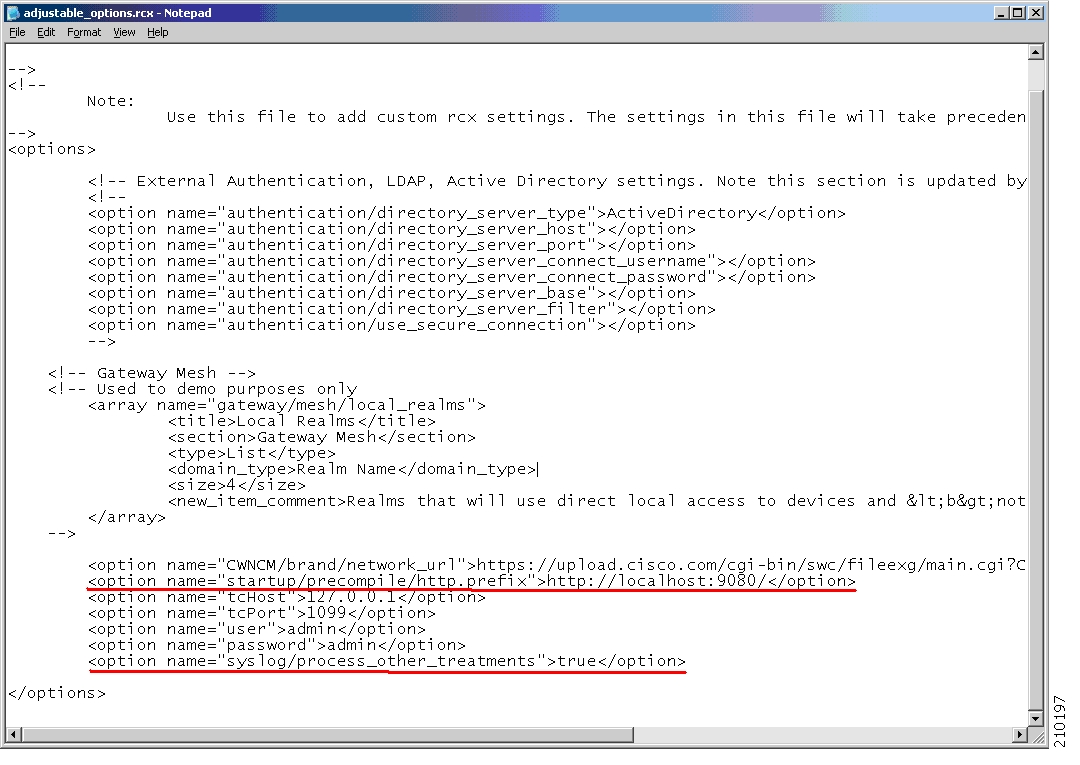
b.
<option name="startup/precompile/http.prefix">http://localhost:9080/</option>.c.
Figure 2-5 Adjustable Options File Example
d.
e.
f.
Figure 2-6 syslog.conf File Example
g.
Step 2
a.
b.
c.
d.
e.
f.
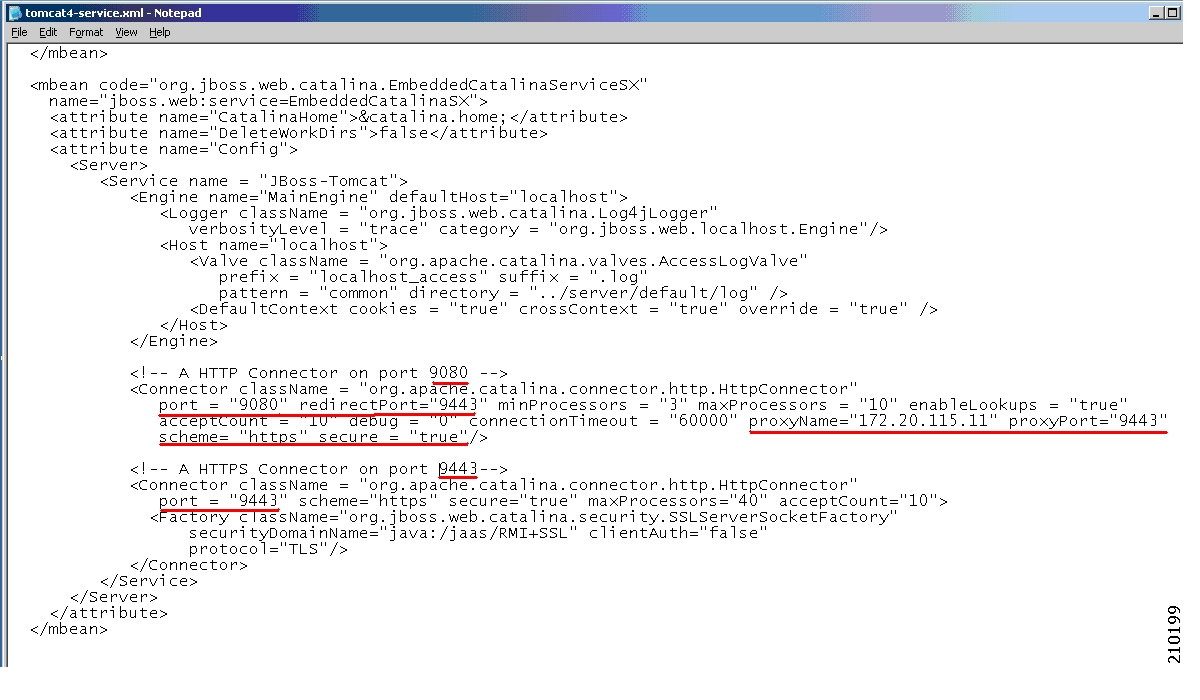
g.
Figure 2-7 tomcat4-service.xml File Example
Step 3
a.
Step 4
As a result of changing the NCM Web Server port from 443 to 9443, you must update the Start Menu associated with NCM
a.
b.
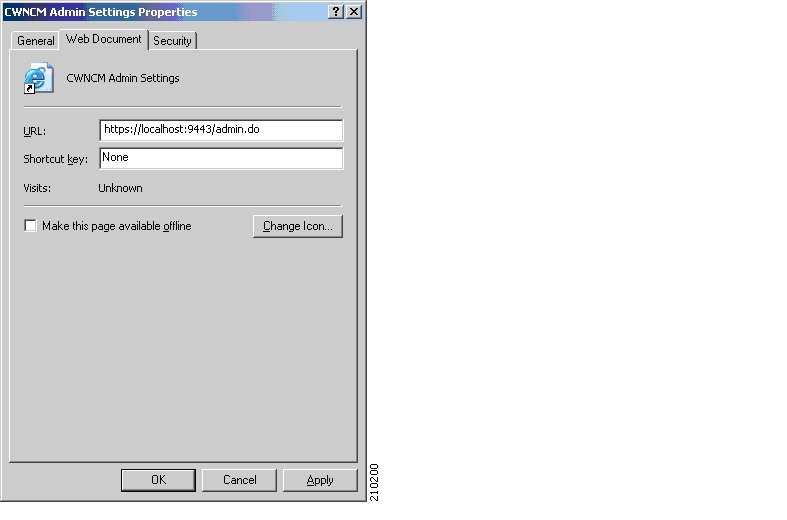
The CWNCM Admin Settings Properties window is displayed. See Figure 2-8.
Figure 2-8 CWNCM Admin Settings Properties Window
c.
d.
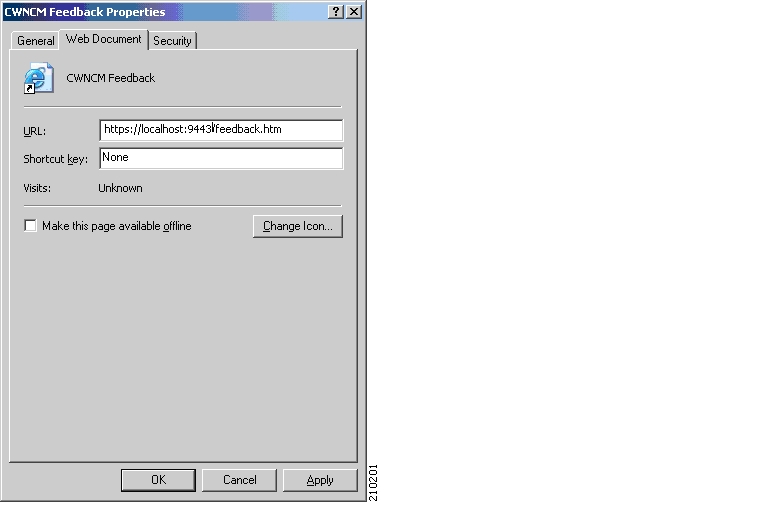
The CWNCM Feedback Properties window is displayed. See Figure 2-9.
Figure 2-9 CWNCM Feedback Properties Window
e.
f.
The CWNCM Login Properties window is displayed. See Figure 2-10.
Figure 2-10 CWNCM Login Properties Window
g.
h.
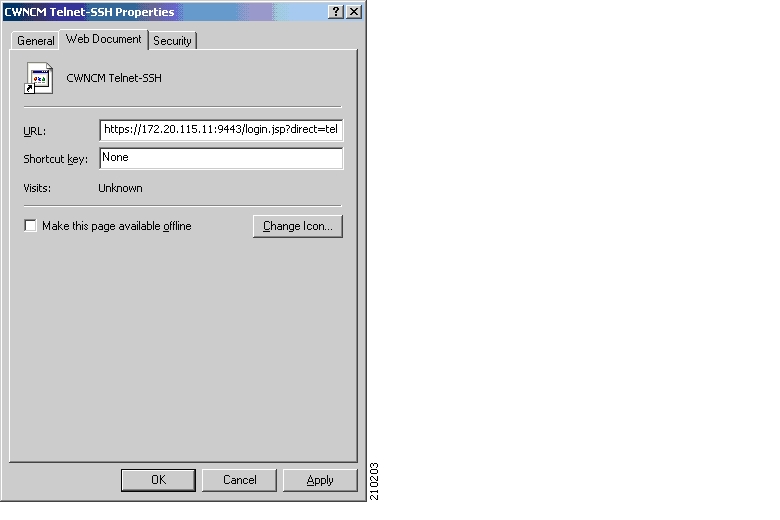
The CWNCM Telnet-SSH Properties window is displayed. See Figure 2-11.
Figure 2-11 CWNCM Telnet-SSH Properties Window
i.
Note
Step 5
a.
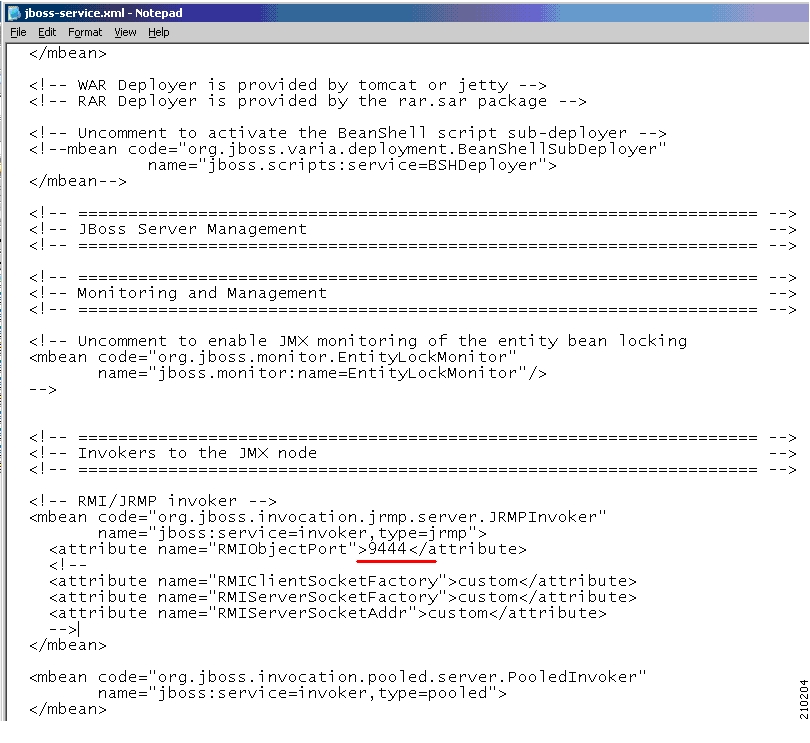
b.
Figure 2-12 jboss-service.xml File Example
Step 6
a.
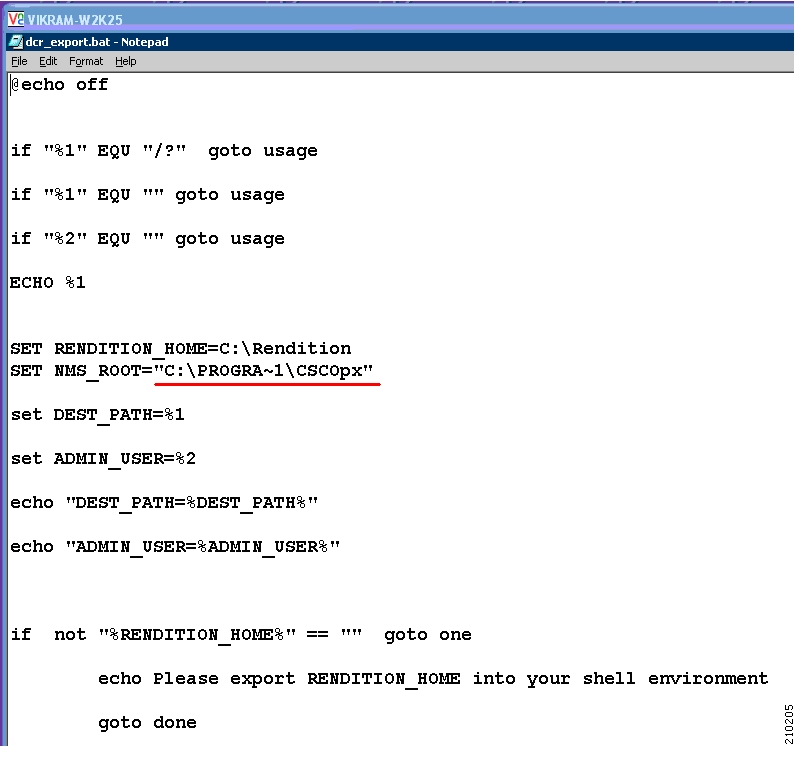
b.
Figure 2-13 NMS_ROOT File Example
c.
Restarting the NCM Services
To restart the NCM services, do the following:
Step 1
a.
A list of Local Services appears.
b.
c.
The Service Control window displays the message Windows is attempting to start the following service on Local Computer.......
d.
Step 2
a.
A list of Local Services appears.
b.
c.
The Service Control window displays the message Windows is attempting to start the following service on Local Computer......TrueControl Syslog Server.
d.
Note
Step 3
a.
A list of Local Services appears.
b.
c.
The Service Control window displays the message Windows is attempting to start the following service on Local Computer......TrueControl Management Engine.
d.
Note
Step 4
a.
b.
c.
d.
Restarting the LMS Services
To restart the LMS services, do the following:
Step 1
a.
A list of Local Services appears.
b.
c.
The Service Control window displays the message Windows is attempting to start the following service on Local Computer......CiscoWorks Daemon Manager.
d.
Note
Step 2
a.
A list of Local Services appears.
b.
c.
The Service Control window displays the message Windows is attempting to start the following service on Local Computer......CWCS syslog service.
d.
Note
Step 3
Note
a.
A list of Local Services appears.
b.
c.
The Service Control window displays the message Windows is attempting to start the following service on Local Computer......IPM PM Server.
d.
Note
Configuring for Cross Launch of NCM and LMS
To configure for cross launching of NCM and LMS, do the following:
Step 1
a.
b.
The CiscoWorks URL should display in the CiscoWorks Server URL field. Note that the My Favorites field on the left side of the window does not display the CiscoWorks link.
c.
d.
e.
Note the host ip address.
f.
g.
Note that the CiscoWorks URL now appears in the My Favorites field on the left side of the window.
Step 2
a.
b.
c.
d.
copy .\CWNCM-cwhp.xml C:\<LMS install directory>\CSCOpx\objects\data\cmf\cmic\mst-templates
where LMS install directory is the location of the directory where LMS is installed.
e.
perl .\cmic_reg-win.pl <ip address of the current server> 9443 add
where ip address of the current server is the IP address of the current server.
The following is an example of the output from this command. Note that the actual path and IP addresses may defer on your host.
SERVER 172.20.115.25PORT 443JAVA C:\PROGRA~1\CSCOpx\bin\cwjava -cw C:\PROGRA~1\CSCOpx -cp:p MDC\tomcat\webapps\cwhp\WEB-INF\lib\cwhp.jar;lib\classpath\cmic.jar;MDC\tomcat\shared\ lib\xerces.jar;objects\log4j\1.2.8\log4j-1.2.8.jar;MDC\tomcat\shared\lib\MICE.jar;MDC\ tomcat\shared\lib\NATIVE.jar com.cisco.nm.cwcs.cwhp.applications.add CWNCM-cwhp 443 https 172.20.115.25[Thu Aug 17 11:31:00 PDT 2006] CCR HostName is 172.20.115.25[Thu Aug 17 11:31:00 PDT 2006] Host name is 172.20.115.25[Thu Aug 17 11:31:00 PDT 2006] Registring the application with CWNCM-cwhp, 172.20.115.25, 443, https[Thu Aug 17 11:31:00 PDT 2006] INFO [CMICLogger : info] : com.cisco.nm.cmf.cmic.registry.OperateRecords Processing template C:\PROGRA~1\CSCOpx/objects/data/cmf/cmic/mst-templates/CWNCM-cwhp.xml[Thu Aug 17 11:31:05 PDT 2006] INFO [CMICLogger : info] : com.cisco.nm.cmf.cmic.registry.OperateRecords The number of records to be added : 7[Thu Aug 17 11:31:06 PDT 2006] INFO [CMICLogger : info] : com.cisco.nm.cmf.cmic.registry.RegistryInteractor Successfully added record to the registry :7[Thu Aug 17 11:31:06 PDT 2006] INFO [CMICLogger : info] : com.cisco.nm.cmf.cmic.registry.OperateRecords Writing registered template at C:\PROGRA~1\CSCOpx/objects/data/cmf/cmic/registered-templates/networkcompliancemanager 1.0.1.0.172.20.115.25.443.https.xmlStep 3
![]()
![]()
![]()
![]()
![]()
![]()
![]()
![]()
Posted: Tue Feb 20 14:49:23 PST 2007
All contents are Copyright © 1992--2007 Cisco Systems, Inc. All rights reserved.
Important Notices and Privacy Statement.