|
|

Table Of Contents
Installing Components Using the GUI
Installing the Regional Distribution Unit
Installing Extensions on a Network Registrar Server
Installing the Application Programming Interface
Installing Components Using the CLI
Installing the Regional Distribution Unit
Installing Network Registrar Extensions
Installing the Application Programming Interface
Configuring the Syslog to Receive Alerts from BPR
Uninstalling Broadband Provisioning Registrar
Installing Components
This chapter explains the procedures you must follow to correctly install Broadband Provisioning Registrar (BPR) components in a Solaris operating system environment.
This chapter contains the following topics:
•
Installing components using the GUI
•
•
Installing Components Using the GUI
This section explains the procedures that you follow to install one or more of components of BPR using the GUI.
You can choose to install one or all of these components:
•
•
•
For more information about each component see the "Broadband Provisioning Registrar Components" section on page 2-1.
Before you begin any of these procedures, you must complete the initial installation procedure. For more information, see the "Initial Installation Steps" section on page 2-5.
Installing the Regional Distribution Unit
Install the RDU server on a Solaris 8 server that meets the requirements described in the "Hardware Requirements" section on page 1-2.
To install the RDU server, complete the steps described in the "Initial Installation Steps" section on page 2-5, then follow these steps:
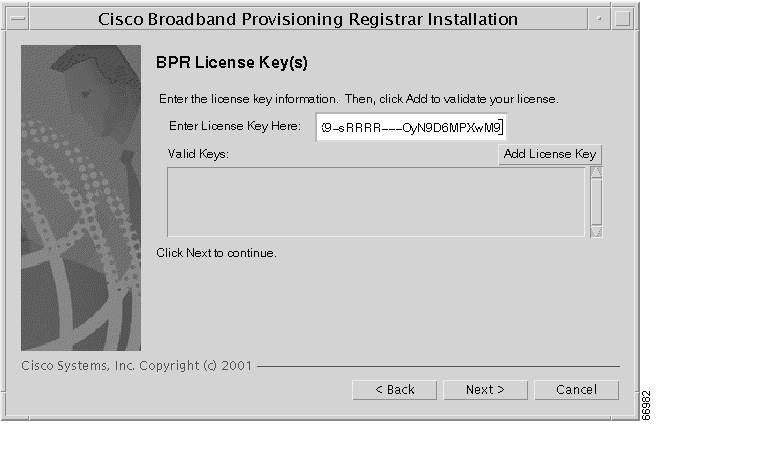
Step 1
The BPR License Key(s) screen appears ( Figure 3-1).
Figure 3-1 BPR License Key(s) Screen
Step 2
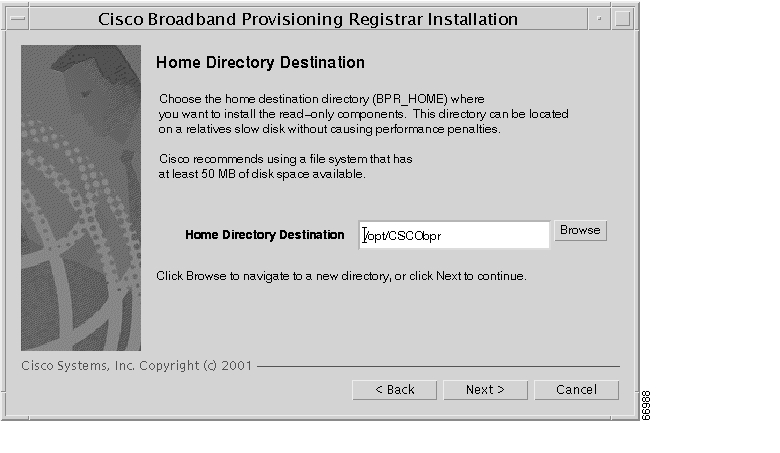
Step 3
The default directory is /opt/CSCObpr.
Figure 3-2 Home Directory Destination Screen
Step 4
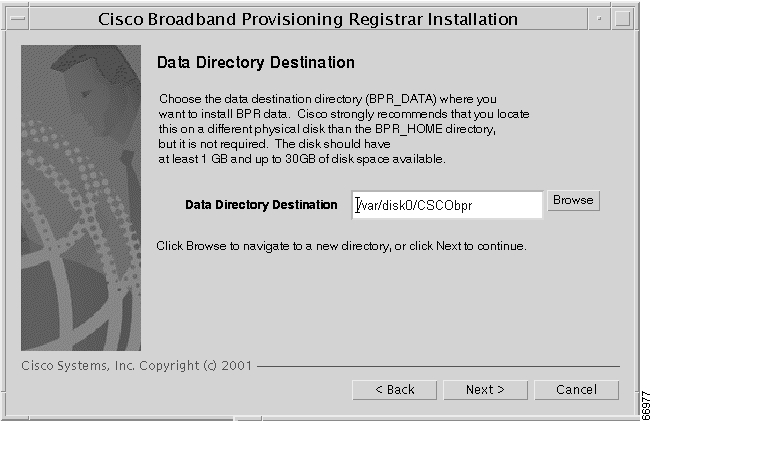
Step 5
The Data Directory Destination screen appears ( Figure 3-3). The default directory is /var/CSCObpr.
Figure 3-3 Data Directory Destination Screen
Step 6
Note
The directory specified becomes the top-level directory under which the installation program creates a number of subdirectories; for example, /var/disk0/CSCObpr/rdu/db.Step 7
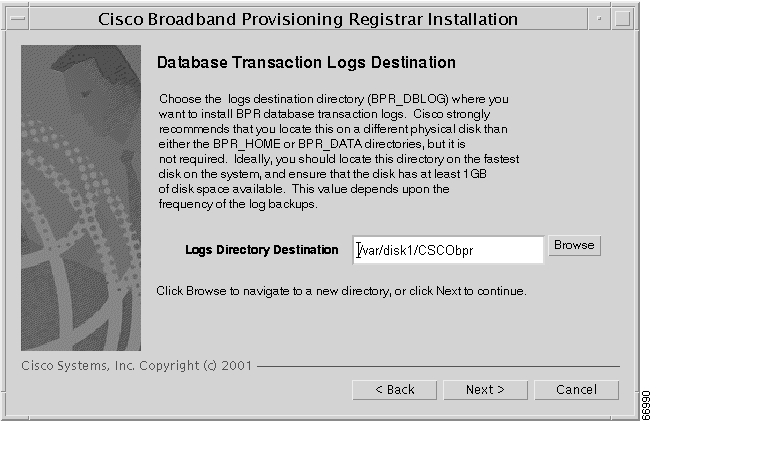
The Database Transaction Logs screen appears ( Figure 3-4).
Figure 3-4 Database Transaction Logs Screen
Step 8
Note
The directory specified becomes the top-level directory under which the installation program creates a number of subdirectories.Step 9
Step 10
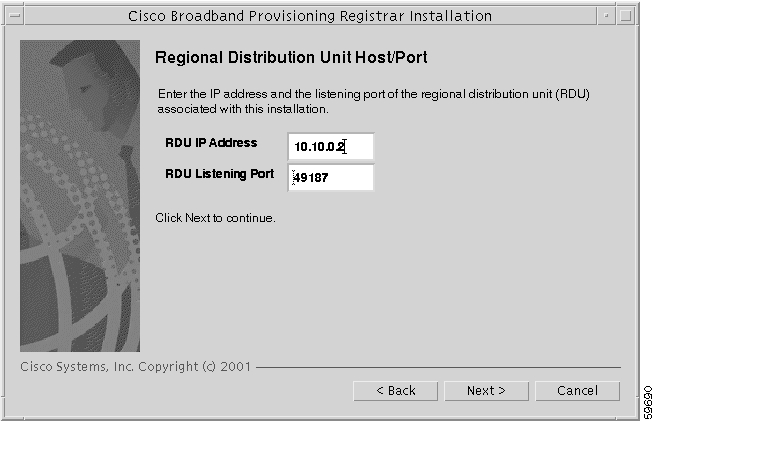
The Regional Distribution Unit Host/Port screen appears ( Figure 3-5).
Figure 3-5 Regional Distribution Unit Host/Port Screen
Step 11
Note
Caution
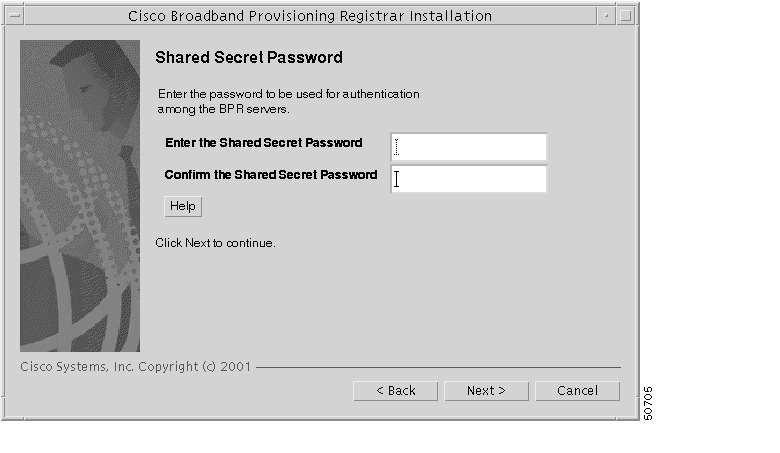
Step 12
Figure 3-6 Shared Secret Password Screen
Step 13
Note
Step 14
a.
b.
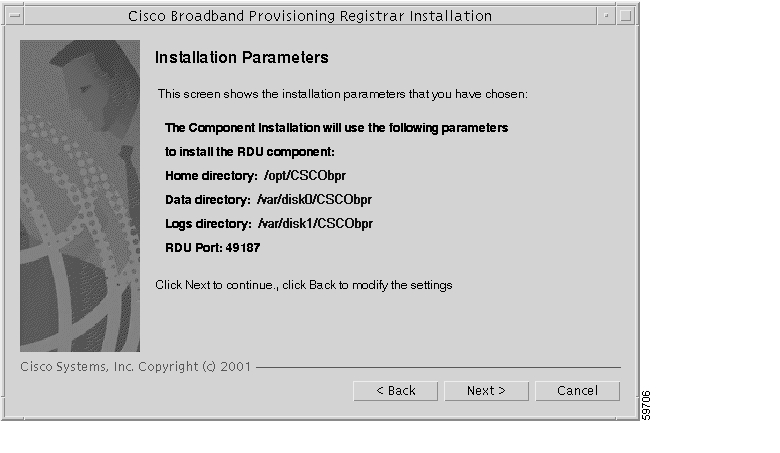
c.
Figure 3-7 Installation Parameters Screen
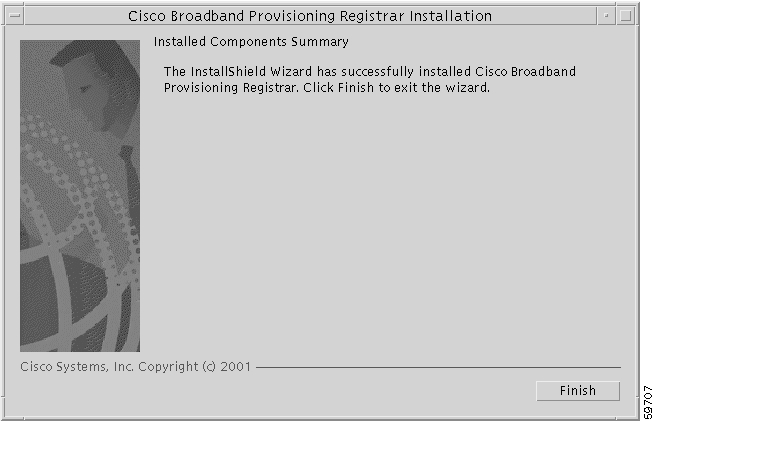
Step 15
Figure 3-8 Installed Components Summary Screen
To exit the installation program, click Finish.
Installing Extensions on a Network Registrar Server
You install BPR extensions on a Network Registrar server. If you are deploying BPR in a failover environment, you also must install the extensions on the failover servers. After you install extensions, you need to configure them.
The remainder of this section explains how to install and configure the extensions.
Installing Extensions
Before you install the Network Registrar extensions, complete the steps described in the "Initial Installation Steps" section on page 2-5. To install the extensions, follow these steps:
Step 1
Figure 3-9 Home Directory Destination Screen
Step 2
Step 3
Figure 3-10 Data Directory Destination Screen
Step 4
Note
The directory specified becomes the top-level directory under which the installation program creates a number of subdirectories; for example, /var/disk0/CSCObpr/rdu/db.Step 5
Figure 3-11 Regional Distribution Unit Host/Port Screen
Step 6
Step 7
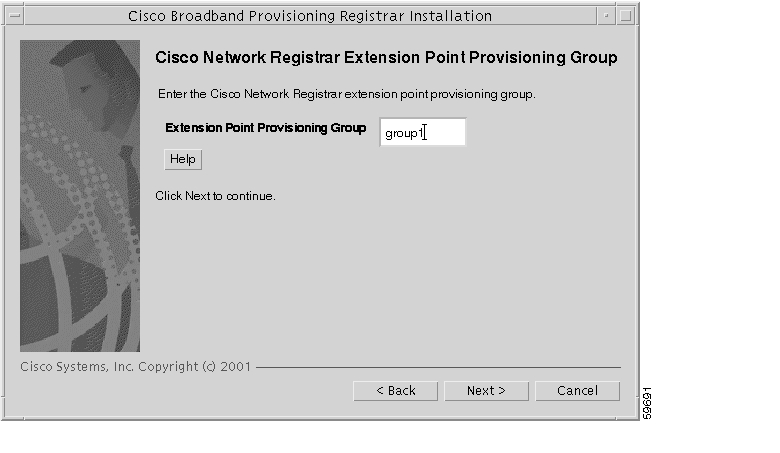
Figure 3-12 Cisco Network Registrar Extension Point Provisioning Group Screen
Step 8
Step 9
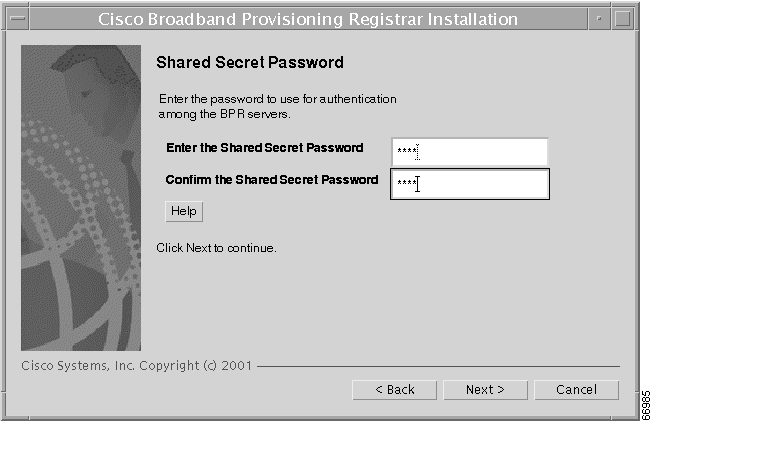
Figure 3-13 Shared Secret Password Screen
Step 10
Note
Step 11
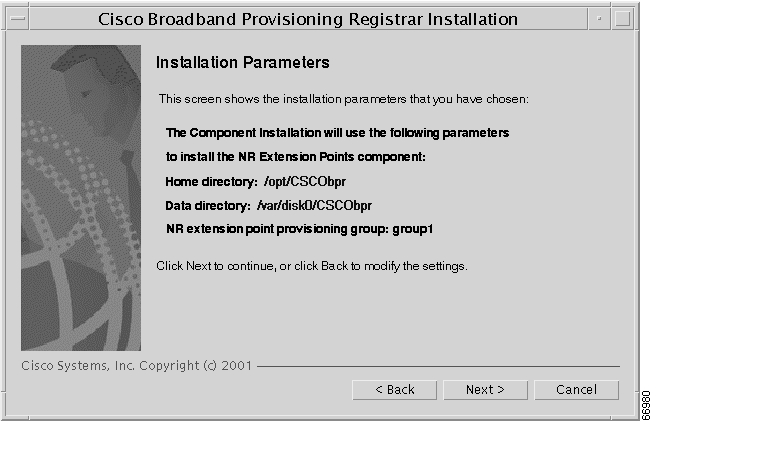
Figure 3-14 Installation Parameters Screen
Step 12
Figure 3-15 Installed Components Summary Screen
Step 13
Configuring Extensions
After you install the BPR extensions to Network Registrarr, you must configure the extensions. The procedure described in this section makes these assumptions:
•
•
•
To configure extensions, follow these steps:
Step 1
Step 2
/opt/nwreg2/usrbin/nrcmd -N admin -P changeme -b </opt/CSCObpr/cnr_ep/bin/bpr_cnr_enable_extpts.nrcmdStep 3
/etc/init.d/aicservagt stop/etc/init.d/aicservagt startAlternatively, you can enter this command to reload the server:
/opt/nwreg2/usrbin/nrcmd -N admin -P changeme "dhcp reload"
Caution
Note
Installing the Application Programming Interface
Install the API component on one or more client devices. Before you install the API, complete the steps described in the "Initial Installation Steps" section on page 2-5. To install the API, follow these steps:
Step 1
Figure 3-16 Home Directory Destination Screen
Step 2
Step 3
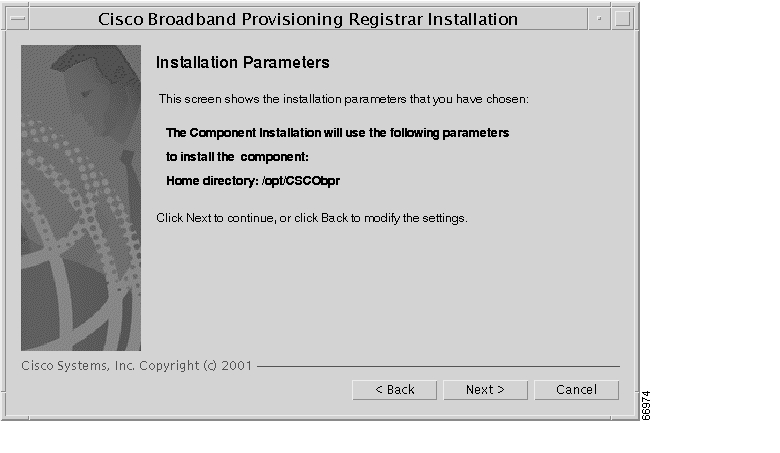
Figure 3-17 Installation Parameters Screen
Step 4
Figure 3-18 Installed Components Summary Screen
Step 5
Installing Components Using the CLI
This section explains the procedures that you follow to install one or more of components of BPR using the CLI.
You can choose to install one or all of these components:
•
•
•
For more information about each component see the "Broadband Provisioning Registrar Components" section on page 2-1.
Before you begin any of these procedures, you must complete the initial installation procedure. For more information, see the "Installing from the Command Line" section on page 2-7.
Installing the Regional Distribution Unit
To install an RDU, complete the steps described in the "Installing from the Command Line" section on page 2-7. Then, follow these steps:
Step 1
Step 2
For example:
Installation ComponentsSelect one or more components to install BPR.Regional distribution unit (RDU) (y/n/?) [no] yCisco Network Registrar extension points (y/n/?) [no] nApplication provisioning interface (API) client (y/n/?) [no] nThe program prompts you to confirm the components that you want to install.
Step 3
Step 4
Starting the individual component installation parameters validation.Press Enter to Continue or 'q' to Quit:Validating the individual component installation parameters - Please wait.The program prompts you to enter your BPR license key.
Step 5
BPR License Key(s)Enter the license key information to validate your license.Enter Key [] ASf-tU-A$R$R-hyw9-sRRRR---N9D6MPXwM========== Confirmation ==========Do you want to enter another License KeyIs this correct (y/n/q/?) [yes] yesStep 6
Step 7
Home Directory DestinationHome Directory Destination [/opt/CSCObpr]The program asks you to confirm the directory.
Step 8
Step 9
Data Directory DestinationData Directory Destination [/var/CSCObpr]/var/disk0/CSCObprThe program then asks you to confirm the directory.
Note
The directory specified becomes the top-level directory under which the installation program creates a number of subdirectories; for example, /var/disk0/CSCObpr/rdu/db.Step 10
Step 11
Database Transaction Logs DestinationLogs Directory DestinationLogs Directory Destination [/var/CSCObpr] /var/disk1/CSCObprThe program then asks you to confirm the directory.
Note
The directory specified becomes the top-level directory under which the installation program creates a number of subdirectories.Step 12
Step 13
Regional Distribution Unit Host/PortEnter the IP address and the listening port of the regional distribution unit(RDU)associated with this installation.Enter the Host/IP address and address of the listening port for the RDU andRDU Listening Port [49187]
Note
The program then prompts you to confirm the listening port number.
Step 14
Note
Step 15
Shared Secret PasswordEnter the password to be used for authenticationamong the BPR servers.If you are performing a lab installation, then the password will be used forall the servers. If this is a component installation, then the password youenter must be the same as the components previously installed.Enter the Shared Secret Password [secret] secretThe program prompts you to confirm the password.
Step 16
The Component Installation will use the following parametersto install the RDU component:Home directory:/opt/CSCObprData directory:/var/disk0/CSCObprLogs directory:/var/disk1/CSCObprRDU Port:49187Step 17
Installing Network Registrar Extensions
Before you install Network Registrar extensions, complete the steps described in the "Installing from the Command Line" section on page 2-7. To install the extensions, follow these steps:
Step 1
To skip installing an RDU and the API, press n and Enter for these options.
For example:
Installation ComponentsSelect one or more components to install BPR.Regional distribution unit (RDU) (y/n/?) [no] nCisco Network Registrar extension points (y/n/?) [no] yApplication provisioning interface (API) client (y/n/?) [no] nThe program prompts you to confirm the components that you want to install.
Step 2
Step 3
Starting the individual component installation parameters validation.Press Enter to Continue or 'q' to Quit:Validating the individual component installation parameters - Please wait.The program prompts you to enter the home directory destination,
Step 4
Home Directory DestinationHome Directory Destination [/opt/CSCObpr]The program then asks you to confirm the directory.
Step 5
Step 6
Data Directory DestinationData Directory Destination [/var/CSCObpr] /var/disk0/CSCObpr
Note
The directory specified becomes the top-level directory under which the installation program creates a number of subdirectories; for example, /var/disk0/CSCObpr/rdu/db.Step 7
Step 8
Regional Distribution Unit Host/PortEnter the IP address and the listening port of the regional distribution unit(RDU)associated with this installation.Enter the Host/IP address and address of the listening port for the RDU.RDU IP Address [doc-u5.cisco.com] 10.10.10.2RDU Listening Port [49187]========== Confirmation ==========RDU Host:10.10.10.2RDU Port:49187Is this correct (y/n/q/?) [yes] yStep 9
Step 10
Cisco Network Registrar Extension Point Provisioning GroupEnter the Cisco Network Registrar extension point provisioning group.This a required field. The value you specify must contain only alphanumericcharacters without spaces and not exceed 10 characters in length. You can usethe BPR command-line tool to change this value after you complete thisinstallation.Extension Point Provisioning Group [] group1Step 11
Note
Step 12
Shared Secret PasswordEnter the password to be used for authenticationamong the BPR servers.If you are performing a lab installation, then the password will be used forall the servers. If this is a component installation, then the password youenter must be the same as the components previously installed.Enter the Shared Secret Password [secret] changemeThe program prompts you to confirm the password.
Step 13
Step 14
Installation ParametersThis screen shows the installation parameters that you have chosen:========== Confirmation ==========The Component Installation will use the following parametersto install the NR Extension Points component:Home directory:/opt/CSCObprData directory:/var/disk0/CSCObprNR extension point provisioning group:group1Step 15
Step 16
Installing the Application Programming Interface
Before you install the application programming interface (API), complete the steps described in the "Installing from the Command Line" section on page 2-7. To install the API, follow these steps:
Step 1
To skip installing an RDU and Network Registrar extension points, enter n and Enter for these options.
For example:
Installation ComponentsSelect one or more components to install BPR.Regional distribution unit (RDU) (y/n/?) [no] nCisco Network Registrar extension points (y/n/?) [no] nApplication provisioning interface (API) client (y/n/?) [no] yThe program prompts you to confirm the components that you want to install.
Step 2
Step 3
Starting the individual component installation parameters validation.Press Enter to Continue or 'q' to Quit:Validating the individual component installation parameters - Please wait.The program prompts you to enter the home directory destination.
Step 4
Home Directory DestinationHome Directory Destination [/opt/CSCObpr]The program then asks you to confirm the directory.
Step 5
Installation ParametersThis screen shows the installation parameters that you have chosen:========== Confirmation ==========The Component Installation will use the following parametersto install the component:Home directory:/opt/CSCObprStep 6
Configuring the Syslog to Receive Alerts from BPR
This section describes how to configure the syslog on a Network Registrar server to receive alerts and debugging information from BPR.
Step 1
Step 2
touch /var/log/bpr.logStep 3
Step 4
local6.info /var/log/bpr.log
Note
Step 5
Step 6
ps -ef | grep syslogdroot 217 1 0 Nov 26 ? 0:00 /usr/sbin/syslogdkill -HUP 217Network Registrar is now ready to receive alerts from BPR.
Uninstalling Broadband Provisioning Registrar
The program described in this section uninstalls the RDU, Network Registrar extensions, and the API, but it does not uninstall the Network Registrar application. Prior to removing BPR you have to manually unconfigure Network Registrar.
The uninstallation program removes all files located under the installation directory (the default installation directory is /opt/CSCObpr). If the database is found under the installation directory, as is the case in the lab installation program, the program displays a warning message that it is deleting the database. You can exit from the uninstallation program at that time, or you can choose to proceed.
The uninstallation program also shuts down and removes the following processes if they are detected: RDU Agent and JRun.
The uninstallation program does not remove files that were placed outside the installation directory. For example, a component installation places the database and database transaction logs directories under /var/CSCObpr. So theses files are not removed. The uninstallation program also does not remove any files that are located under the Network Registrar directory.
Caution
To uninstall BPR, follow these instructions:
Step 1
Step 2
Note
a.
/opt/nwreg2/usrbin/nrcmd -N admin -P changeme -b </opt/CSCObpr/cnr_ep/bin/bpr_cnr_disable_extpts.nrcmdb.
/etc/init.d/aicservagt stop/etc/init.d/aicservagt startAlternatively, enter this command:
/opt/nwreg2/usrbin/nrcmd -N admin -P changeme "dhcp reload"c.
rm -f /opt/nwreg2/extensions/dhcp/dex/libbprextensions.soStep 3
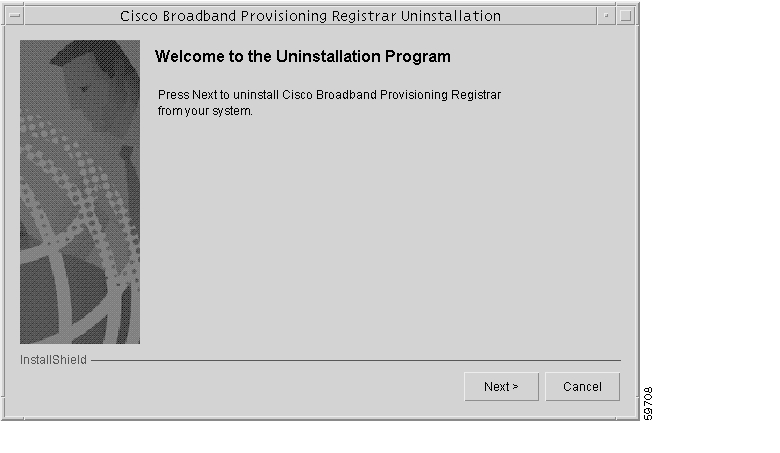
/opt/CSCObpr/_uninst/uninstall.binThe uninstallation program's Welcome screen appears ( Figure 3-19).
Figure 3-19 Broadband Provisioning Registrar Uninstallation Screen
Step 4
Figure 3-20 Uninstall Screen
When the uninstallation is complete, the Cisco Broadband Provisioning Registrar was Uninstalled screen appears ( Figure 3-21).
Figure 3-21 Cisco Broadband Provisioning Registrar Was Uninstalled Screen
Step 5
![]()
![]()
![]()
![]()
![]()
![]()
![]()
![]()
Posted: Tue Nov 30 14:37:20 PST 2004
All contents are Copyright © 1992--2004 Cisco Systems, Inc. All rights reserved.
Important Notices and Privacy Statement.