|
|

Table Of Contents
Understanding the Administrator's User Interface
Accessing the BACC Administrators Graphical User Interface
Administrator's User Interface
Selecting Navigation Bar Items
Scrolling Backward and Forward
Understanding the Administrator's User Interface
This chapter describes how to access the Broadband Access Center for Cable (BACC) administrative user interface and explains important aspects about it.
Chapter 9, "Using the Broadband Access Center for Cable Administrator User Interface" explains how to use the BACC administrator user interface to perform administrative activities. In addition, the Cisco Broadband Access Center for Cable Command Line Interface Reference contains descriptions of the CLI commands used to access, monitor, and control the device provisioning engine (DPE) devices.
Accessing the BACC Administrators Graphical User Interface
You can access the BACC user interface from any computer that can access the URL corresponding to the BACC application.
Logging In
You can log into the BACC user interface as an administrative user, a Read/Write user, or a Read Only user. Although each user type has different capabilities, as described in the "Users" section, you access the user interface in the same way.
Complete this procedure to access the BACC administrator user interface:
Step 1
Launch your web browser. Table 8-1 lists the browsers supported in this BACC release.
Step 2
http://<machine_name>:8100/adminui/Where:
•
•
Step 3
Figure 8-1 Login Page
Step 4
Note that the FQDN of the RDU server you are logged into is displayed in the User Login area.
Step 5
a.
b.
Note
Step 6
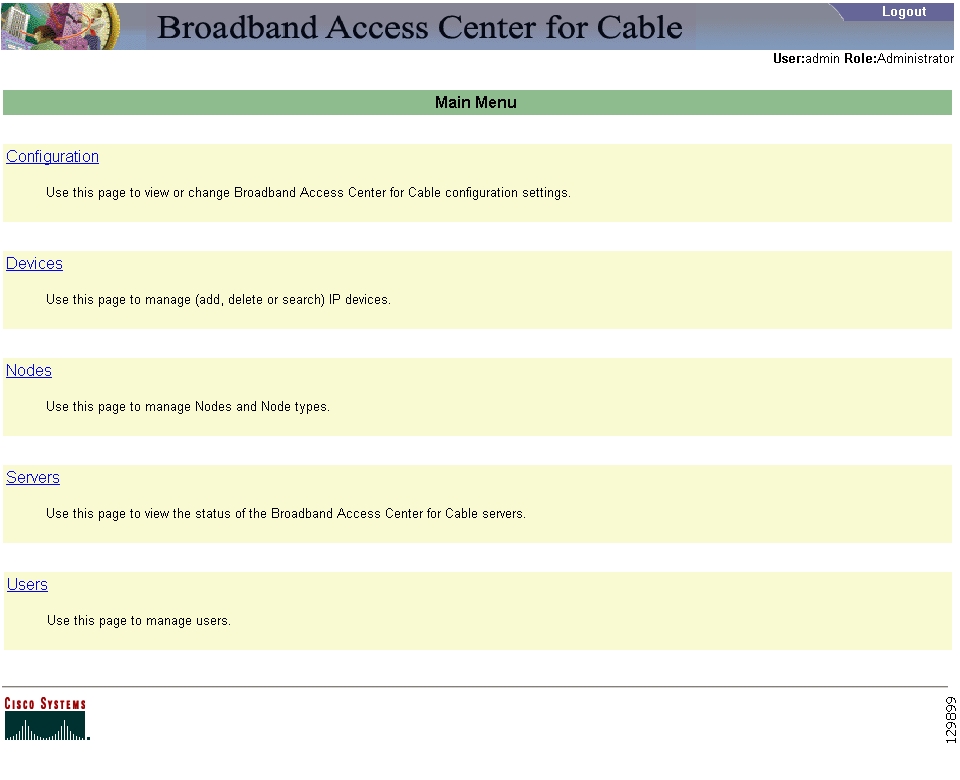
Figure 8-2 Main Menu Page
Logging Out
Complete this procedure to log out of BACC:
Step 1
Step 2
Administrator's User Interface
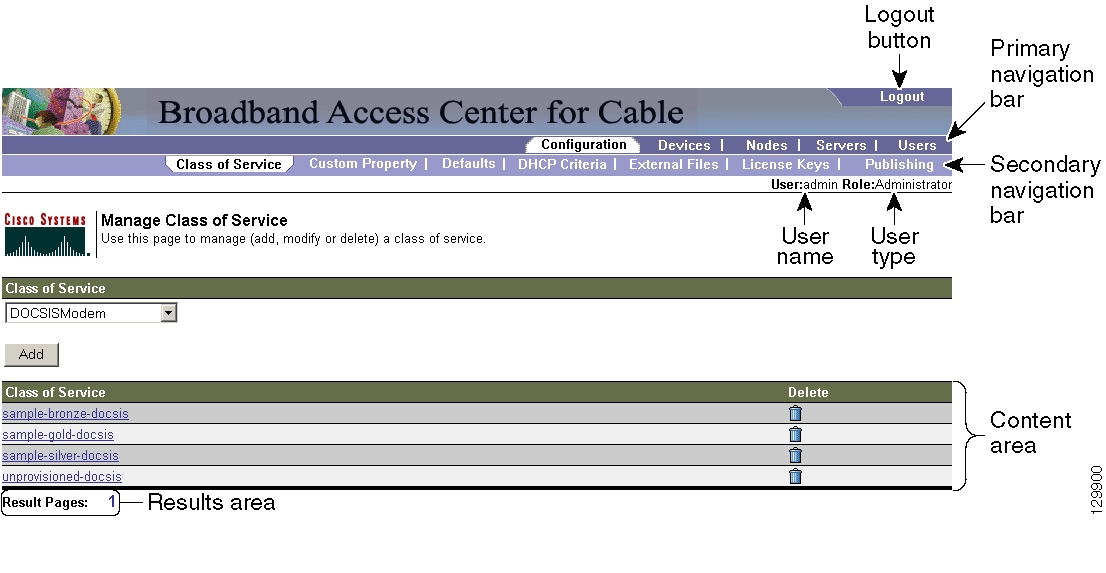
The BACC administrator user interface, as shown in Figure 8-3, is divided into three separate areas:
•
•
•
Some BACC administrator pages may also contain View, Delete, Submit, or Reset controls.
Figure 8-3 Administrator User Interface
Selecting Navigation Bar Items
To select a Navigation bar item, click the desired Primary Navigation bar item, and then click the appropriate Secondary Navigation bar item. (See Figure 8-3.) Note that the Users option has no secondary options to select from.
The Main Menu
You can select from these options on the Main menu:
•
•
•
•
•
After selecting one of these options, you can make further menu selections by clicking the desired menu item in the Primary Navigation bar. In addition, each Primary Navigation bar menu item displays unique options in the Secondary Navigation bar.
Configuration
Use the Configuration menu to view and modify various configuration settings for the overall system. These include:
•
•
•
•
•
•
•
Devices
Use the Devices menu to manage and maintain devices, and perform searches for any device using these search formats:
•
•
•
•
•
•
Servers
Use the Server menu to list the current status of these items or for any selected component:
•
•
•
•
Nodes
The Nodes menu lets you group devices into specific categories that can be searched and documented using log entries. that then be searched on and very detailed log entries made. BACC supports pre-defined Nodes that can be used to group devices. You can also create your own nodes as required.
Users
Depending on your user type, you can use this menu to add, modify, and delete users. This menu displays all users configured to use BACC and identifies their user types.
There are three types of BACC users: an Administrator, a Read/Write user, and a Read Only user. Each has different levels of access with unique permissions to ensure access control and the integrity of provisioning data.
The assigned user type appears near the top right corner of every administrative user interface screen.
Administrator
BACC recognizes only one administrator and allows this user to view, add, change, delete device data, and create other users. As an Administrator, you can also change other users permissions from Read/Write to Read Only, and vice versa. In addition, you have the ability to change the passwords of any other user type.
Read/Write User
As a Read/Write user, you can perform the same functions as the administrator although you cannot create other users nor can you change the user types of others or change their passwords. Read/Write users can change their own password.
Read Only User
As a Read Only user, you have basic access including the ability to change your password and to view, but not change, device data. You cannot perform any action that is considered disruptive. You cannot, for example, perform reset or regenerate configurations.
Note
Scrolling Backward and Forward
Several functions within BACC administrator can result in lengthy lists of information that cannot always be displayed on a single page. BACC allows you to view these pages one at a time through a group of controls located in the lower left corner of each page. When multiple pages of information are available, the number of pages are also identified. To access a specific page, click the appropriate page number. Click the left and right arrow controls to move backward or forward respectively, through the number of displayed pages.
![]()
![]()
![]()
![]()
![]()
![]()
![]()
![]()
Posted: Thu Feb 2 12:56:14 PST 2006
All contents are Copyright © 1992--2006 Cisco Systems, Inc. All rights reserved.
Important Notices and Privacy Statement.