|
|

Table Of Contents
Defining Business Tags
Business tags are records that you can use to identify managed network objects (such as, modules, chassis and so on), with more familiar names of your choice. A business tag is a record that is stored in the ANA gateway database that points to a network element.
You can perform the following functions using the Business Tag module:
Roles Required to Define Business Tag
Table 6-1 lists the roles that are required to define the business tag. For more information on roles, see Creating and Managing Users and Scopes, page 14-27.
Adding a Business Tag
You can add a business tag to the network elements, interfaces, modules, and chassis. The Inventory and Monitoring perspectives are used to add business tags.
From the Monitoring perspective, you can add a business tag to the network elements. From the Inventory perspective, you can add a business tag to the chassis, modules, and interfaces.
This section contains:
•
Adding a Business Tag to a Network Element
•
Adding a Business Tag to a Network Element
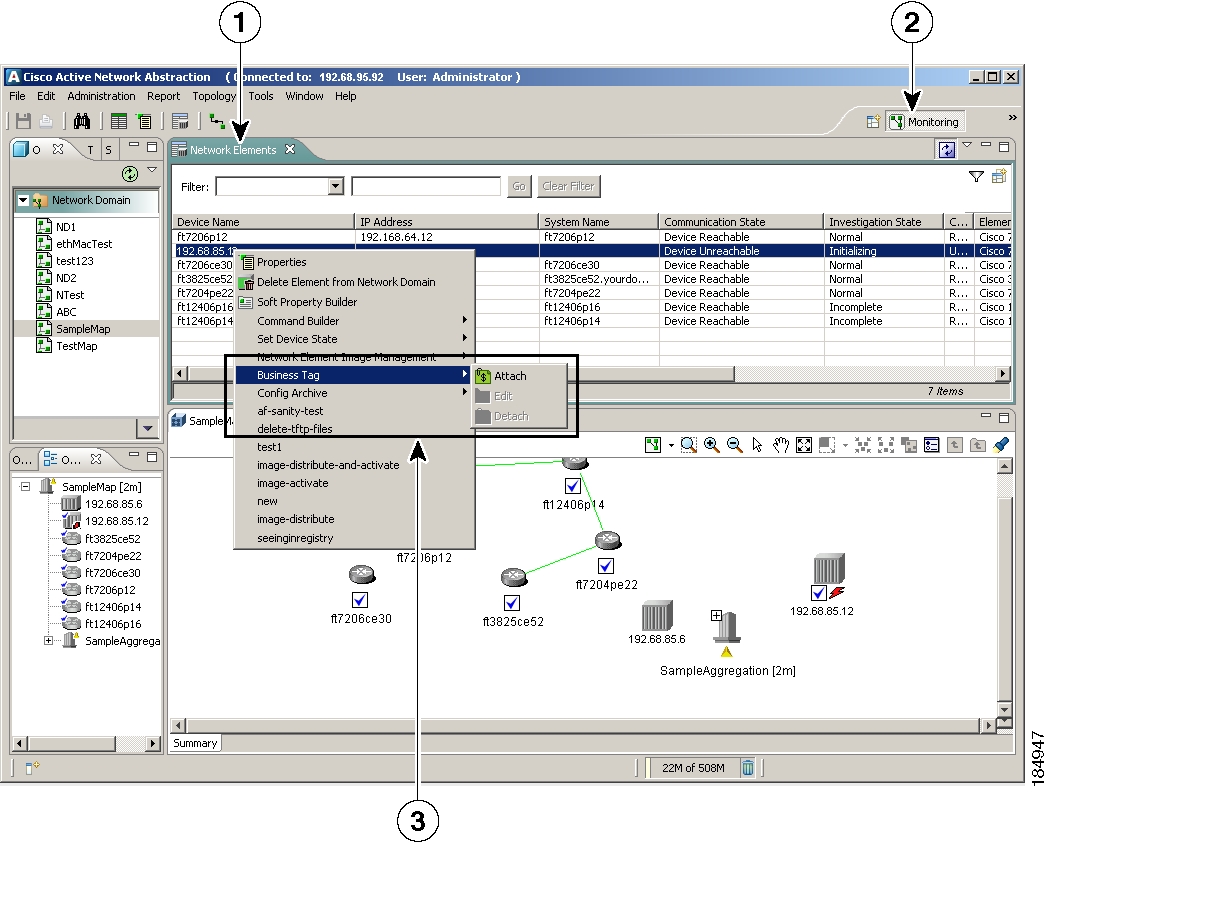
Figure 6-1 shows how to add a business tag to a network element.
Figure 6-1 Adding a Business Tag to a Network Element
To add a business tag to a network element:
Step 1
Step 2
Step 3
Step 4
Step 5
•
•
•
Step 6
The business tag's details are visible in the map workspace, but they are not visible in the Network Element view or in the Inventory perspective.
See Opening a Topology Map, page 5-7 for information on opening a topology map.
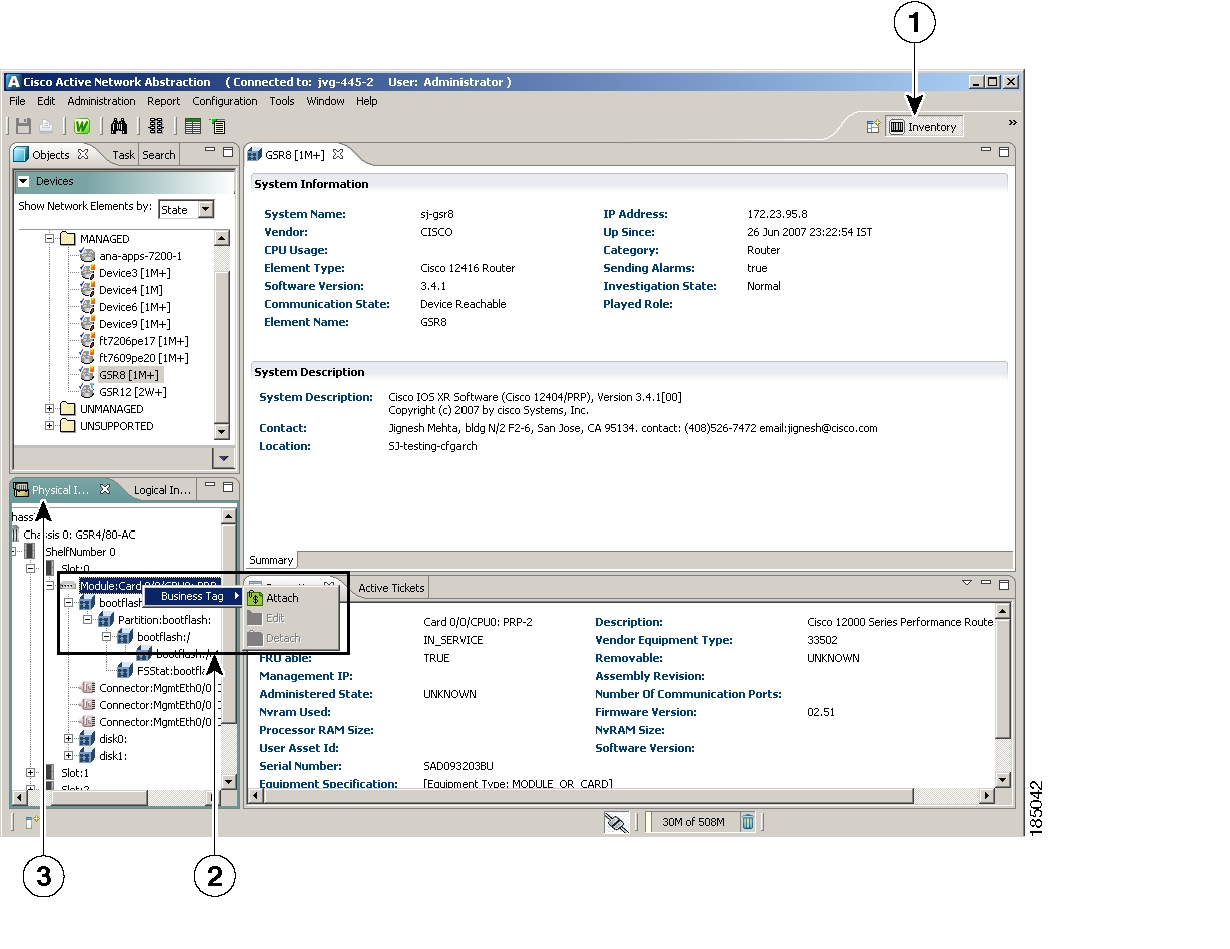
Adding a Business Tag to a Chassis, a Module, or an Interface
Figure 6-2 shows how to add a business tag to a module.
Figure 6-2 Adding Business Tag to a Chassis, a Module, or an Interface
To add a business tag to a chassis, a module, or an interface:
Step 1
Step 2
Step 3
Step 4
•
•
•
Step 5
To view the business tag details, close and reopen the Physical Inventory tab.
Editing a Business Tag
You can edit all the data in a business tag. To edit the network element business tag information, use the Monitoring perspective. To edit the chassis, module, or interface business tag information, use the Inventory perspective.
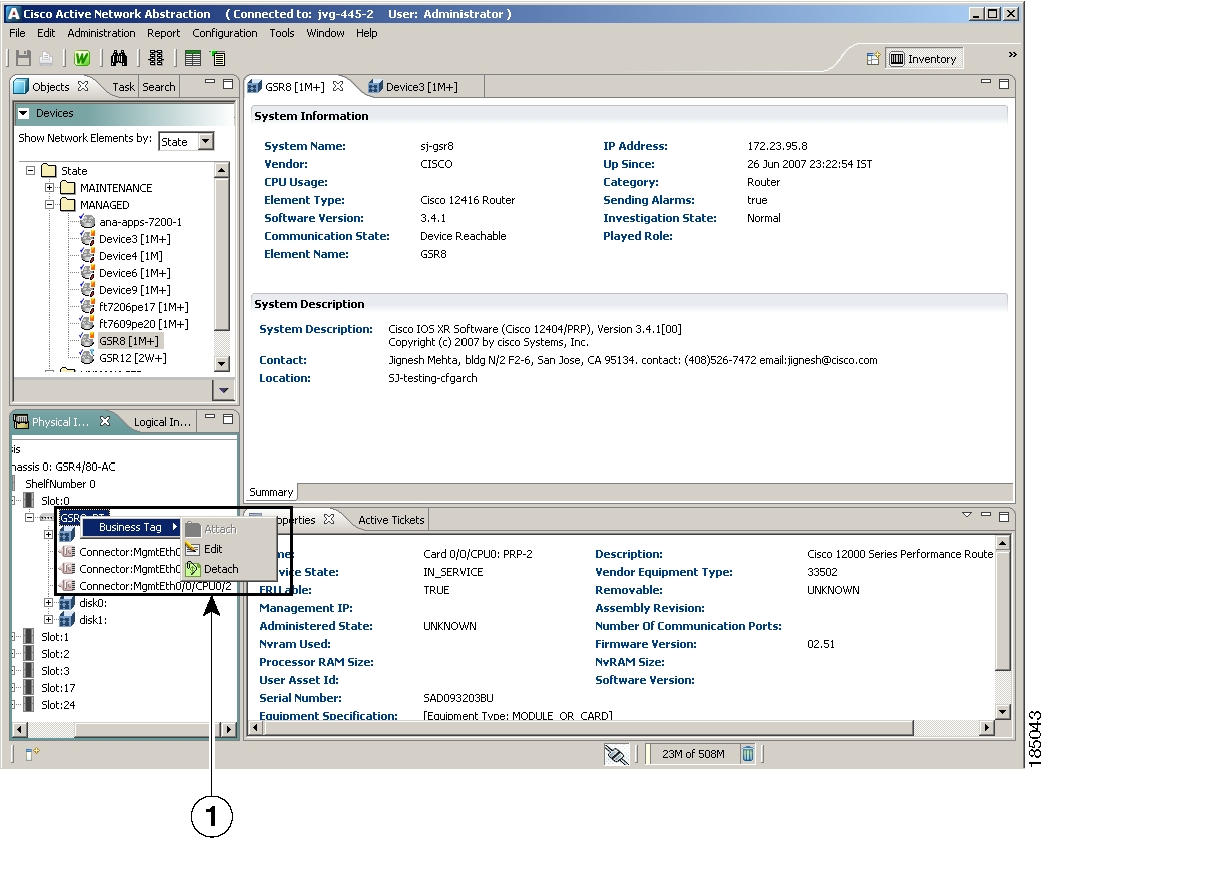
Figure 6-3 displays the navigation required to edit and delete the business tag of a module.
Figure 6-3 Editing and Deleting a Business Tag
This section contains:
•
•
Editing the Business Tag of a Network Element
To edit the business tag of a network element:
Step 1
Step 2
Step 3
Step 4
Step 5
The Confirm Perspective Switch dialog box appears.
Step 6
You can edit all the fields: Unique Key, Name, and Description.
Step 7
Editing the Business Tag of a Chassis, a Module, or an Interface
To edit the business tag to a chassis, a module, or an interface:
Step 1
Step 2
Step 3
The Confirm Perspective Switch dialog box appears.
Step 4
You can edit all the fields: Unique Key, Name and Description.
Step 5
Deleting a Business Tag
You can delete a business tag that you no longer require. To delete the network element business tag information, use the Monitoring perspective. To delete the chassis, module, or interface business tag information, use the Inventory perspective.
This section contains:
•
•
Deleting the Business Tag of a Network Element
To delete the business tag of a network element:
Step 1
Step 2
Step 3
Step 4
Step 5
Deleting the Business Tag of a Chassis, a Module, or an Interface
To delete the business tag of a chassis, a module, or an interface:
Step 1
Step 2
Step 3
![]()
![]()
![]()
![]()
![]()
![]()
![]()
![]()
Posted: Mon Sep 24 07:19:57 PDT 2007
All contents are Copyright © 1992--2007 Cisco Systems, Inc. All rights reserved.
Important Notices and Privacy Statement.