|
|

Cisco ESSE administrators can use the screens discussed in this chapter to manage software versions and upgrades. To view these screens, select the Administration tab at the top of the GUI.
The Software Status screen provides information on the software currently installed, including a description of the software version, installation date, and the installation status. A Software Status screen is shown in Figure 6-1.
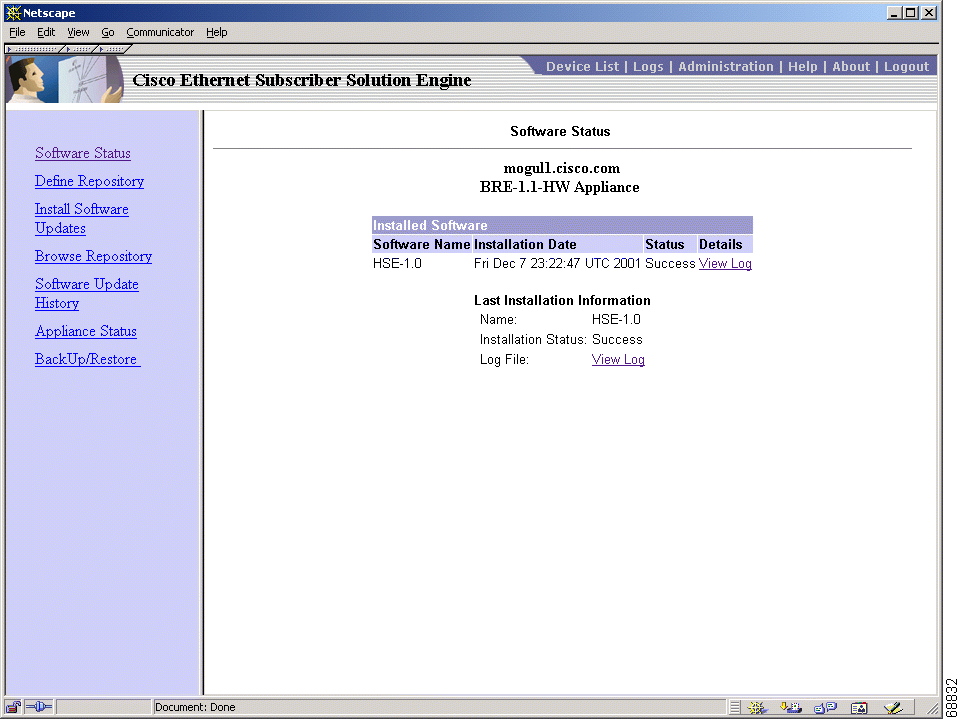
The screen displays information (see Table 6-1) about all of the software currently installed on the Cisco ESSE:
| Field | Description |
|---|---|
Software Name | Image name of the software |
Installation Date | Date the software was installed |
Status | Status of the installation |
Details | Selecting View Log displays the detailed Install Log for this software |
The Last Installation Information segment of the screen shows information about the most recent software installation. See Table 6-2.
| Field | Description |
|---|---|
Name | Image name of the software |
Installation Status | Status of the installation |
Log File | Selecting View Log displays the detailed Install Log for this software |
A Repository provides software update services to the Cisco ESSE. You must define the Repository host name or IP address and port number before you can connect to the repository to update the software. A Define Repository screen is shown in Figure 6-2.
Instructions for creating a repository are in the Cisco Ethernet Subscriber Solution Engine Installation and Setup Guide.

To define or redefine the Repository, fill in the following fields of the form provided in the GUI:
| Field | Description |
|---|---|
Host Name | The host name or IP address of the Repository. |
Port Number | The port number used by the software on the Repository. The default port number is 9851, and no other port number will work. |
Description | Description of the Repository; this field is optional; you can enter any description. |
The Install Software Updates screen allows you to update your Cisco ESSE software by selecting a software update from the Repository and pressing the Install button. You must define the Repository hostname and port number before you can use this option to update software. An Install Software Updates screen is shown in Figure 6-3.
When you update or reinstall software, the Cisco ESSE reboots. Therefore, you cannot access the Cisco ESSE during a software update; and you must log in again after updating the software. The GUI will automatically return to the login screen after a reboot.

Updating your software using this screen is considered a remote upgrade procedure. It is most useful if you need to upgrade multiple Cisco ESSEs at a time from one image. You can also upgrade by directly booting from an upgrade CD; doing so is useful if you are upgrading only a single Cisco ESSE.
To update the software, select a software version from the Compatible Updates section, Compatible Reinstallations section, or Complete Images section.
The Compatible Updates, Compatible Reinstallations, and Compatible Images sections of the screen display information listed about the software you can install. See Table 6-4.
| Field | Description |
|---|---|
Name | Name of the software |
Version | Version number of the software |
Summary | Brief description of the software |
Release Date | Release date of the software |
Details | Detailed description of the software |
To view details about the any of the listed software, click README in the Details field.
The Browse Repository screen (see Figure 6-4) allows you to browse the available complete images and software upgrades on the Repository.
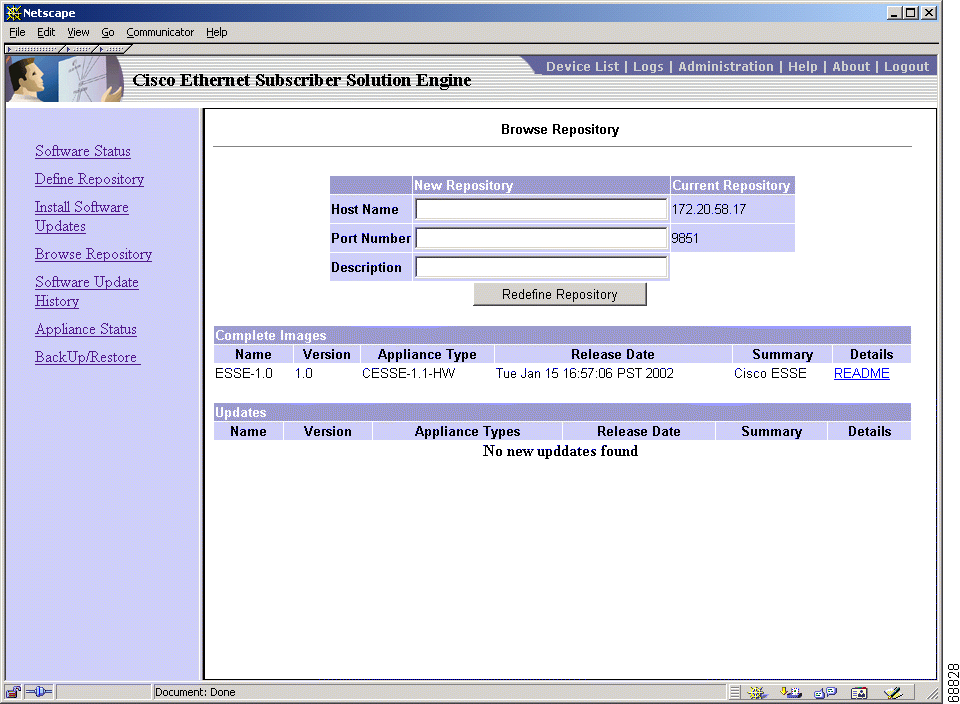
A Repository must be defined in order to browse software. To define or redefine the Repository, Fill in the fields of the form described in Table 6-5 and click Redefine Repository.
.
| Field | Description |
|---|---|
Host Name | The hostname or IP address of the Repository; if one is currently defined, its host name or IP address is listed. |
Port Number | The port number used by the software on the Repository. The default port number for a repository is 9851. |
Description | Description of the Repository. This field is optional; you can enter any description. |
The Complete Images section and Updates section of the screen display the information described in Table 6-6 for all software available on the Repository:
| Field | Description |
|---|---|
Name | Identifier for the software. |
Version | Version number of the software. |
Summary | Brief description of the software. |
Release Date | Release date of the software |
Details | Click README for a complete description of the software. |
The Software Update History screen (see Figure 6-5) provides information on current and previous versions of installed software, including the version number, installation date, and installation status.
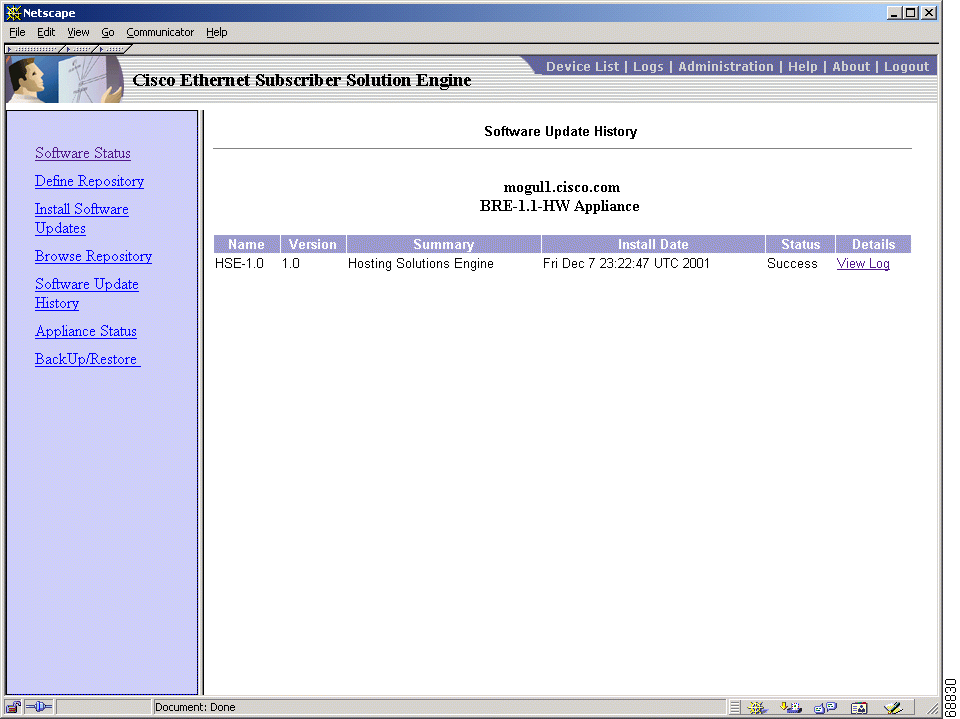
This screen shows only the update history, not a history of installed images. If you install a completely new image, the previous update history is erased. The Software Update History screen displays the information listed in Table 6-7:
| Field | Description |
|---|---|
Name | Name of the software |
Version | Software version |
Summary | Brief description of the software |
Install Date | Date software was installed |
Status | Status of the installation: Success: software was installed with no errors Warning: software was installed successfully with minor errors Error: software installation failed |
Details | The View Log link displays the detailed Install Log for this installation, including warning and error messages. |
The System Status screen (see Figure 6-6) provides information on Cisco ESSE resource usage, network statistics, active alerts, and process status. To view the System Status screen, select Appliance Status from the list of options on the left of the GUI screen.
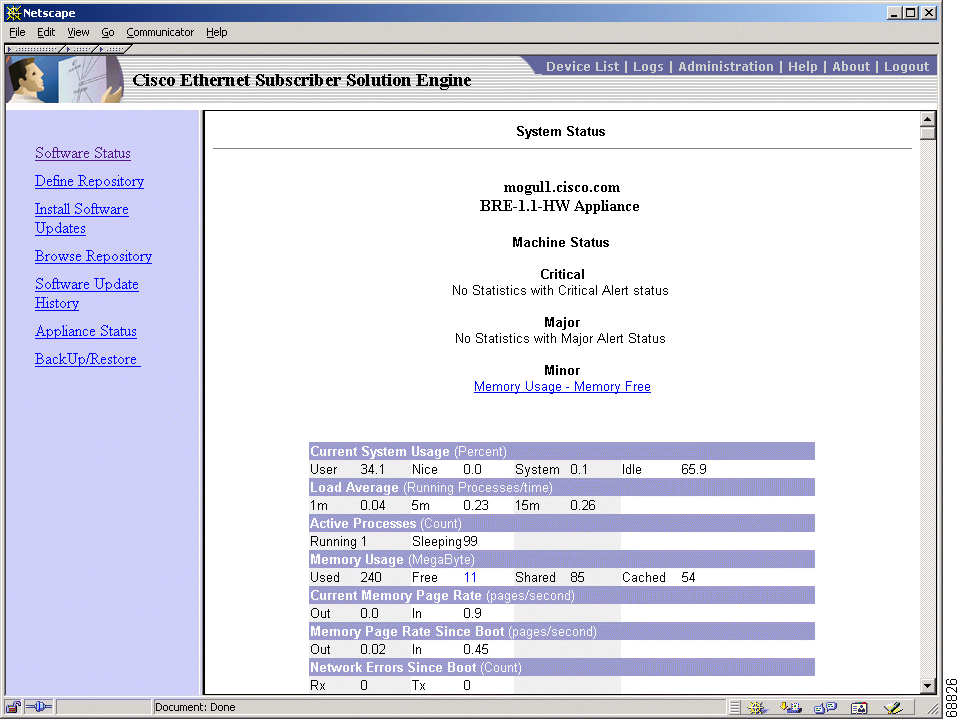
You can display the current status of the Cisco ESSE while it is running using this screen. This screen may take a few minutes to load.
The alert levels are:
Click any alert to scroll to that section of the table for details.
The Backup/Restore feature allows you to back up and restore Cisco ESSE and Cisco ONT 1031 log and user information stored on the system.
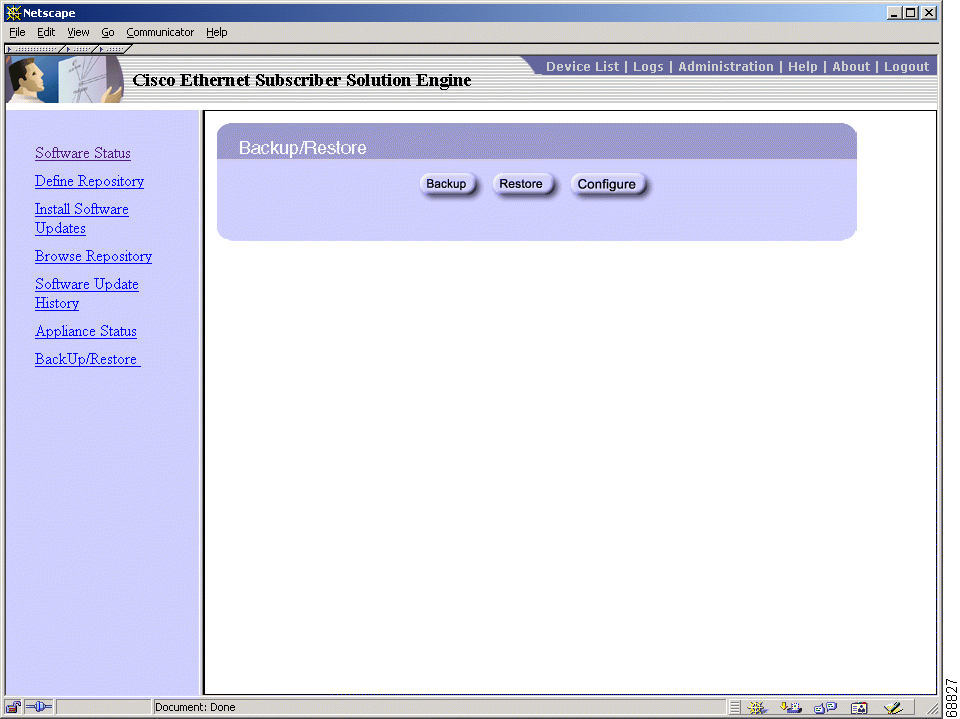
The Backup/Restore screen has the following buttons:
Backing up essential system files requires a backup location on a server. The backup location should be running an FTP server, because the Cisco ESSE pushes the backed-up data to the FTP server.
To configure a backup location:
Step 1 Press the Configure button on the Backup/Restore screen.
Step 2 Enter the hostname or IP for the backup location in the Hostname field.
Step 3 Enter the username you use on the backup location machine in the Username field.
Step 4 Enter the password you use on the backup location machine in the Password field.
Step 5 Re-enter the password to verify that it is correct.
Step 6 Optional: Specify the path to which the backup image is saved.
Step 7 Click Save.
Now that your backup location is configured, you may back up the Cisco ESSE data files.
The data backup automatically creates copies of all necessary data files.
 |
Note You should perform a backup every time you add a user. |
To back up the data files used by the Cisco ESSE, follow these steps:
Step 1 Click the Backup button.
Step 2 Make sure the backup location information is correct.
Step 3 Click OK.
The Cisco ESSE saves the backup image.
Step 4 To confirm that your data has been backed up, look at your backup location for a backup directory with saved Cisco ESSE hostname_date_time.inf and Cisco ESSE hostname_date_time.tar files.
To restore data from a backup location, follow these steps:
Step 1 Select a backup image from the drop-down list box. Images are listed by Cisco ESSE hostname and date and time of backup. The time is Cisco ESSE UTC (Coordinated Universal Time).
Step 2 Click Continue. The Restore Backup window opens.
Step 3 Click OK.
The Cisco ESSE shuts down and restarts after the data has been restored. After the system reboots, the GUI automatically returns to the login screen.
 |
Note When you update or reinstall software, the Cisco ESSE reboots. Therefore, you cannot access the Cisco ESSE during a software update; and you must log in again after updating the software. The GUI will automatically return to the login screen after a reboot. |
![]()
![]()
![]()
![]()
![]()
![]()
![]()
![]()
Posted: Wed Sep 4 22:00:58 PDT 2002
All contents are Copyright © 1992--2002 Cisco Systems, Inc. All rights reserved.
Important Notices and Privacy Statement.