|
|

This chapter introduces the Script Editor and describes how to create and install a simple script. It includes:
Subsequent chapters provide more detail about ICM software scripting language and other features of the Script Editor.
ICM software determines the best way to handle a call through routing scripts, which are programs that access information about calls and call center activity.
Routing scripts contain instructions that can:
You can create a specific set of scripts to be executed for each call type, such as Sales or Support. In addition, you can schedule different scripts to be used at different times of day, or different days of the week and year, for each call type.
A routing script resembles a programming flowchart consisting of nodes (represented as rectangles) and connections (represented as line segments). You define routing logic by selecting appropriate objects from a palette of drag-and-drop objects and placing them in the script workspace.
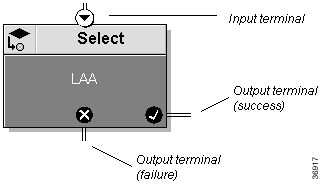
Each node has one or more terminals which are represented as small circles with an arrowhead, X, or checkmark. When ICM software executes a script, control flows into a node through an input terminal and out through an output terminal. Some nodes (like Start) have a single output terminal with an arrowhead. Others (like Select, shown in Figure 1-1) have two output terminals.
 |
Note The input terminal appears only after a connection is made to the node. |
If the node's operation succeeds, control flows from the node through the success output terminal (indicated by the checkmark). If the node's operation fails, control flows from the node through the failure output terminal (indicated by the X). For example, in the case of the Select node, if a target is selected, control flows through the success terminal. If no target is found to satisfy the selection rule, control flows through the failure terminal.
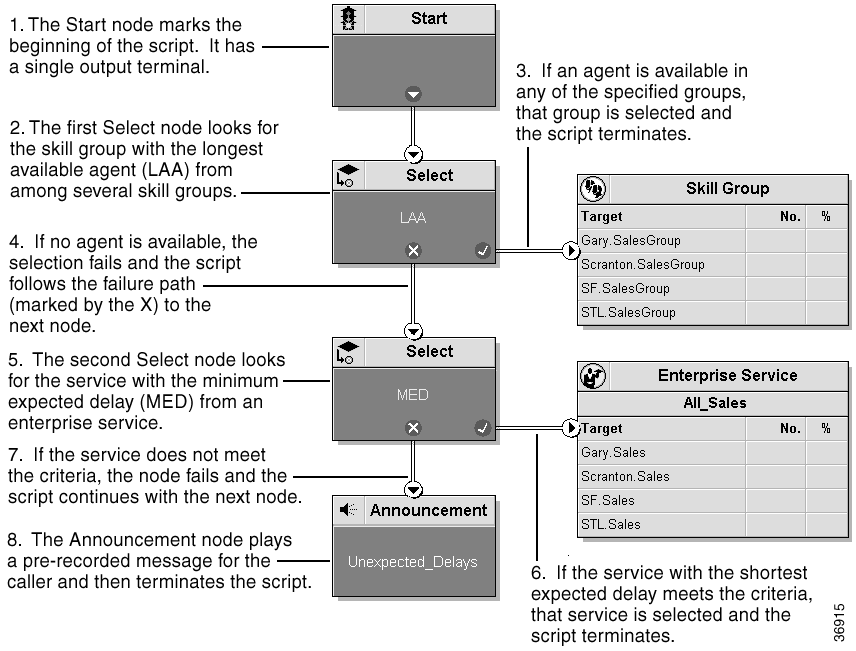
The information you provide through nodes, and the connections you establish between them, instruct ICM software how to best handle a call. Figure 1-2 shows a simple script and describes the steps it would take in processing a routing request.
An administrative script executes periodically on a specific time schedule, rather than in response to a route request. Administrative scripts can perform background processing such as setting persistent variables—that can then be used by routing scripts—or collecting data from third-party systems.
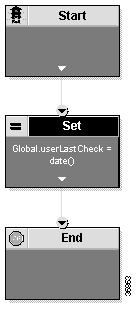
Figure 1-3 shows an administrative script that sets the userLastCheck global variable to the current date.
 |
Note Only a subset of the Script Editor's nodes can be used in an administrative script. (The Script Editor will prevent you from inserting invalid objects in an administrative script.) |
For more information about using administrative scripts, see Script Administration.
You create routing scripts using the Script Editor tool. The parts of the Script Editor user interface are shown in Figure 1-4. (Not all menu and toolbar options appear in the Script Editor window until you have opened a script file.)
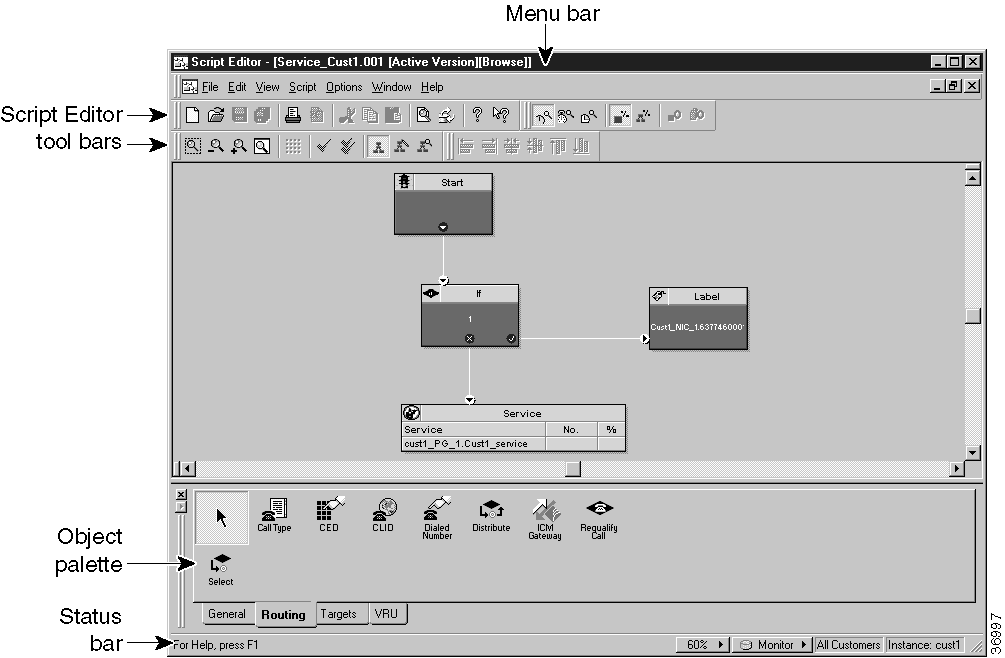
The Script Editor toolbars correspond to command options available through the menus. (For example, the default Scripting toolbar contains options available through the Script menu.) Some toolbars, such as the Main toolbar, contain options from more than one menu.
When you initially open the Script Editor, the toolbars are anchored at the top of the Script Editor's main window. However, you have the option of changing the appearance and location of the toolbars. For instance, you can:
To change the appearance of a toolbar or icons, use the View > Toolbar menu options. (To directly access this shortcut menu, position the pointer anywhere on a toolbar and left-click the mouse.)
To move a toolbar, position the pointer over the toolbar's "gripper"—the double vertical lines on the graphic—press-and-hold the left mouse button, and do the following:
The object palette contains icons that represent commands in ICM software scripting language. You drag object icons into the Script Editor window's workspace, where they become scripting language nodes.
The object palette contains four tabs which group the object icons by category:
You can reposition the object palette as you would a toolbar. In addition, you can choose to display large icons (with text labels) or small icons (without text labels.)
There are two methods of moving objects into the workspace:
The Script Editor supports three modes:
 |
Note For further information on monitor mode, see Script Administration. |
The Script Editor displays the mode of the current script in the Script Editor status bar. In order to make changes to a script, the script must be in edit mode. (When you create a new script, the Script Editor automatically places it in edit mode.)
You can change the mode at any time by choosing the appropriate option from the Script menu (Edit Script, Browse Script, or Monitor Script) or by clicking one of the mode buttons.
Script Editor online help is available to provide information about Script Editor options and features. To access Script Editor online help:
 |
Note Context-sensitive help is available only for Script Editor nodes. |
To successfully create or edit a routing script file that can then be scheduled and run by ICM software, you must do the following:
 |
Note You can also create a script by copying one from another system. For more information, see Importing and Exporting Scripts in Script Administration. |
The sections that follow take you through the process of creating a simple script.
To begin creating a script, you must invoke the Script Editor and set up the initial window.
Step 2 In Script Editor, choose File > New from the menu bar or click the New Script button on the main toolbar. The Create a New Script dialog box appears.
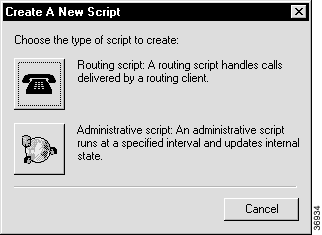
There are two types of scripts:
 |
Note Administrative scripts use a subset of object palette icons: all of the objects on the General tab, plus the Wait object (which appears on the VRU tab). |
Step 3 Click the button for a routing script. This creates an empty script in edit mode that consists only of a Start node.
After a script is opened and in edit mode, you are free to add, modify, delete and connect script nodes. This section describes how to insert the following nodes:
First, you'll insert a Select node and Skill Group nodes to set a rule which ICM software can use to choose among a set of targets.
Step 2 Position the mouse pointer over the output terminal of the Start node. Press-and-hold the left mouse button and drag a connection to the Select node. A connection line appears between the two nodes and an input terminal appears on the Select node.
Step 3 Position the mouse pointer over the Skill Group object on the object palette's Targets tab. press-and-hold the left mouse button and drag a Skill Group object to the right of the Select node you created.
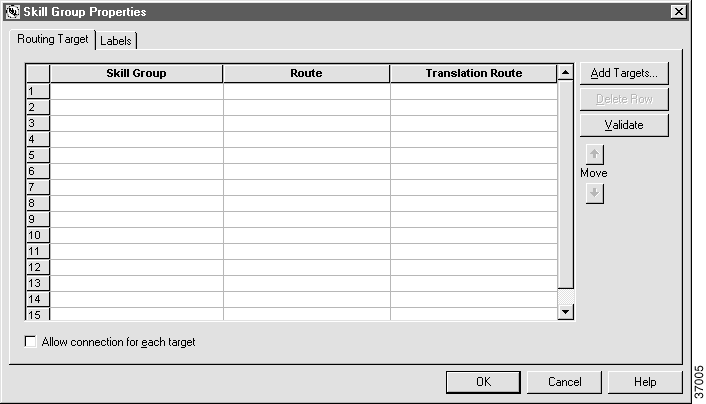
Step 5 Click the Add Targets button. The Add Skill Groups Targets dialog box appears.
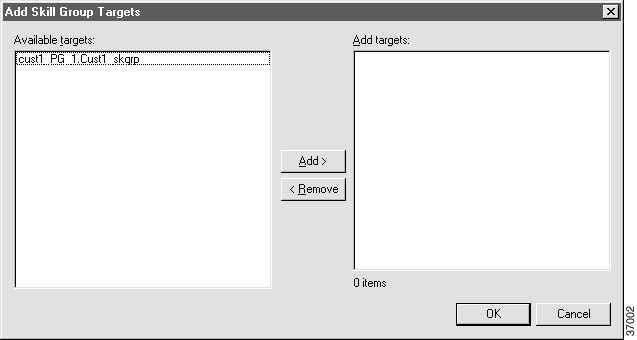
Step 6 Select a value from the Available Targets list and click the Add button. Repeat until all the skill groups you require appear in the Add Targets list.
Step 7 Click OK to add the changes to the Skill Group Properties dialog box.
 |
Note If there is only one route option available, it is automatically inserted in the dialog box. If there is more than one option available, you must use the Route or Translation Route drop-down lists to select a route for the target. |
Step 8 If necessary, specify a Route or Translation Route value using the drop-down lists.
Step 9 Click OK to close the Skill Group Properties dialog box.
Step 10 Position the mouse pointer over the Select node's success output terminal. press-and-hold the left mouse button and drag a connection to the Skill Group routing target. A connection line appears between the Select node and the Skill Group routing target and an input terminal appears on the routing target.

Step 11 Right-click the Select node and choose Properties from the shortcut menu. The Select Properties dialog box appears.
Step 12 Click OK to accept the default values—the Standard selection rule of Longest Available Agent (LAA) and the evaluation order of Start with First Target—and close the dialog box.
 |
Note For more information on selection rules, see Standard Selection Rules in Target Selection. |
Next, you'll connect an Announcement node to the Select node's failure terminal.
The Announcement node provides call-handling instructions if ICM software ever runs into the situation where it cannot route a call to a member of the target skill group. In such a case, ICM software will play a pre-recorded message and terminate the call.
Step 2 Right-click the Announcement node and choose Properties from the shortcut menu. The Announcement dialog box appears, displaying all announcements currently configured for the system.
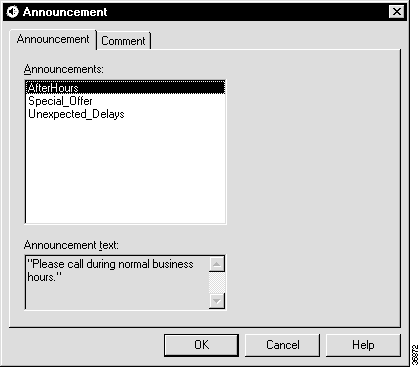
Step 3 Choose a name from the Announcements list.
Step 4 Click OK to apply the changes and close the dialog box.
Step 5 Position the mouse pointer over the failure output terminal of the second Select node, press-and-hold the left mouse button, and drag a connection to the Announcement node. A connection line appears between the two nodes.
The script is complete and you can now validate and save it.
Before you save a script, you should check it for errors and to ensure that it is valid and consistent with currently installed configuration information. When you validate a script, the Script Editor checks whether or not there are any problems and groups them into two categories:
The Script Editor provides several ways to check your script for errors:
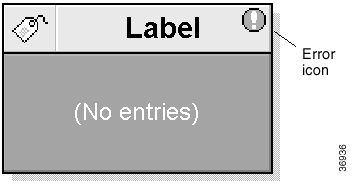


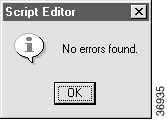
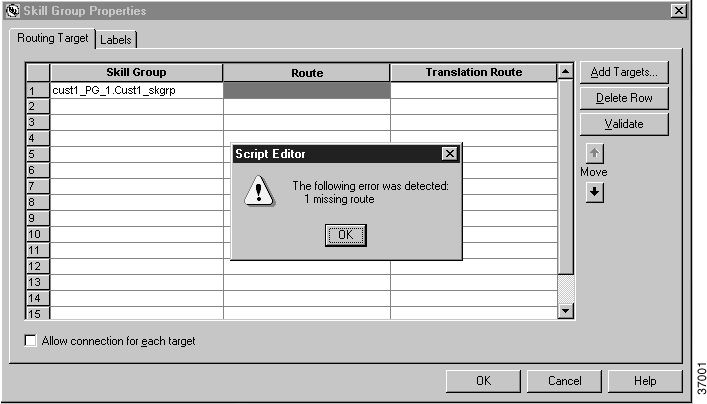
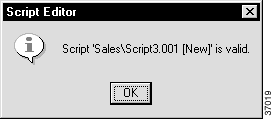
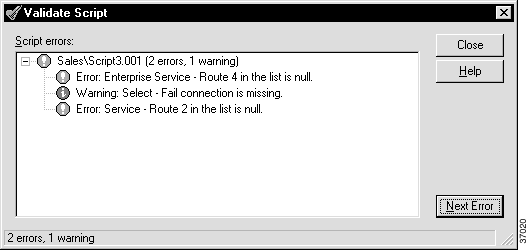
Step 2 Click the Next Error button to step through the errors and warnings. As you move through the messages, the Script Editor highlights the script object that caused the error.
Step 3 When you have finished reviewing the errors, click Close to close the dialog box.
Step 4 Fix any problems before saving the script.
Once you validate the script, save it.
 |
Note ICM software cannot begin using a script until you have saved it. |
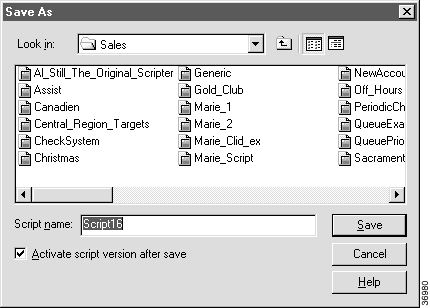
Step 2 The Script Editor assigns a temporary name (such as SCRIPT1) in the Script Name field.
Step 3 You can type a new name in the Script Name field or choose the name of an existing script from the selection list.
Step 4 Optionally, deselect the Activate Script Version After Save checkbox.
 |
Note When you save a script, the Script Editor attaches a version number to
the name. By default, the Script Editor will make the most recent
version of a script the active version. An active script is the version
that ICM software runs if the script is currently scheduled. (For more
information on active scripts, see
Script
Administration.) Activate requires that the script be put in browse mode, which releases the lock. If a script is not activated, the script stays in edit mode and the lock is not released. |
Step 5 Click Save to save the script to ICM software database. The Script Editor automatically tests that the script is valid and the script lock you hold on it is released so that other users can make changes to the script.
 |
Note If the script is not valid, you can still save it, but ICM software cannot put it into service. |
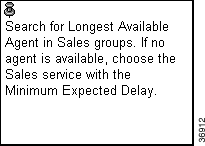
You might find it useful to display text other than the default within a node. For example, the Announcement node's text default is the name of the announcement you select. If you prefer that the node display the text of the message the caller will actually hear, you can enter that text using the Comment tab in the node's Properties dialog box.
Step 2 Click the Comment tab. (The Announcement node's Properties dialog box Comment tab is shown below.)
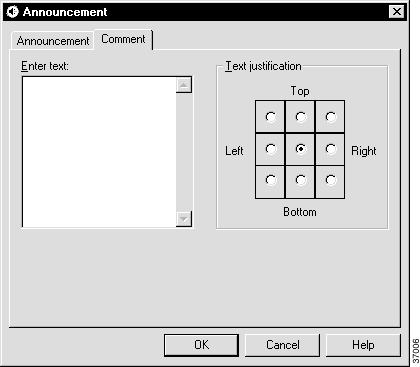
Step 3 Enter the text you want displayed in the node and choose how you want the text justified within the node by clicking one of the nine alignment boxes. (Vertically, you can justify the text to the top, bottom, or center of the node. Horizontally, you can justify the text to the left, right, or center of the node.)
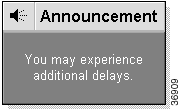
Step 4 Click OK to return to the script window workspace. The text you entered now appears in the node, centered both vertically and horizontally, in place of the announcement name.
Occasionally, you might want to add a general comment to the script; for example, a comment that describes the purpose of the entire script rather than just a single node. You would use the Comment object on the object palette's General tab to specify such text.
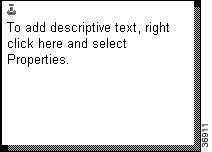
Step 2 Right-click the comment and choose Properties from the shortcut menu. The Comment Properties dialog box appears.
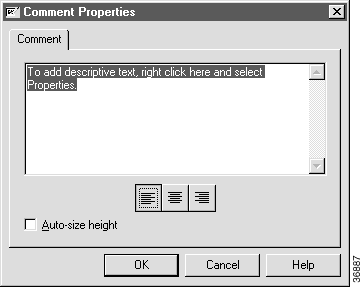
Step 3 Enter the text you want to appear in the comment.
Step 4 Click one of the three justification buttons to indicate that the text be left-justified, centered, or right-justified. If you want the height of the comment object to be automatically adjusted to the length of the text, choose Auto-Size Height. Otherwise, you can adjust the height by sizing the comment with the mouse.
Step 5 Click OK to return to the script window. The text you entered appears in the comment object.
When you have finished editing, validating, and saving the script, exit the Script Editor.
Within the Script Editor, select File > Exit. If you have any unsaved changes, the Script Editor prompts you to save the changes.
![]()
![]()
![]()
![]()
![]()
![]()
![]()
![]()
Posted: Tue Jun 25 08:16:58 PDT 2002
All contents are Copyright © 1992--2002 Cisco Systems, Inc. All rights reserved.
Important Notices and Privacy Statement.