|
|

This chapter gives an overview of the Cisco Customer Premises Equipment (CPE) Commander software and describes how to install and access it in order to manage Cisco 67x device settings. The Cisco CPE Commander works on PC platforms (Windows NT, Windows 2000, Windows 95, and Windows 98) and Macintosh platforms.
The Cisco CPE Commander 1.4 software adds the following new features:
 |
Note The Cisco CPE Commander 1.4 software is compatible only with the Cisco Broadband Operating System (CBOS) 2.4 or higher. |
The following sections describe how to install the Cisco CPE Commander software on either a PC or Macintosh platform.
To install the Cisco CPE Commander software on a PC:
Step 1 Insert the Cisco CPE Commander CD-ROM into your CD-ROM drive.
Step 2 Using Windows Explorer, navigate to the directory folder named Commander.
Step 3 Double left-click the Commander folder.
Step 4 Locate the setup.exe file and double left-click.
Step 5 After each dialog box, click Next.
The final InstallShield prompts you to place a shortcut on the desktop or in the Startup menu. If you answer yes to either of these, the InstallShield places a shortcut to the Cisco CPE Commander on your desktop and in your Startup menu. If a shortcut to the Commander resides in your Startup menu, the Cisco CPE Commander launches automatically each time you boot up.
Step 6 Click Next when you are finished.
Step 7 After you complete the installation, reboot your machine.
After you reboot, the Cisco CPE Commander automatically starts up if you checked the option in Step 5 at the final InstallShield prompt. For the steps to access and launch the Cisco CPE Commander application, see the "Accessing the Cisco CPE Commander" section.
To install the Cisco CPE Commander software on a Macintosh platform:
Step 1 Insert the Cisco CPE Commander CD-ROM into the CD-ROM drive on your computer.
The Cisco CPE Commander icon appears on the desktop.
Step 2 Double-click the Cisco CPE Commander icon. This opens the Cisco CPE Commander volume.
Step 3 Double-click the Cisco CPE Commander self-extracting archive. The filename contains a .sea extension.
This opens the self-extracting archive and prompts you to select a folder for the Cisco CPE Commander software.
Step 4 Choose the folder or drive on which you want to install Cisco CPE Commander software.
Step 5 Click OK.
You have installed Cisco CPE Commander software. For the steps to access and then launch the Cisco CPE Commander application, see the "Accessing the Cisco CPE Commander" section.
The following sections describe how to access and launch the Cisco CPE Commander.
To access and launch the CPE commander:
Step 1 Access the Cisco CPE Commander in one of three ways:
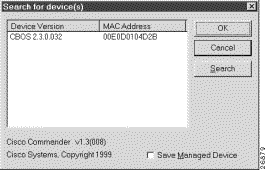
The dialog box shown in Figure 1-1 appears.

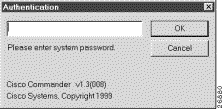
Step 2 Highlight the name of the Cisco CPE device and click OK. The Authentication dialog box appears. (See Figure 1-2.)

Step 3 Enter the Exec-level password and click OK.
 |
Note Cisco recommends that you set an Exec password for security reasons. |
You are now logged on to the Cisco CPE Commander. For more information, see "Using the Cisco CPE Commander." The data displayed by the Cisco CPE Commander is automatically updated every 2 seconds.
To access the Cisco CPE Commander on a Macintosh platform:
Step 1 Go to the folder in which you placed the Cisco CPE Commander software.
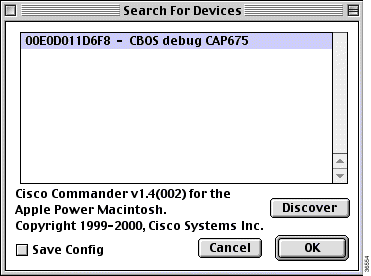
Step 2 Double-click the Cisco CPE Commander icon.The dialog box shown in Figure 1-3 appears.

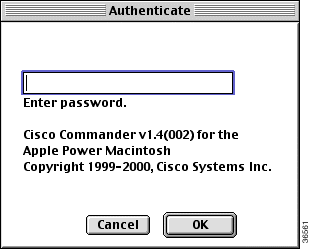
Step 3 Highlight the name of the Cisco CPE device and click OK. The Authentication dialog box appears. (See Figure 1-4.)

Step 4 Enter the Exec-level password and click OK.
 |
Note Cisco recommends that you set an Exec password for security reasons. |
You are now logged on to the Cisco CPE Commander. For more information, refer to "Using the Cisco CPE Commander." The data displayed by the Cisco CPE Commander is automatically updated every 2 seconds.
![]()
![]()
![]()
![]()
![]()
![]()
![]()
![]()
Posted: Sat Sep 28 01:24:02 PDT 2002
All contents are Copyright © 1992--2002 Cisco Systems, Inc. All rights reserved.
Important Notices and Privacy Statement.