|
|

This chapter provides instructions for installing the element management system (EMS) software on a user workstation, and includes the following sections:
EMS is a powerful operations and management tool with a graphical user interface. EMS enables you to provision, manage, and monitor up to 2,500 nodes within a Cisco 6700 series or Cisco IAD1101 network.
The following three components make up EMS:
 |
Note You must close any open applications on the workstation before installing EMS. Cisco Systems recommends that you reboot the workstation before installing EMS. |
The EMS workstation must have an Ethernet port to communicate with the NE. Table 2-1 lists the minimum system requirements for each supported operating system.
| Operating System | Platform | RAM | Disk Space |
|---|---|---|---|
Windows 951 | 166 MHz Pentium-class CPU | 32 MB (64 MB recommended) | 100 MB (1 GB recommended) |
Windows NT (with Service Pack 3) | 233 MHz Pentium-class CPU | 128 MB | 1 GB |
UNIX (Solaris 2.5 or 2.6) | Ultra 5 or greater | 128 MB | 1 GB |
| 1Windows 95 workstation must use EMS Lite, which does not offer alarm server or network configuration server applications. |
On a Cisco 6732 Multiservice Access Platform, connect a crossover Ethernet cable in one of two ways:
Use the following procedures to install EMS on a Windows NT workstation.
|
Note If the EMS alarm server and the EMS network configuration server run on the same node that you intend to upgrade, you must shut them down before installing a new version of EMS on that node. |
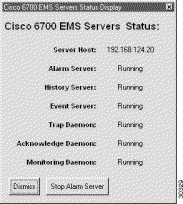
Step 2 EMS launches the alarm server status display. (See Figure 2-2.)
Step 3 Click the Stop Alarm Server button. EMS displays the following dialog box. (See Figure 2-3.)
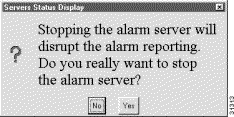
Step 4 Click Yes to shut down the alarm server and return to Cisco 6700 NetView.
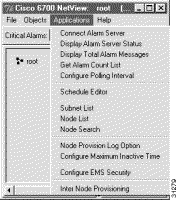
You must exit EMS on the workstation before installing a new version of EMS. To exit EMS, select File > Exit from Cisco 6700 NetView. (See Figure 2-4.)


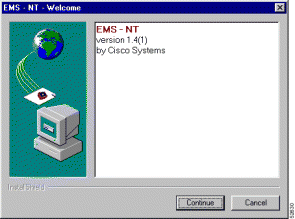
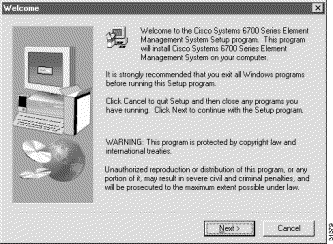
The Cisco 6700 Element Management System installation window appears. (See Figure 2-6.)
Step 2 Click Continue to begin the installation. Cisco recommends that you close all other applications before proceeding. (See Figure 2-7.)
Step 3 Click Next to proceed.
Step 4 Select the directory in which EMS will be installed. (See Figure 2-8.)
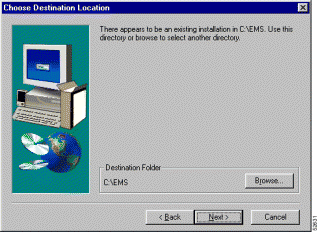
Step 5 If you are performing a first-time installation of EMS on your workstation, a folder called EMS will be created on the root directory (C:\EMS). You can accept this directory by clicking on the Next button, or you can change the directory with the Browse button.
Step 6 If you are upgrading your EMS software from a previous version, the installation program will replace the old version with the new version.
Step 7 When prompted for the alarm server IP address, enter the IP address of the EMS alarm server. (See Figure 2-9.) Contact your EMS administrator for the correct IP address.
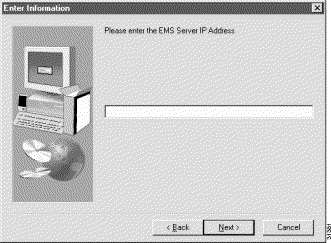
Step 8 Click Next to proceed.
Step 9 If you are upgrading EMS from a previous version, EMS will provide the alarm server IP address from the previous EMS installation. Click Next to accept this IP address, or replace it with a new IP address.
Step 10 When prompted for the network configuration server IP address, enter the IP address of the EMS network configuration server. (See Figure 2-10.) Contact your EMS administrator for the correct IP address.

Step 11 Click Next to proceed.
Step 12 If you are upgrading EMS from a previous version, EMS will provide the network configuration server IP address from the previous EMS installation. Click Next to accept this IP address, or replace it with a new IP address.
Step 13 You will be prompted to verify the installation information you have supplied. (See Figure 2-11.)
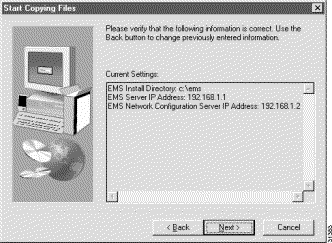
Step 14 If you wish to change this information, use the Back button to make changes.
Step 15 Click Next to proceed with the installation of EMS program and data files.
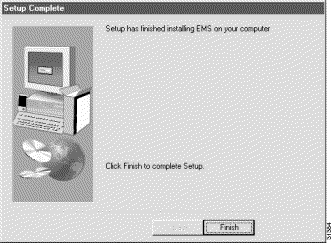
Step 16 When the installation file transfer is complete, click Finish to end EMS installation and reboot the workstation. (See Figure 2-12.)
When the installation is complete, EMS places icons for the EMS Netview, EMS Alarm Server, and EMS Network Configuration Server on your desktop. All three icons have the same "magic lamp" image. (See Figure 2-13.)

Use the following procedures to install EMS on a Windows 95/98 workstation.
You must exit EMS on the workstation before installing a new version of EMS. To exit EMS, select File > Exit from Cisco 6700 NetView. (See Figure 2-14.)
The Cisco 6700 Element Management System Lite installation window appears. (See Figure 2-16.)
Step 2 Click Continue to begin the installation. Cisco recommends that you close all other applications before proceeding. (See Figure 2-17.)
Step 3 Click Next to proceed.
Step 4 Select the directory in which EMS Lite will be installed. (See Figure 2-18.)
If you are performing a first-time installation of EMS on your workstation, a folder called EMS will be created on the root directory (C:\EMS). You can accept this directory by clicking Next, or you can change the directory with the Browse button.
If you are upgrading your EMS software from a previous version, the installation program will replace the old version with the new version.
You will be prompted to verify the installation information you have supplied. (See Figure 2-19.)
Step 5 If you wish to change this information, use the Back button to make changes.
Step 6 Click Next to proceed with the installation of EMS program and data files.
Step 7 During the installation, EMS updates the AUTOEXEC.BAT file on the workstation. (See Figure 2-20.)
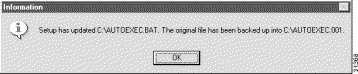
Step 8 Click OK to proceed.
 |
Caution During the installation, you may see a window with the message "Warning: Batch file update failed. Please update file by hand." This message indicates that the EMS install application was unable to edit the AUTOEXEC.BAT file on your workstation. Complete the following steps, then proceed to the "Editing AUTOEXEC.BAT" for further instructions. |
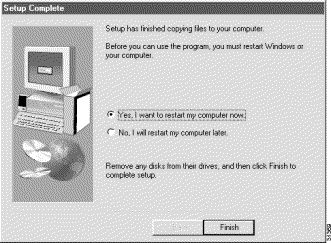
Step 9 When the installation file transfer is complete, click Finish to end EMS installation and reboot the workstation. (See Figure 2-21.)
Step 10 After the workstation has been rebooted, EMS places the Cisco 6700 NetView icon on your desktop. (See Figure 2-22.)

The following procedure shows how to enter EMS system variables into the AUTOEXEC.BAT file for your workstation.
This procedure should only be used in the event of a batch update failure in the EMS Lite installation. If you did not receive a failure message while installing EMS Lite, do not perform this procedure.
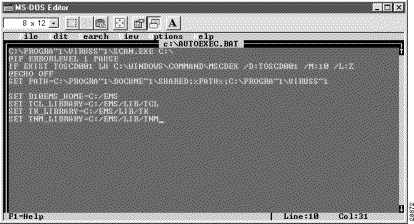
Step 2 Type edit autoexec.bat in the text window, and click OK to launch the MS-DOS editor. (See Figure 2-23.)
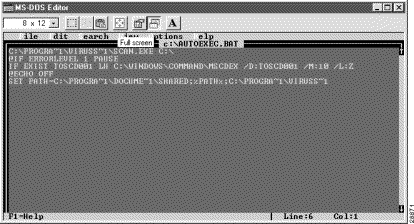
Step 3 Use the down arrow key to scroll down past the last line of existing text, and enter the following lines of text exactly as shown (see Figure 2-24):
SET B10EMS_HOME=C:/EMS

SET TCL_LIBRARY=C:/EMS/LIB/TCL

SET TK_LIBRARY=C:/EMS/LIB/TK

SET TNM_LIBRARY=C:/EMS/LIB/TNM
|
Note You must use the forward slash character (/ ) when entering these variables. This procedure assumes that EMS was installed to the default folder, C:\EMS. |
Step 4 Select File > Save to save this configuration.
Step 5 Select File > Exit to close the editor.
Step 6 Close all applications and reboot the workstation to load the EMS system variables.
The install script creates two scripts—ems.csh and ems.ksh—in the EMS installation directory. If you are upgrading or reinstalling EMS on the workstation, the script files, network configuration, and alarm information are retained from the previous installation.
EMS may be installed in any directory in which you have write privileges (root directory). The EMS distribution package for UNIX (ems_unix) contains three files:
To install EMS on a UNIX workstation:
Step 2 Choose whether you want to install directly from the CD-ROM or first copy the distribution package files into a user account. If installing directly from the CD-ROM, go to Step 3. Otherwise, enter the following commands:
# cp * user directory

# cd user directory
Step 3 Add execute rights to the install script:
# chmod +x emsinstall
Step 4 Execute the install script:
# ./emsinstall


                              EMS Unix Installation
                              ---------------------
Step 5 Press Return to select the default file name and location, ./ems.tar.
Enter tar file name [./ems.tar]:

Setting up installation...done.
Step 6 Enter a fully-qualified path name for the EMS installation directory. If the B10EMS_HOME environment variable has already been set from a previous installation, the script permits you to use that value.
Where would you like to install the EMS?
Enter fully qualified path name: /export/home0/ems


Creating /export/home0/ems...done.

Extracting EMS files...
...
Placing EMS files in /export/home0/ems...done.
Step 7 Enter y to install the network configuration server, or if the server is already installed or if you do not wish to install it, enter n.
Will this installation use the network configuration server (y/n)? [n]: y


Generating script files with environment variables...done.
Files /export/home0/ems/ems.csh
and /export/home0/ems/ems.ksh
have been created. Set the value of B10EMS_SERVER and
c6700NET_SERVER if necessary in the appropriate file and source it before running the EMS.
Hit Enter to complete the installation...

Completing installation...

EMS installation is complete. The EMS includes the 'nmtrapd' program which requires root
permissions. Please get root permissions and type >> ./emsinstall root << to install it.
Step 8 If you do not want to install the alarm server, go to Step 12.
To install the alarm server, obtain the root password for your workstation, then complete the following steps:
Step 9 Set user to root:
# su
Step 10 Execute the emsinstall script with root privileges:
# ./emsinstall root
The install script prompts for the fully-qualified path name of the EMS installation directory, unless that directory is already defined in the environment.
Step 11 Exit from the root login:
# exit
Step 12 You must configure the IP addresses of the alarm server and network configuration server. Use vi (a standard text editor under UNIX) or another text editor to set the B10EMS_SERVER (alarm server) and C6700NET_SERVER (network configuration server) variables. Contact your network administrator for the correct IP addresses.
The following example uses vi to edit the ems.csh file:
# vi ems.csh

"ems.csh" 12 lines, 406 characters
setenv B10EMS_HOME /export/home0/ems
setenv B10EMS_SERVER
setenv C6700NET_SERVER
setenv TCL_LIBRARY $B10EMS_HOME/lib/tcl
setenv TK_LIBRARY $B10EMS_HOME/lib/tk
setenv TNM_LIBRARY $B10EMS_HOME/lib/tnm
setenv TNM_NMTRAPD $B10EMS_HOME/bin/nmtrapd
if (\Qsetenv | grep LD_LIBRARY_PATH\Q != "") then setenv LD_LIBRARY_PATH
${LD_LIBRARY_PATH}:${B10EMS_HOME}/lib
else setenv LD_LIBRARY_PATH ${B10EMS_HOME}/lib
endif
Step 13 After editing the ems.csh or ems.ksh file, you must update the environment.
For C-Shell, enter source ems.csh. Alternatively, you can append the ems.csh file to the ~/.cshrc file, log out, and log in.
For Korn Shell, enter ems.ksh. Alternatively, you can append the ems.ksh file to the ~/.profile file, log out, and log in.
The following example uses source ems.csh to update the environment:
# source ems.csh

# env

...
B10EMS_HOME=/export/home0/ems
B10EMS_SERVER=171.68.205.106
C6700NET_SERVER=171.68.205.106
TCL_LIBRARY=/export/home0/ems/lib/tcl
TK_LIBRARY=/export/home0/ems/lib/tk
TNM_LIBRARY=/export/home0/ems/lib/tnm
TNM_NMTRAPD=/export/home0/ems/bin/nmtrapd
LD_LIBRARY_PATH=/export/home0/ems/lib
# exit
EMS environment variables are specified in the ems.csh and ems.ksh files (see Table 2-2):
| Variable | Description/Location |
B10EMS_HOME | The EMS installation directory |
B10EMS_SERVER | IP address of the computer running the alarm server |
C6700NET_SERVER | IP address of the computer running the network configuration server |
LD_LIBRARY_PATH | EMS installation directory/lib |
TCL_LIBRARY | EMS installation directory/lib/tcl |
TK_LIBRARY | EMS installation directory/lib/tk |
TNM_LIBRARY | EMS installation directory/lib/tnm |
TNM_NMTRAPD | EMS installation directory/bin/nmtrapd |
The Element Management System (EMS) can be started by using C-Shell or Korn Shell.
Step 2 Use these scripts to start the alarm server, network configuration server, and Cisco 6700 NetView:
|
Note The display environment must be set when the alarm server is running, or the environment variable must point to some other display that is up. If this is not done, logging out of EMS will close the display environment and shut down the alarm server. |
|
Note The alarm server uses ports 162 and 2321 as trap daemons. Make sure that these ports are not in use when starting the alarm server. |
These programs are in the EMS installation directory/bin directory, and they can be started from any directory included in the path.
Step 2 Log out, and log back in.
or
Step 2 Log out, and log back in.
If you have problems installing EMS, the information in this section might be helpful. If you still have difficulty with your installation, contact a customer service representative. (See "Technical Assistance Center" of the Preface.)
The following section describes error messages, and their possible solutions, that might appear when you install EMS.
During the installation, you get an error similar to the following:
Warning: Batch file update failed. Please update file by hand.
This error indicates that the EMS install application was unable to edit the AUTOEXEC.BAT file on your workstation. To update the AUTOEXEC.BAT file on a workstation, complete the procedure "Editing AUTOEXEC.BAT":
![]()
![]()
![]()
![]()
![]()
![]()
![]()
![]()
Posted: Mon Feb 5 12:55:31 PST 2001
All contents are Copyright © 1992--2001 Cisco Systems, Inc. All rights reserved.
Important Notices and Privacy Statement.