|
|

Time division multiplexing (TDM) cross connections are available on the following line cards:
To create a TDM cross connection:
Step 1 To start internal cross connect provisioning, enter the node view of the node to be provisioned.
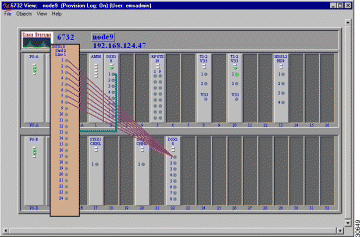
Step 2 Move the cursor to the specific line (facility) that will be provisioned. Right-click the line and select TDM Cross Connect. This launches an expanded view of the line card and line to be provisioned. (See Figure 8-1.)
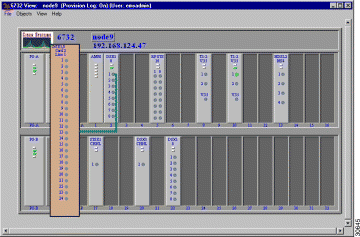
Step 3 Move the cursor to the DS0 line to be provisioned. Click the DS0 line and drag the cursor to the desired destination line. (See Figure 8-2.)
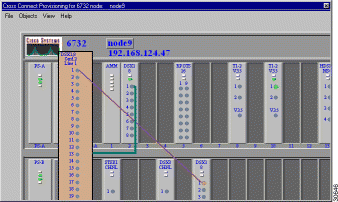
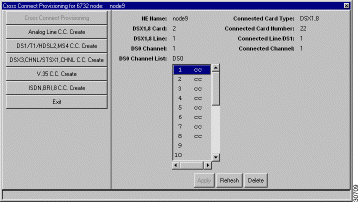
Step 4 After the visual cross connect is created, the cross connect provisioning screen will appear. (See Figure 8-3.) From this screen, you can select the number of DS0 lines to be cross connected.
Step 5 Determine the DS0 lines that are to be cross connected. In the DS0 Channel List on the left side, select the DS0 lines to be cross connected. Select the destination lines in the DS0 Channel List on the right side. Click Create to complete the cross connect provisioning process.
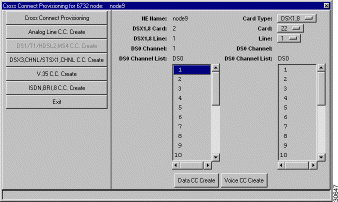
EMS confirms the completion of the cross connects with the text "cc" placed next to each successfully provisioned line. (See Figure 8-4.)
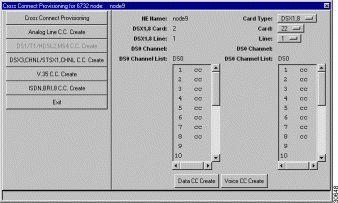
Step 6 Click Exit to return to the node view. All of the provisioned cross connects will be shown. (See Figure 8-5.)
The cross connect provisioning screen can also be used to delete cross connects. Cross connect deletions can be initiated from the node view with cross connects displayed, or from the cross connect provisioning window (select the Cross Connect Provisioning option).
Step 1 With the cross connects displayed from the node view, double-click a specific cross connection line. EMS launches the cross connect provisioning window. (See Figure 8-6.)
Step 2 From the DS0 Channel List, select the cross connections to be deleted. Click Delete to remove the cross connections. EMS confirms the deletion by removing the "cc" text next to each line.
To end internal cross connect provisioning, right-click the expanded line card and select End Cross Connect Display.
Inter-node (external) cross connects are made from one Cisco 6700 NE to another Cisco 6700 NE.
Step 1 From the node view of the node that will initiate the cross connect provisioning (source), select the Inter Node Provision option. Click and drag a line between the nodes to be cross connected. A red line will indicate the path. (See Figure 8-7.)
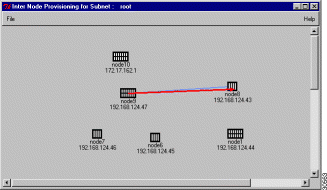
A Path List window will appear after the visual link is made between the two nodes. (See Figure 8-8.) This indicates the path that will be used to communicate between the two nodes (Path ID) and the number of nodes that are included in the path (Node Count). Networks that contain more nodes and different configurations might have multiple paths from the source node to the destination node. In the example below, Path ID 0 is selected.

Step 2 Move the cursor to the red line that was just created. Double-click this line to launch the Inter-Node Cross Connect Provisioning window.
Step 3 From the Inter-Node Cross Connect Provisioning screen, the EMS displays all of the line cards that are installed in the linked nodes. Note that the inter-node link is displayed on this screen.
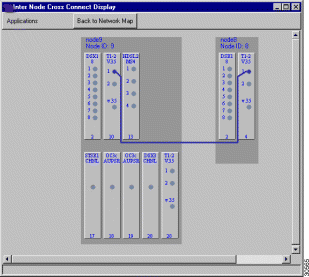
Step 4 Move the cursor to the desired card and line on the source node. Right-click the specific line, and select Start Inter Node Cross Connect from the popup menu. EMS launches the expanded (cross connect) line card view. (See Figure 8-10.)
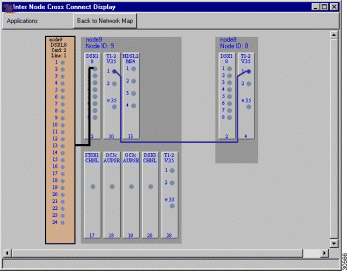
Step 5 Drag a line from the source DS0 to the destination line on the other NE. (See Figure 8-11.)
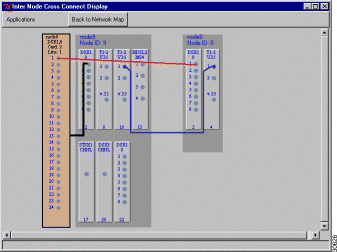
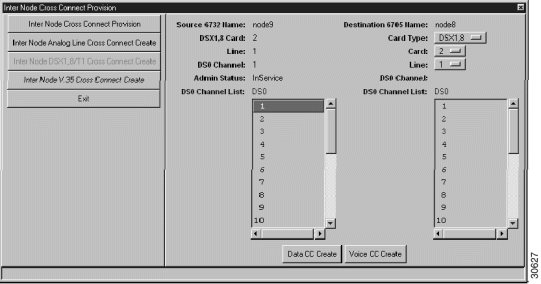
Step 6 After the visual line is drawn, EMS launches the inter node cross connect provisioning window. (See Figure 8-12.) Determine the DS0 lines that are to be cross connected. In the DS0 Channel List on the left side, select the DS0 lines to be cross connected. Select the destination lines in the DS0 Channel List on the right side. Click Data CC Create or Voice CC Create to create a data or voice cross connection.
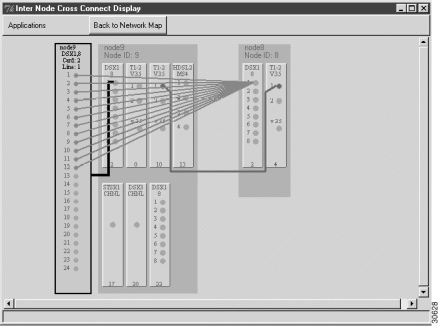
EMS confirms the completion of the cross connects with the text "cc" placed next to each successfully provisioned line. Click Exit to return to the inter-node cross connect and visually confirm the inter-node cross connects. (See Figure 8-13.)
The inter node cross connect provisioning window can also be used to delete cross connects. Cross connect deletions can be initiated from the node view with cross connects displayed, or from the inter node cross connect provisioning window (select the Inter-Node Cross Connect Provision option).
Step 1 With the cross connects displayed from the node view, double-click a specific cross connection line. EMS launches the inter-node cross connect provisioning window. (See Figure 8-14.)
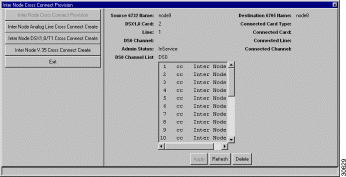
Step 2 From the DS0 Channel List, select the cross connections to be deleted. Click Delete to remove the cross connections. EMS confirms the deletion by removing the cross-connect text next to each line.
To end inter-node cross connect provisioning, right-click the expanded line card and select End Cross Connect Display.
![]()
![]()
![]()
![]()
![]()
![]()
![]()
![]()
Posted: Fri Mar 3 15:32:24 PST 2000
Copyright 1989 - 2000©Cisco Systems Inc.