|
|

Table Of Contents
The SCE 2000 Mounting Brackets
Attach the Brackets to the SCE 2000
Installing the Crossrail Supports (Four-post rack only)
Assemble the Crossrail Supports
Attach the Crossrail Supports to the Rack
Rack-Mount the SCE 2000
This section provides information for rack-mounting the SCE 2000 platform.
•
The SCE 2000 Mounting Brackets
•
•
•
The SCE 2000 Mounting Brackets
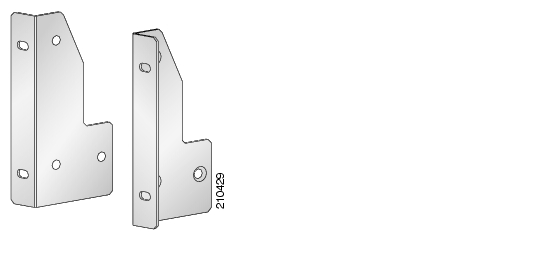
There are two standard types of equipment racks, and the appropriate brackets for each are provided in the enclosed kit.
•
Figure 2-1
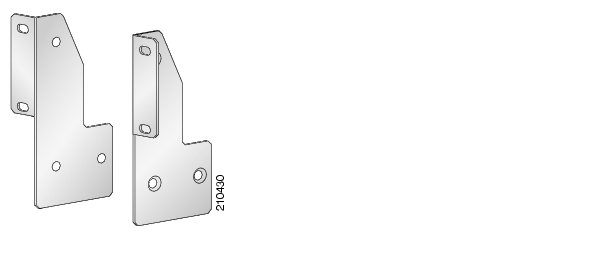
•
Figure 2-2
The SCE 2000 mounts to the two front rack posts with brackets that attach to the front of the SCE 2000 The inside width between the two posts or mounting strips (left and right) must be at least 17.3 inches (44 cm).
Note
Attach the Brackets to the SCE 2000
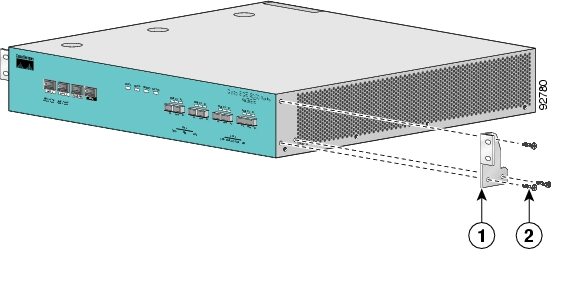
Before installing the SCE 2000 in the rack, you must first install an appropriate rack-mount bracket on each side of the front of the SCE 2000 , as illustrated in the following figures.
Figure 2-3 Attaching the Mounting Brackets (4-post)
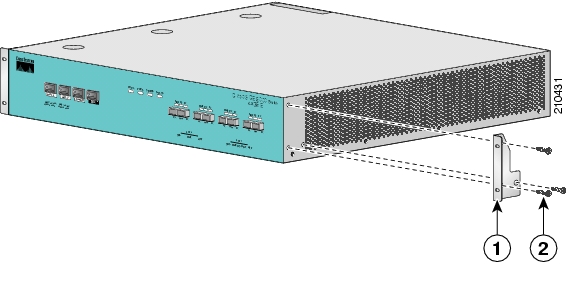
Figure 2-4 Attaching the Mounting Brackets (2-post)
To install the rack-mount brackets on the SCE 2000 chassis, complete the following steps:
Before installing the SCE 2000 in the rack, you must first install a rack-mount bracket on each side of the front of the SCE 2000 .
Step 1
Step 2
Step 3
If mounting the SCE 2000 in a rack with only two posts, skip to Mount the System to the Rack.
If mounting the SCE 2000 in a rack with four posts, proceed to the next step, Installing the Crossrail Supports (Four-post rack only).
Installing the Crossrail Supports (Four-post rack only)
This section provides information for assembling the crossrail supports and attaching them to the rack.
When mounting in a rack with four posts (front and back) the two crossrail supports are mounted one on each side of the rack. The SCE 2000 then slides into these crossrails, which support the weight of the unit.
•
•
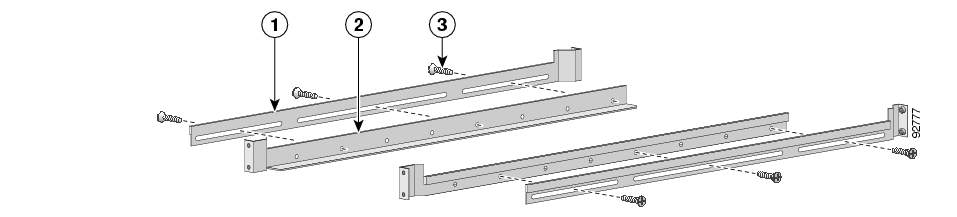
Assemble the Crossrail Supports
Step 1
Figure 2-5 Assembling the Slider Brackets
Step 2
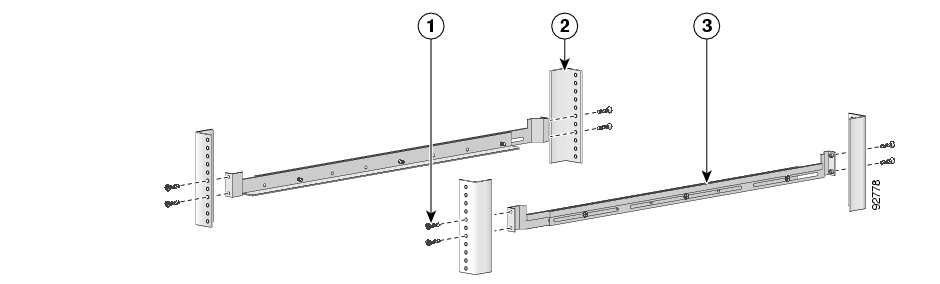
Attach the Crossrail Supports to the Rack
Step 1
Figure 2-6 Attaching the Crossrails to the Rack
Step 2
Step 3
Step 4
Mount the System to the Rack
When the appropriate mounting brackets are securely installed, the SCE 2000 can be installed into the rack.
SUMMARY STEPS
1.
2.
3.
4.
5.
DETAILED STEPS
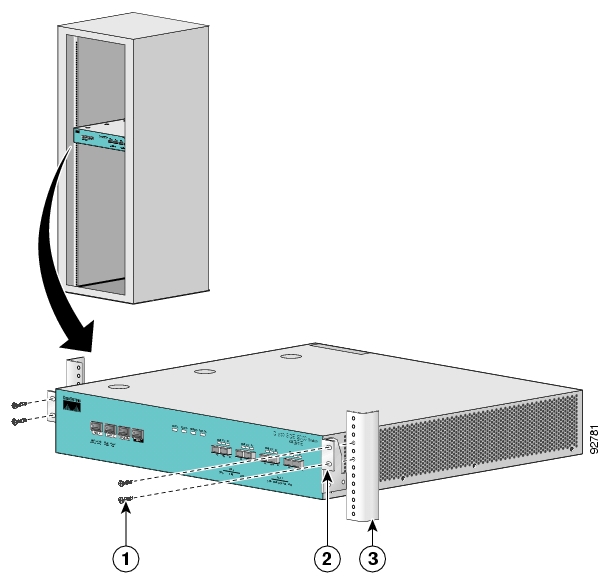
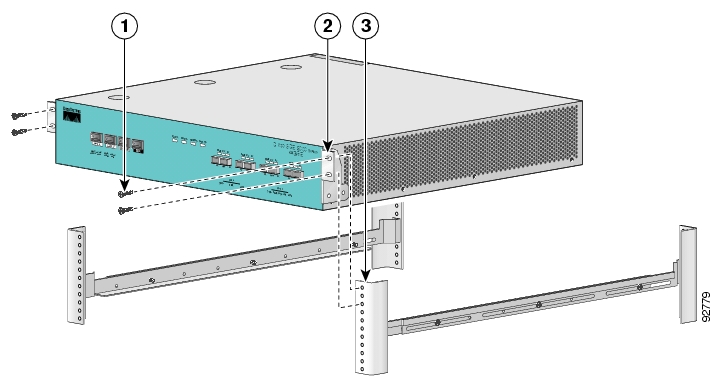
Step 1
Figure 2-7 Sliding the SCE Platform into the Rack
Step 2
Step 3
A rack with both front and back posts will have the crossrail supports installed. Slide the SCE 2000 onto these crossrails and push it all the way back.
Step 4
Figure 2-8 Securing the SCE Platform to the Rack
Step 5
Note
![]()
![]()
![]()
![]()
![]()
![]()
![]()
![]()
Posted: Thu May 31 02:20:17 PDT 2007
All contents are Copyright © 1992--2007 Cisco Systems, Inc. All rights reserved.
Important Notices and Privacy Statement.