|
|

Table Of Contents
Using the Service Configuration Editor: Traffic Control
How to Set Advanced Package Options
How to View the Rules of a Package
How to Display the Services Affected by a Rule
How to View Global Controller Settings
How to Edit the Total Link Limits
How to Set Maximum Bandwidth of Global Controllers
How to Delete Global Controllers
Defining Global Controllers in a Dual-Link System
Managing Bandwidth: a Practical Example
How to Set BW Management Prioritization Mode
Collection Manager Virtual Links Names Utility
Managing Virtual Links Global Controllers
How to Enable Virtual Links Mode
How to View Virtual Links Global Controller Settings
How to Edit the Virtual Links Total Link Limits
How to Manage Virtual Links with CLI Commands
How to Edit Quota Management Settings for Packages
How to Select Quota Buckets for Rules
How to Edit Breach-Handling Parameters for a Rule
Using the Service Configuration Editor: Traffic Control
The Traffic Control capabilities of the Service Control Engine (SC platform and the Cisco Service Control Application for Broadband (SCA BB) are used to limit and prioritize traffic flows. Control of traffic is based on parameters such as the service of the flow, the subscriber's package, and the subscriber's quota state.
Unknown Subscriber Traffic
A traffic flow that does not match any filter rule (see Filtering the Traffic Flows ) is processed by the SCE platform, which tries to identify the subscriber responsible for the traffic flow. The SCE platform checks its internal database for a subscriber identified by the IP address or VLAN tag of the traffic flow. If no such subscriber exists, the traffic flow is mapped to the Unknown Subscriber Traffic category.
The Unknown Subscriber Traffic category is included in the tree in the Network Traffic tab but is not part of the package hierarchy. The Unknown Subscriber Traffic category cannot be deleted.
•
Traffic of one unknown subscriber cannot be distinguished from traffic of other unknown subscribers. Therefore you cannot set either per-subscriber usage limits or subscriber-level metering with subscriber BWCs. You can use subscriber BWCs only to link a selected service to a global controller.
The Unknown Subscriber Traffic category behaves like a package with the following parameters:
•
•
•
–
–
You can:
•
–
–
•
–
–
•
–
–
Managing Packages
A package is a description of subscriber policy. It is a collection of rules that defines the system's reaction when it encounters flows that are mapped to the service to which the rule is related. It is recommended that you first define services (see In the current service configuration, click the Network Traffic tab. ) and only then add and define packages.
Every SCA BB service configuration contains a package, the default package, which is the root package and cannot be deleted.
A subscriber is mapped to the default package if no other package is specifically assigned to the subscriber, or if a nonexistent package is assigned to the subscriber.
A service configuration can contain up to 5000 packages.
•
Package Parameters
A package is defined by the following parameters:
•
–
–
•
–
–
–
•
–
–
•
–
–
–
Each usage counter has:
–
•
–
–
–
These parameters are defined when you add a new package (see How to Add Packages ). You can modify them at any time (see How to Edit Packages ).
How to View Packages
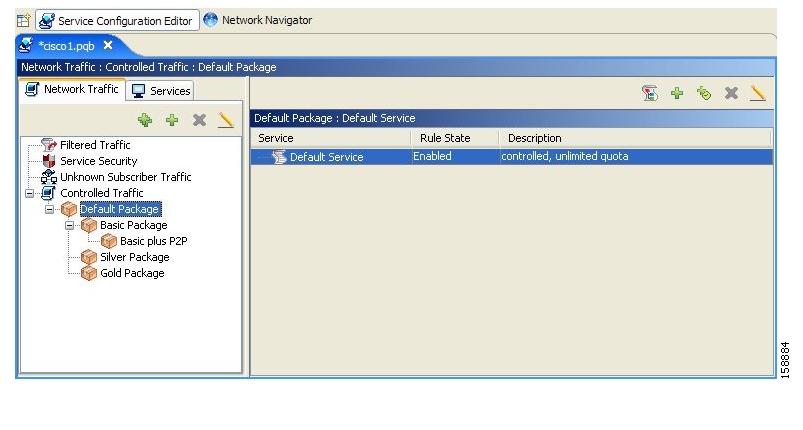
You can view a hierarchy tree of all existing packages, and you can see a list of services for which specific rules are defined for any selected package.
Step 1
The Network Traffic tab appears.
Figure 9-1
A list of all packages is displayed in the package tree.
•
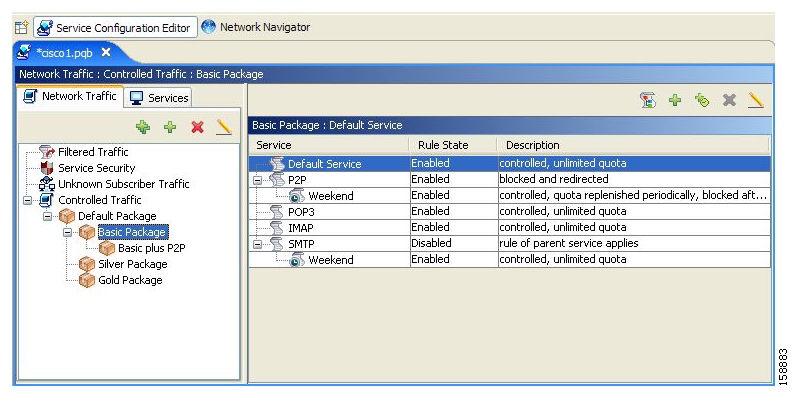
Step 2
A list of all rules of this package is displayed in the right (Rul pane.
Figure 9-2
How to Add Packages
A default package is predefined in the Console installation. You can add additional packages to a service configuration, subject to the limit of 5000 packages per service configuration.
After you have added a new package, you can define rules for the package (see How to Add Rules to a Package ).
Step 1
Step 2
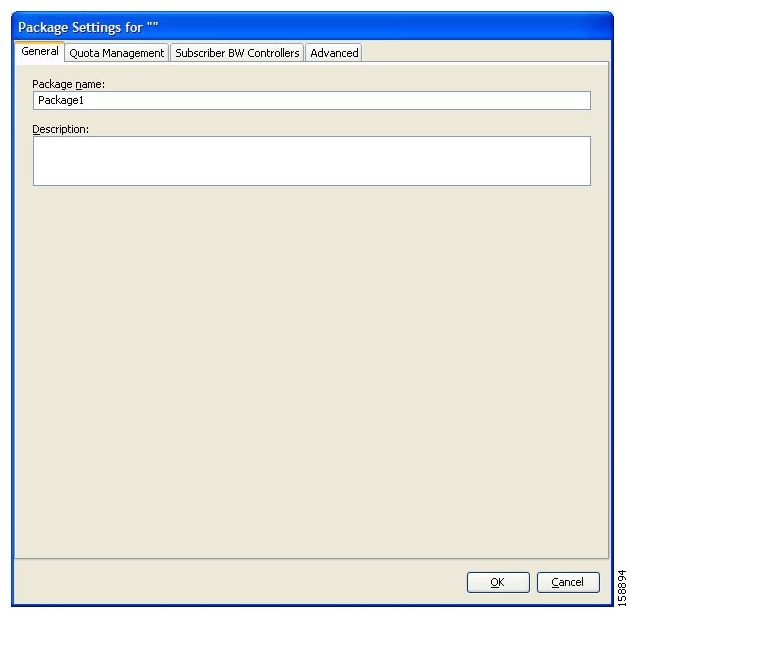
( Add Package).
The Package Settings dialog box appears.
Figure 9-3
Step 3
Step 4
Step 5
Step 6
The Package Settings dialog box closes.
The new package is added as a child to the package selected in the package tree and becomes the selected package. The default service rule is displayed in the right (Rul pane.
To edit the default service rule, and to add new rules to the package, see Managing Rules.
What to Do Next
To configure parameters in the Quota Management tab see Editing Package Quota Management Settings (Using the Quota Management Tab (Packages) How to Edit Quota Management Settings for Packages.
To configure parameters in the Subscriber BW Controllers tab, see How to Edit Package Subscriber BWCs.
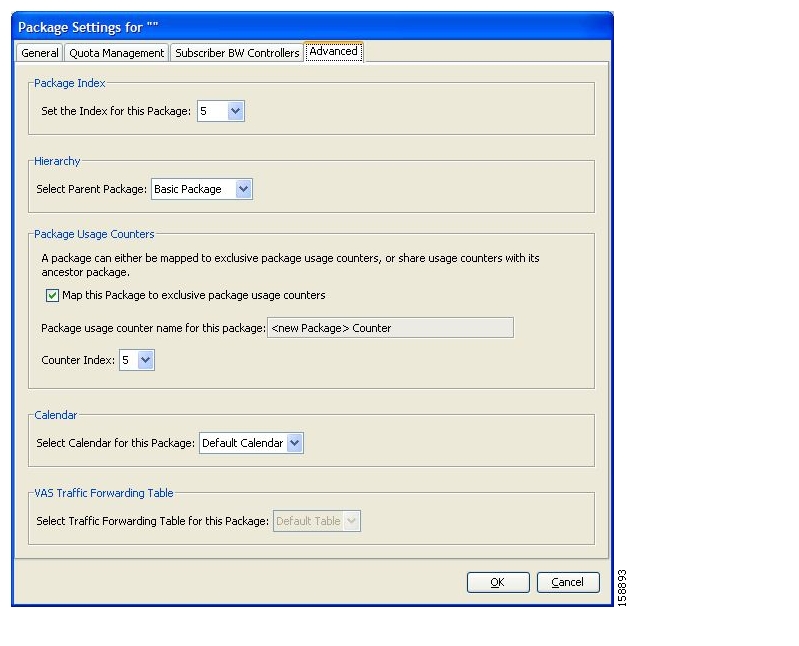
How to Set Advanced Package Options
You can change the index for the package, specify an exclusive usage counter, or select a calendar for the package in the Advanced tab.
SUMMARY STEPS
1.
2.
3.
4.
5.
6.
7.
8.
DETAILED STEPS
Step 1
The Advanced tab opens.
Figure 9-4
Step 2
•
Step 3
Step 4
The name in the read-only Package usage counter name for this package field changes to reflect your choice.
The Counter Index drop-down list is dimmed.
Step 5
•
Step 6
Step 7
•
Step 8
The Package Settings dialog box closes.
The new package is added as a child to the selected parent package and becomes the selected package. The default service rule is displayed in the right (Rul pane.
To edit the default service rule, and to add new rules to the package, see Managing Rules.
How to Duplicate Packages
Duplicating an existing package is a useful way to create a new package similar to an existing package. It is faster to duplicate a package and then make changes than to define the package from scratch.
A duplicated package is added at the same level in the package tree as the original package.
Step 1
Step 2
( Duplicate Package).
A duplicate package is created with all the same attributes as the original package. The name of the new package is the name of the selected package followed by "(1)" (or "(2)", and so on if a package is duplicated many times).
Step 3
How to Edit Packages
You can modify the parameters of a package (including the default packag at any time.
Step 1
Step 2
( Edit Package).
The Package Settings dialog box appears.
Step 3
Step 4
Step 5
Step 6
Step 7
The Advanced tab opens.
1.
–
2.
3.
The name in the read-only Package usage counter name for this package field changes to reflect your choice.
The Counter Index drop-down list is dimmed.
4.
The name in the read-only Package usage counter name for this package field changes to reflect your choice.
The Counter Index drop-down list is dimmed.
5.
–
6.
7.
–
Step 8
The Package Settings dialog box closes.
All changes to the package parameters are saved.
How to Delete Packages
You can delete user-defined packages. The default package cannot be deleted.
Step 1
Step 2
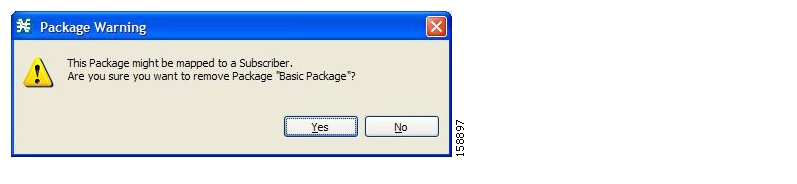
( Delete Package).
A Package Warning message appears.
Figure 9-5
Step 3
The package is deleted and is no longer displayed in the package tree.
Managing Rules
After you have defined services and basic packages, you can define rules for the package.
You can configure rules to do some or all of the following:
•
•
•
•
A rule usually applies at all times. To allow additional flexibility, you can divide the week into four separate time frames. You can define subrules— time-based rules —for each time frame.
The Default Service Rule
A default service rule is assigned to every package. It cannot be deleted or disabled.
The default values of this rule are:
•
•
•
Rule Hierarchy
The SCE platform will apply the most specific rule to any flow.
For example, if you define rules for E-Mail and POP3, any flow mapped to the POP3 service will be handled according to the POP3 rule—any flow mapped to the SMTP or IMAP service will be handled according to the E-Mail rule. This means, for example, that POP3 can have its own usage limits, whereas SMTP and IMAP must share usage limits.
Note
Any rule that also applies to child services is indicated by
.
Rules that do not apply to any child services are shown by
.
Time-based rules are shown as children of the relevant rule. The icon for a time-based rule also shows if the rule applies to child services (
or
).
See also How to Display the Services Affected by a Rule.
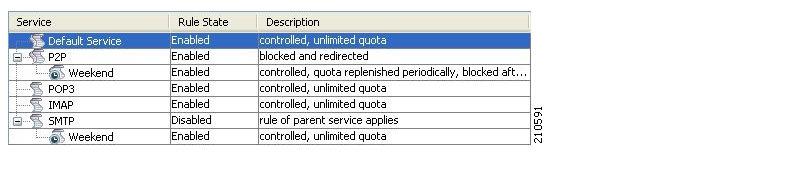
How to View the Rules of a Package
You can view a list of the rules of a package.
The listing for each rule includes an icon, the name of the service or group of services to which the rule applies, whether the rule is enabled or disabled, and a brief description of the rule.
Step 1
A list of all rules defined for this package is displayed in the right (Rule) pane.
Figure 9-6
What to Do Next
To see more information about a rule, open the Edit Rule for Service dialog box (see How to Edit Rules ).
To see more information about a time-based rule, open the Edit Time-Based Rule for Service dialog box (see How to Edit Time-Based Rules ).
Adding Rules to a Package
•
•
How to Add Rules to a Package
Adding time-based rules is described in the section How to Add Time-Based Rules to a Rule.
Step 1
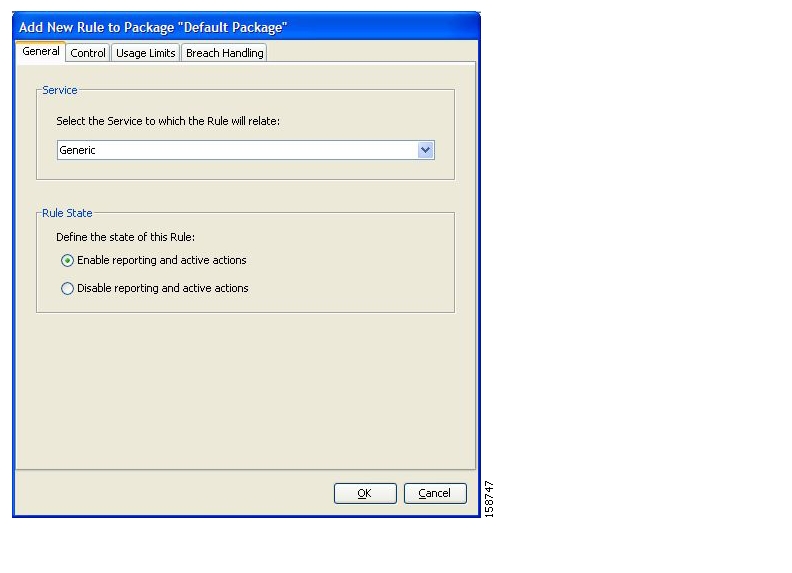
Step 2
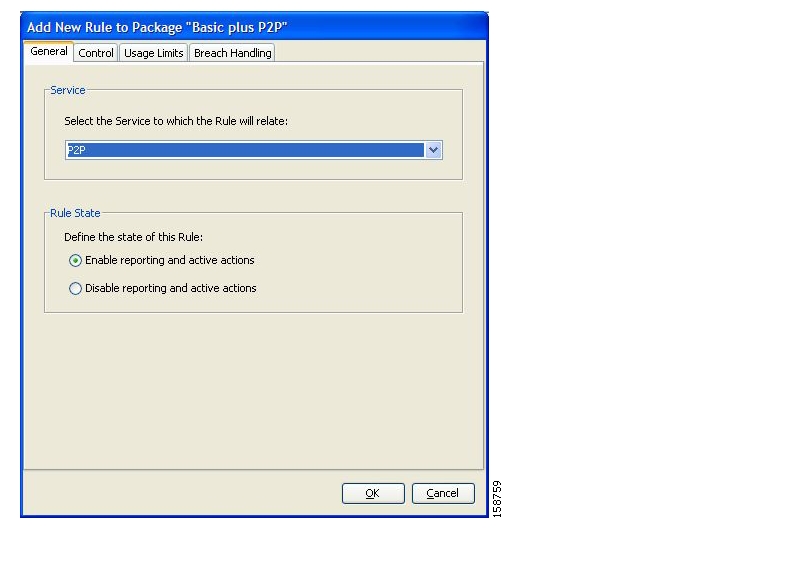
The Add New Rule to Package dialog box appears.
Figure 9-7
Step 3
Note
Step 4
•
•
Note
Step 5
Step 6
The Add New Rule to Package dialog box closes.
The new rule is added to the list of rules displayed in the right (Rule) pane.
What to Do Next
Usage limits and breach handling are part of quota management (see Managing Quotas ):
•
•
How to Define Per-Flow Actions for a Rule
The Control tab of the Add New Rule to Package dialog box allows you to set behavior per traffic flow for sessions that are mapped to the current service.
Step 1
The Control tab opens.
Figure 9-8
To control flows that are mapped to the service of this rule, continue at step 5.
Step 2
The Redirect to check box is enabled.
Note
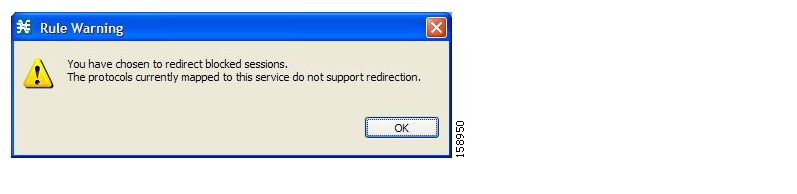
Step 3
Note
The Redirection URL Set drop-down list is enabled.
•
Figure 9-9
•
From the Redirection URL Set drop-down list, select a URL set to serve as the redirection target. (URL redirection sets are defined in the System Settings dialog box, see Setting Redirection Parameters.)
Step 4
Step 5
The options in the Flow Characteristic area are enabled.
Step 6
The BWCs in this drop-down list are defined when creating or editing the package (see How to Edit Package Subscriber BWCs ).
Note
When the mouse is placed over the drop-down list, a tooltip appears containing the properties of the selected BWC (Peak Information Rate (PIR), Committed Information Rate (CIR), Global Controller, and Assurance Level).
Figure 9-10
Step 7
Step 8
Note
Step 9
Step 10
Step 11
Step 12
The Add New Rule to Package dialog box closes.
The new rule is added to the list of rules displayed in the right (Rule) pane.
How to Edit Rules
You can edit any rule, including the default service rule.
Note
Note
Step 1
Step 2
Step 3
The Edit Rule for Service dialog box appears.
Figure 9-11
Step 4
•
•
Step 5
1.
The Control tab opens.
2.
Step 6
1.
The Usage Limits tab opens.
2.
Step 7
1.
The Breach Handling tab opens.
2.
Step 8
The Edit Rule for Service dialog box closes.
All changes to the rule are saved.
How to Delete Rules
You can delete any user-defined rule. The default service rule cannot be deleted.
Note
Step 1
Step 2
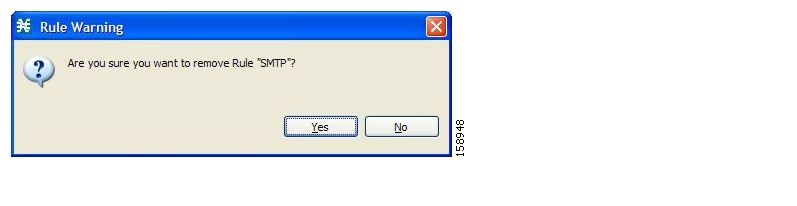
Step 3
A Rule Warning message appears.
Figure 9-12
Step 4
The selected rule is deleted.
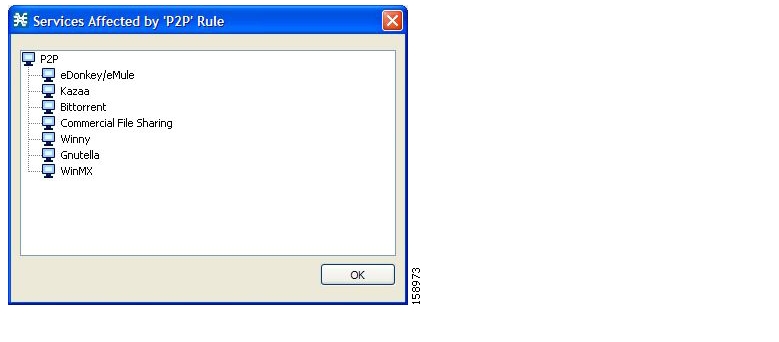
How to Display the Services Affected by a Rule
You can define a service as the child of another service (the parent service is a service group). Until you define a separate rule for a child service, the child service is governed by the rule of the parent service. A rule that affects any of a service's children is indicated in the rules list by a different icon, as illustrated for the default service rule and the P2P rule in the following figure.
Figure 9-13
You can display all (child) services that are affected by a rule.
Note
Step 1
( Show All Services Affected By This Rule).
The Services Affected dialog box appears.
Figure 9-14
Step 2
The Services Affected dialog box closes.
Managing Time-Based Rules
The Console allows you to divide the week into four time frames (see Managing Calenders ). A time-based rule is a rule that applies to one time frame.
You can add time-based rules to any rule. If a time-based rule is not defined for a time frame, the parent rule is enforced.
Often, you will want the rules for the different time frames to be similar. When you add a time-based rule, the settings of the parent rule are copied to the new time-based rule; you can make any needed changes. Subsequent changes to the parent rule do not affect the time-based rule.
You must define the calendar before defining the related time-based rules.
•
•
•
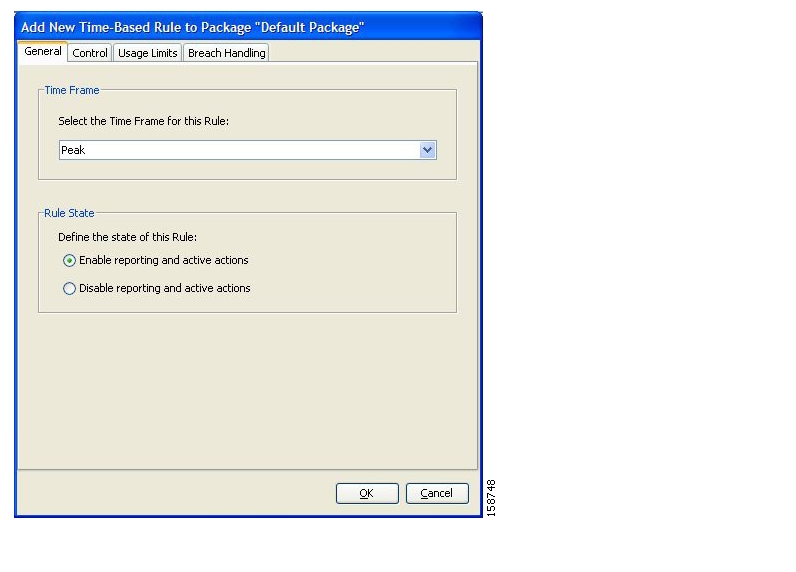
How to Add Time-Based Rules to a Rule
Adding a time-based rule to a rule allows you to specify alternate rule parameters applicable only for a specific time frame. If a time-based rule is not defined for a time frame, the parent rule is enforced.
Note
A service whose time-based rule affects any of its child services is indicated in the rules list by a modified icon, as illustrated for the Weekend time-based rule of the P2P rule in the following screen capture.
Figure 9-15
Step 1
Step 2
Step 3
( Add Time-Based Rule).
The Add New Time-Based Rule dialog box appears.
Figure 9-16
Step 4
Step 5
•
•
Step 6
1.
The Control tab opens.
2.
Step 7
1.
The Usage Limits tab opens.
2.
Step 8
1.
The Breach Handling tab opens.
2.
Step 9
The Add New Time-Based Rule dialog box closes.
The new time-based rule is displayed as a child of the rule in the Rule pane.
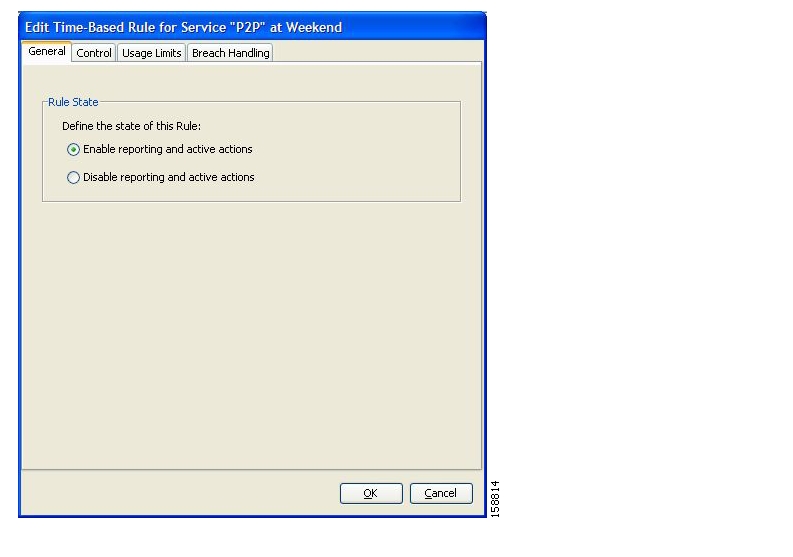
How to Edit Time-Based Rules
You can edit time-based rules.
Note
Step 1
Step 2
Step 3
The Edit Time-Based Rule for Service dialog box appears.
Figure 9-17
Step 4
•
•
Step 5
1.
The Control tab opens.
2.
Step 6
1.
The Usage Limits tab opens.
2.
Step 7
1.
The Breach Handling tab opens.
2.
Step 8
The Edit Time-Based Rule for Service dialog box closes.
All changes to the time-based rule are saved.
How to Delete Time-Based Rules
You can delete any time-based rule.
Note
Step 1
Step 2
Step 3
A Rule Warning message appears.
Figure 9-18
Step 4
The selected rule is deleted.
Managing Calenders
Calendars are used to divide the hours of the week into four time frames .
After you have configured a calendar, you can add time-based rules to a package that uses the calendar. A time-based rule is a rule that applies to only one time frame. Time-based rules allow you to set rule parameters that will apply only at specific times. You might, for example, want to define different rules for peak, off-peak, nighttime, and weekend usage.
Each service configuration includes one default calendar. You can add nine more calendars, each with a different time-frame configuration. You can use different calendars for different packages. You can also use different calendars where a service provider has customers in more than one time zone by configuring calendars with a one-hour offset from each other.
Managing calendars includes the following:
•
•
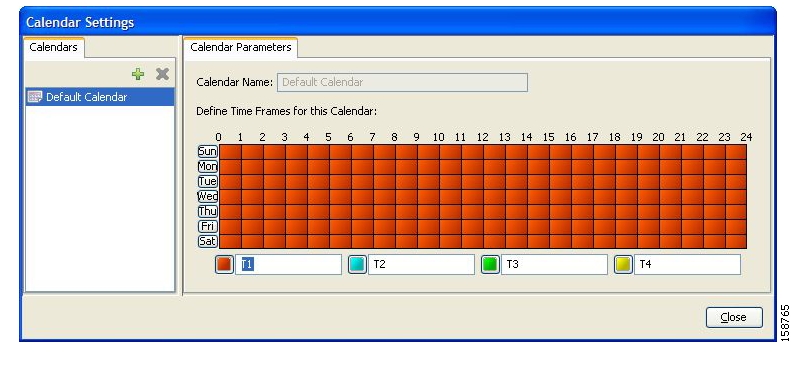
How to View Calendars
You can view a list of existing calendars and their time frames.
Step 1
The Calendar Settings dialog box appears.
Figure 9-19
The Calendars tab displays a list of existing calendars. Click a calendar in the list to display its time-frame settings.
The time frames for the selected calendar are displayed and configured in the Calendar Parameters tab.
Step 2
The Calendar Settings dialog box closes.
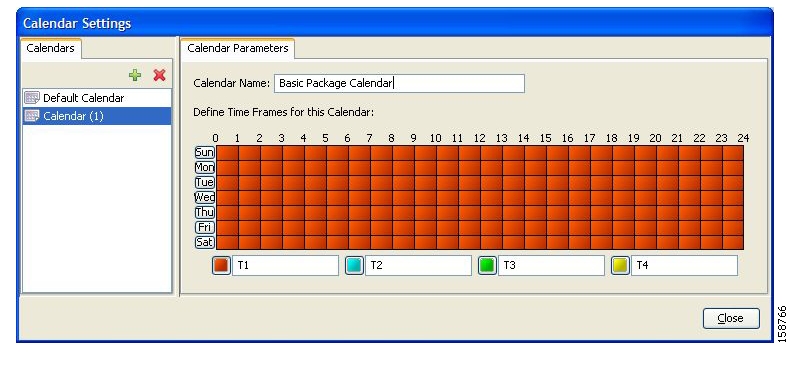
How to Add Calendars
Each service configuration includes one default calendar. You can add up to nine more calendars.
Step 1
The Calendar Settings dialog box appears.
Step 2
A new calendar is added with the name Calendar (1).
Step 3
Figure 9-20
Step 4
The Calendar Settings dialog box closes, and the new calendar name is saved.
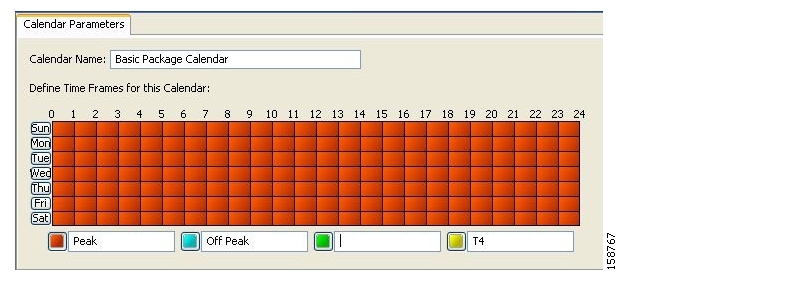
How to Rename the Time Frames
By default, the time frames are named T1, T2, T3, and T4. You can change these names at any time; for example, you may want to name the time frames Peak, Off Peak, Night, and Weekend.
Note
Step 1
The Calendar Settings dialog box appears.
In the Calendar Parameters tab, below the grid, each of the four time frames is listed in a field next to a colored square.
Step 2
Figure 9-21
Step 3
Step 4
The Calendar Settings dialog box closes, and the changes to the names of the time frames are saved.
How to Delete Calendars
You can delete any user-added calendar. The default calendar cannot be deleted.
Note
Step 1
The Calendar Settings dialog box appears.
Step 2
A Calendar Removal Confirmation message appears.
Step 3
The calendar is deleted.
Step 4
The Calendar Settings dialog box closes.
How to Configure the Time Frames
By default, all the hours of the week belong to one time frame. The Console allows you to assign each of the 168 (24x7) hours of the week to one of four separate time frames. These time frames allow you to supply time-dependent differentiated services and to impose constraints on any service.
You might want, for example, to divide the week as follows:
•
•
•
•
You can define different time frames for each calendar.
Step 1
The Calendar Settings dialog box appears.
Step 2
In the Calendar Parameters tab, the selected calendar's Define Time Frames for this Calendargrid is displayed. The grid, representing one week, is laid out in a format of 24 hours x 7 days. Each cell represents one hour.
Below the grid, the name of each time frame appears next to a colored button.
Step 3
Step 4
You can select a group of cells by holding down the mouse button and dragging across the cells.
Figure 9-22
The changes are written to the service configuration as you make them.
Step 5
Step 6
The Calendar Settings dialog box closes.
You have now mapped the week into four different time frames. The following figure illustrates a possible time partition plan:
Figure 9-23
Managing Bandwidth
The upstream and downstream interfaces are each assigned one default global controller. You can add additional global controllers.
A service configuration can contain up to 1024 upstream global controllers and 1024 downstream global controllers (including the default global controllers).
After you have defined global controllers, you can add subscriber BW controllers (BWCs) to packages, and map these subscriber BWCs to different global controllers.
If you enable or disable Virtual Links mode, all user-defined global controllers are deleted from the service configuration. A subscriber BWC that pointed to a user-defined global controller now points to the default global controller. (Other parameters of these subscriber BWCs remain unchanged.)
Managing Global Bandwidth
The upstream and downstream interfaces are each assigned one default global controller that, by default, controls 100 percent of the link traffic. You can add up to 1023 more global controllers for each interface, and assign a maximum percentage of the total link limit to each global controller separately.
You can also define the bandwidth total link limit to be less than the physical capacity of the SCE platform for each interface separately. When another device that has limited BW capacity is next to the SCE platform on the IP stream, you can have this limitation enforced in a policy-aware manner by the SCE platform, instead of having it enforced arbitrarily by the other device.
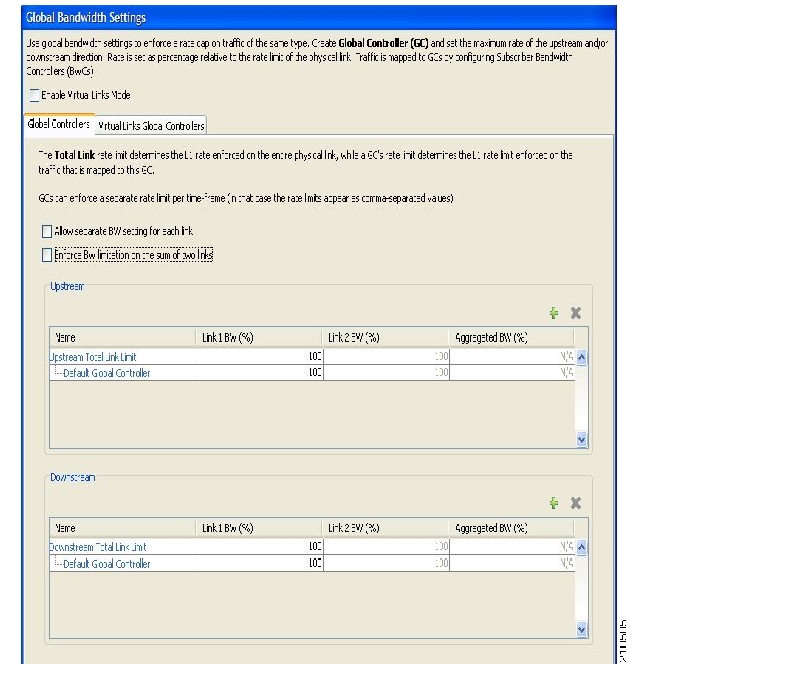
How to View Global Controller Settings
Note
Step 1
The Global Bandwidth Settings dialog box appears.
Figure 9-24
The two check boxes near the top of the Global Controllers tab are used only in dual-link systems (see Defining Global Controllers in a Dual-Link System ).
The main part of the dialog box contains the Upstream area listing upstream global controllers and the Downstream area listing downstream global controllers. Each list has four columns; the third and fourth columns are relevant to dual-link systems:
•
•
For each global controller you can set different values for the maximum bandwidth for each of the four time frames defined by the default calendar (see Managing Calenders ):
–
–
Figure 9-25
–
Figure 9-26
–
Step 2
A tooltip appears, showing the actual maximum bandwidth permitted to this global controller, in Mbps. This figure is calculated automatically by the system based on the possible SCE platform types (Gigabit Ethernet or Fast Ethernet), the controller maximum bandwidth percentage, and the total link bandwidth percentage.
Figure 9-27
Step 3
The Global Bandwidth Settings dialog box closes.
How to Edit the Total Link Limits
You can limit the total bandwidth passing through the SCE platform.
For example, if another device sitting next to the SCE platform on the IP stream has limited BW capacity, you can limit the bandwidth passing through the SCE platform to match the capacity of the other device.
The total link limits for upstream and downstream traffic are defined independently.
Step 1
The Global Bandwidth Settings dialog box appears.
Step 2
The values displayed in the tooltips of all the cells in the Link 1 BW (%) cells change to reflect the new total link limit.
Step 3
Your changes are saved.
The Global Bandwidth Settings dialog box closes.
How to Add Global Controllers
You can add up to 1023 upstream global controllers and 1023 downstream global controllers to a service configuration.
Step 1
The Global Bandwidth Settings dialog box appears.
Step 2
A new global controller is added to the interface global controller list with a maximum bandwidth capacity of 100 percent of the total link limit.
Step 3
Note
Step 4
Step 5
Your changes are saved.
The Global Bandwidth Settings dialog box closes.
How to Set Maximum Bandwidth of Global Controllers
You can edit the maximum bandwidth (as a percentage of the total link limit) that a global controller can carry.
You can set a different maximum bandwidth for each of the four available time frames.
In a dual-link system, you can set different values for each link and for the aggregated BW of the two links.
Step 1
The Global Bandwidth Settings dialog box appears.
Step 2
A Browse button appears in the cell.
Step 3
The Global Controller Bandwidth Settings dialog box appears.
Figure 9-28
Step 4
•
Step 5
•
Note
Step 6
Your changes are saved.
The value in the BW (%) cell changes to reflect the new bandwidth limits.
Step 7
Step 8
Your changes are saved.
The Global Bandwidth Settings dialog box closes.
How to Delete Global Controllers
You can delete unused global controllers at any time. The default global controller and the Total Link Limit cannot be deleted.
Step 1
The Global Bandwidth Settings dialog box appears.
Step 2
Step 3
Note
The global controller is deleted.
Step 4
Your changes are saved.
The Global Bandwidth Settings dialog box closes.
Defining Global Controllers in a Dual-Link System
In a dual-link system, you can define each global controller's maximum bandwidth separately for each link.
Alternatively, you can apply bandwidth limitations to the sum of the two links.
Note
•
•
How to Set Global Controller Bandwidth Limits Separately for Each Link
Step 1
The Global Bandwidth Settings dialog box appears.
Step 2
Step 3
The cells in the Link 2 BW (%) column are enabled.
Each cell has the same value as the parallel cell in the Link 1 BW (%) column.
Step 4
Changes to bandwidth percentages are not copied to the Link 2 tab.
Step 5
Step 6
Your changes are saved.
The Global Bandwidth Settings dialog box closes.
How to Set Global Controller Bandwidth Limits as the Sum of Two Links
Step 1
The Global Bandwidth Settings dialog box appears.
Step 2
The cells in the Aggregated BW (%) column are enabled and contain the value 100.
Step 3
Your changes are saved.
The Global Bandwidth Settings dialog box closes.
Managing Subscriber Bandwidth
After you have defined global controllers, you can add subscriber BWCs to packages and map these subscriber BWCs to different global controllers.
A Subscriber BWC controls subscriber bandwidth consumption for upstream or downstream flows. It controls and measures the bandwidth of an aggregation of traffic flows of a service or group of services.
Each package has its own set of BWCs that determine the bandwidth available per package subscriber for each available service.
The two Primary BWCs , one for upstream traffic and one for downstream traffic, allocate bandwidth to specific subscribers, depending upon the Committed Information Rate (CIR), the Peak Information Rate (PIR), and the Subscriber relative priority settings. You can configure these parameters, but the Primary BWCs cannot be deleted.
There are two default BWCs, one for upstream traffic and one for downstream traffic. By default, all services are mapped to one of these two BWCs. The BWC mechanism controls rate subpartitioning within the default BWC rate control, based on the CIR, PIR, and AL. You can configure these parameters, but the default BWCs cannot be deleted.
You can add up to 32 user-defined BWCs per package:
•
•
Each user-defined BWC controls either downstream or upstream traffic.
Caution If you enable or disable Virtual Links mode, all user-defined global controllers are deleted from the service configuration. A BWC that pointed to a user-defined global controller now points to the default global controller. (Other parameters of these BWCs remain unchanged.)
Bandwidth control is explained in greater detail in the section Subscriber Bandwidth Control.
Subscriber BWC Parameters
The Subscriber BW Controllers tab of the Package Settings dialog box has the following configuration parameters:
•
•
•
Note
If you specify a bandwidth of, for example, 64 Kbps, the bandwidth will be stable at this value.
If you specify a bandwidth of, for example, 70 Kbps, the bandwidth will be unstable and oscillate between 64 Kbps and 80 Kbps.•
•
Assurance Level 10 (persistent) never goes below the relevant CIR, unless the total line rate cannot sustain this.
•
•
•
How to Edit Package Subscriber BWCs
Step 1
The Package Settings dialog box appears.
Step 2
The Subscriber BW Controllers tab opens.
Figure 9-29
Step 3
1.
2.
–
–
3.
( Add a sub BW Controller) once for each additional BWC.
4.
( Add an extra BW Controller) once for each additional BWC.
5.
–
–
–
–
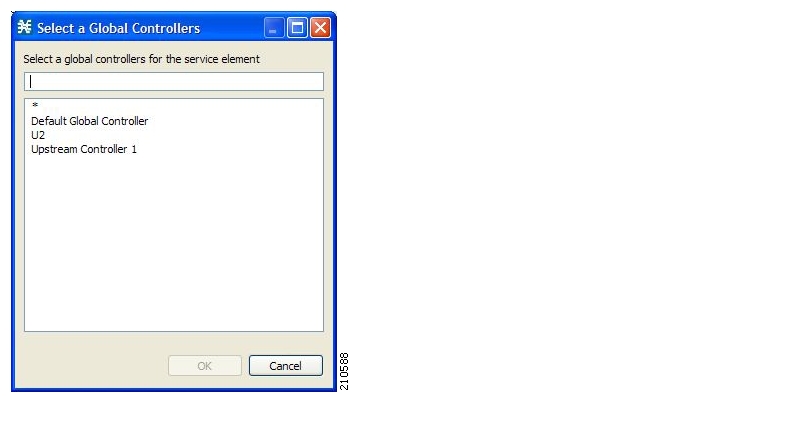
Click in the Global Controller cell of the BWC, and then click the Browsebutton that appears.
The Select a Global Controller dialog box appears.
Figure 9-30
–
–
Step 4
Step 5
The Package Settings dialog box closes.
All changes to the BWC settings are saved.
Managing Bandwidth: a Practical Example
This section explains how to achieve effective bandwidth control by combining the configuration of global controllers and subscriber BWCs, and gives a practical example.
•
•
How to Configure Total Bandwidth Control
Step 1
Ascertain which services are likely to be problematic, and what the maximum percentage of total bandwidth should be for each. You do not need to configure services and packages that are unlikely to be problematic; you can include them in the default global controllers.
Step 2
1.
2.
Step 3
1.
2.
Example: How to Limit P2P and Streaming Traffic
Note
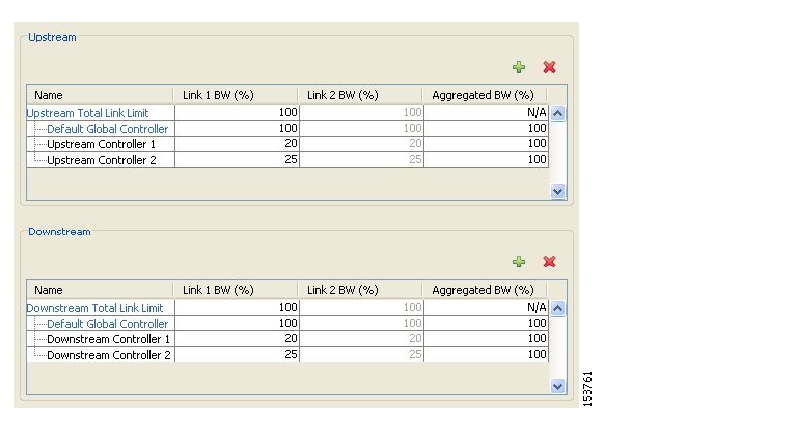
Step 1
Figure 9-31
(Here, Upstream Controller 1 and Downstream Controller 1 will be used for P2P traffic, and Upstream Controller 2 and Downstream Controller 2 will be used for streaming traffic.)
Step 2
Figure 9-32
(Here, BWC1 will be for upstream P2P traffic and BWC3 will be for downstream P2P traffic; BWC2 will be for upstream streaming traffic and BWC4 will be for downstream streaming traffic.)
Step 3
Figure 9-33
Step 4
Figure 9-34
Step 5
All subscriber traffic using these services will be added to the virtual queue total for these queues. In turn, the bandwidth available to the subscriber for these protocols will fluctuate, depending on how "full" these queues are.
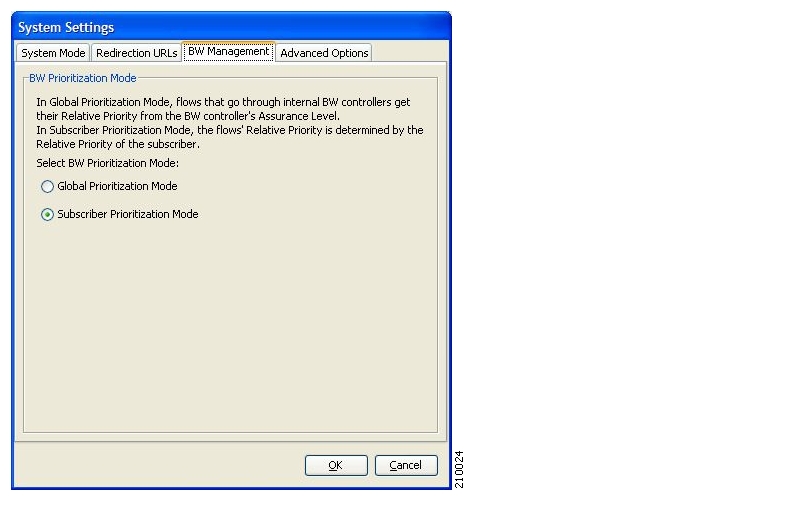
How to Set BW Management Prioritization Mode
Relative priority is the level of assurance that an internal BWC (iBWC) receives when competing against other iBWCs for bandwidth.
The relative priority of the flow that goes through an iBWC is determined by the relative priority of one of:
•
•
Step 1
The System Settings dialog box appears.
Step 2
The BW Management tab opens.
Figure 9-35
Step 3
•
•
Step 4
The System Settings dialog box closes.
The selected BW management parameter is saved.
Managing Virtual Links
In Virtual Links mode, template bandwidth controllers are defined for packages. Actual bandwidth parameters are assigned when a subscriber enters the system and depend on the subscriber's package (which defines the template controllers) and the physical link assigned to the subscriber.
For each service configuration that has Virtual Links mode enabled, there is one default upstream virtual link and one default downstream virtual link. The upstream and downstream interfaces are each assigned one default template global controller.
You can add additional template global controllers. You can add, modify, and delete virtual links using a command-line interface (CLI).
A service configuration can contain up to 1024 upstream global controllers and 1024 downstream global controllers (including the default global controllers). The maximum number of virtual links is limited by the number of directional template global controllers: the number of template global controllers times the number of virtual links cannot exceed 1024.
If you enable or disable Virtual Links mode, all user-defined global controllers are deleted from the service configuration. A subscriber BWC that pointed to a user-defined global controller now points to the default global controller. (Other parameters of these subscriber BWCs remain unchanged.)
The following steps outline configuring a service configuration in Virtual Links mode. The procedure is similar to that for configuring any service configuration, but virtual links must be added using the CLI.
1.
2.
3.
4.
Add subscriber BW controllers to the packages and associate them with appropriate global controllers.
5.
The bandwidth values of the default global controllers are set; the values of all other global controllers are not set - these global controllers are templates.
6.
Each virtual link gets a set of global controllers with the PIR values of the template global controller configuration.
If necessary, you can use the CLI to change the global controllers' PIR values.
7.
8.
Collection Manager Virtual Links Names Utility
The Collection Manager (CM) includes a command-line utility for managing the names of virtual links.
For more information about the CM Virtual Links Names Utility, see "Managing Virtual Links" in the "Managing the Collection Manager" chapter of the Cisco Service Control Management Suite Collection Manager User Guide .
Managing Virtual Links Global Controllers
Virtual link global controllers can be added edited and deleted in the same way as regular global controllers. Refer to the following sections for more information:
•
•
•
•
How to Enable Virtual Links Mode
To use virtual links, you must enable Virtual Links mode.
If you enable or disable Virtual Links mode, all user-defined global controllers are deleted from the service configuration.
Step 1
The Global Bandwidth Settings dialog box appears.
Step 2
Note
The Virtual Links Global Controllers tab opens.
Step 3
The Global Bandwidth Settings dialog box closes.
How to View Virtual Links Global Controller Settings
Note
(Accounting, reporting, and subscriber bandwidth control in SCA BB is based on Layer 3 volume.)
Step 1
The Global Bandwidth Settings dialog box appears.
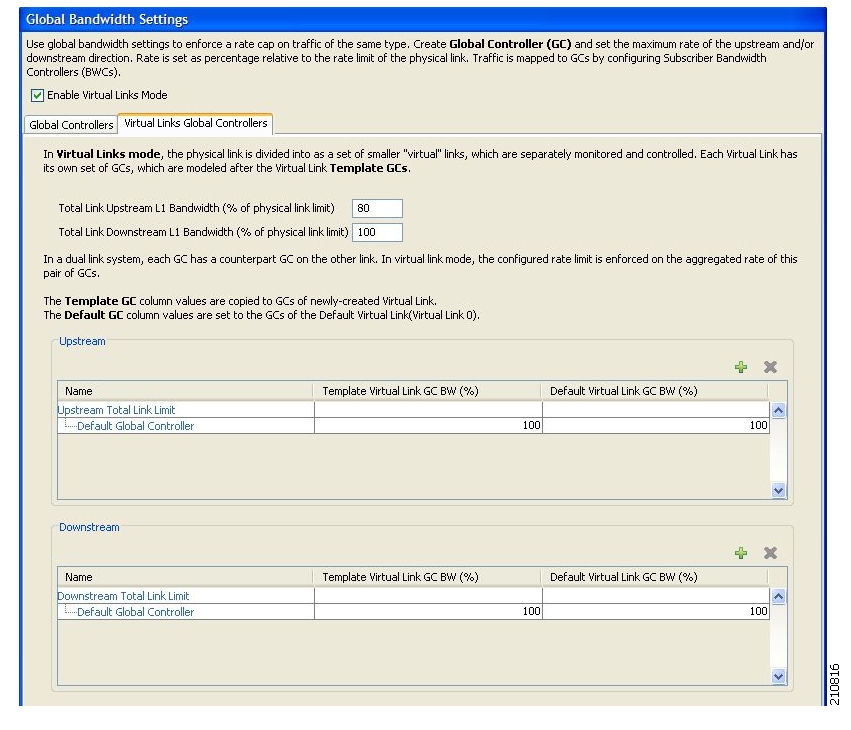
Figure 9-36
The maximum percentage of the total physical link bandwidth that can be used by any global controller is displayed at the top of the Virtual Links Global Controllers tab:
•
•
The percentage values of the global controllers defined in the rest of the dialog box depend on the values displayed here. So, for example, if the Total Link Upstream L1 bw (%) has a value of 80 and the upstream default global controller has a value of 100>, this is 100>of 80>of the physical link bandwidth.
The main part of the dialog box contains the Upstream area listing upstream global controllers and the Downstream area listing downstream global controllers. Each list has three columns:
•
•
•
For an explanation of the values in these two columns, see How to View Global Controller Settings.
Step 2
A tooltip appears, showing the actual maximum bandwidth permitted to this global controller, in Mbps. This figure is calculated automatically by the system based on the possible SCE platform types (Gigabit Ethernet or Fast Ethernet), the controller maximum bandwidth percentage, and the total link bandwidth percentage.
Step 3
The Global Bandwidth Settings dialog box closes.
How to Edit the Virtual Links Total Link Limits
You can limit the total bandwidth passing through the physical link.
The total link limits for upstream and downstream traffic are defined independently.
In a dual-link system, bandwidth limitations are applied to the sum of the two links.
Step 1
The Global Bandwidth Settings dialog box appears.
Step 2
The values displayed in the tooltips of all the cells in the Link 1 BW (%) cells change to reflect the new total link limit.
Step 3
Your changes are saved.
The Global Bandwidth Settings dialog box closes.
How to Manage Virtual Links with CLI Commands
You can configure, enable and disable virtual links using the SCE platform Command-Line Interface (CLI). For more information about the SCE platform CLI, see the Cisco Service Control Engine (SCE) CLI Command Reference.
Use the following CLI commands to manage virtual links:
•
•
•
•
•
These commands are line interface configuration commands. To run these commands you must enter line interface configuration mode and see the
SCE(config if)#prompt displayed.Use the following CLI command to set the virtual links index of a subscriber:
•
This commands is a line interface configuration command. To run this command you must enter line interface configuration mode and see the
SCE(config if)#prompt displayed.Use the following CLI command in EXEC mode to monitor the status of virtual links:
•
Follow the steps below to enter line interface configuration mode.
•
Description of Virtual Links CLI Commands
The following table gives a description of the virtual links CLI commands listed in this section.
Step 1
SCE#), type: configure.Step 2
The
SCE(config)#prompt appears.Step 3
Step 4
The
SCE(config if)#prompt appears.
Managing Quotas
•
•
•
Breach-Handling Parameters
The following are the configuration parameters in the Breach Handling tab of the Edit Rule for Service Settings dialog box.
•
–
–
–
–
–
–
–
–
–
–
Note
To define Subscriber Notifications, see Managing Subscriber Notifications.
How to Edit Quota Management Settings for Packages
You can define whether quota management for a package is performed by an external quota manager or by SCA BB.
You also define the quota buckets associated with the package. Rules can use quota buckets to set limits to the consumption of particular service groups (see the following section).
Quota Replenish Scatter
By default, if subscriber quota is replenished using periodical quota management, the quota of all subscribers is replenished at the same time. To smooth quota replenishment, you can scatter the time of quota replenishment.
To activate this feature, enter a non-zero value for the Length of the time frame for quota replenish scatter (minutes) property of the Advanced Options tab of the Systems Settings dialog box (see Managing Advanced Service Configuration Options ). By default, this property has a value of zero, that is, all quota is replenished at the same time.
Each subscriber's quota replenishment occurs at a random time within the quota replenish scatter time frame, with replenish events split evenly before and after the quota aggregation time.
Best results are obtained if the scatter time frame is the same length as the quota aggregation period, which should completely smooth replenish events. (Do not enter a value larger than the quota replenish period.) In the case of hourly quota replenish period, the scatter should therefore be set to 60 minutes.
The quota replenish scatter function is independent of all other quota management parameters.
Step 1
The Package Settings dialog box appears.
Step 2
The Quota Management tab opens.
Step 3
•
Note
Click OK to continue.•
Note
Step 4
•
•
Step 5
1.
Note
2.
3.
Note
Make sure that the configuration is appropriate to the rules that you will apply to the package. For example, if you do not configure a bucket with Type = Number of sessions, you cannot define a rule with usage limits defined in number of sessions.
Step 6
The Package Settings dialog box closes.
All changes to the quota management settings are saved.
How to Select Quota Buckets for Rules
You can select the quota buckets that the flows mapped to a rule will use. The quota buckets in the drop-down lists were defined during package setup (see Editing Package Quota Management Settings (Using the Quota Management Tab (Packages) How to Edit Quota Management Settings for Packages ). If no quota bucket is appropriate for the rule, add a new quota bucket to the package or edit an existing bucket.
Step 1
Step 2
Step 3
The Edit Rule for Service dialog box appears.
Step 4
The Usage Limits tab opens.
Step 5
•
•
•
Note
Step 6
Step 7
The Edit Rule for Service dialog box closes.
All changes to the rule are saved.
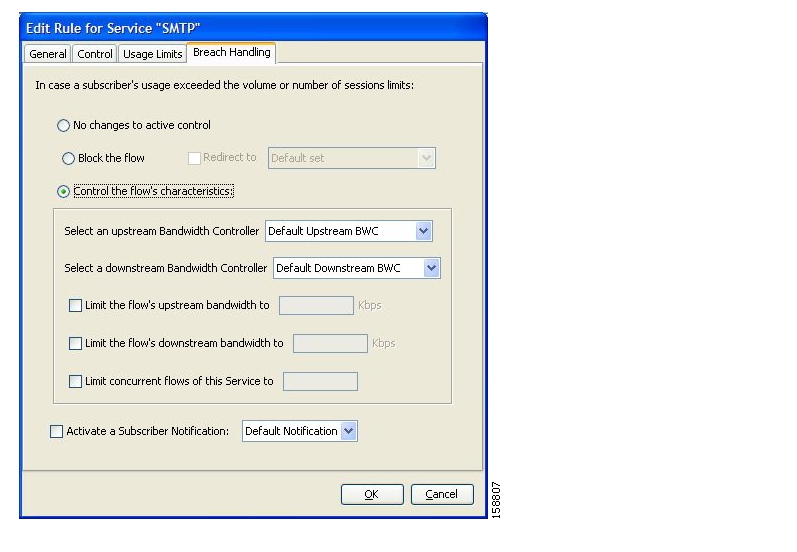
How to Edit Breach-Handling Parameters for a Rule
You can define the SCE platform behavior when an aggregated volume limit or the total number-of-sessions limit is exceeded. You can also notify subscribers when they exceed their quotas.
Step 1
Step 2
Step 3
The Edit Rule for Service dialog box appears.
Step 4
The Breach Handling tab opens.
Figure 9-37
Step 5
To change the flow's characteristics when quota is breached, continue at step 9.
To leave the flow unchanged when quota is breached, select the No changes to active controlradio button.
Step 6
Step 7
1.
The Redirect to check box is enabled.
2.
Note
Click OKto continue.3.
Note
Click OK, and continue at step 10.4.
Step 8
Step 9
The options in the Flow Characteristic area are enabled:
•
The BWCs in this drop-down list are defined when creating or editing the package (see How to Edit Package Subscriber BWCs ).
When the mouse is placed over the drop-down list, a tooltip appears containing the properties of the selected BWC (Peak Information Rate (PIR), Committed Information Rate (CIR), Global Controller, and Assurance Level).
•
•
•
•
Step 10
Note
•
Note
Note
Step 11
The Edit Rule for Service dialog box closes.
All changes to the rule are saved.
![]()
![]()
![]()
![]()
![]()
![]()
![]()
![]()
Posted: Mon Oct 8 19:15:38 PDT 2007
All contents are Copyright © 1992--2007 Cisco Systems, Inc. All rights reserved.
Important Notices and Privacy Statement.