|
|

Table Of Contents
Setting Bladelet Properties, Variables, and Rules
Variable Picker Dialog—Manage and Initialize
Advanced Variable Picker Dialog—Select, Manage, and Initialize
Setting Bladelet Properties, Variables, and Rules
Basic tasks involving creating PEPs are discussed in Getting Started with Cisco ADS
This section explains how to set Bladelet Properties, manage Variables, and set Rules within each Bladelet Properties window. However, each Bladelet and its Bladelet Properties is explained in ADS Bladelets Reference
Note
For more information on implementing an AON network, see the following:
•
–
–
•
–
–
Contents
•
•
Assigning Bladelet Properties
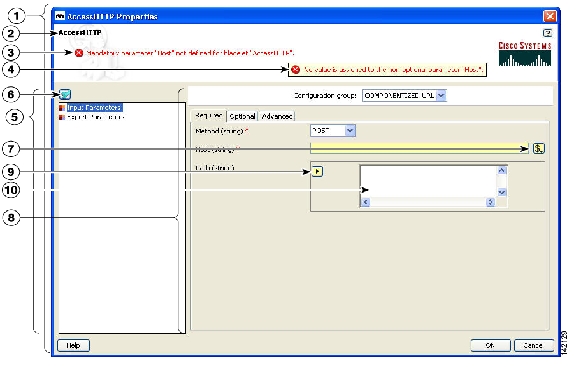
You assign Bladelet properties by means of the Bladelet Properties window ( Figure 20) and subsequent dialog boxes. To open this window, follow the procedure in the "Creating PEPs" section, in "Getting Started with Cisco ADS" chapter. The window shown here is for the AccessHTTP Bladelet.
Required Fields
Each required field in the Bladelet Properties window is marked by a red asterisk. Until all required fields are completed with the correct value, an error message appears on top of the Bladelet Properties window to indicate which field remains to be completed or indicates that there is a parameter type mismatch and so on before the Bladelet is completely configured.
Text Area and Auto Complete Field
The Bladelet Properties window provides either a text area or an auto complete field. An Arrow icon—toggle button—allows to toggle between the text area and auto complete text field. If the data type is of the string type, the Text area is the default; otherwise it is an auto complete text field.
The Bladelet Properties window displays an auto complete text field with a yellow background. You can enter a $ (dollar) sign to trigger the available list of variables in the current scope. You can select a variable from the list by double-clicking your mouse or by pressing the Enter key. After the variable is entered in the auto complete text field, you can use a . (dot) to get the attributes of the selected variable. You can enter $ and . after the selected variable to see if the list includes more methods.
Figure 20 Bladelet Properties Window
Managing Variables
ADS 2.1 has a new Variable Picker dialog box. It has a tabbed panel which allows you to perform all the operations with the variables in one single dialog box. You can add, delete, rename variables. You can also initialize variables and set values for the variables before and after a Bladelet Execution. It also binds the variables to parameters in the Bladelet Properties window. You can also scope variables through this dialog, where only the variables visible in the current scope are listed in this dialog. All the variables in the current scope and also from the parents scope are visible.
You can invoke the Variable Picker Dialog window ( Figure 21) in two different ways:
•
•
Figure 21 Icons to Open the Variables Dialog
Variable Picker Dialog—Manage and Initialize
Manage Variables Icon
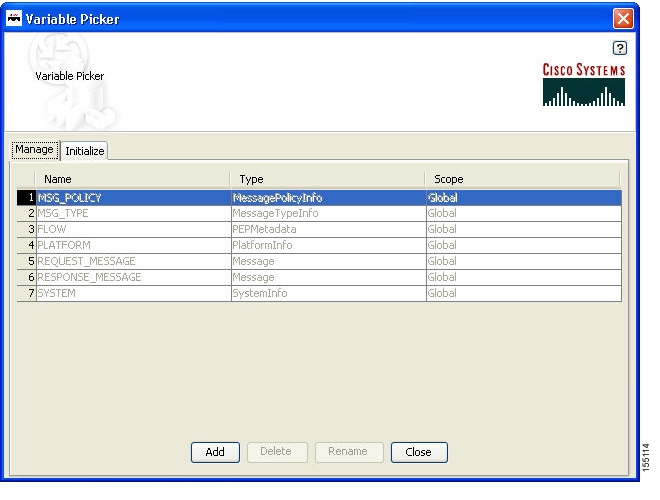
The Variables Picker Dialog ( Figure 22) with two tab pages—Manage and Initialize—appears when you click the Manage Variables icon within any Bladelets Properties window. You can also open the same window by Right-Clicking the mouse on a PEP, or Bladelets, or anywhere inside the PEP Developer Pane.
Variable Picker—Manage tab
You can select the Manage tab ( Figure 22) to add, delete, and rename variables in the current scope. A list of existing variables is provided in a table view along with the Scope information. Variables names are treated unique in a parent/child hierarchy. Therefore, you can define variables of the same name in different scopes. Deleting variables is restricted to validate if the variable is being used in any of the Parameters of the bladelets in the current scope. Renaming of a variables renames the references in the variables in all the Assignment Blocks, Rules, and also in Bladelet Properties Dialog.
Figure 22 Variable Picker—Manage Tab
Variables Definition
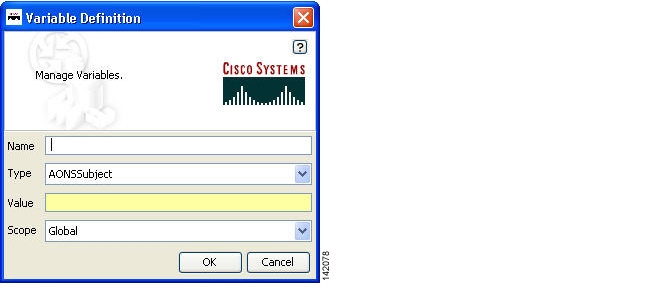
The Variables Definition window ( Figure 23) appears when you click the Add button in the Manage Tab dialog window.
Figure 23 Variables Definition
You can add new variables from the Variable Definition dialog window. You can also chose the Type and Scope of the variable along with an initialization Value. To see the complete list of Variable-Type choices, see
Variable Picker—Initialize Tab
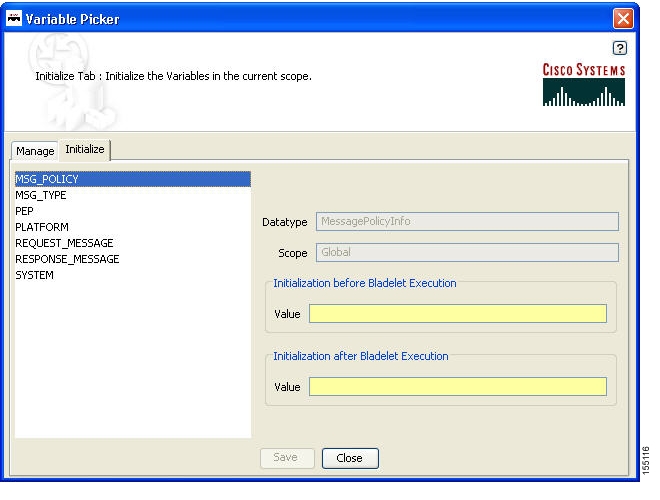
You can select the Initialize tab ( Figure 24) to initialize the variables in the current scope. Each variable has a value before and after a Bladelet Execution. You are able to complete the value fields by using the Auto Complete feature, which provides the drop-down selection window. This window provides an auto complete text field with a yellow background. You can enter a $ (dollar) sign to trigger the available list of variables in the current scope. You can select a variable from the list and select it by double-clicking your mouse or by pressing the Enter key. After the variable is selected, you can also use a . (dot) to get the attributes of the selected variable. You can enter $ (dollar) or a . (dot) after the variable to see if the list includes more methods.
Figure 24 Variable Picker—Initialiaze Tab
Note
Advanced Variable Picker Dialog—Select, Manage, and Initialize
Advanced Variables Options
The Variables Picker dialog window ( Figure 25) with three tab pages—Select, Manage, and Initialize—appears when you click the Advanced Variables Options icon within any Bladelets Properties window.
Note
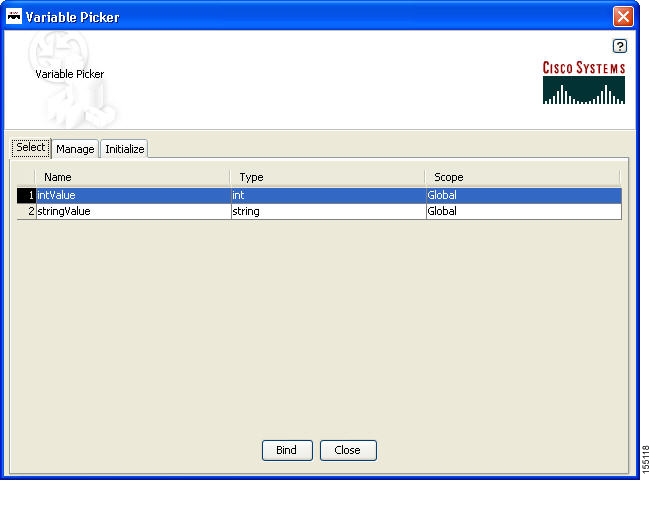
Advanced Variable Picker—Select tab
You can bind variables to different parameters in Bladelet Properties based on the type of the parameter. The variables listed in this tab are either of the same type or the types convertible to the binding type visible in the current scope.
Figure 25 Advanced Variable Picker—Select Tab
Note
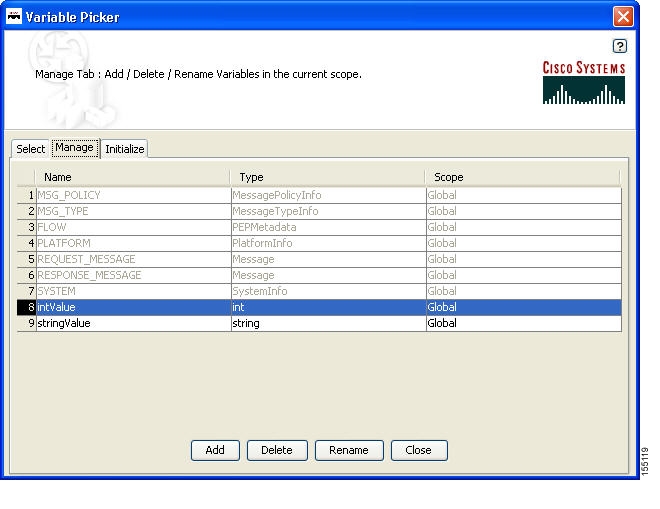
Advanced Variable Picker—Manage Tab
You can select the Manage tab ( Figure 26) to add, delete, and rename variables in the current scope. A list of existing variables is provided in a table view along with the Scope information. Variables names are treated unique in a Parent/Child hierarchy. Therefore, you can define Variables of the same name in different scopes. Deletion of Flow Variables is restricted to validate if the Variable is being used in any of the Parameters of the bladelets in the current scope. Renaming of a Variables renames the references in the Variables in all the Assignment Blocks, Rules and also in Bladelet Properties Dialog.
Note
Figure 26 Advanced Variable Picker—Manage Tab
The Variables Definition window ( Figure 27 ) appears when you click the Add button in the Manage Tab dialog. You can add new variables from this dialog window. You can also chose the Type and Scope of the variable along with an initialization value.
Figure 27 Variables Definition
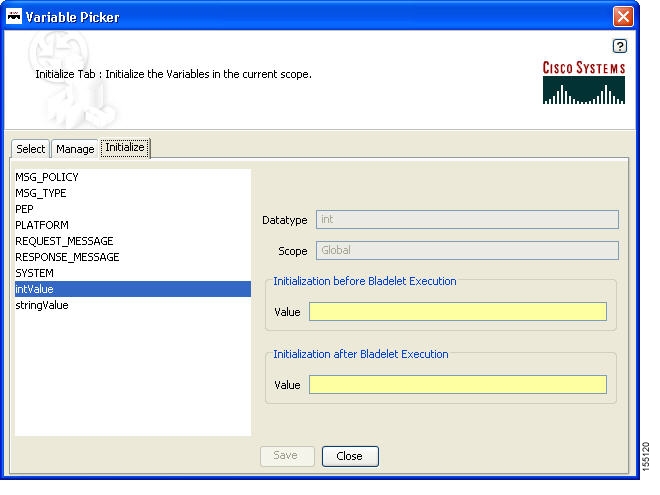
Advanced Variable Picker—Initialize tab
You can select the Initialize tab ( Figure 28) to initialize the variables in the current scope and assign Value. Each Variable has a value before and after a Bladelet Execution. You are able to complete the value fields by using the Auto Complete feature, which provides the drop-down selection window. This window provides an auto complete text field with a yellow background. You can enter a $ (dollar) sign to trigger the available list of variables in the current scope. You can select a variable from the list and select it by double-clicking your mouse or by pressing the Enter key. After the variable is selected, you can also use a . (dot) to get the attributes of the selected variable. You can enter $ (dollar) or a . (dot) after the variable to see if the list includes more methods.
Note
Figure 28 Advanced Variable Picker—Initialize Tab
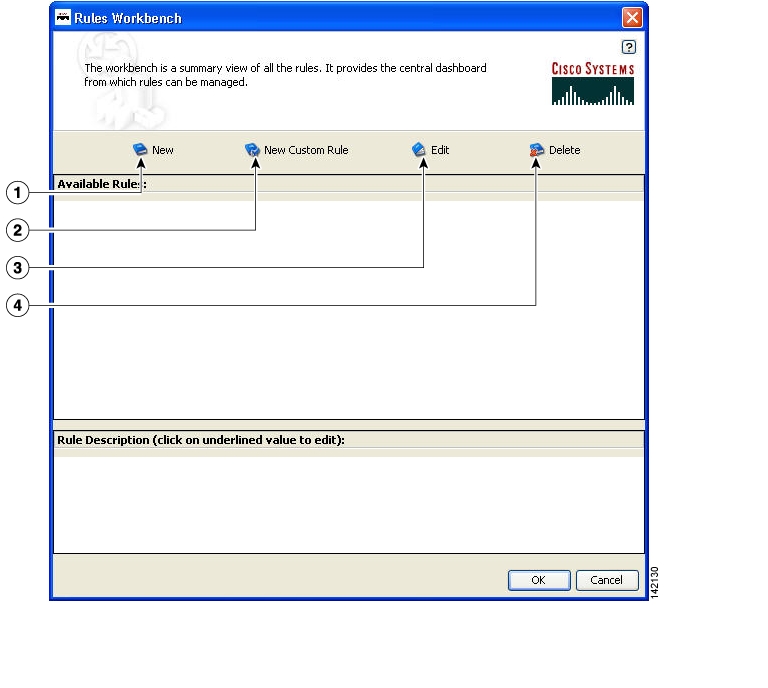
Managing Rules Workbench
The Rules Workbench dialog box ( Figure 29) appears when you click the Rules Wizard icon from the ADS icon bar (or choose PEP > Rules Wizard). It is also available from the Bladelet Properties window for bladelets, such as Branch, Distribute, SetDestination, Authorize, and BalanceLoad.
Figure 29 Rules Workbench Dialog Box
Rules Workbench—New Rules
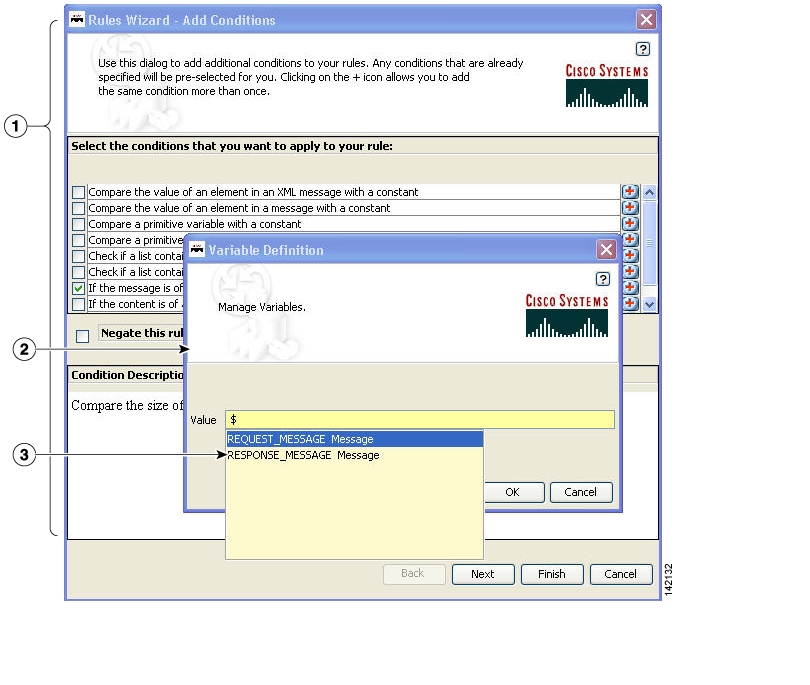
The Rules Wizard—Add Conditions dialog box ( Figure 30) appears when you click the New icon in the Rules Workbench dialog box. You can select and configure rules from the list.
After you create a rule, this dialog box is also available from the Edit or Delete icon in the Rules Workbench dialog box. You are able to edit or delete a rule as needed.
Figure 30 Rules Wizard—Add Conditions
List of available conditions from which to select (click a condition and set its values)
Conditions Description area
The Variable Definition window ( Figure 31) appears when you select "If the message is of a certain size" and then select message in the Condition Description area of the Rules Wizard—Add Conditions dialog box ( Figure 30) to define the message.
This window provides an auto complete text field with a yellow background. You can enter a $ (dollar) sign to trigger the available list of variables in the current scope. You can select a variable from the list by double-clicking your mouse or by pressing the Enter key. After the variable is selected, you can also use a . (dot) to get the attributes of the selected variable. You can enter $ and . to see if the list includes more methods.
Figure 31 Variable Definition
Available Templates area (click a template)
Rule Description area (click a rule and set its values)
Rules Workbench—Custom Rules
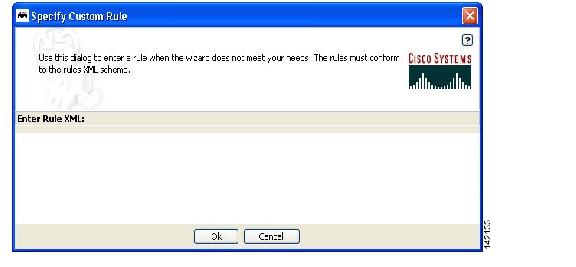
The Rules Workbench—Specify Custom Rules dialog box ( Figure 32) appears when you click the New Custom Rules icon in the Rules Workbench dialog box. You can manually enter values that you want to include in a condition. The rules must conform to the rules XML schema. For the custom rules XML schema, see the Custom Rule XML Schema section.
Figure 32 Rules Workbench—Specify Custom Rule
Custom Rule XML Schema
<!-- ARML (AONS Rule Markup Language) DTD --><!ELEMENT ruleset (rule*)><!ATTLIST ruleset name NMTOKEN #IMPLIED><!ELEMENT rule (condition?, action*) ><!ATTLIST rule name NMTOKEN #REQUIRED><!ENTITY % booleanExp "(unaryExp | binaryExp | naryExp)"><!ELEMENT condition (%booleanExp;)><!ELEMENT action (assignment)* ><!ATTLIST action conditionValue NMTOKEN #REQUIRED><!ENTITY % expression "(variable | %booleanExp; | constant)"><!ELEMENT unaryExp (%expression;)><!ATTLIST unaryExp operator (not) #REQUIRED><!ELEMENT binaryExp (%expression;,%expression;)><!ATTLIST binaryExp operator (eq | neq | lt | lte | gt | gte) #REQUIRED><!ELEMENT naryExp (%expression;)+><!ATTLIST naryExp operator (and | or) #REQUIRED><!ELEMENT assignment (variable,(%expression;)?)><!ELEMENT constant EMPTY><!ATTLIST constanttype (string | boolean | byte | short | char | long | int | float | double | null) #REQUIREDvalue CDATA #REQUIRED><!ELEMENT variable EMPTY><!ATTLIST variablename NMTOKEN #REQUIREDtype (string | boolean | byte | short | char | long | int | float | double | object) #REQUIREDextensionType (xpath | regex ) #IMPLIEDapplyTo CDATA #IMPLIEDapplyToType (Document | string) #IMPLIEDapplyToValue CDATA #IMPLIED>
![]()
![]()
![]()
![]()
![]()
![]()
![]()
![]()
Posted: Fri Oct 6 16:59:07 PDT 2006
All contents are Copyright © 1992--2006 Cisco Systems, Inc. All rights reserved.
Important Notices and Privacy Statement.