|
|

Table Of Contents
ADS Bladelets Reference
A Bladelet is an operation that is performed on a message. It is a user defined software component that implements certain interfaces and provides a useful unit of functions. For example, Authentication bladelet provides authentication against various authentication schemes such as, LDAP, Kerberos, and Netegrity; it will not do anything else.
Cisco AON Development Studio (ADS) provides a repository of standard Bladelets that are organized by category—for example, logic, message handling, security, transformation, and so on. This chapter presents detailed reference information that you need to choose and use ADS Bladelets.
Note
For more information on implementing an AON network, see the following:
•
–
–
–
•
–
–
Contents
Information About Bladelets
Bladelets are used in the construction of Policy Execution Plans (PEPs). You construct a PEP with the graphical-user-interface (GUI) ADS tool, which enables you to drag and drop icons representing Bladelets onto a canvas. You then "connect" the Bladelets, thus forming a PEP.
Bladelets are highly configurable. Using ADS, you configure Bladelets during normal PEP construction by setting their properties, which are grouped hierarchically into three levels:
<configuration-group>
<configuration-subgroup>
<parameter-group> and <parameter>
Figure 33 shows the various components of a Bladelet. (The example shown below is an Access DB Bladelet.)
Figure 33 ADS Bladelet
Bladelet Choices
This section describes the predefined Bladelets that ADS displays in its Task Pane, in Getting Started with Cisco ADS. It also describes any Bladelet properties that you need to set in order for the Bladelet to function properly.
ADS provides the following Bladelet categories:
Note
•
•
•
PEP Markers Category
In the PEP Markers category, there are two markers:
Exception-PEP Marker
Use the Exception-PEP marker for tracking and recording exceptions in the PEP. It is a good way to create instances that you can store as database records to audit exceptions as information is routed through the PEP.
There are no properties to set for this marker.
Break Marker
Use the Break marker only inside loops. It is only allowed in a Loop and cannot be used elsewhere. You cannot place any other bladelets after the Break marker. The Break marker is used to exit out of the loops. For details, see the Loop Bladelet.
There are no properties to set for this marker.
External Access Category
In the External Access Category, there are two Bladelets:
Access HTTP
Summary
The Access HTTP Bladelet makes an outgoing HTTP call using the GET or POST method in either the Componentized or Normal URL Configuration groups.
Prerequisites, Dependencies, and Restrictions
AccessHTTP is synchronous, and thus cannot be used to execute a PEP running on the same node.
Details
Figure 34 to Figure 36 show required, optional, and advanced settings for the Componentized URL Configuration group.
Figure 37 to Figure 39 show required, optional, and advanced settings for the Normal URL Configuration group.
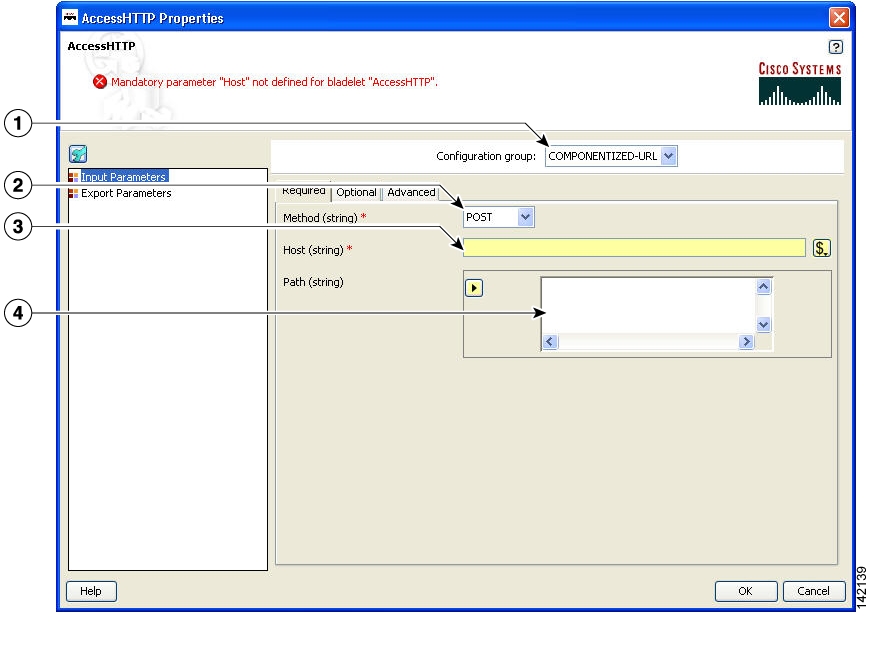
Figure 34 Access HTTP Properties Window—Input Parameters, Componentized URL, Required Tab
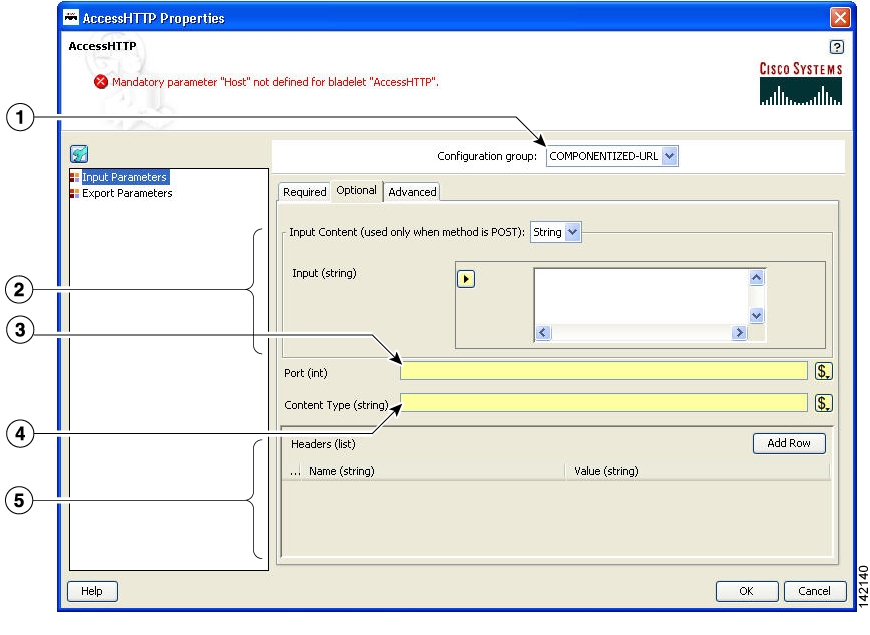
Figure 35 Access HTTP Properties Window—Input Parameters, Componentized URL, Optional Tab
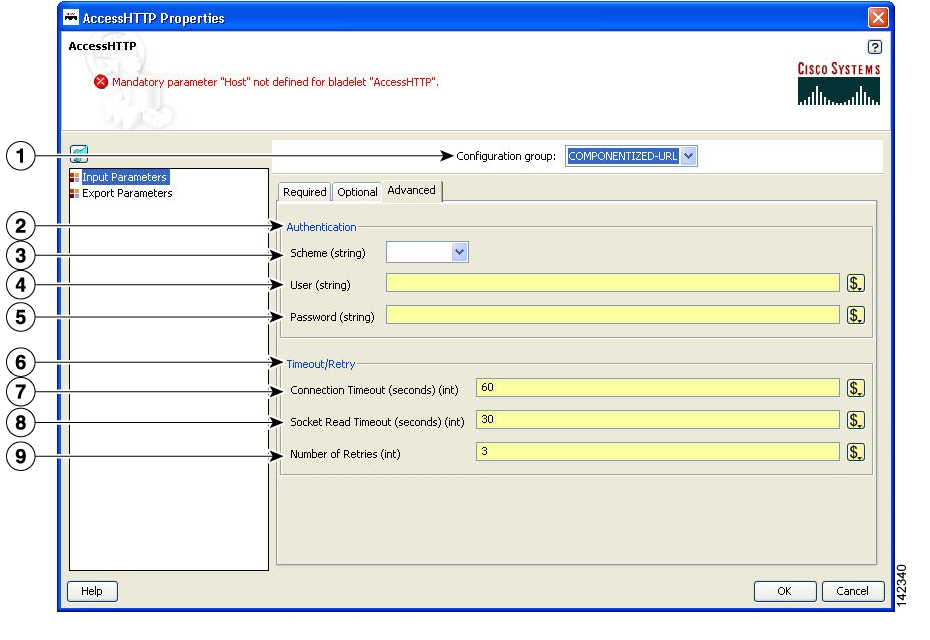
Figure 36 Access HTTP Properties Window—Input Parameters, Componentized URL, Advanced Tab
Figure 37 Access HTTP Properties Window—Input Parameters, Normal URL, Required Tab
Configuration Group
Configuration group, set here to Normal URL.
Method
Method. Choices: POST or Get.
URL
Complete URL.
Figure 38 Access HTTP Properties Window—Input Parameters, Normal URL, Optional Tab
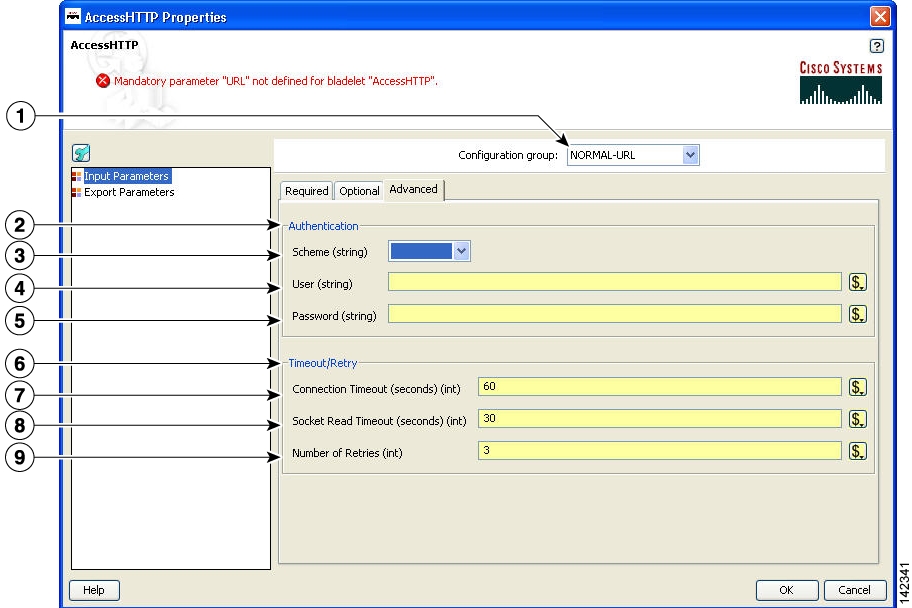
Figure 39 Access HTTP Properties Window—Input Parameters, Normal URL, Advanced Tab
Figure 40 Access HTTP Properties Window—Export Parameters
Response
Response from the HTTP call (string type).
Result
Response from the HTTP call (AON content type).
Status
Status HTTP call (integer type m).
Outcome
None.
Exceptions
•
•
Access DB
Summary
Use this Bladelet to make a SQL call out to a database.
Prerequisites, Dependencies, and Restrictions
Access DB does not work with binary objects; it only works with basic types, for example string, int, and so on.
Details
Figure 41 Access DB Properties Window—Data Source
Figure 0-42 Access DB Properties Window—SQL
Figure 0-43 Access DB Properties Window—Export Parameters
Outcome
None.
Exceptions
•
•
Note
General Category
In the General Category, there are three Bladelets:
•
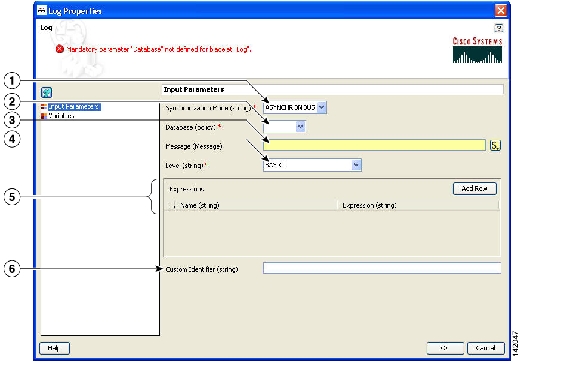
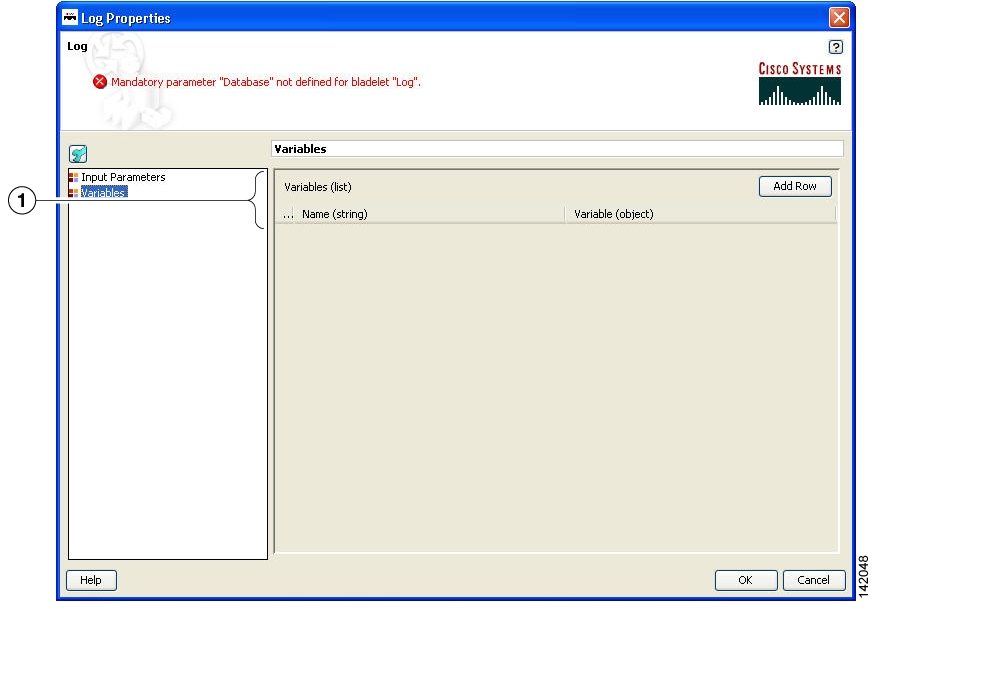
Log
Summary
The Log Bladelet allows you to log message contents, PEP variables and other important data related to the message, message class, source, destination, time stamps, and PEP name.
Prerequisites and Dependencies
None.
Details
Figure 44 Log Properties Window—Input Parameters
Figure 45 Log Properties Window—Variables
Outcome
None.
Exceptions
•
Timeout: Timeout occurred. This applies only to synchronous mode. For example, this can happen when the database is not available or is extremely slow.
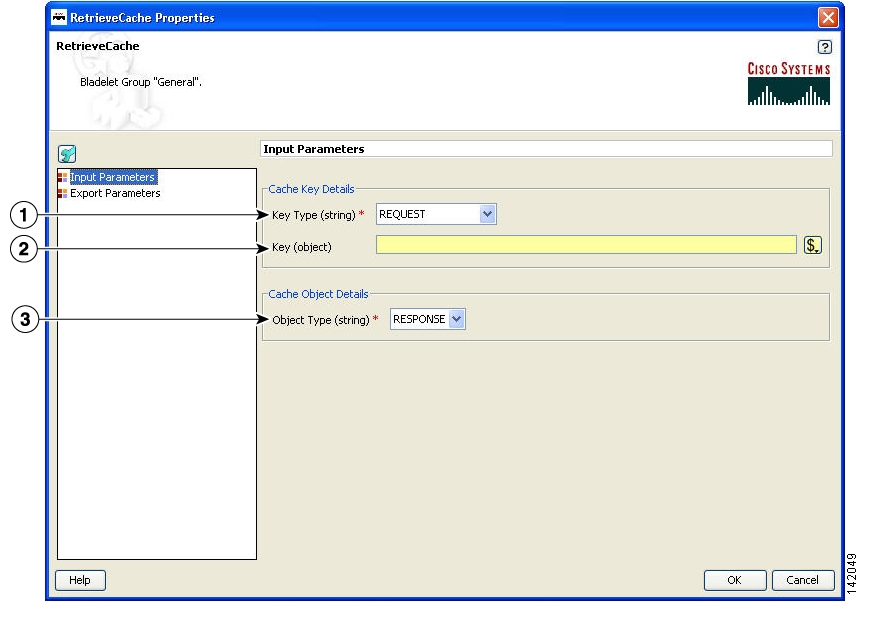
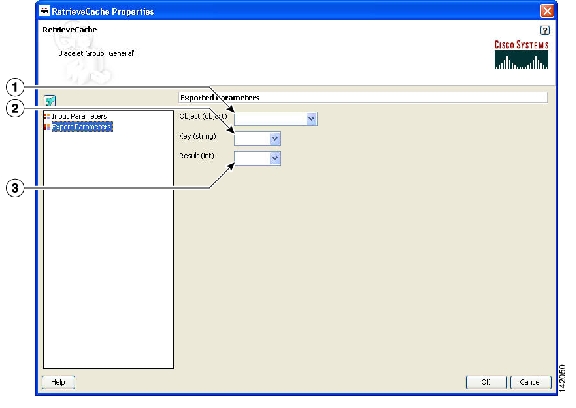
Retrieve Cache
Summary
This Bladelet retrieves data from two named caches configured on an AON node. The named caches are response and variable. The response cache caches server responses. The variable cache caches PEP variables. Populate these named caches by using the CacheData Bladelet. Populate the variable cache by using the Caching Service API exposed to custom Bladelets.
Prerequisites and Dependencies
•
Details
Figure 46 Retrieve Cache Properties Window—Input Parameters
Figure 47 Retrieve Cache Properties Window—Export Parameters
Outcome
•
•
The Bladelet exports the cache key that was used for the lookup operation, the result of the operation (0 indicates a miss; 1 indicates a hit) as follows:
•
•
Exceptions
None.
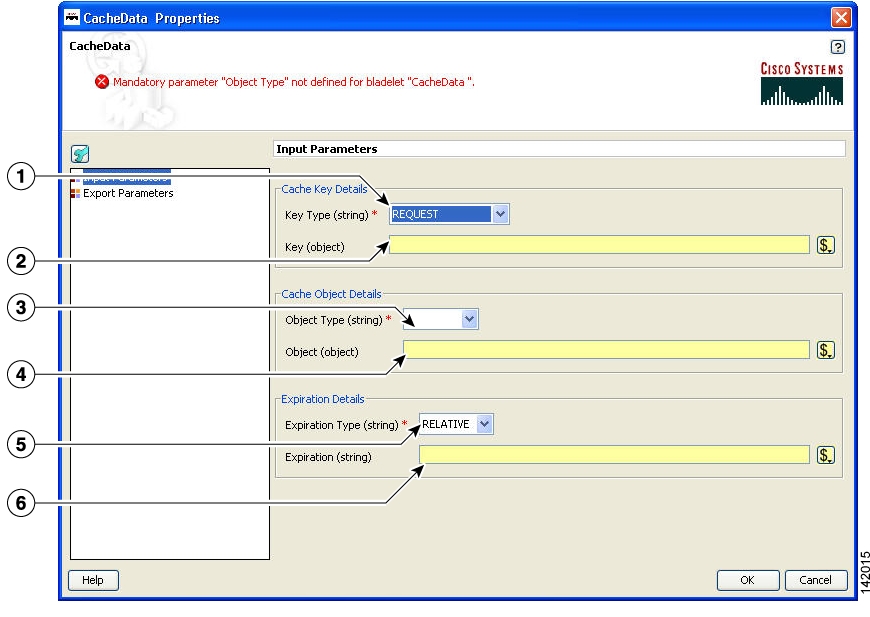
Cache Data
Summary
This Bladelet should be used to set data into the named caches configured on an AON node. The named caches are "response" and "variable". The "response" cache caches server responses. The "variable" cache caches PEP variables. You can retrieve data from the named caches by using the RetrieveCache Bladelet. In addition, you can retrieve data from the "variable" cache by using the Caching Service API exposed to Custom Bladelets.
Prerequisites and Dependencies
•
Details
When it is given a cache key and optionally a PEP variable, this Bladelet caches the variable or the server response message.
Figure 48 Cache Data Properties Window—Input Parameters
Figure 49 Cache Data Properties Window—Export Parameters
Outcome
•
Exceptions
None.
Logic Category
In the Logic Category, there are two Bladelets:
•
•
•
•
Loop
Summary
The Loop Bladelet allows you to construct a PEP and apply repeated business logic processing based on the number of items in the data types—Counter, Iterator, or Map—over which the loop is performed. This construct is identical to a loop which is found in the Java or C programming languages. The Loop Bladelet is represented as a block in which other bladelets are placed.
Figure 50 Loop Bladelet
Prerequisites and Dependencies
None.
Details
A PEP can be viewed as a program expressed in the PEP Description Language (PDL). PDL is a programming language and defines the variable types used in a PEP as the fundamental data types. The PDL exposes a number of data types—List, Map, and Iterator. At runtime, these data types represent a collection of other data types (List and Map) or a cursor into this collection (Iterator). When handling these data types, it is almost always required to do some kind of repeated processing (loop) for each entry in the collection.
Note
The Loop Bladelet has three different data types—Counter, Iterator, and Map.
Counter
The Counter Loop is used when a given operation (for example, another bladelet needs to be executed) needs to be performed specific number of times. It is similar to a "for" loop with counter variable being initialized to a user specified value and incriminated by a user specified amount. The loop terminates at a user specified end value. See Figure 51 for the details of the Counter Loop parameters.
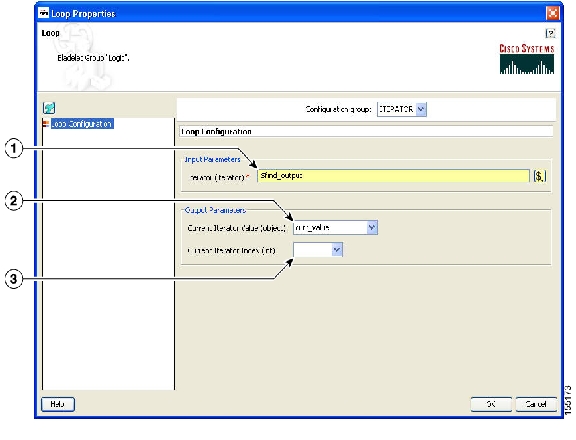
Iterator
The Iterator Loop must be used to loop through a list. The current object and index is available at each loop iteration and can be used by bladelets within the loop. See Figure 52 for the details of the Iterator Loop parameters.
Map
The Map Loop is used to iterate over a map. It exposes both the current key and current value at each loop iteration, both of which can be used by bladelets within the loop. See Figure 53 for the details of the Map Loop parameters.
Figure 51 Loop Properties Window—Counter
Figure 52 Loop Properties Window—Iterator
Figure 53 Loop Properties Window—Map
Outcome
Loops can be nested to arbitrary levels and there is no pre-defined limit to the number of loops that can be used in a PEP. For each type of data that the loop executes over, a different set of PEP variables are exported.
Exceptions
None.
Scope
Summary
The Scope Bladelet is used to define a physical block within a PEP that allow localized definition of variables and business logic.
Prerequisites and Dependencies
None.
Details
There are no properties to set for this Bladelet.
The scope construct in the PEP Description Language (PDL) allows you to define physical blocks within the PEP that allow localized definition of variables and business logic. This is similar to the {} operator in the Java or C++ programming languages where a block of execution bounded by the braces serves as a container for variables that are not visible outside the execution block.
A single scope block can only have one immediate parent scope (the scope block within which it is nested) and the global scope (always present) is the top level scope and is the root node in the tree representation of all the scopes in a PEP. There are some semantics that apply when using a scope block. In general a scope block is most useful when it is used to restrict the scope of a PEP variable ensuring that a variable defined in one part of the PEP is not available for use in other parts of the PEP. The restrictions on the variables in a Scope are dependent on the visibility of the variable in that block. A scope block can recognize those variables that are defined in its parent scope.
In Figure 54 the root node of the tree represents the default Global scope that is always present in a PEP. You can add additional scopes by dragging the scope construct from the palette to the canvas and including it at any point in the flow. Figure 54 shows a sample PEP containing two explicit scope blocks and the global scope (represented by the white background region on the canvas).
Figure 54 Sample Scopes within a PEP
In the first scope the Authenticate Bladelet can only use the variables defined with global and Scope. In the second scope, Scope 1, the Authorize Bladelet can only use variables defined with global or Scope 1. The Log Bladelet can only use variables defined with Global or Scope 1.
Outcome
Scopes can be nested within each other with no pre-defined limit on the number of scopes that can be included in a PEP.
Exceptions
None.
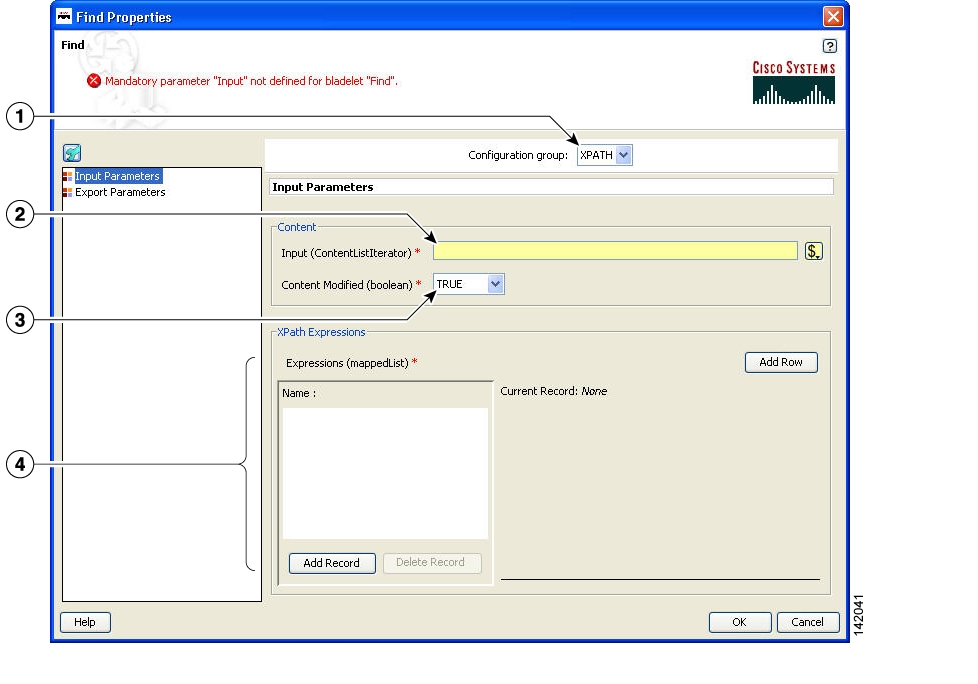
Find
Summary
The Find Bladelet queries an XML message and extracts all nodes identified by regular (for regular expressions, the message type does not need to be in XML format) and XPath expressions from the message currently being processed by the PEP. After regular and common XPath expressions are evaluated by this Bladelet, they are available for use by other Bladelets. Either XPath or Regex expressions can be evaluated; if both need to be evaluated, you must incorporate multiple instances of the Find Bladelet.
The Regex evaluation engine used by the Find bladelet uses Java Regex API from Sun Microsystems, Inc. There are several APIs to chose from, so we recommend that you use the API that matches the whole input string rather than finding only a match. You need to use the API that matches the whole input string because Find Bladelet needs to save the result of Regex evaluation.
For details of Java Regex API from Sun Microsystems, Inc, see http://java.sun.com/docs/books/tutorial/extra/regex/.
Note
Or
You can also use the Rules Wizard to perform Regex evaluation.Prerequisites and Dependencies
None.
Details
The Find Bladelet finds multiple items from within the message using XPath expressions (for XML messages) or Regular Expressions for Non-XML messages. It works on both MIME as well as NON-MIME data. The output of the find Bladelet is placed inside a PEP variable of type FindResultMapListIterator. This data type is a complex data type that encapsulates results that are found from all parts (> 0 if MIME) of the message that is being searched. The structure of the data type is as follows:
FindResultMapListIterator:
List of parts of the message on which the Find Bladelet operates (List of size 1 containing the results if it is Non-MIME; List of size > 1 if more than 1 MIME part is in the message)
Map of all the different expressions that were searched (recall that you enter a value on the left-hand list box in the Find Bladelet and for each of these you specify a list of expressions on the right-hand table. The map contains key-value pairs with the key being the entries on the left-hand box and the value being a list (size of this list = number of expressions entered for each key). The elements in this list are the actual search results.
Note
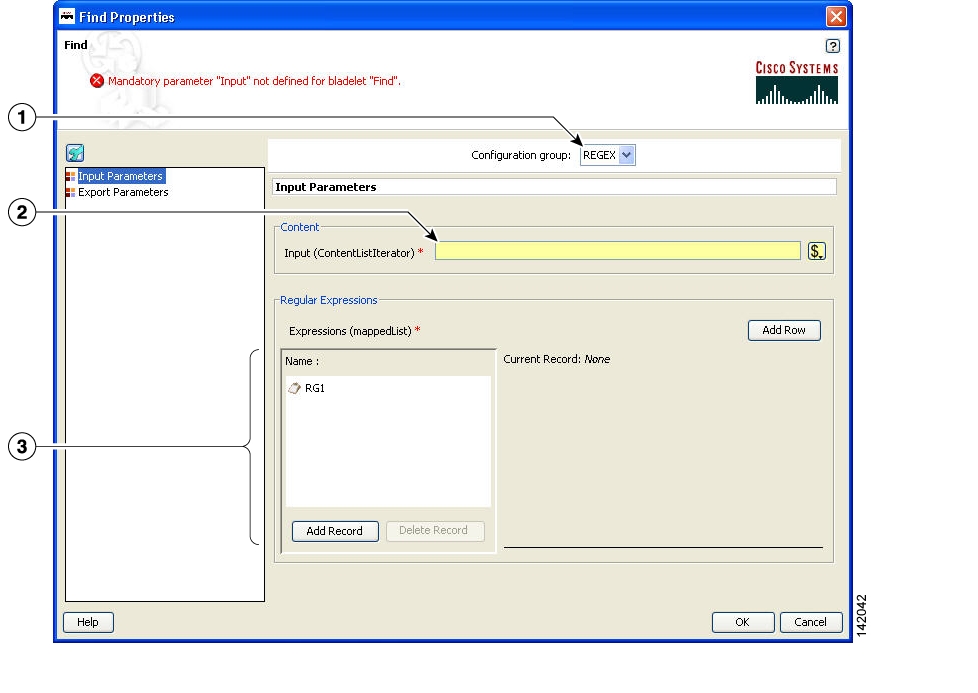
Example:Key (Left hand side list box) XPath Expression listk1 e1e2k2 e3Assume a regular input message (NON-MIME). The way to extract the results are (assume that the output of Find is bound to a PEP variable called findResults) in the Specify Value text box of the PEP Variable Picker dialog type:findResults.elementAt(0).elementAt(k1).elementAt(0).value()This expression returns the value of the search result using expression e1 on the message whilefindResults.elementAt(0).elementAt(k1).elementAt(1).value()gives the value of the search results for e2.The value() function is used if you know your xpath result is of type boolean, string, integer; or if you want only the string value of the first node in the XPath Result (which is a nodeSet)If the XPath result of e3 is known to be a nodeset, then to get e3 result's 2nd node's string value:findResults.elementAt(0).elementAt(k2).elementAt(2).nodeValue(1).The input parameters for this Bladelet (configuration group is set to XPath) are shown in Figure 55. Input parameters for a Bladelet whose configuration group is set to Regex are shown in Figure 56.
Figure 55 Find Properties Window—Input Parameters, XPath
Figure 56 Find Properties Window—Input Parameters, Regex
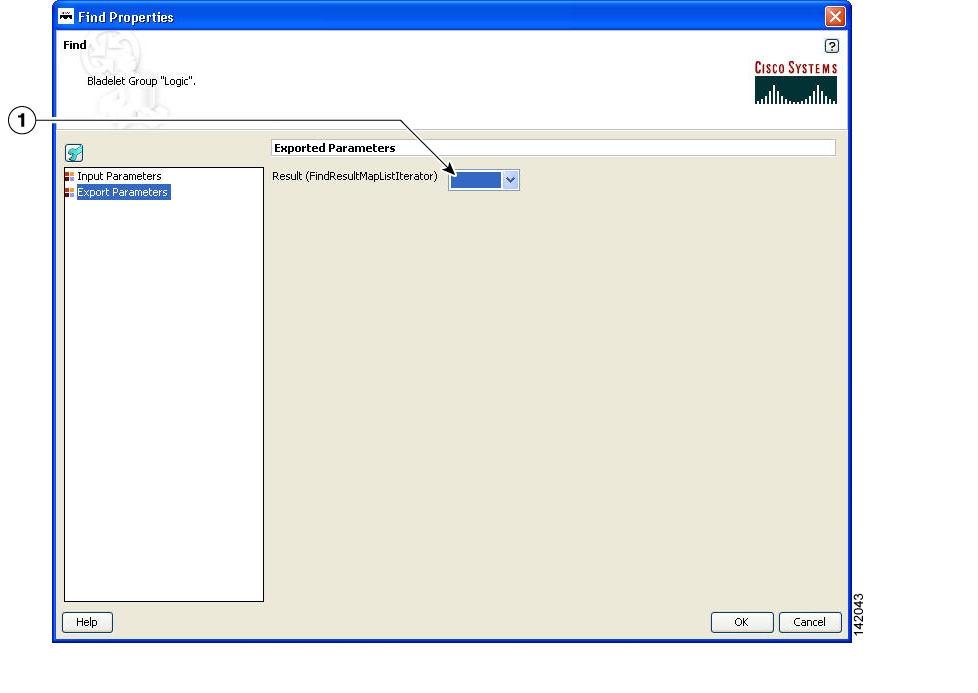
Figure 57 Find Properties Window—Export Parameters
Result
Result to be exported. Export parameter result to a variable such as IVar.
If no PEP variable is available in the list, add one without exiting the properties window as described in the "Managing Variables" section, in "Setting Bladelet Properties, Variables, and Rules" chapter.
Outcome
•
•
Exceptions
Invalid Content Type: The content type is invalid for evaluation. This happens when expression type is XPath while the message is NOT XML documents.
Branch
Summary
This Bladelet establishes conditions for message route branching based on rules and message labels. There are two main sections in the Branch Properties window.
Prerequisites and Dependencies
None.
Details
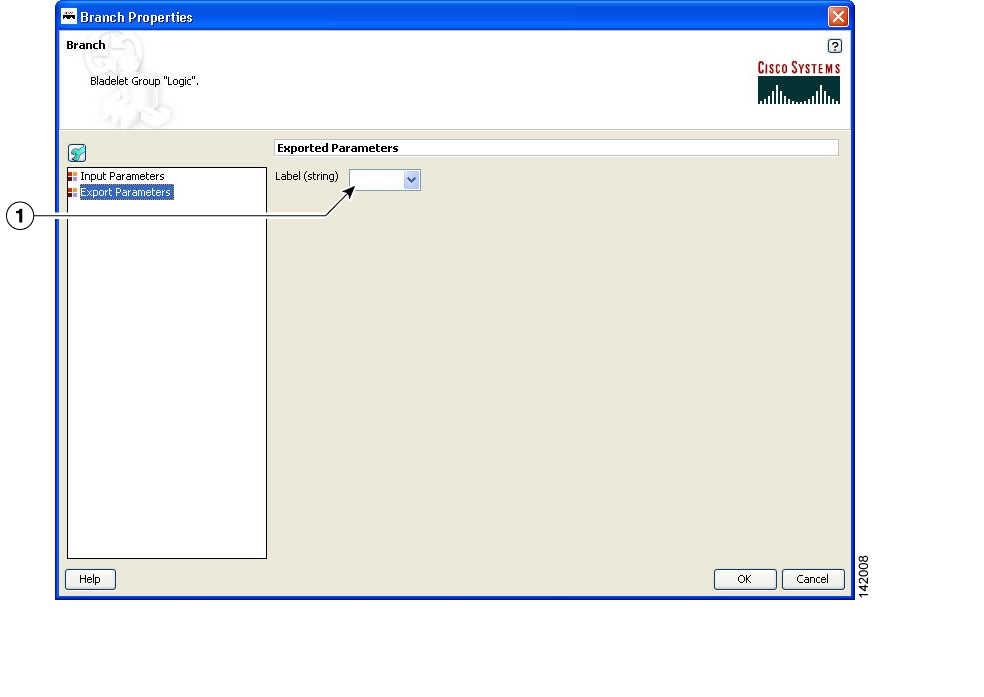
Figure 58 Branch Properties Window—Input Parameters
Figure 59 Branch Properties Window—Export Parameters
Outcome
•
•
Exceptions
None.
Message Handling Category
In the Message Handling Category, there are nine Bladelets:
•
•
Validate
Summary
The purpose of this Bladelet is to validate XML messages based on a schema (XSD) or DTD. The schema referred by the XML message must already be loaded into AON in an appropriate Schema Extension package using the AMC server.
Prerequisites and Dependencies
•
•
Details
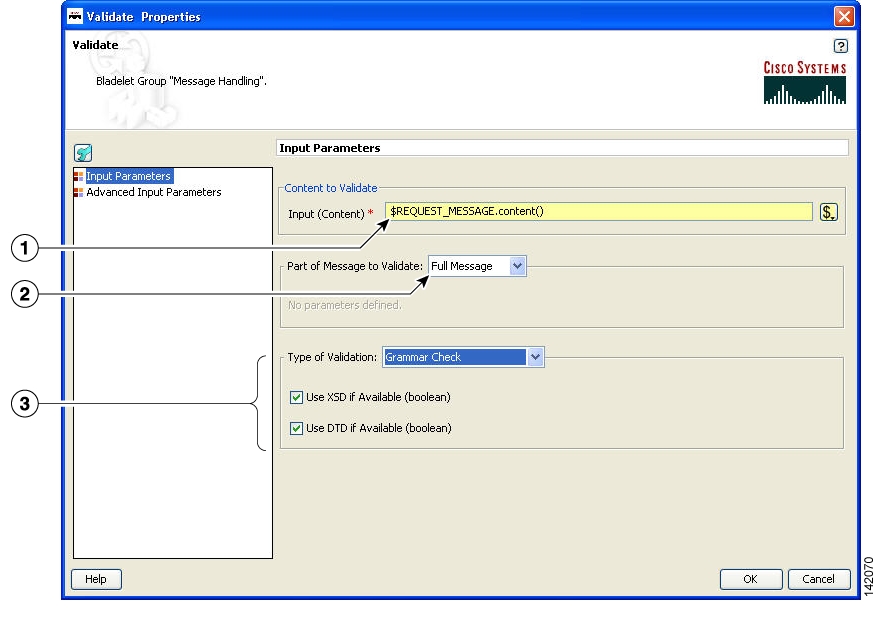
The Validate Bladelet has two main parts in its properties window: input parameters and advanced input parameters.
Figure 60 Validate Properties Window—Input Parameters, Validate
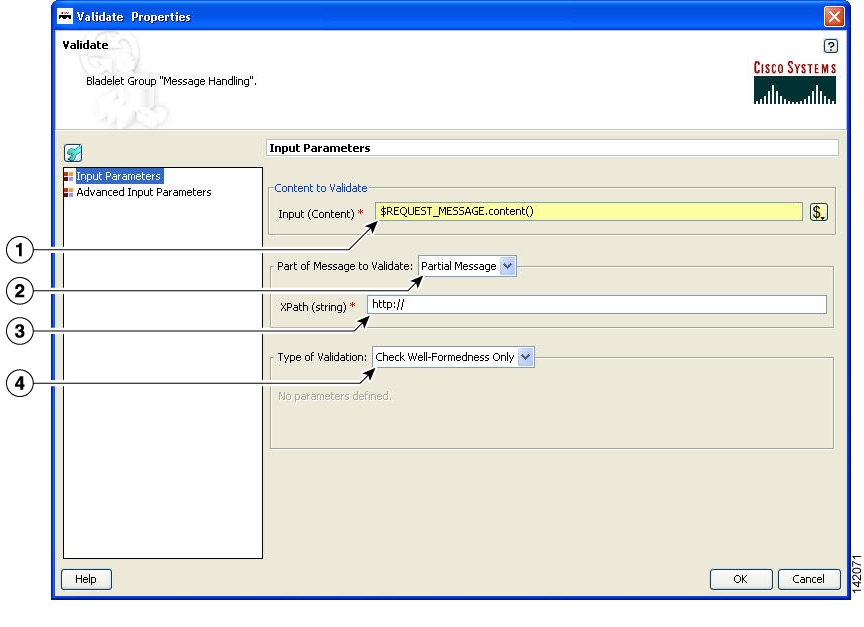
Figure 61 Validate Properties Window— Input Parameters, Check Well-Formedness Only
Figure 62 Validate Properties Window—Advanced Input Parameters 1
Figure 63 Validate Properties Window—Advanced Input Parameters 2
Outcome
•
•
–
–
–
Exceptions
None.
Build Composite Content
Summary
Creates multipart content from the given input message and the parts that need to be added/deleted/overwritten.
Prerequisites and Dependencies
None.
Details
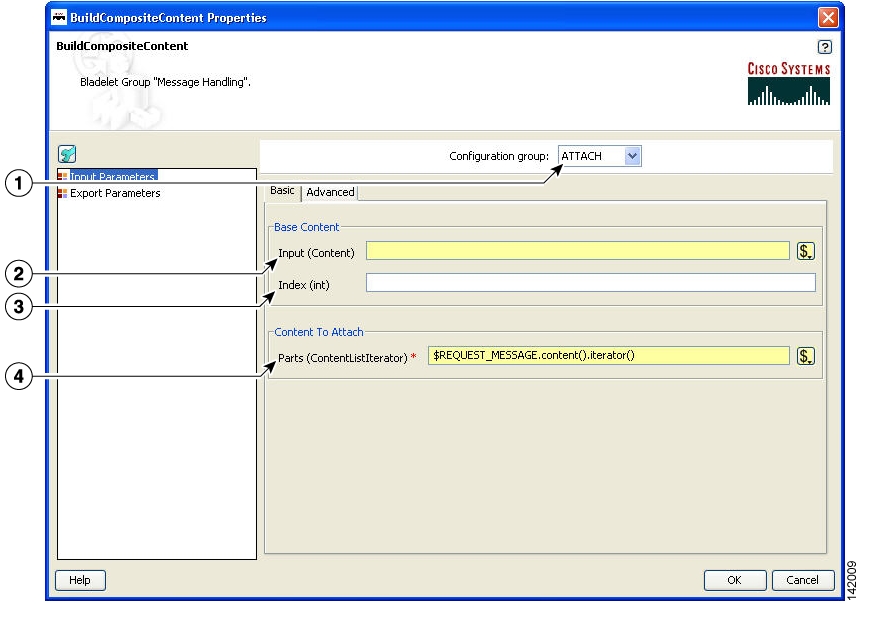
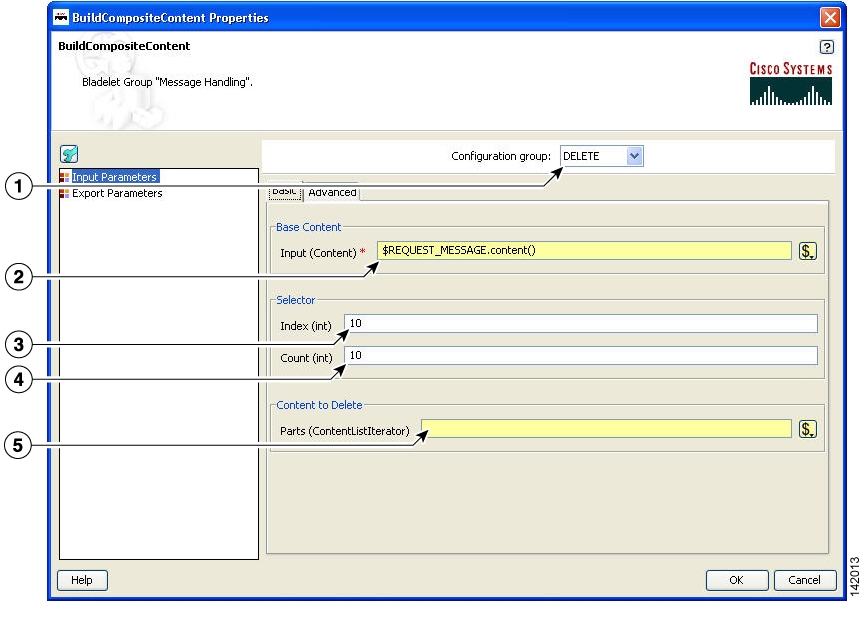
The Build Composite Content Bladelet's properties are, as with some other Bladelets, dependent on the type of configuration group that is used. If the index in the configuration group Attach is null, the Bladelet attaches the parts to the end of the input content. If the index specified is blank in the configuration group Overwrite, it overwrites the Input Content based on the Content-Id of the parts. In configuration group Delete, index and parts are mutually exclusive. Both cannot be specified. If the index is blank, the parts are deleted based on the Content-Id.
Figure 64 Build Composite Content Properties Window—Input Parameters, Attach
Figure 65 Build Composite Content Properties Window—Input Parameters, Overwrite
Figure 66 Build Composite Content Properties Window—Input Parameters, Delete
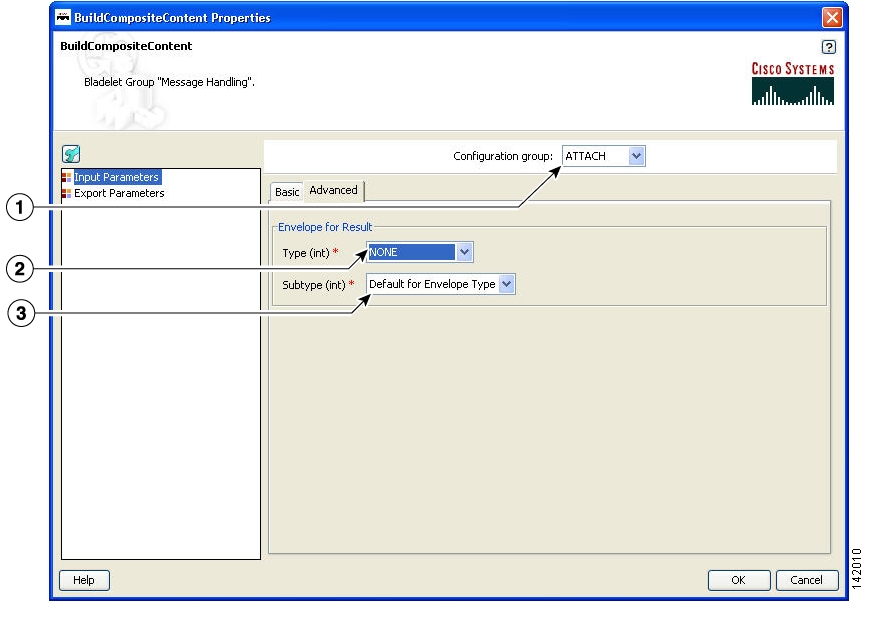
Figure 67 Build Composite Content Properties Window—Input Parameters, Advanced, Attach
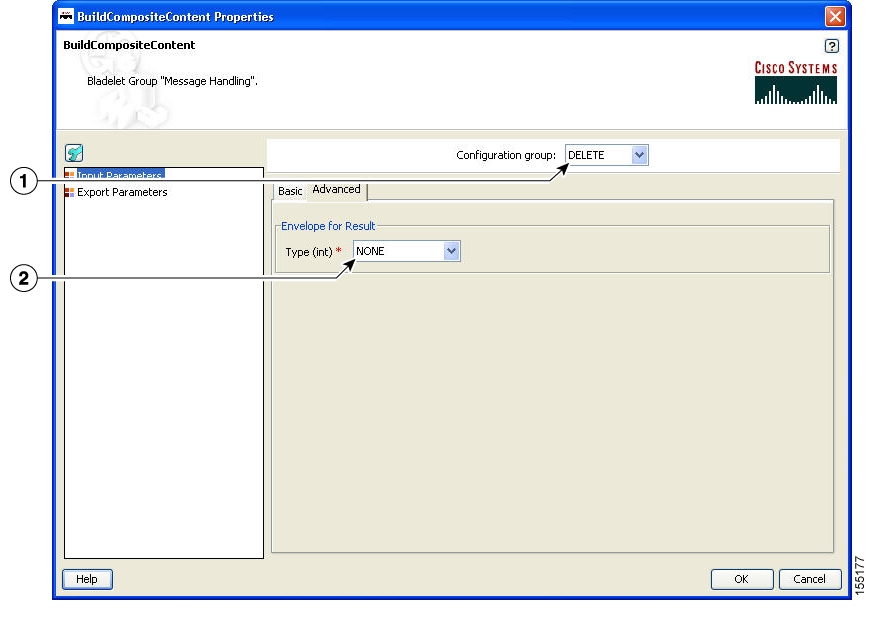
Figure 68 Build Composite Content Properties Window - Input Parameters, Advanced, Overwrite/Delete
Figure 69 Build Composite Content Properties Window—Export Parameters
Outcome
•
Exceptions
ParsingException: Exception thrown when input data is not MIME or when the data could not be parsed.
Discard
Summary
The Discard Bladelet discards a message based on whether it meets certain policies or message requirements established in the PEP and has no user-configurable input parameters.
Prerequisites and Dependencies
None.
Details
There are no properties to set for this Bladelet.
Outcome
•
Exceptions
None.
Create Message
Summary
This Bladelet creates a message wihin a PEP. You can use the message body as an input parameter to this Bladelet or set as the response_message in the PEP context. You can use create message to shorten a message, request PEPs, or speed up responses.
Prerequisites and Dependencies
None.
Details
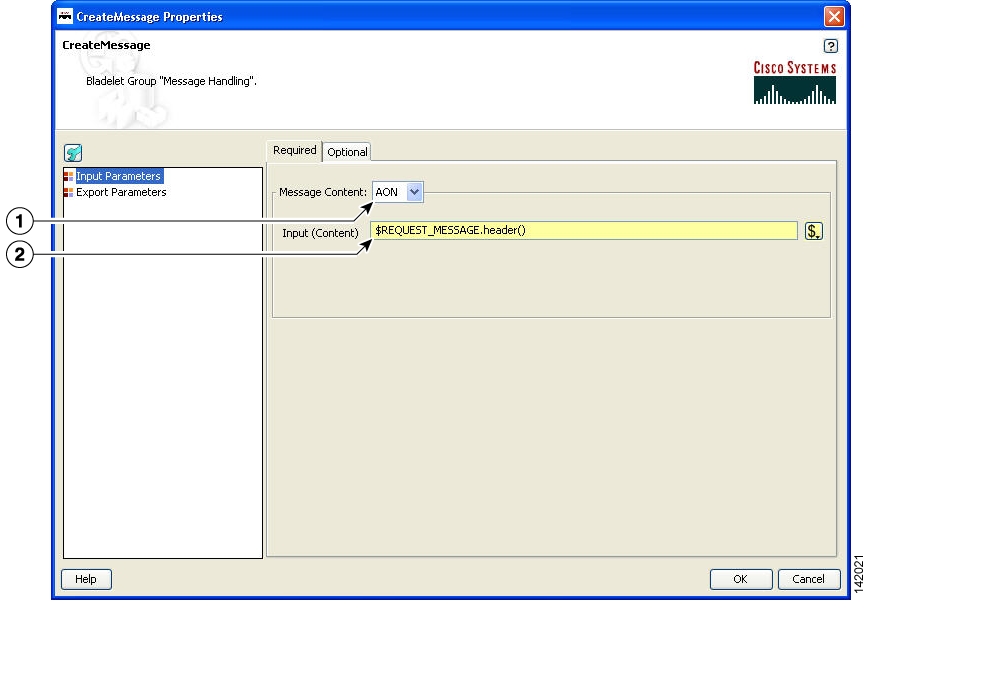
In the Create Message properties window under the Input Parameters section, tabs show required ( Figure 70) and optional ( Figure 72) settings.
Figure 70 Create Message Properties Window—Input Parameters, Required 1
Message Content
Message content (string type). Required.
Input
Input content mentioned in 2 above.
Figure 71 Create Message Properties Window—Input Parameters, Required 2
AON
AON content is created using the bytes in the input. Set as the message payload. Required.
Input
Input content to be set as the content of the message being created.
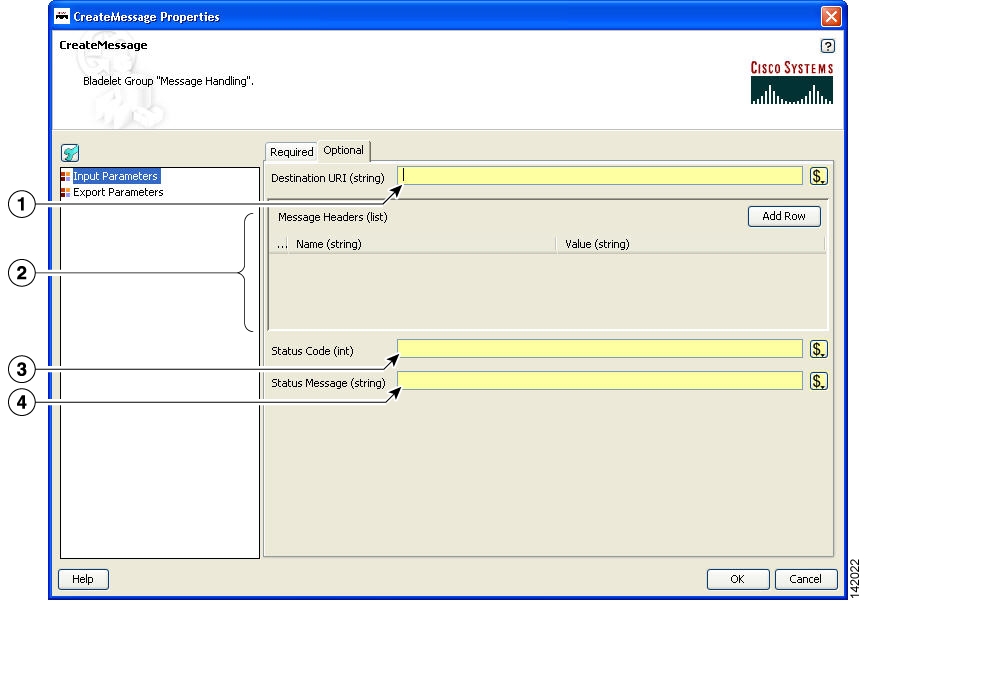
Figure 72 Create Message Properties Window—Input Parameters, Optional
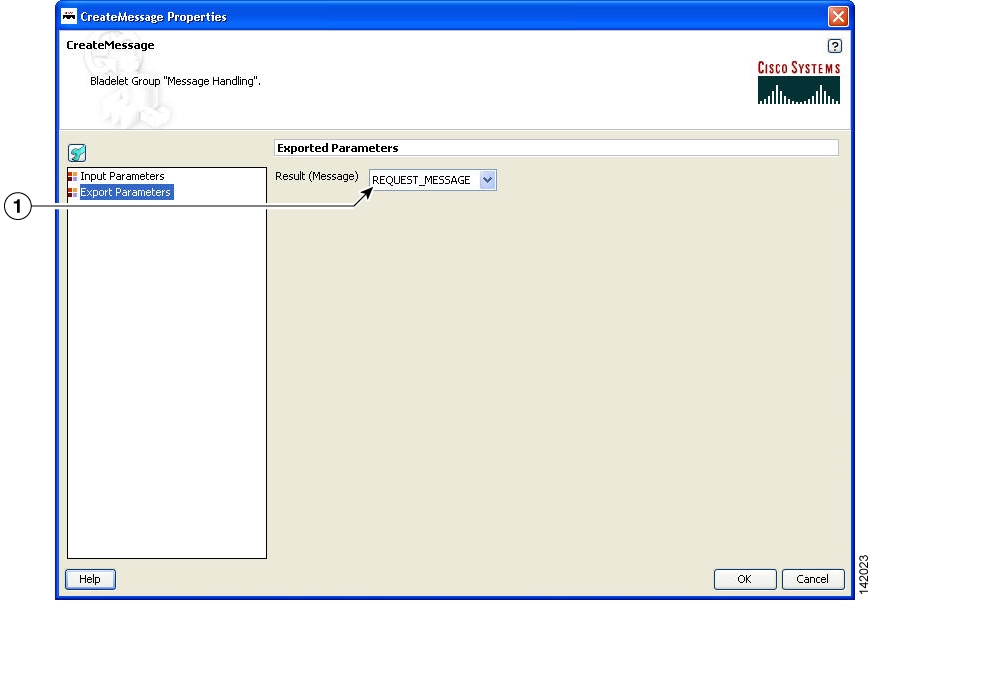
Figure 73 Create Message Properties Window—Export Parameters
Outcome
•
Exceptions
None.
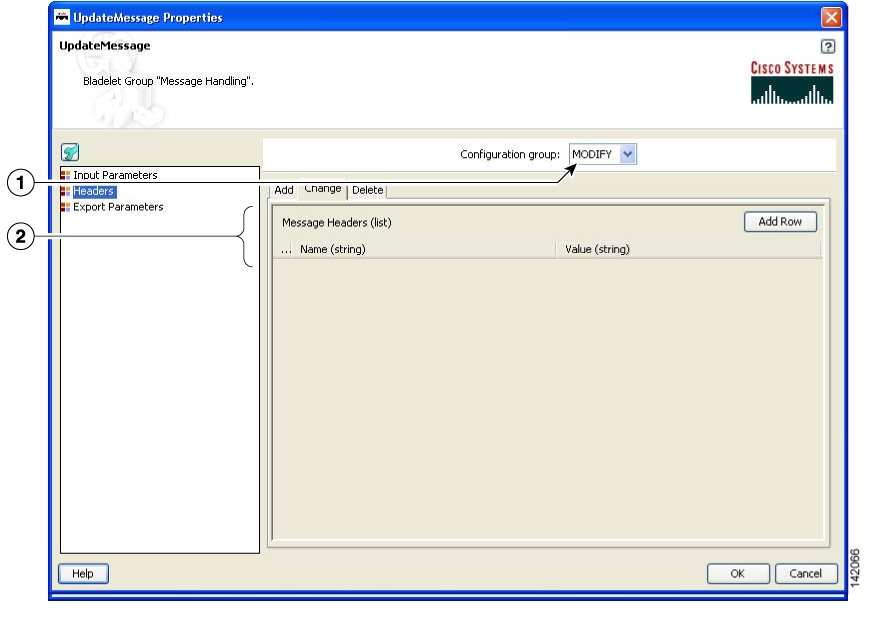
Update Message
Summary
The UpdateMessage Bladelet updates an existing AON message in the PEP. User can optionally update the destination, content or the headers of the message. You can use this Bladelet to update the payload of the incoming message or modify some header information as it forwards on to an endpoint or to the client.
Prerequisites and Dependencies
None.
Details
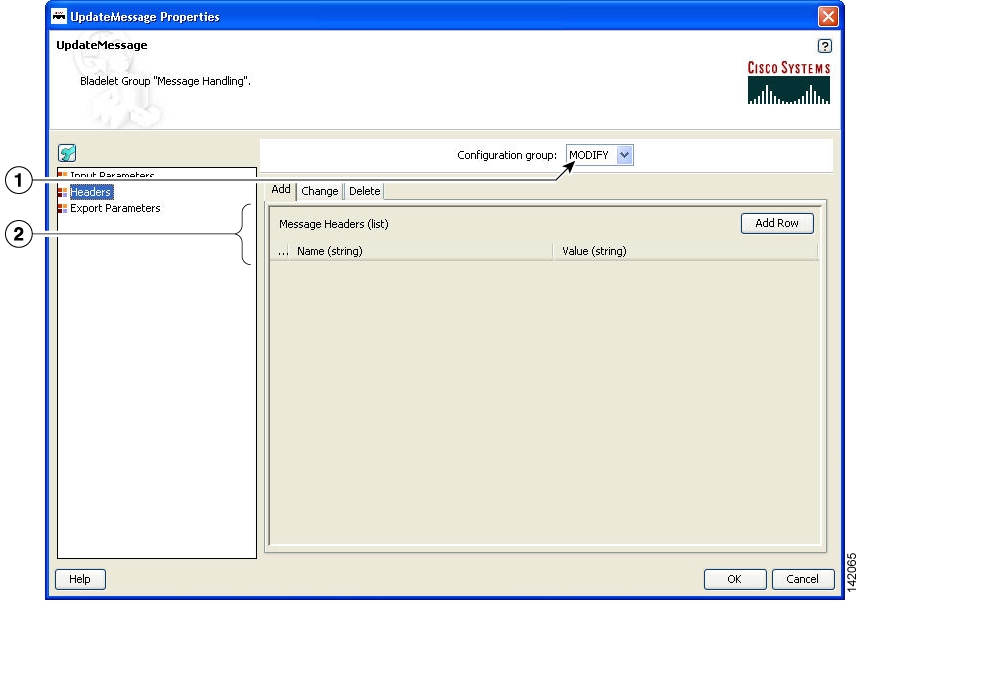
Figure 74 Update Message Properties—Input Parameters
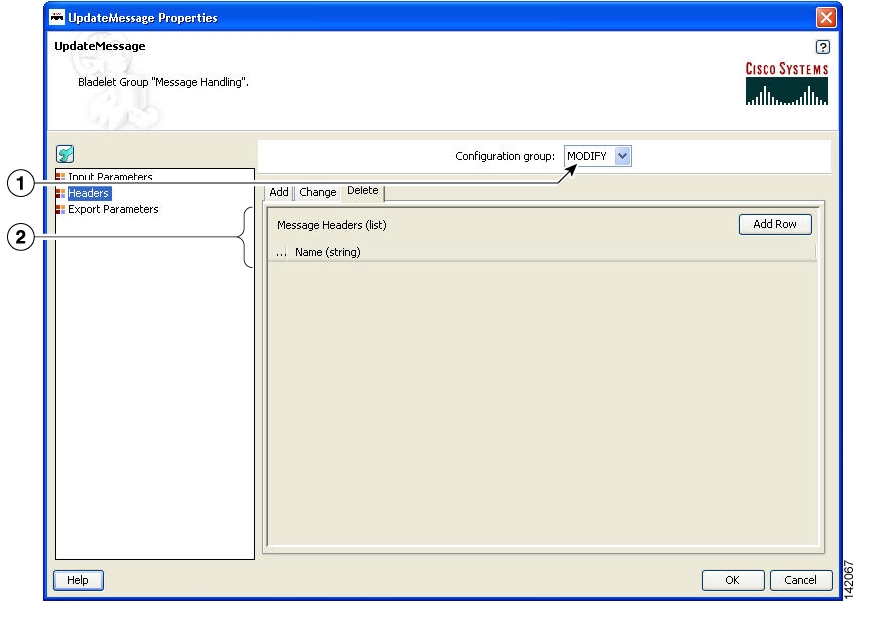
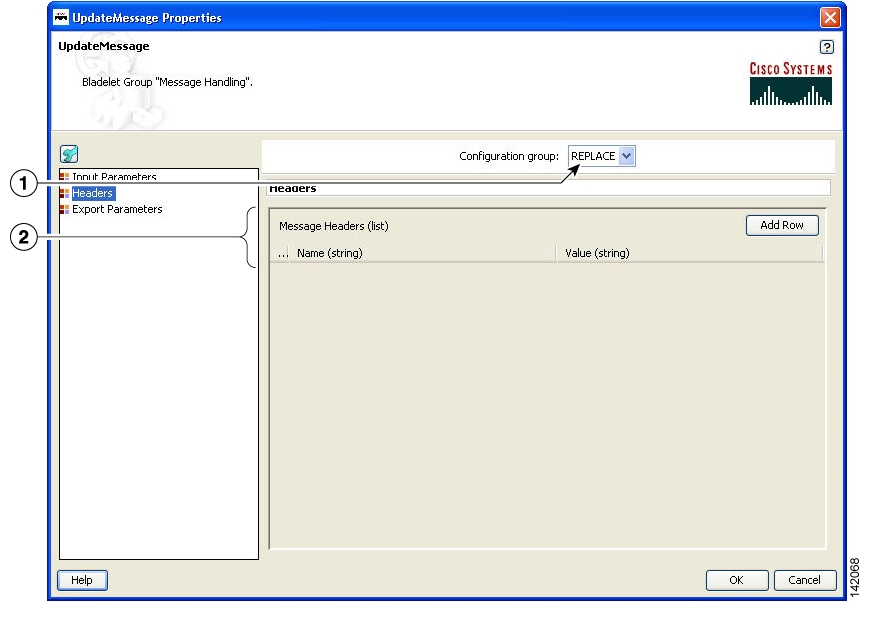
The Headers section has three tabs when the Configuration group is set to Modify ( Figure 75 to Figure 77). You can set the Configuration group to Replace ( Figure 78).
Figure 75 Update Message Properties Window—Headers, Modify, Add Tab
Figure 76 Update Message Properties Window—Headers, Modify, Change Tab
While the Configuration group is still set to Modify, delete one or more header names as necessary.
Figure 77 Update Message Properties Window—Headers, Modify, Delete Tab
Figure 78 Update Message Properties Window—Headers, Replace
Figure 79 Update Message Properties Window—Exported Parameters
Result
Same as the message that was input. No new message is created by this Bladelet. Changes only the headers/content of the input message.
Outcome
•
Exceptions
None.
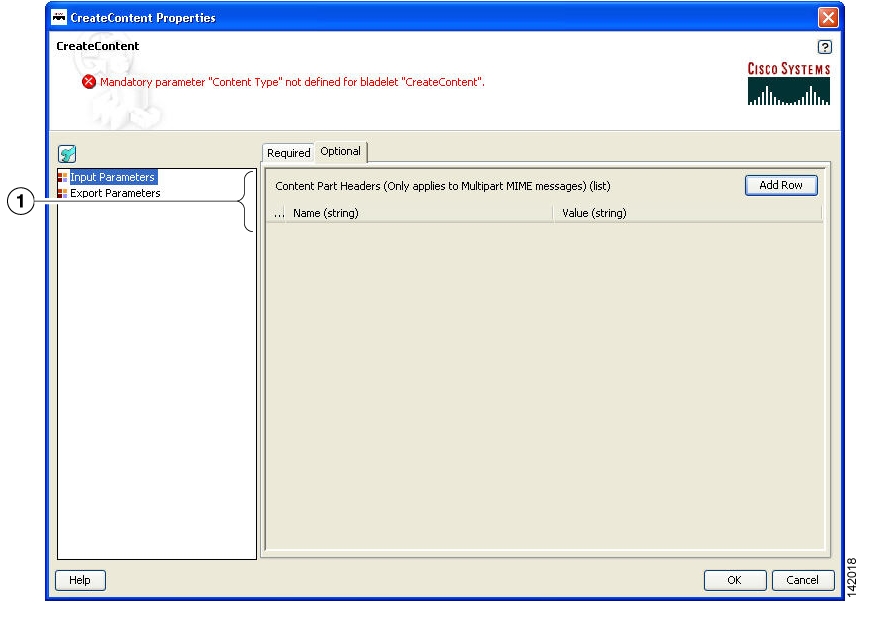
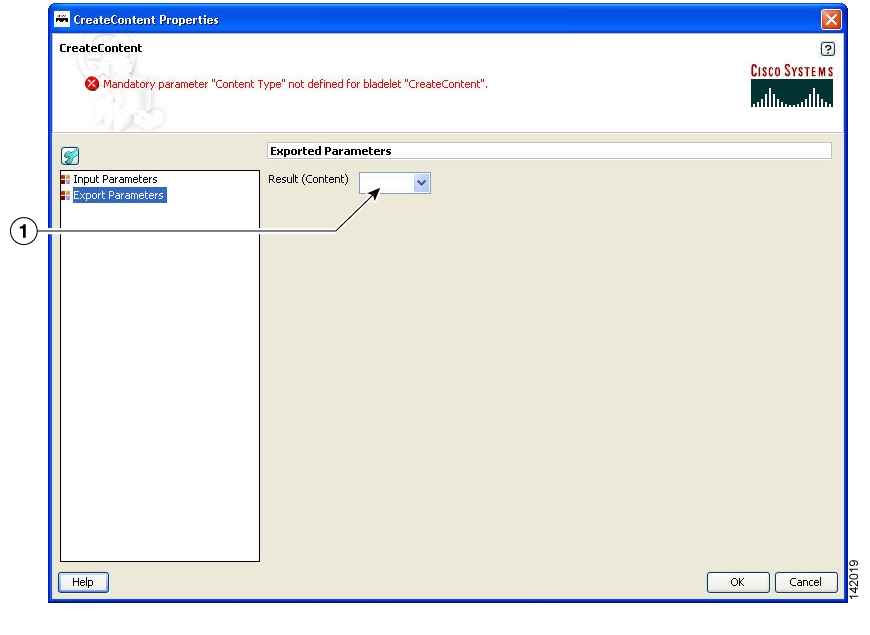
Create Content
Summary
The CreateContent Bladelet creates AON content from a string or converts one type of AON content to the other. Bladelets such as CreateMessage, UpdateMessage, AccessHTTP and BuildMIME operate on AON content that is produced by this Bladelet.
The content headers in the optional configuration group are applicable only to content that is used as a MIME part. If you want to add headers to the message, CreateMessage or UpdateMessage should be used, based on the requirement.
If the content type needs to be more specific than what is shown in the Required/Content-Type drop-down list, you can specify it as one of the headers. For example: Content-Type (header name) and "application/xml" (header value). The entry in the header overrides the default content type.
Prerequisites and Dependencies
None.
Details
Figure 80 Create Content Properties Window—General, Required Parameters
Figure 81 Create Content Properties Window—General, Optional Parameters
Figure 82 Create Content Properties Window—Export Parameters
Outcome
•
Exceptions
None.
Extract Composite Content
Summary
The Extract Composite Content Bladelet extracts the contents from a multipart content message.
Prerequisites and Dependencies
•
Details
Figure 83 Extract Composite Content Properties Window—Extraction Configuration
Source Content
Input content.
Extraction Map
Names and values for one or more extraction maps (string types).
Figure 84 Extract Composite Content Properties Window—Export Parameters
Outcome
•
Exceptions
ParsingException: Exception thrown when input data is not MIME or when the data could not be parsed.
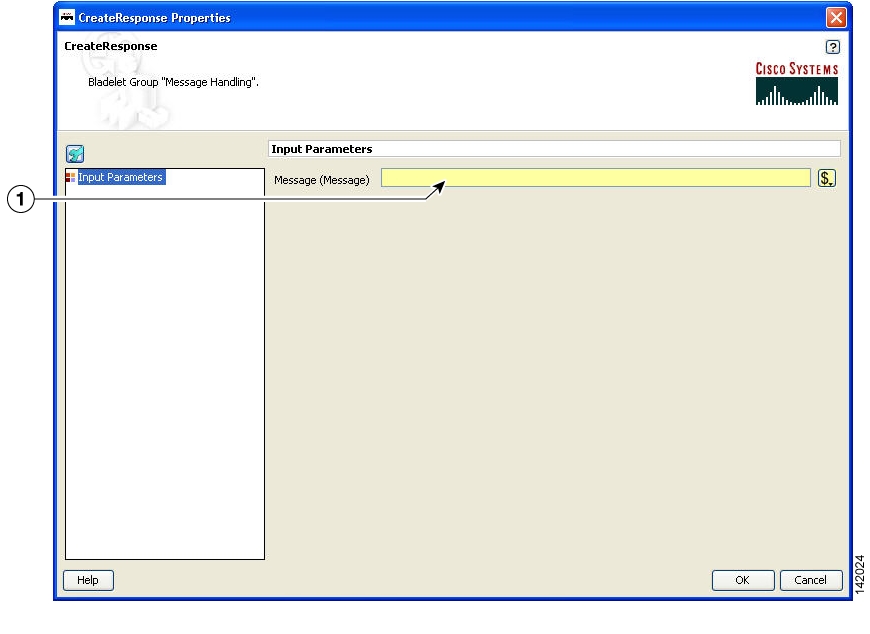
Create Response
Summary
The CreateResponse Bladelet tags an existing AON message in a PEP as the response message that has to be sent back to the client. Normally response messages are created in a PEP by way of a Send Bladelet or a Distribute Bladelet. The users can also handcraft response messages without involving an endpoint using CreateMessage Bladelet. RetrieveCache can put a response message into the PEP that was previously cached by the CacheData Bladelet. In the cases that do not involve Send and Distribute, CreateResponse has to be used to mark a particular message as the response message.
This Bladelet does not have to be used after Send or Distribute Bladelets. This Bladelet is typically used in conjunction with CreateMessage or RetrieveCache. It may also be used when the PEP has multiple Sends and based on some logic, one of the replies needs to be picked.
Prerequisites and Dependencies
None.
Details
Figure 85 Create Response Properties Window—Input Parameters
Outcome
•
Exceptions
None.
Application QoS
Summary
The Application QoS Bladelet enables the network to provide true application Quality of Service (QoS) by inspecting the message content and context. The application QoS functionality is implemented within an Application QoS Bladelet combined with other AON bladelets, such as Encrypt and Sign forms a Policy Execution Plan (PEP). The Application QoS Bladelet makes use of AON PEP variables to extract information from the message to set DSCP values.
Prerequisites and Dependencies
None.
Details
•
–
–
–
–
–
For classified packets, Mission Critical would have the highest priority and Bulk Data Transfer would have the lowest priority. Based on this information, it is easy to map the DSCP values (from the baseline document, default values), extending QoS beyond the L3 and L4. You can configure these DCSP mapping values and override the default as needed. Application QoS can be assigned on one AON node and be carried forward to all downstream AON nodes.
•
•
Note
Figure 86 Application QoS Properties Window
Outcome
•
Exceptions
None.
Routing Category
In the Routing Category, there are four Bladelets:
•
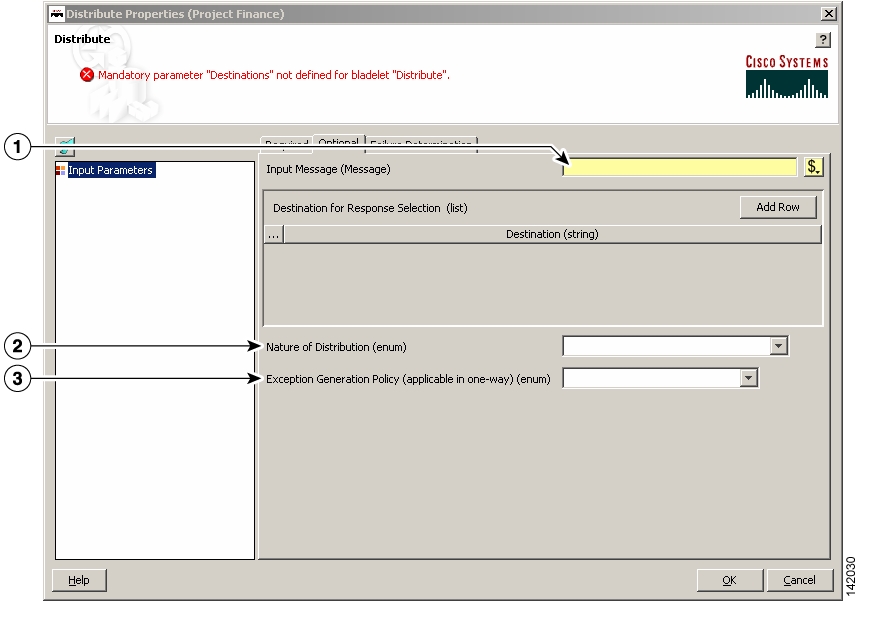
Distribute
Summary
Distribute sends the same message over to multiple endpoints. In case of request-response PEPs, it gathers the responses, chooses one based on a selection criteria, and sets it as the response message. Distribute sets the response message of the PEP to the one chosen. It is a terminal Bladelet, so no Bladelet can follow this Bladelet.
Prerequisites and Dependencies
None.
Details
Figure 87 Distribute Properties Window—Input Parameters, Required
Figure 88 Distribute Properties Window—Input Parameters, Optional
Figure 89 Distribute Properties Window—Input Parameters, Failure Determination
Outcome
•
Exceptions
None.
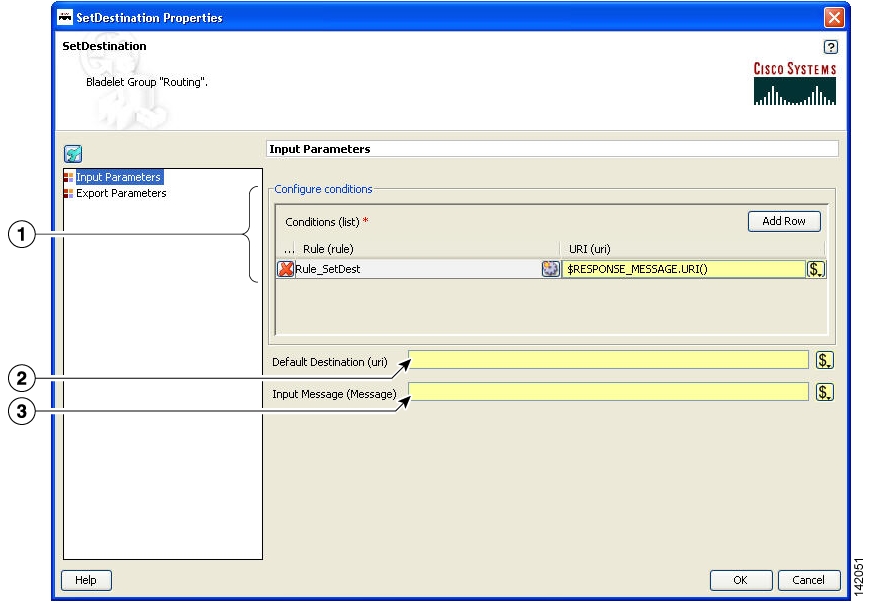
Set Destination
Summary
This Bladelet routes messages to destinations based on rules. It determines the final endpoint (URI) destination of the message being processed by the PEP.
Prerequisites and Dependencies
None.
Details
Figure 90 Set Destination Properties Window—Input Parameters
Figure 91 Set Destination Properties Window—Export Parameters
Outcome
•
•
Exceptions
None.
Send
Summary
The Send Bladelet is the last item in a message request PEP and sends a message to a selected destination. The Bladelet performs protocol translation if the destination URI of the message to be sent out has to go out via an adapter that is different from the one that received the message.
Prerequisites and Dependencies
None.
Details
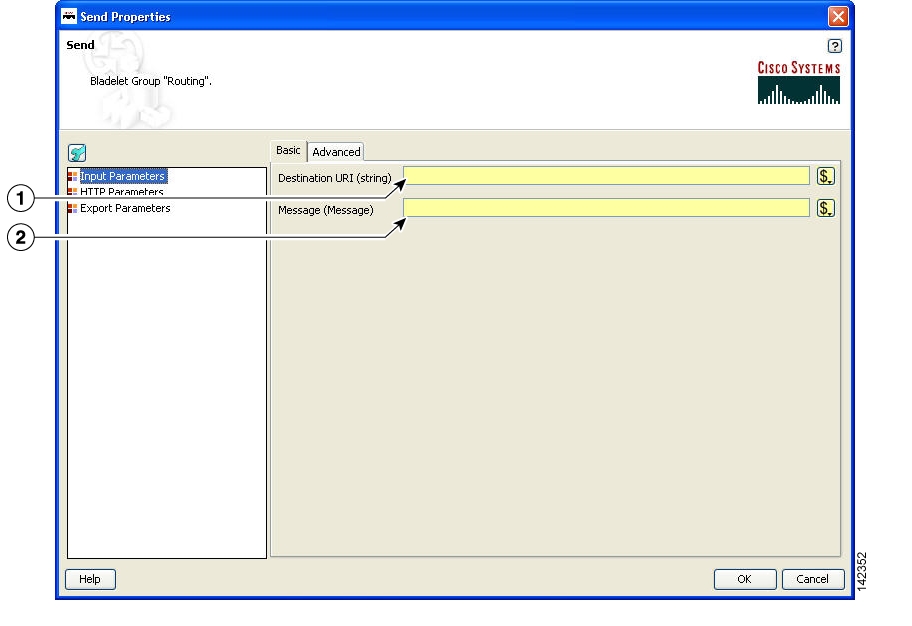
Figure 92 Send Properties Window—Input Parameters, Basic
Figure 93 Send Properties Window—Input Parameters, Advanced
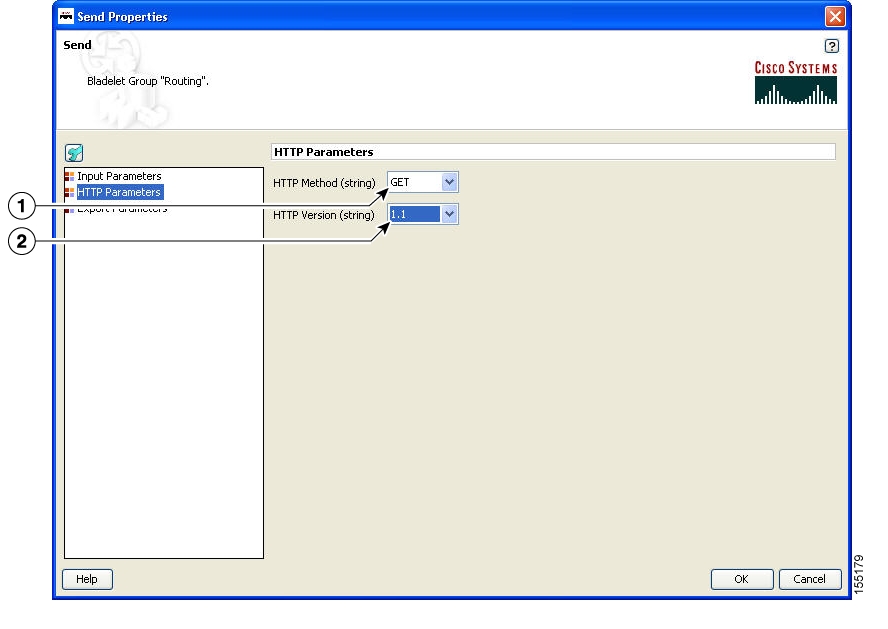
Figure 94 Send Properties Window—HTTP Parameters
HTTP Method
Method. Choices: Get or Post. Used only if the message is sent out via HTTP.
HTTP Version
1.0 or 1.1. Used only if the message is sent out via HTTP.
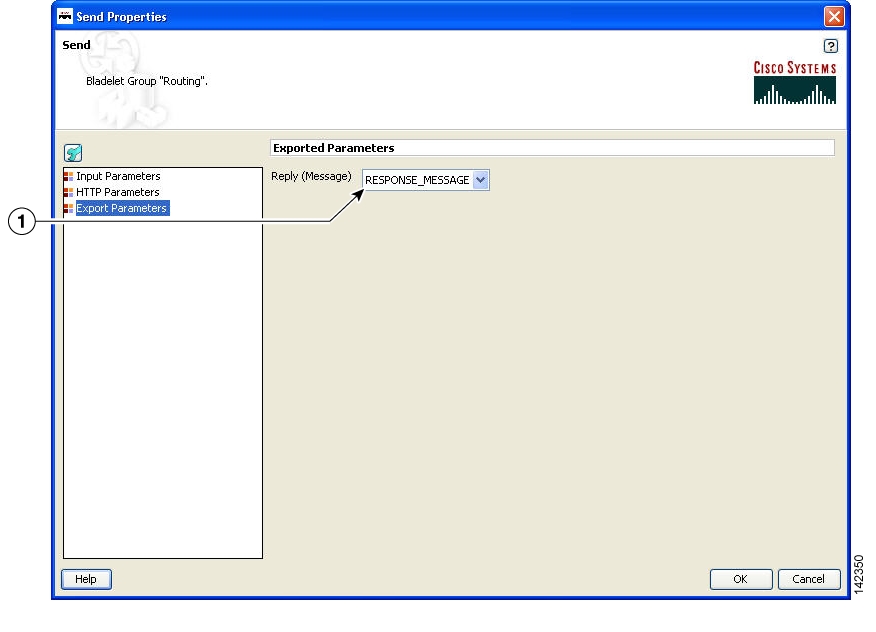
Figure 95 Send Properties Window—Export Parameters
Outcome
•
Exceptions
None.
Balance Load
Summary
This Bladelet distributes the message load to multiple devices for improved throughput service. BalanceLoad employs one of four different algorithms to decide which particular endpoint should receive the next message. It updates the destination URI of the message based on the algorithm. The Send Bladelet that follows the BalanceLoad Bladelet sends the message to the chosen destination.
BalanceLoad does not send the message out to the destination, but just updates the destination of the input message. A send Bladelet that follows BalanceLoad and is given the same input message uses the decision made by the BalanceLoad.
In case of a failure in send, BalanceLoad and Send work together to go through the remaining live destinations to try and find a valid destination to send the message through. Failover is not optional.
The following algorithms mentioned above are used as different approaches for load balancing:
•
•
•
•
Prerequisites and Dependencies
None.
Details
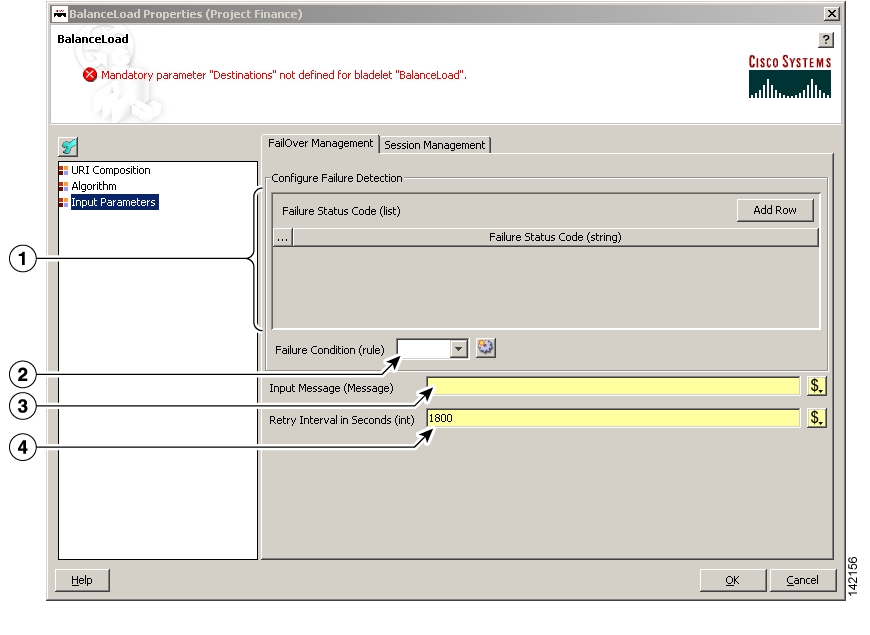
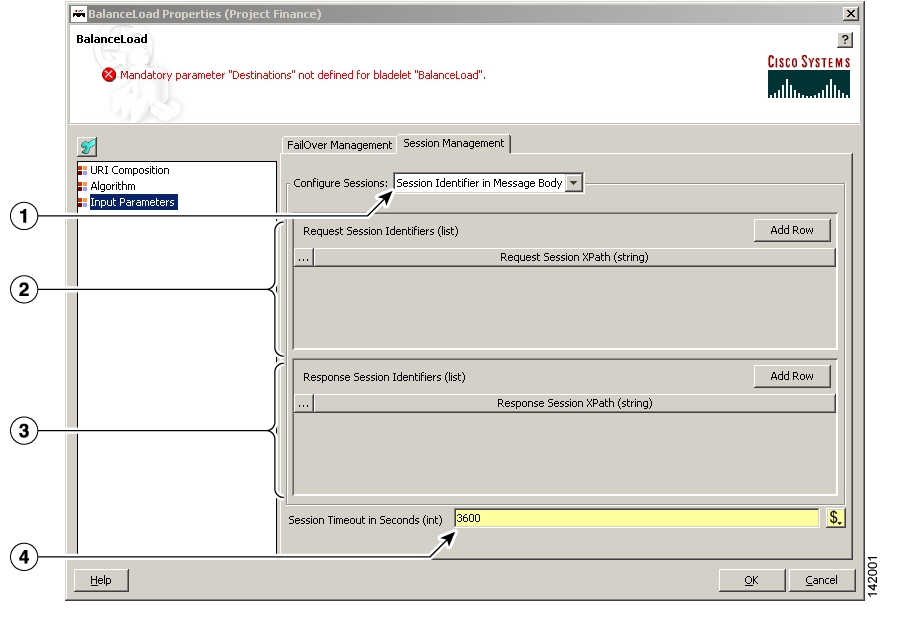
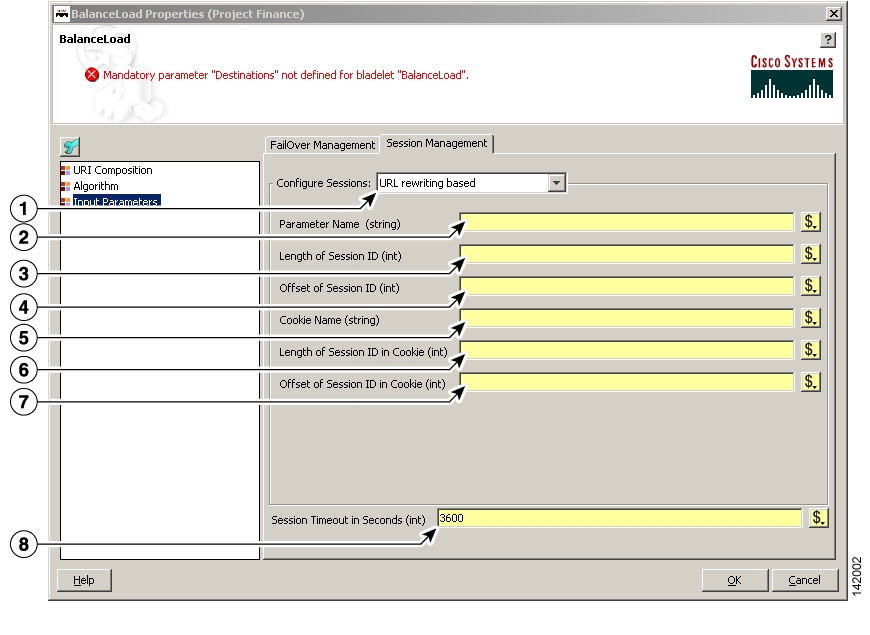
Two tabs, FailOver Management and Session Management, are under the Input Parameters section ( Figure 96 to Figure 99).
Note
Figure 96 Balance Load Properties Window—Configure Parameters, FailOver Management
Figure 97 Balance Load Properties Window—Input Parameters, Session Management 1
Figure 98 Balance Load Properties Window—Input Parameters, Session Management 2
Figure 99 Balance Load Properties Window—Input Parameters, Session Management 3
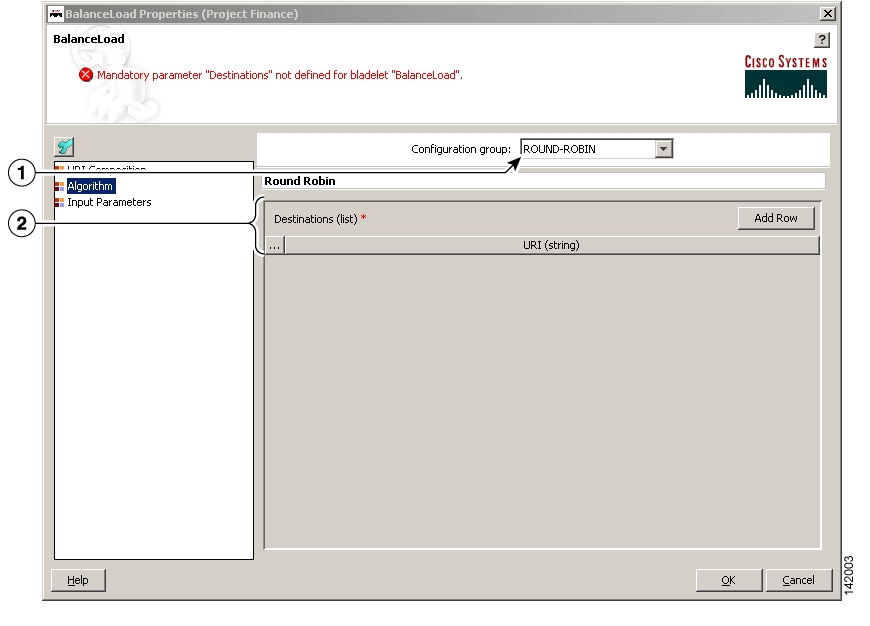
Figure 100 Balance Load Properties Window—Algorithm, Round-Robin
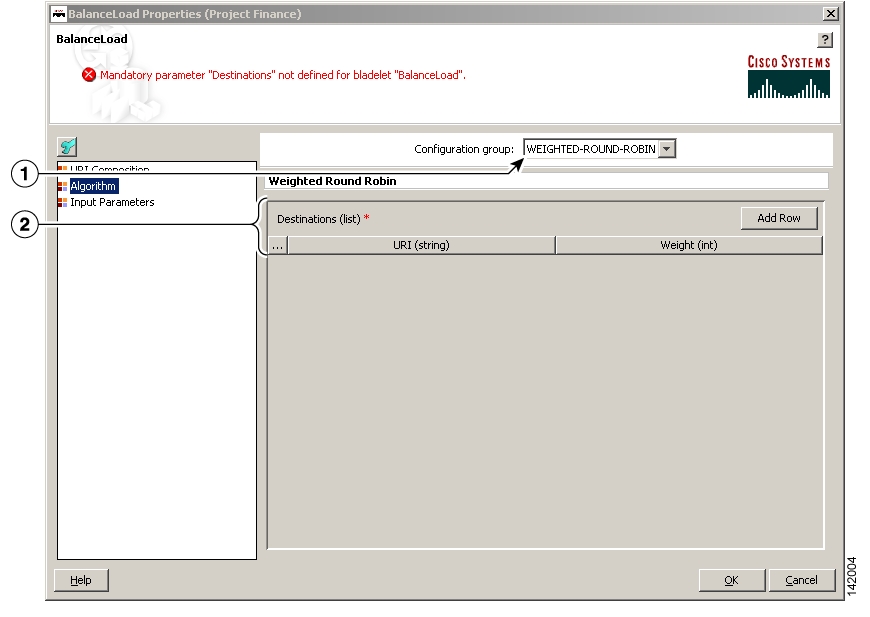
Figure 101 Balance Load Properties Window—Algorithm, Weighted Round-Robin
Figure 102 Balance Load Properties Window—Algorithm, Adaptive
Configuration Group
Configuration group, set here to Adaptive.
Destinations
One ore more destination URIs, such as ZVar.
Figure 103 Balance Load Properties Window—Algorithm, Highest Priority
Outcome
•
•
Exceptions
None.
Security Category
In the Security category, there are eight Bladelets:
•
•
•
•
Authorize
Summary
The Authorize Bladelet uses access control to secure application resources in the PEP and is able to execute AON authorization procedures and other authorization-type procedures. By comparing authorization policies within the message to those within the PEP, the Authorize Bladelet is able to determine the proper course of action based on authorization.
Authorize Bladelet in AON provides the function of computing authorization decisions and enforcing authorization decisions on an incoming message. It supports three different authorization mechanisms as described in the Details section.
Prerequisites and Dependencies
•
•
•
•
The user info must be defined in SiteMinder Policy Server or LDAP repository configured in SiteMinder Policy Server for Authorize to recognize. The identity of the user must be extracted using Identify Bladelet before Authorize can be used in a PEP. Before a user can be authorized to access a resource using SiteMinder 5.5 method, user must be authenticated using SiteMinder 5.5 authentication method because SiteMinder authorization requires user to be authenticated.
Details
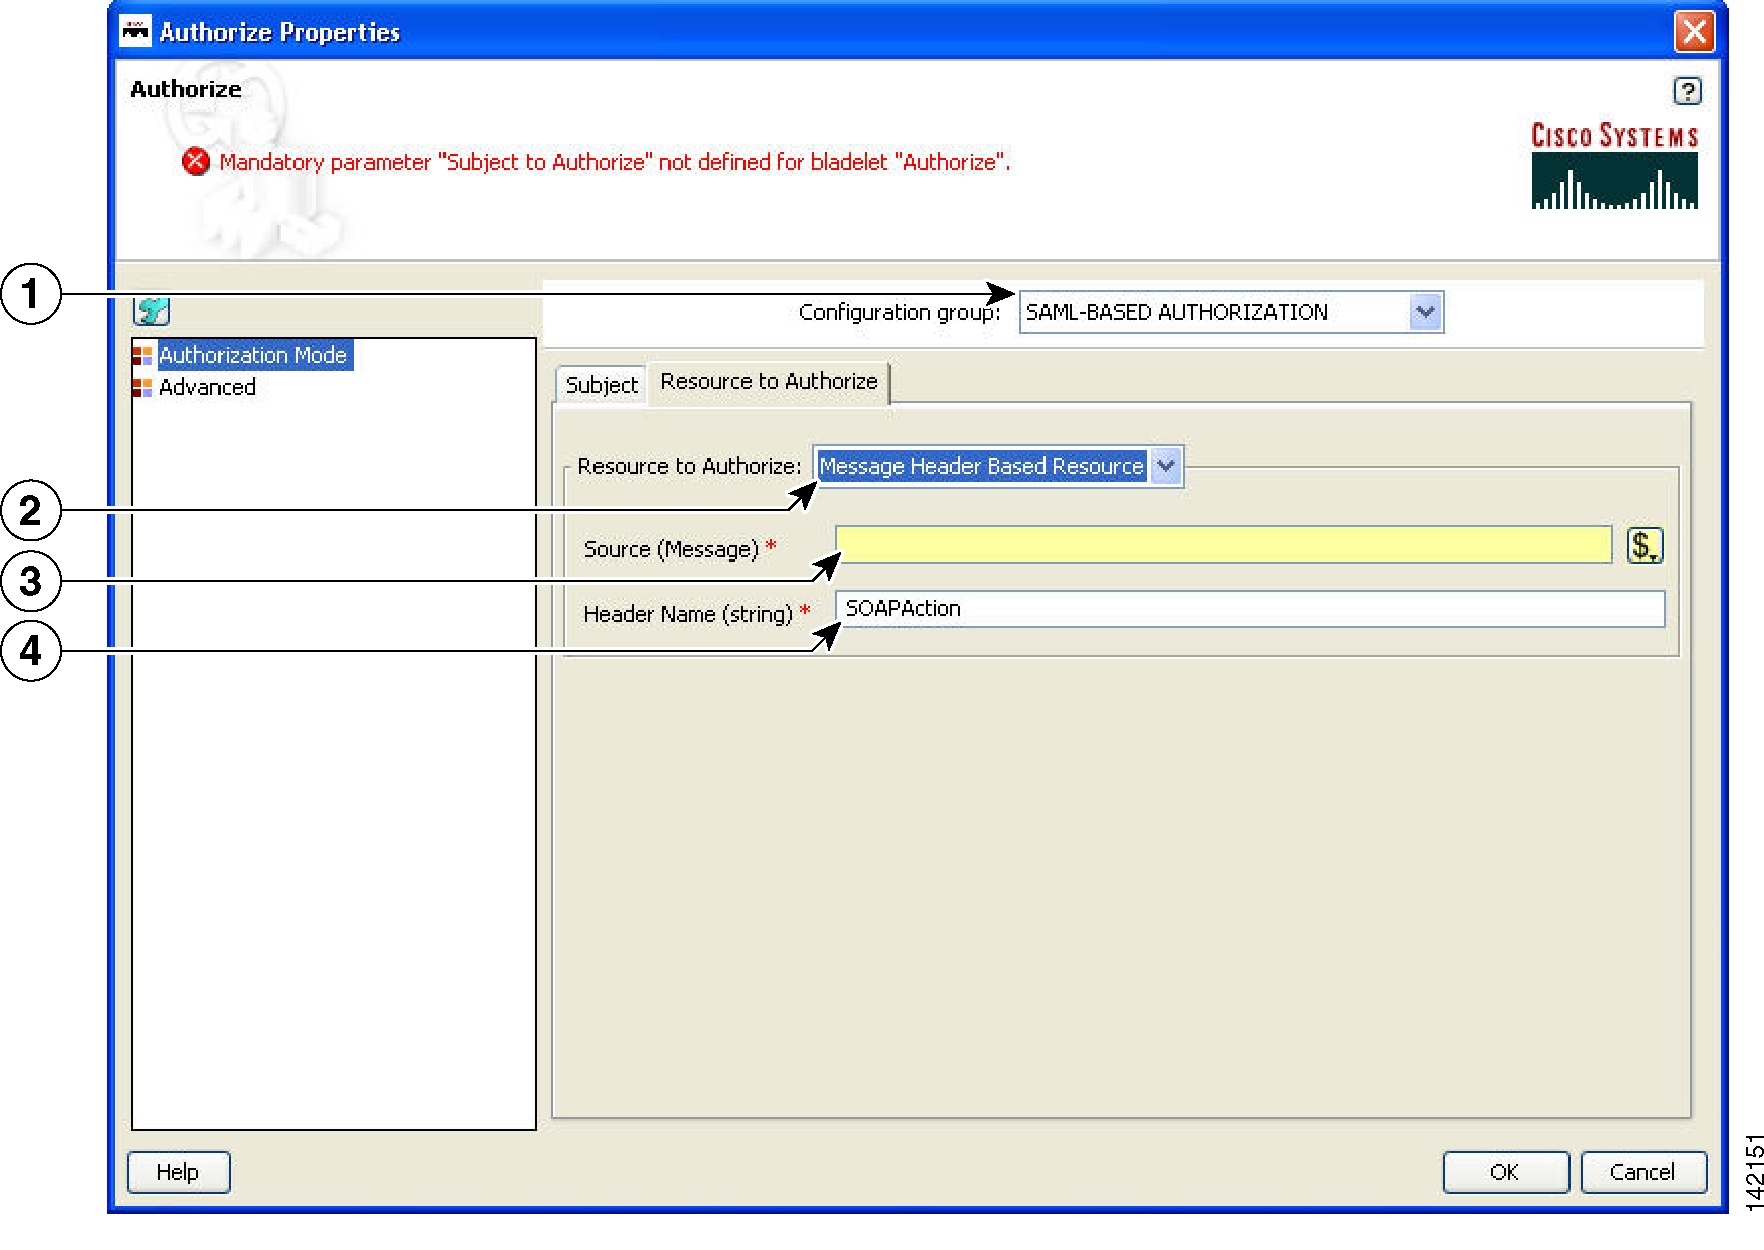
SAML-Based Authorization
Identify Bladelet extracts the SAML Token containing Authorization Assertion, which can be signed or unsigned. You can configure Authorizer to accept an unsigned assertion, in which case it processes a SAML Assertion and enforces it even if it is not signed by a SAML Authority.
Once the SAML Assertion is extracted by the Identify Bladelet, it can be verified by an Identity Verify Bladelet before passing to Authorizer. However, if verification is not done at that point, it performs the signature verification of the SAML Assertion if it is needed.
Authorizer enforces the authorization decision specified in the SAML Assertion by ensuring that resource to authorize is allowed Permit access in the SAML Assertion and the Action configured in the Bladelet matches the Action in the assertion.
If it results in the Deny access then corresponding output path is set on the Authorizer Bladelet.
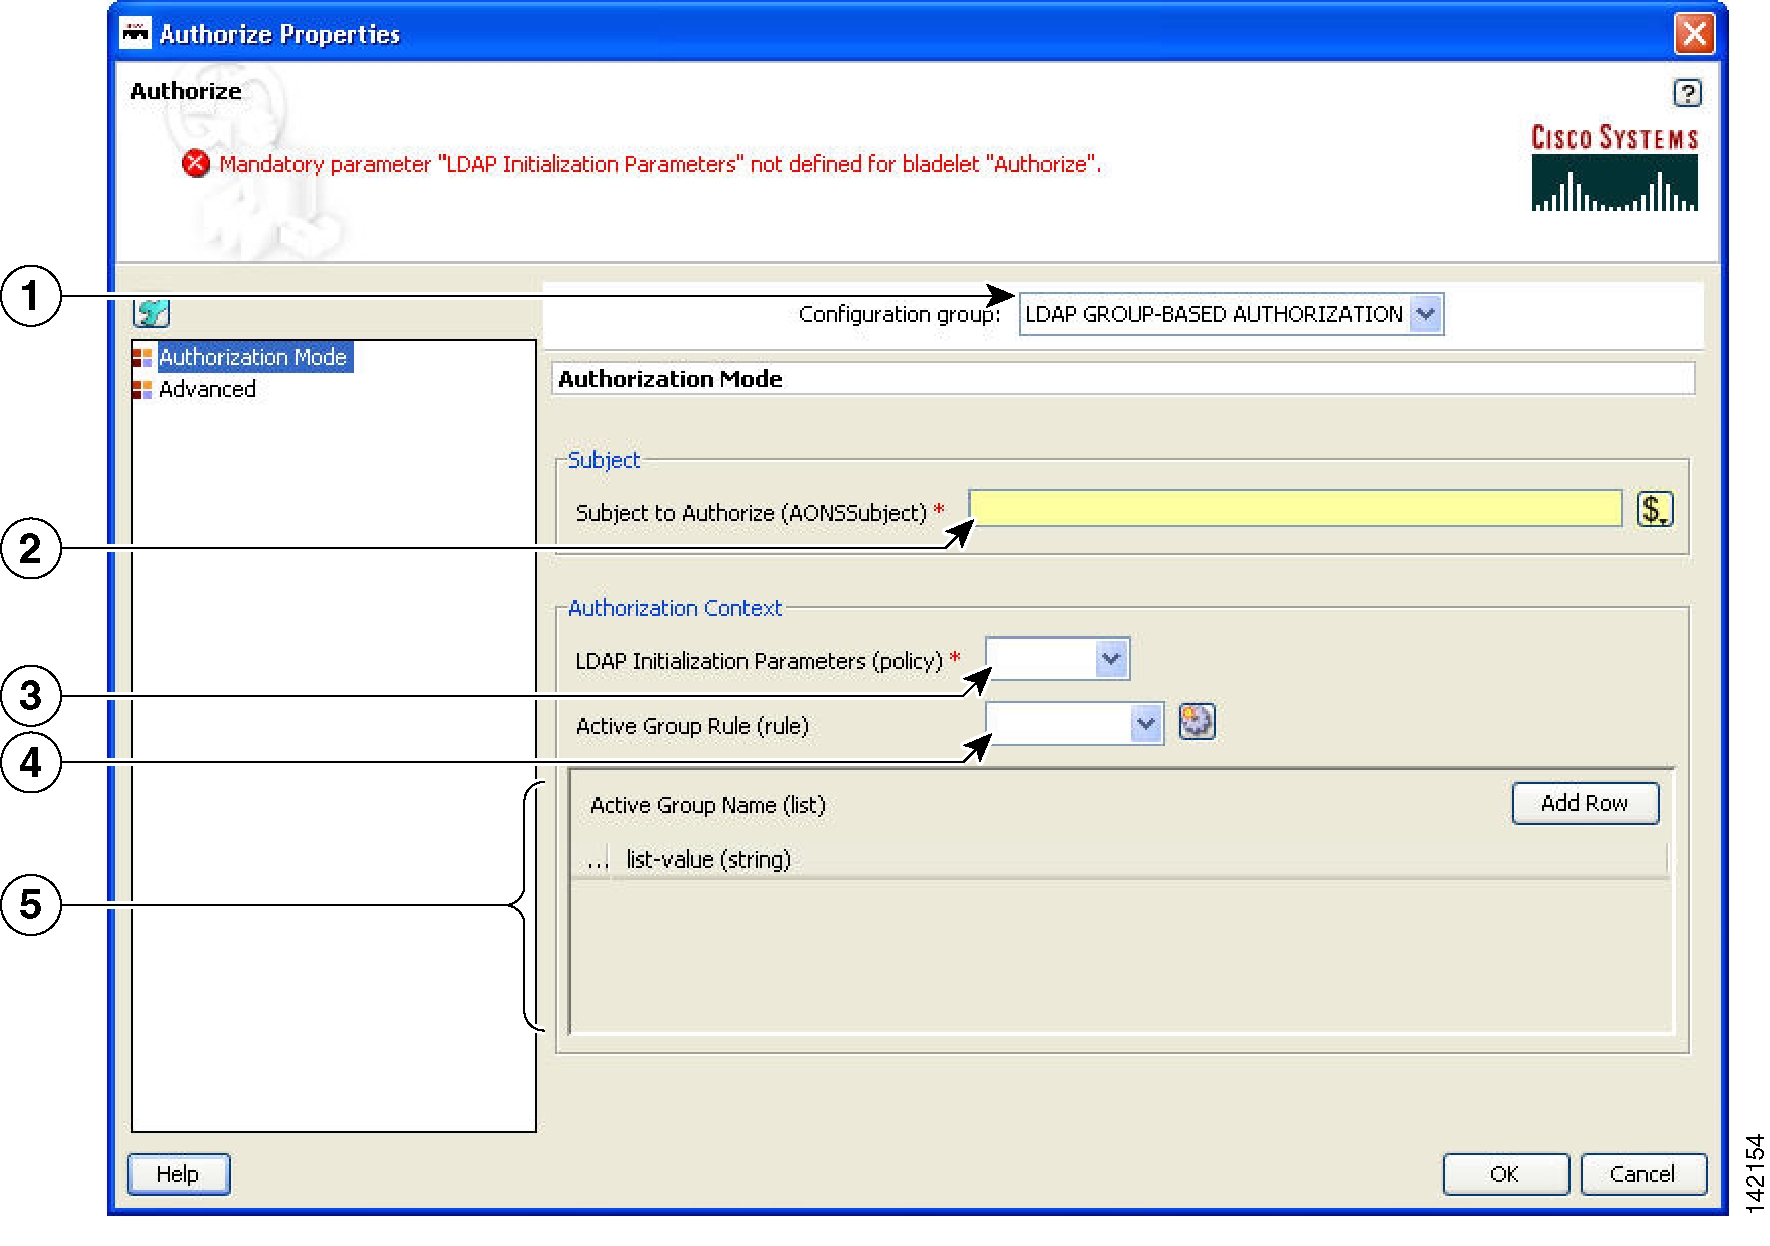
LDAP GROUP-Based Authorization
LDAP Group Based Policy Rules defines Authorization Policies based on the subject's group membership in an LDAP Directory. Such a Rule essentially is a Policy Rule that comprises of Rule Condition and Rule Action where Rule Action specifies one or more LDAP Groups to allow the access.
If all the conditions specified in the policy rule evaluate to true, then list of the groups specified Active Group Name parameter are allowed access. If you specified in the Subject to Authorize is a member of any of the groups that allowed access, access is allowed.
RULE-Based Authorization
Authorizer can make authorization decision based on the results of evaluation of Content Rules specified on Authorizer. Content Rule essentially is a policy rule that comprises of Rule Conditions and a Rule Action. When a Policy Rule is selected for evaluation, all its conditions are evaluated and, if all evaluate to true, Rule Action can be taken.
Rule Action may specify if the Authorize should result in PERMIT or DENY of the Authorization decision. Based on the Rule Action specified and results of Rule Condition evaluation Authorizer sets the output path of Authorizer Bladelet.
SiteMinder 5.5
SiteMinder 5.5 method for authorization uses SiteMinder 5.5 Policy Server for authorization. This method authorizes a user's access to a web application resource configured in the Authorize Bladelet. Access method for accessing the resource usually can be GET or POST which is determined from the request message being handled by AON.
Further resource being accessed must be a protected resource in SiteMinder Policy Server. If resource is not protected, it will result in function failure and access will be denied.
SiteMinder authorization requires that user to authorize is authenticated using SiteMinder authentication method. Authenticate bladelet can be used to authenticate a user using SIteMinder Policy Server before the user is authorized by Authorize bladelet.
Note
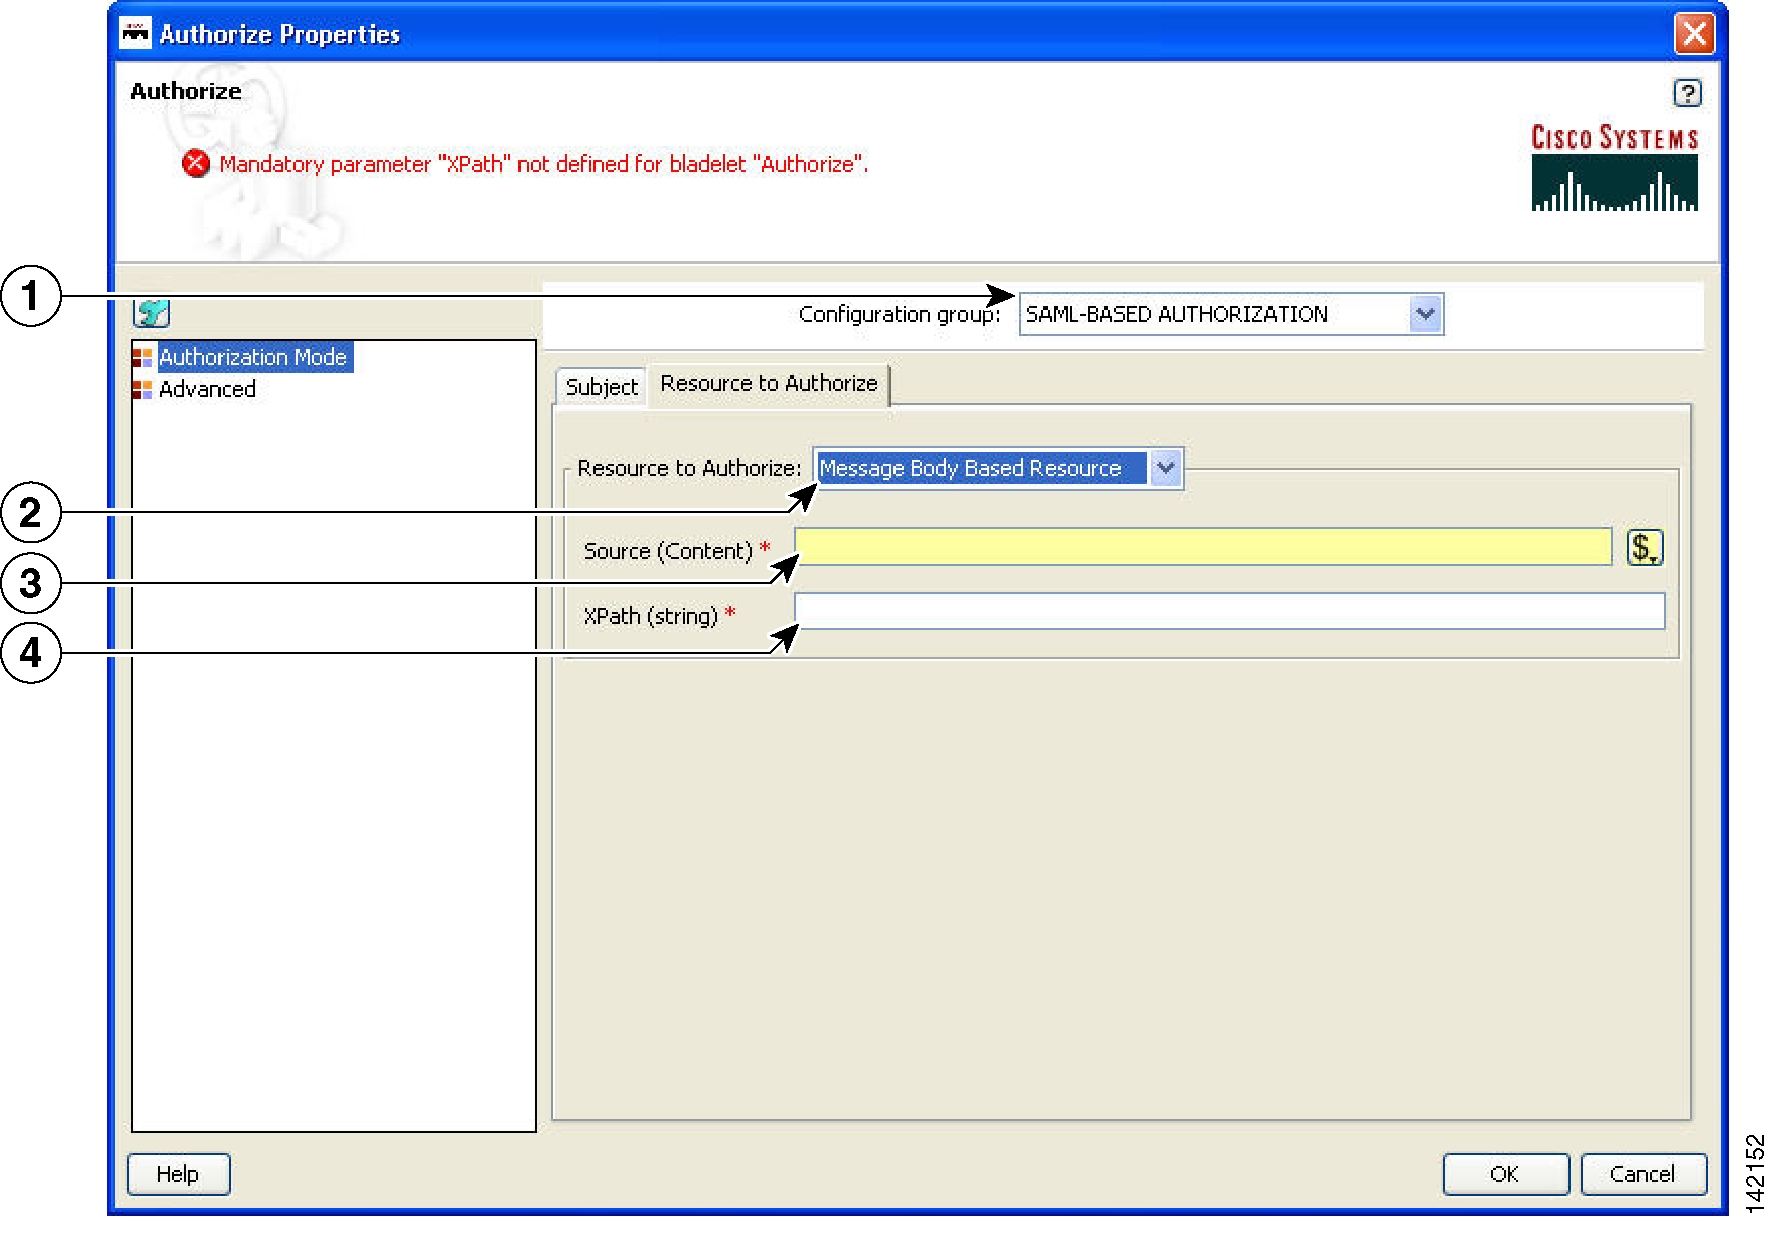
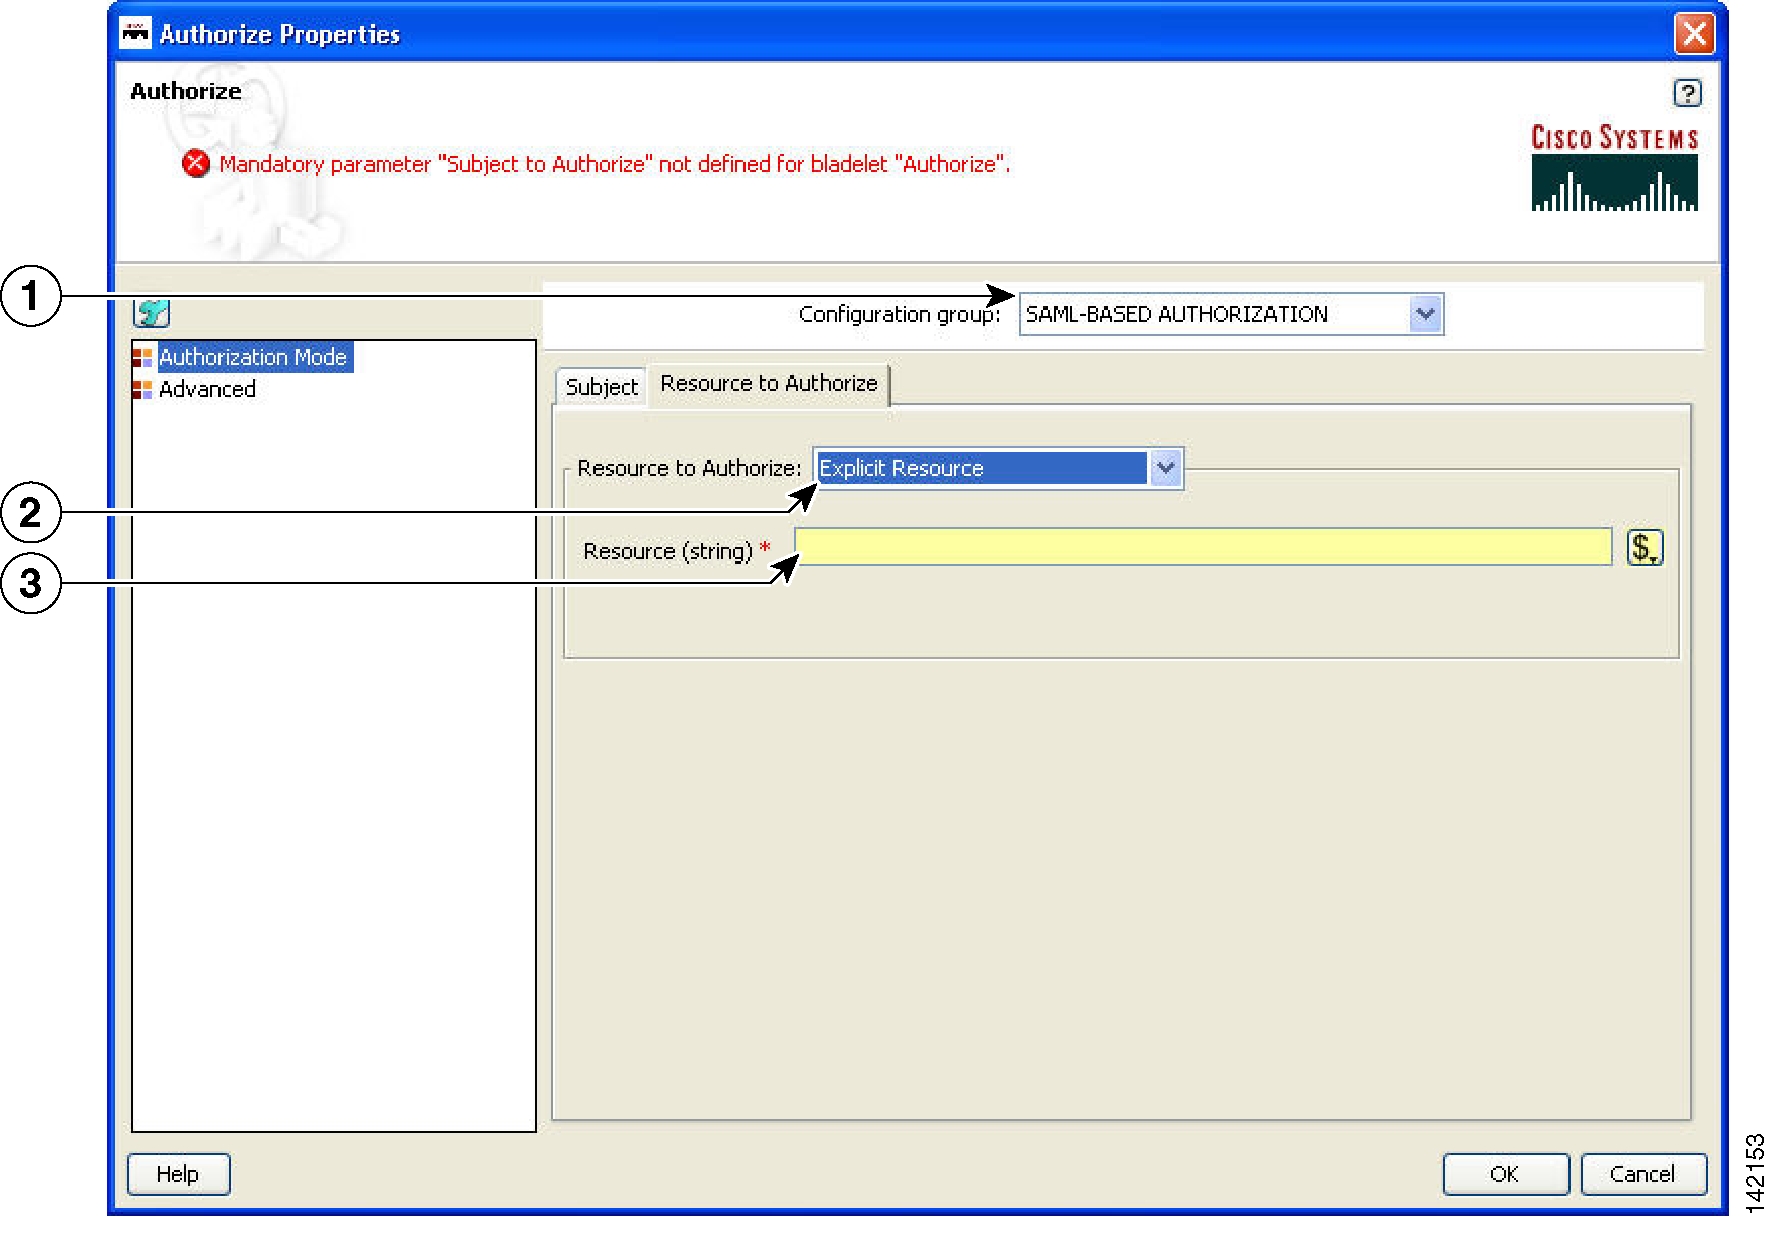
Figure 104 Authorize Properties Window—Authorization Mode, SAML-based Authorization 1
Figure 105 Authorize Properties Window—Authorization Mode, SAML-based Authorization 2
Figure 106 Authorize Properties Window—Authorization Mode, SAML-based Authorization 3
Figure 107 Authorize Properties Window—Authorization Mode, SAML-based Authorization 4
Figure 108 Authorize Properties Window—Authorization Mode, LDAP Group-Based Authorization
Figure 109 Authorize Properties Window—Authorization Mode, Rule-Based Authorization
Figure 110 Authorize Properties Window—Authorization Mode, SiteMinder 5.5
Figure 111 Authorize Properties Window—Advanced
Outcome
•
–
–
Exceptions
None.
Encrypt
Summary
The Encrypt Bladelet encrypts all or parts of the input message to maintain data integrity. Encrypt parts of an XML or SOAP message by specifying the XPath locations of the elements to be encrypted in the message. AON can encrypt XML, SOAP and non-XML messages and their attachments.
Prerequisites and Dependencies
•
•
Details
This Bladelet encrypts incoming SOAP, XML, and Non-XML messages using a dynamically generated symmetric key. The symmetric key is encrypted using the asymmetric public key of the message recipient. Given the public key of the recipient message as an input parameter, this Bladelet moves the CPU-intensive encryption operation to AON. Configure one or more elements in the message to be encrypted using XPath expressions.
Set Encrypt Bladelet's Output Content only if the output content is a MIME content. This happens for encrypting of SOAP with Attachments, XML with Attachments, non-XML and non-XML with Attachments.
For other cases (Xpath encrypting of SOAP and XML), the input content is modified in-place, so you need not create a new content variable. In such cases, use the Content that was passed as input to the Bladelet.
AON checks the destination URI of the message to determine the key alias for Encryption. For asymmetric key encryption, the encryption key alias is identical to the destination hostname. For example, if the destination URI is http://server1.domain.com/someservice, the encryption Bladelet expects an RSA key with the alias server1.domain.com in the keystore.
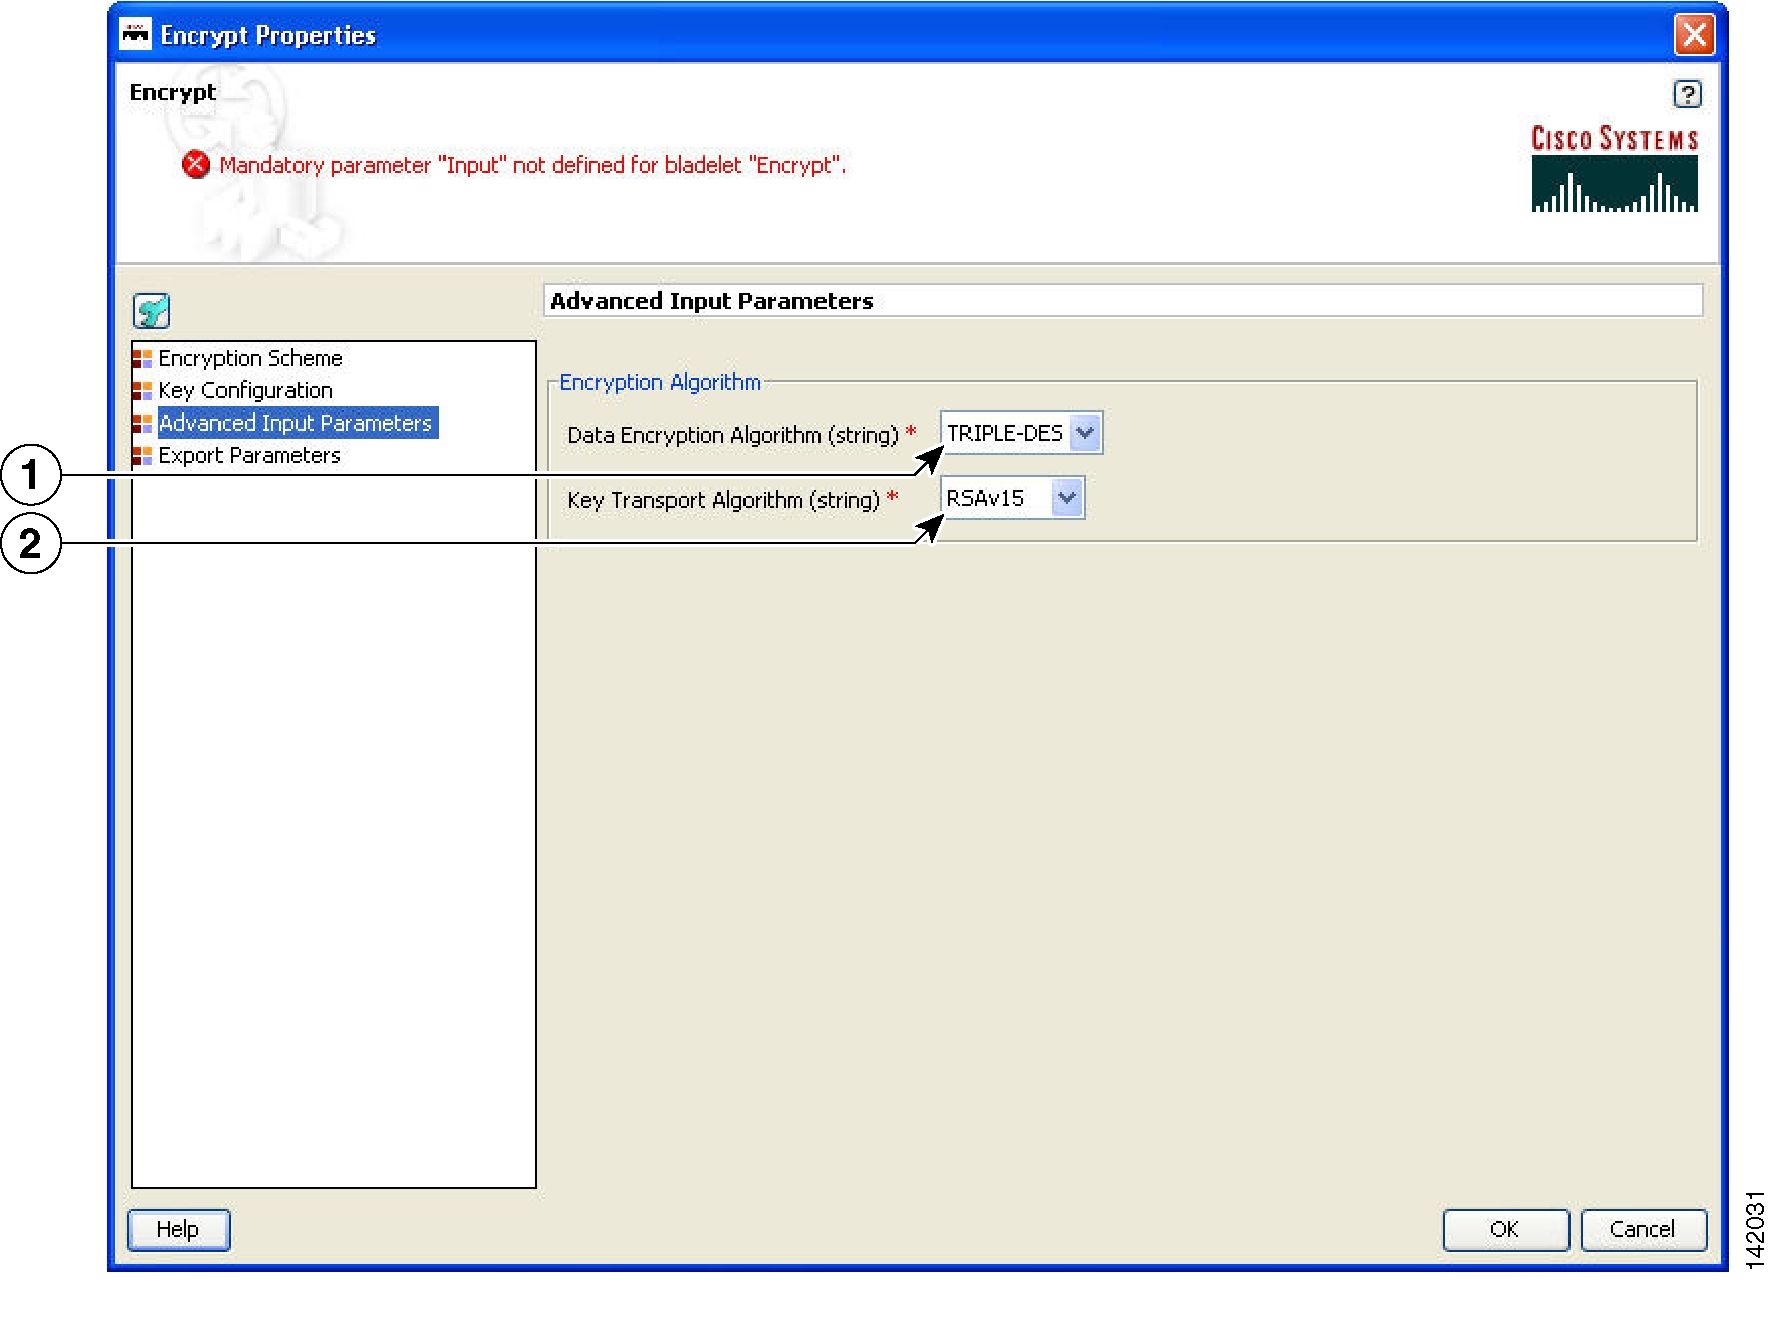
Figure 112 Encrypt Properties Window—Advanced Input Parameters
Data Encryption Algorithm
Algorithm used to encrypt the actual data. Choices: Triple-DES, AES128, AES192, and AES256.
Key Transport Algorithm
Encryption key. Currently only RSAv1.5 is supported.
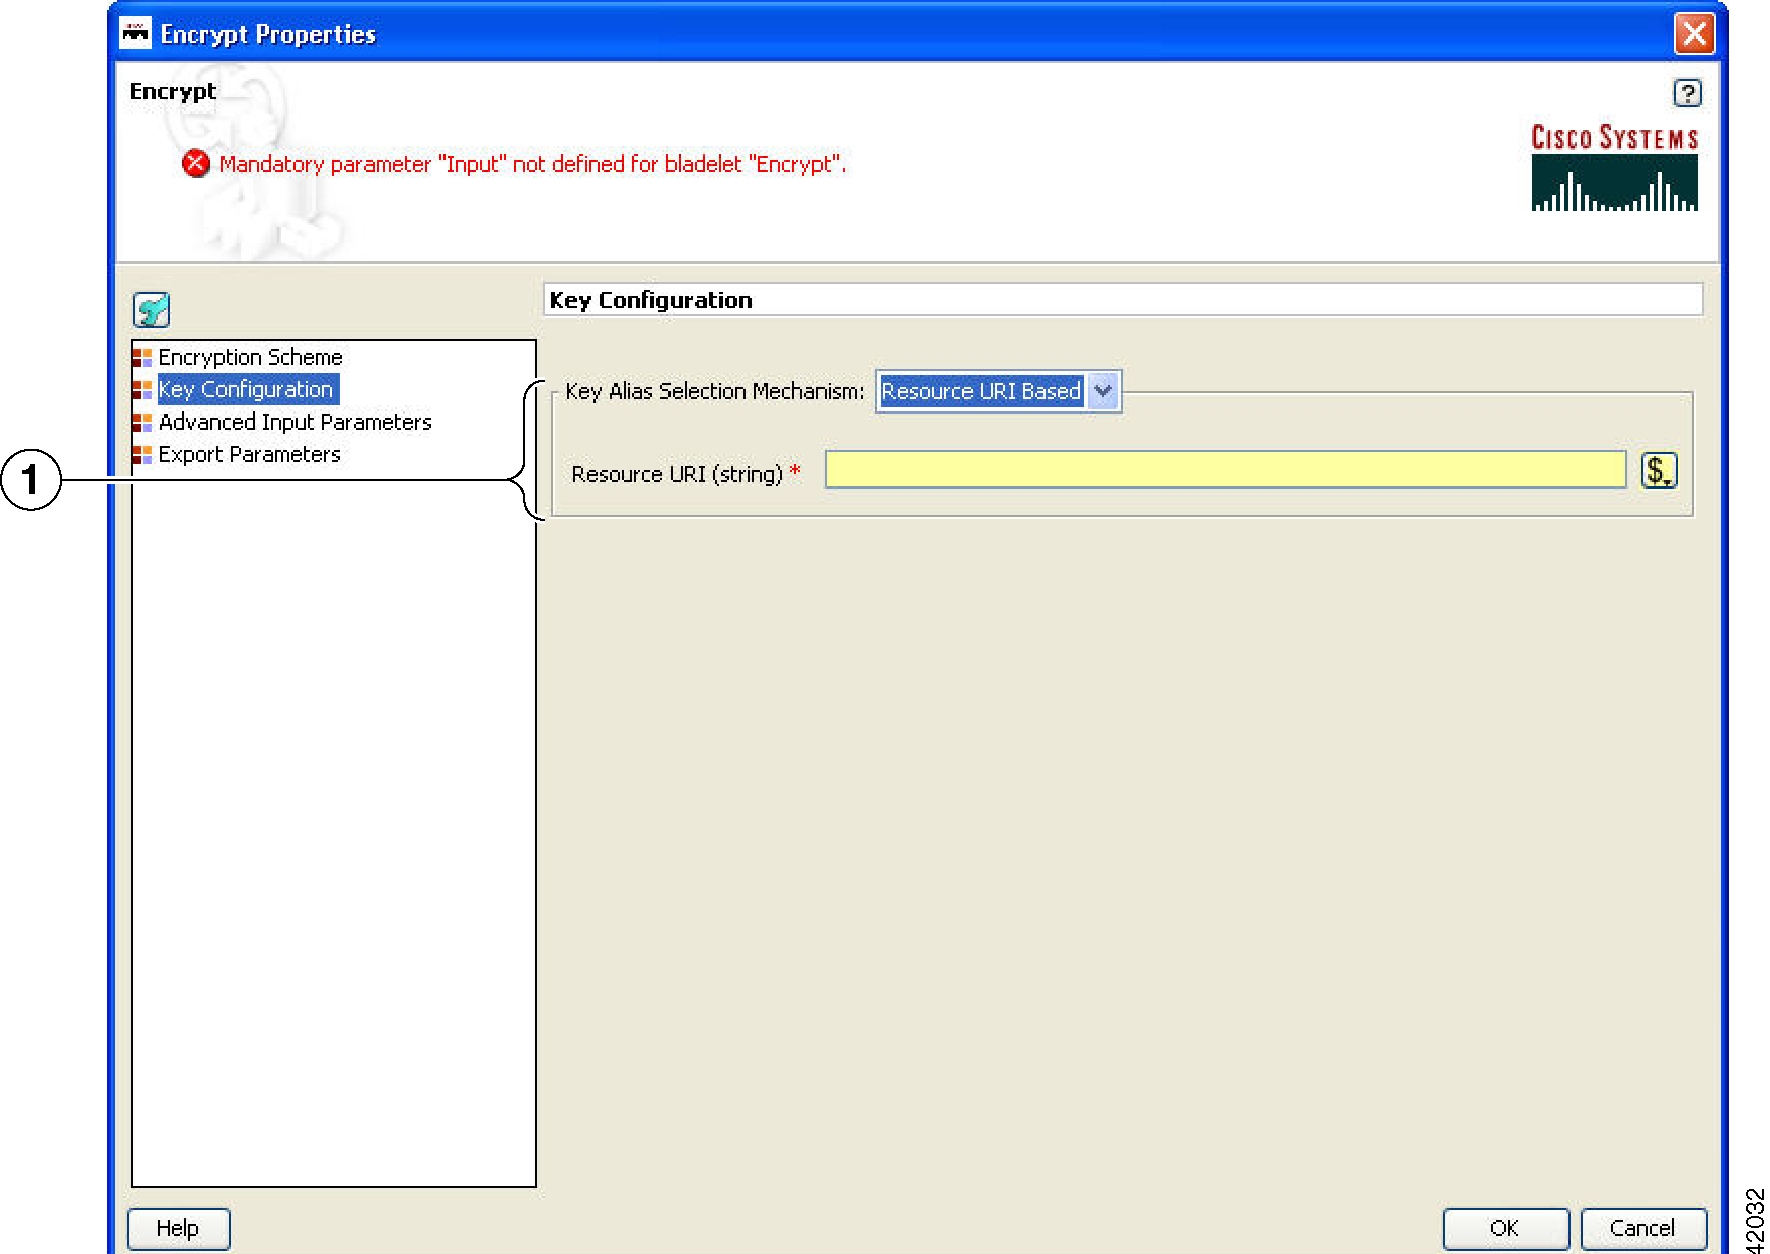
Figure 113 Encrypt Properties Window—Key Configuration, Resource URI Based
Resource URI Based
URI of the intended recipient of this encrypted message. The key alias corresponding to this resource encrypts the symmetric key. Must already be configured on the AMC server.
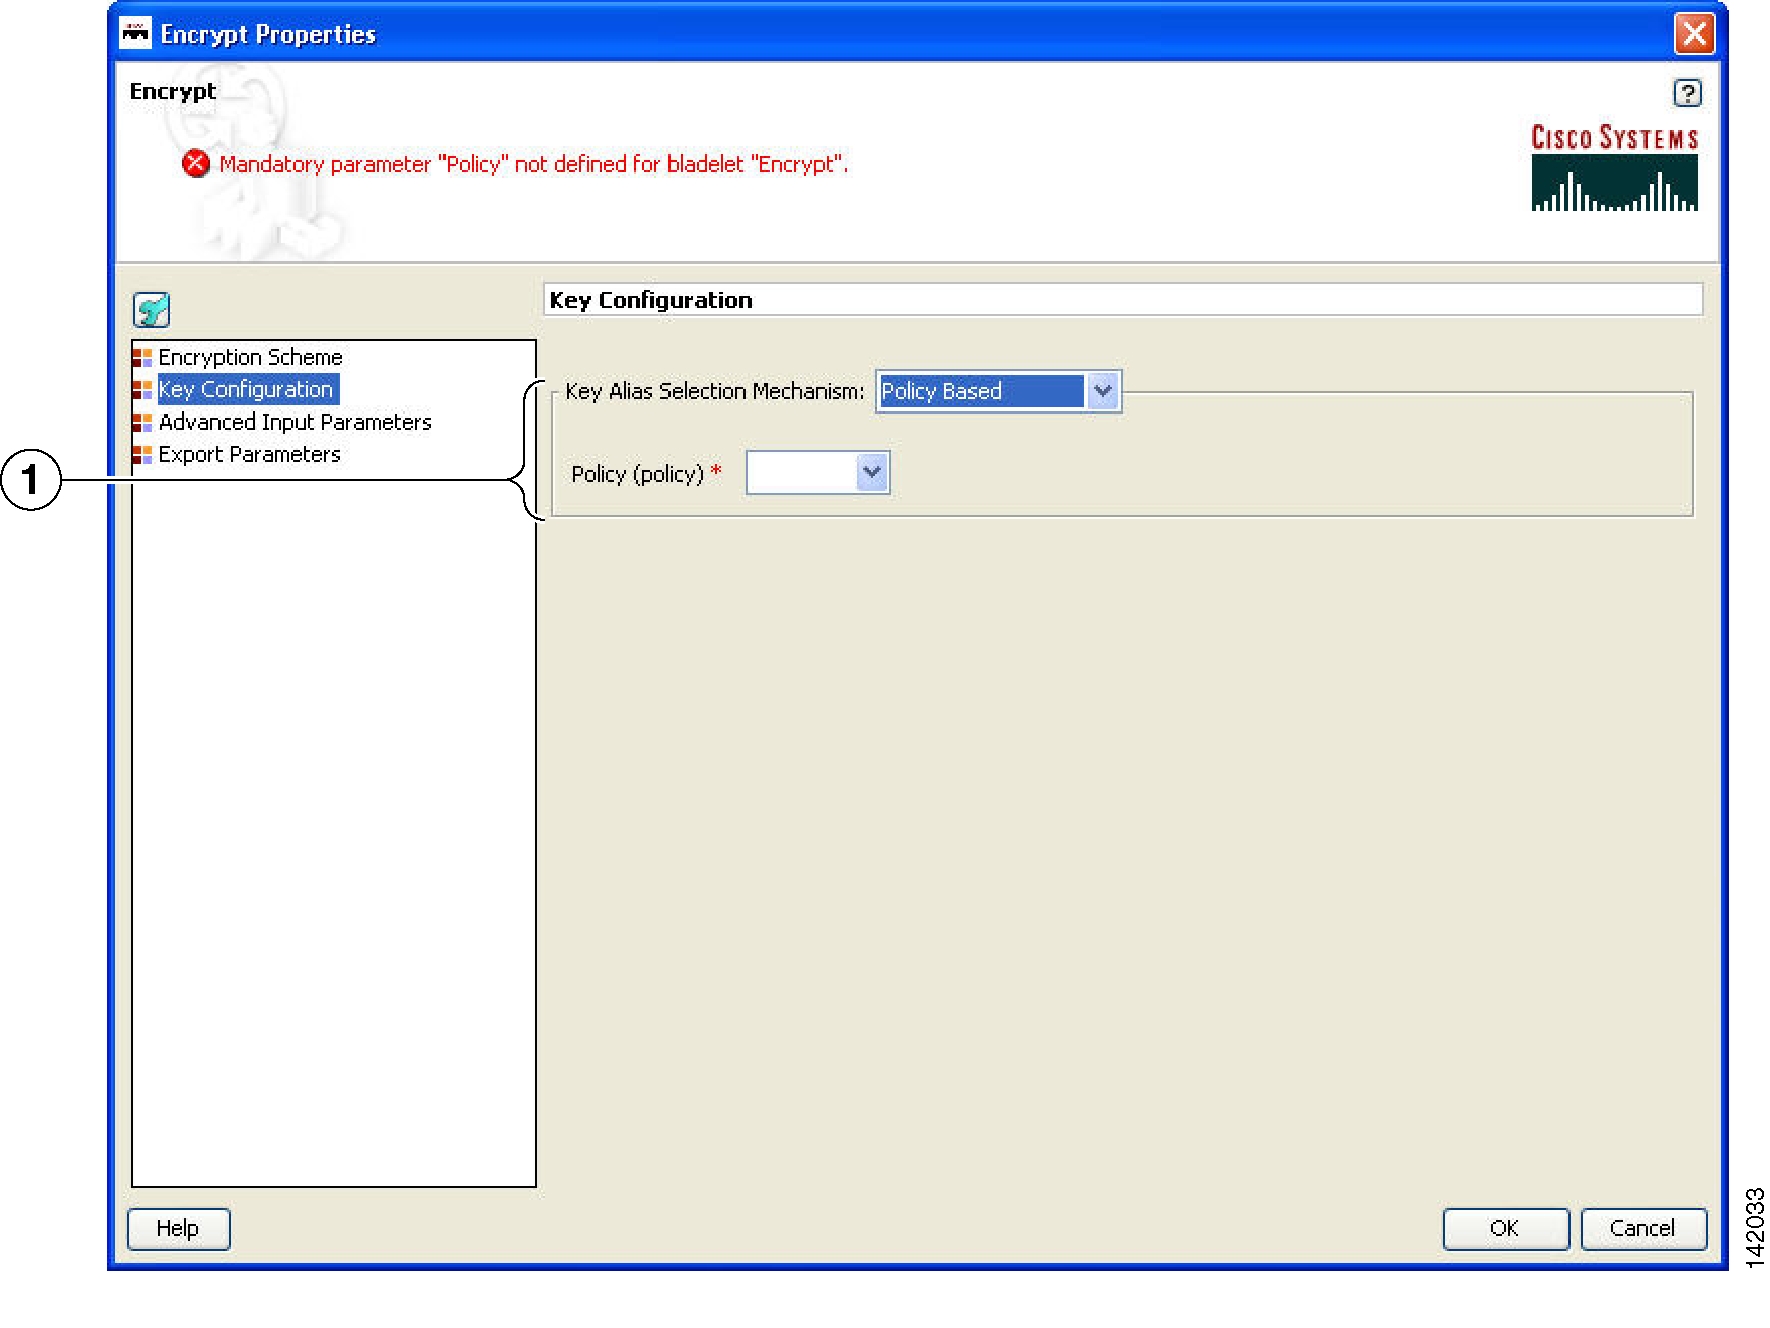
Figure 114 Encrypt Properties Window—Key Configuration, Key Alias Policy Based
Three types of Configuration groups in the Encryption Scheme section affect the way the settings are determined:
•
•
•
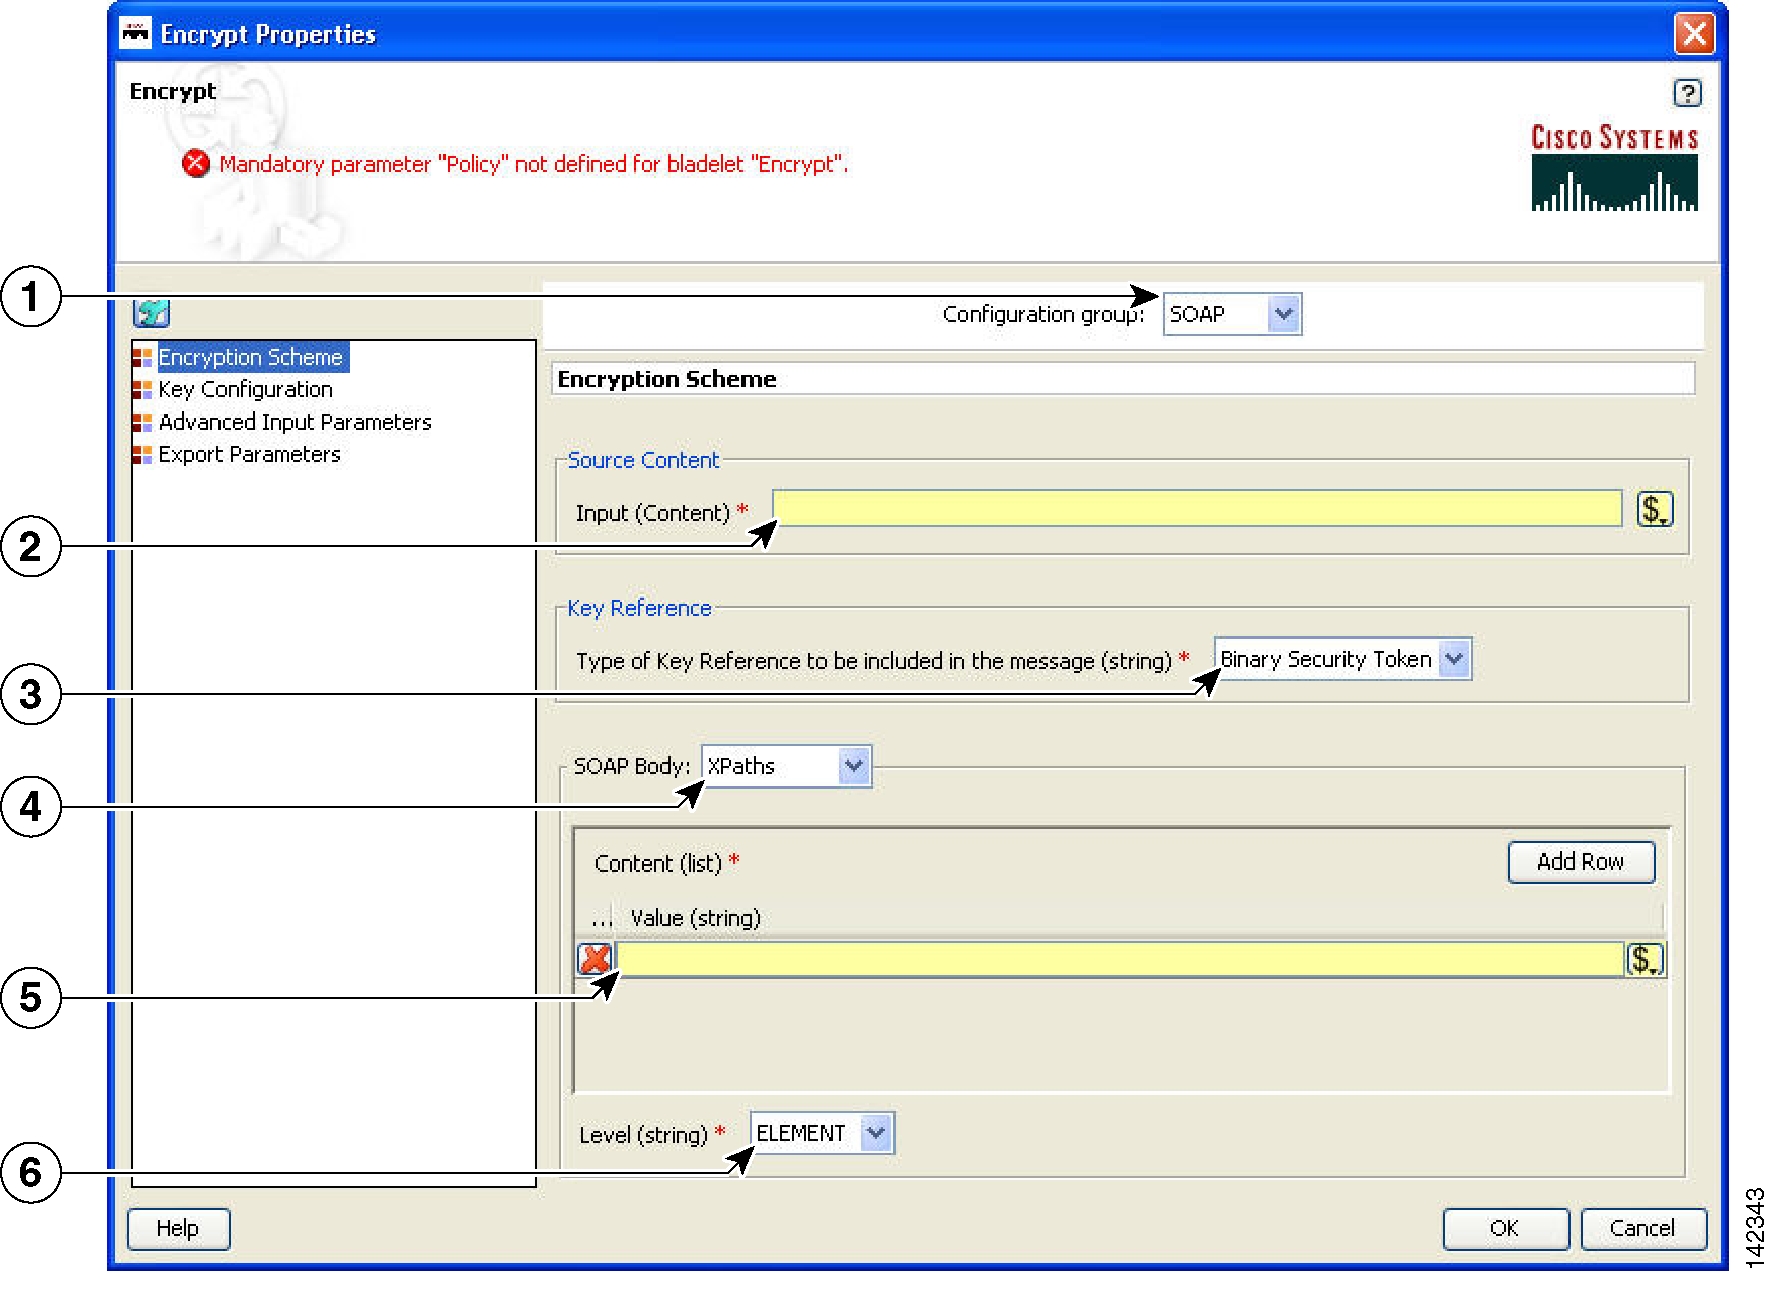
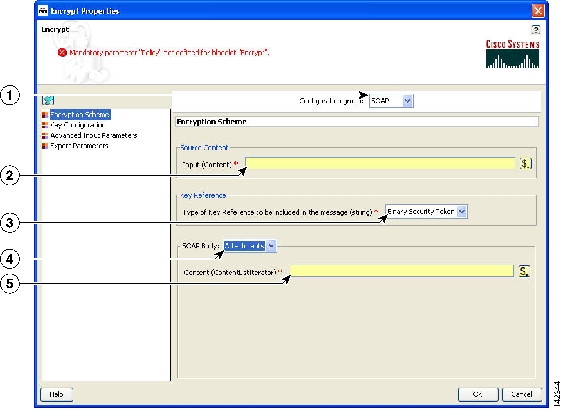
Figure 115 Encrypt Properties Window—Encryption Scheme, SOAP, SOAPBody
Figure 116 Encrypt Properties Window—Encryption Scheme, SOAP, XPaths
Figure 117 Encrypt Properties Window—Encryption Scheme, SOAP, Attachments
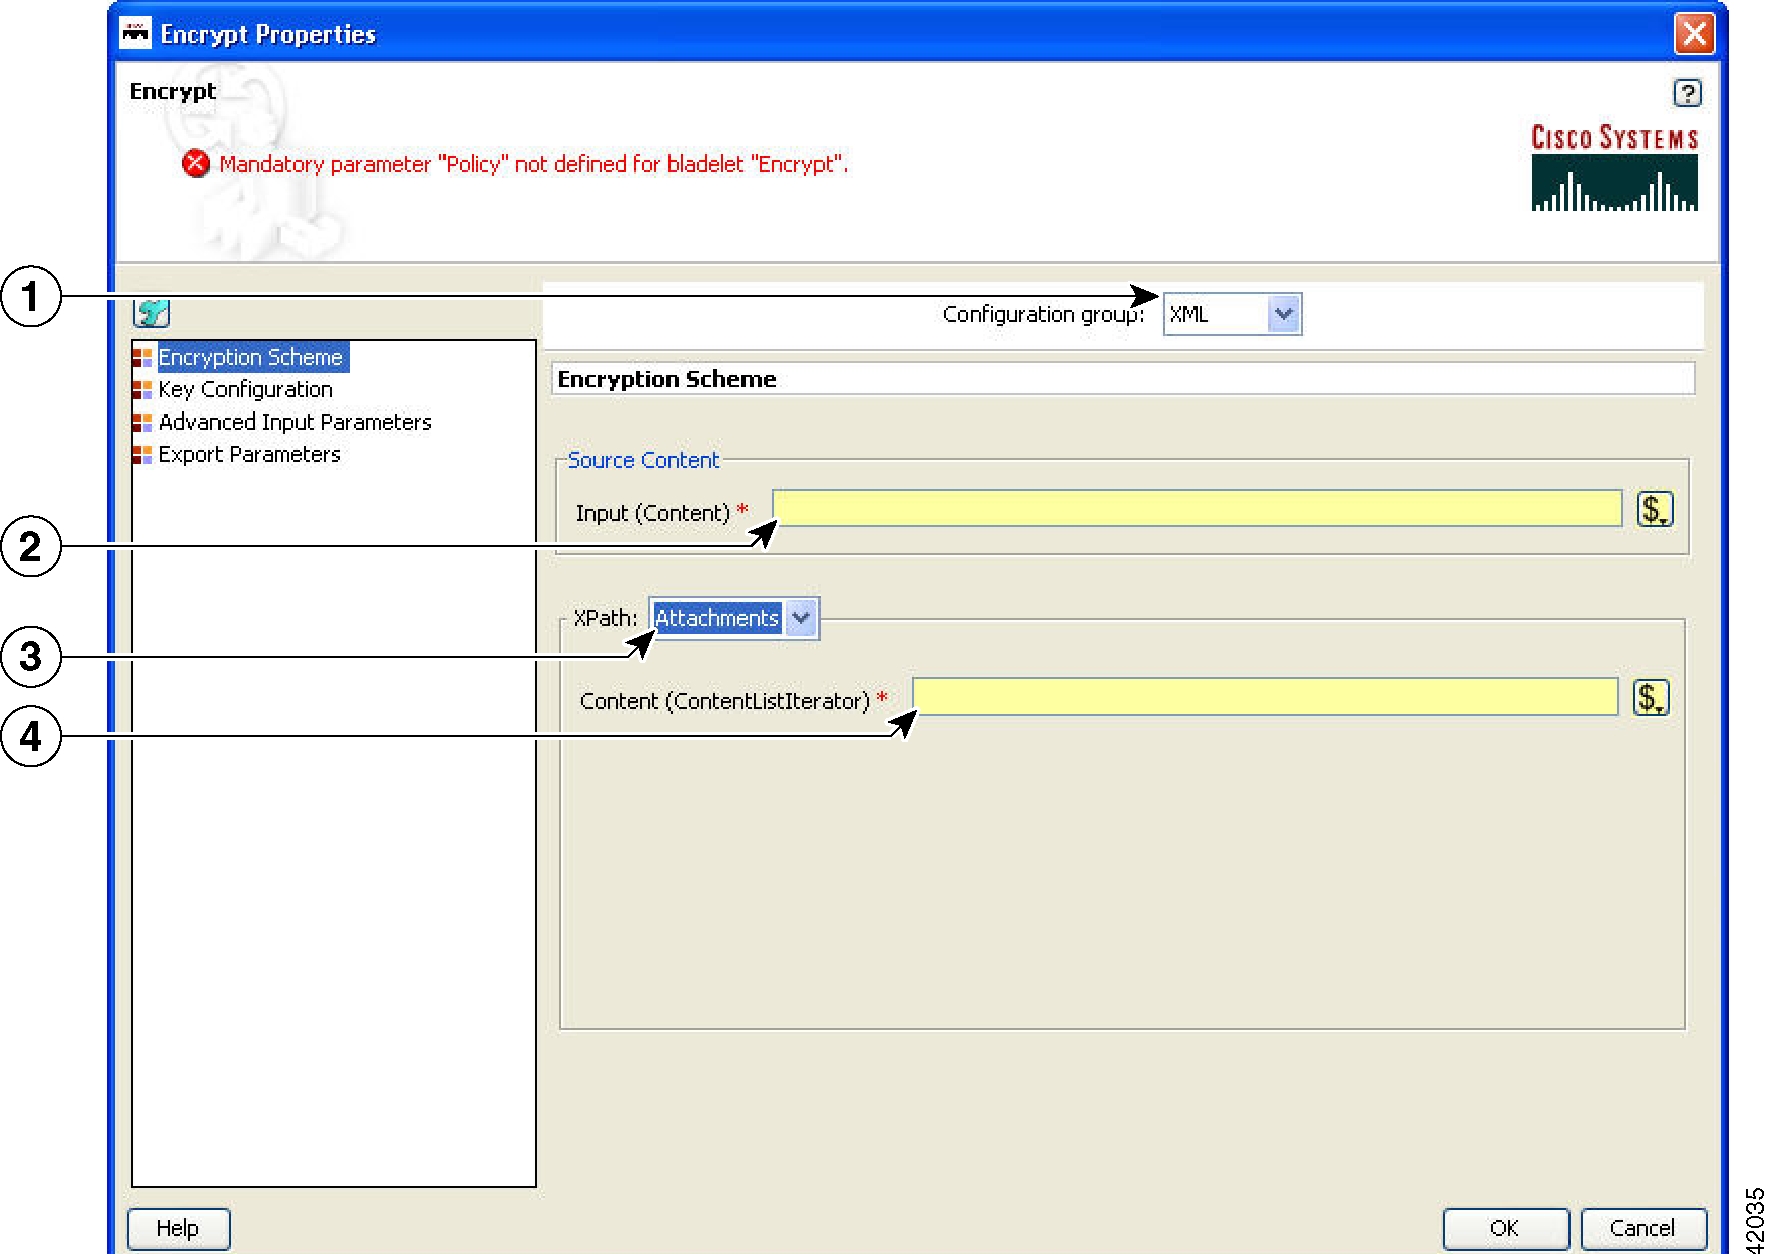
Figure 118 Encrypt Properties Window—Encryption Scheme, XML, XPaths
Figure 119 Encrypt Properties Window—Encryption Scheme, XML, Attachments
Figure 120 Encrypt Properties Window—Encryption Scheme, Non-XML, Source Content
Figure 121 Encrypt Properties Window—Encryption Scheme, Non-XML, Attachments
Figure 122 Encrypt Properties Window—Export Parameters
Outcome
•
•
Exceptions
•
•
Verify Signature
Summary
As the name suggests, verify signature verifies digital signature contained in XML/SOAP/non-XML message.In summary:
•
•
Prerequisites and Dependencies
•
Details
The Verify Signature Bladelet usually verifies all the signatures contained in the original message, including multipart and nonmultipart messages.
If the XKMS verification is enabled, then the AON node should be capable of reaching external VERISIGN website.
Note
Figure 123 Verify Signature Properties Window—Content to Verify
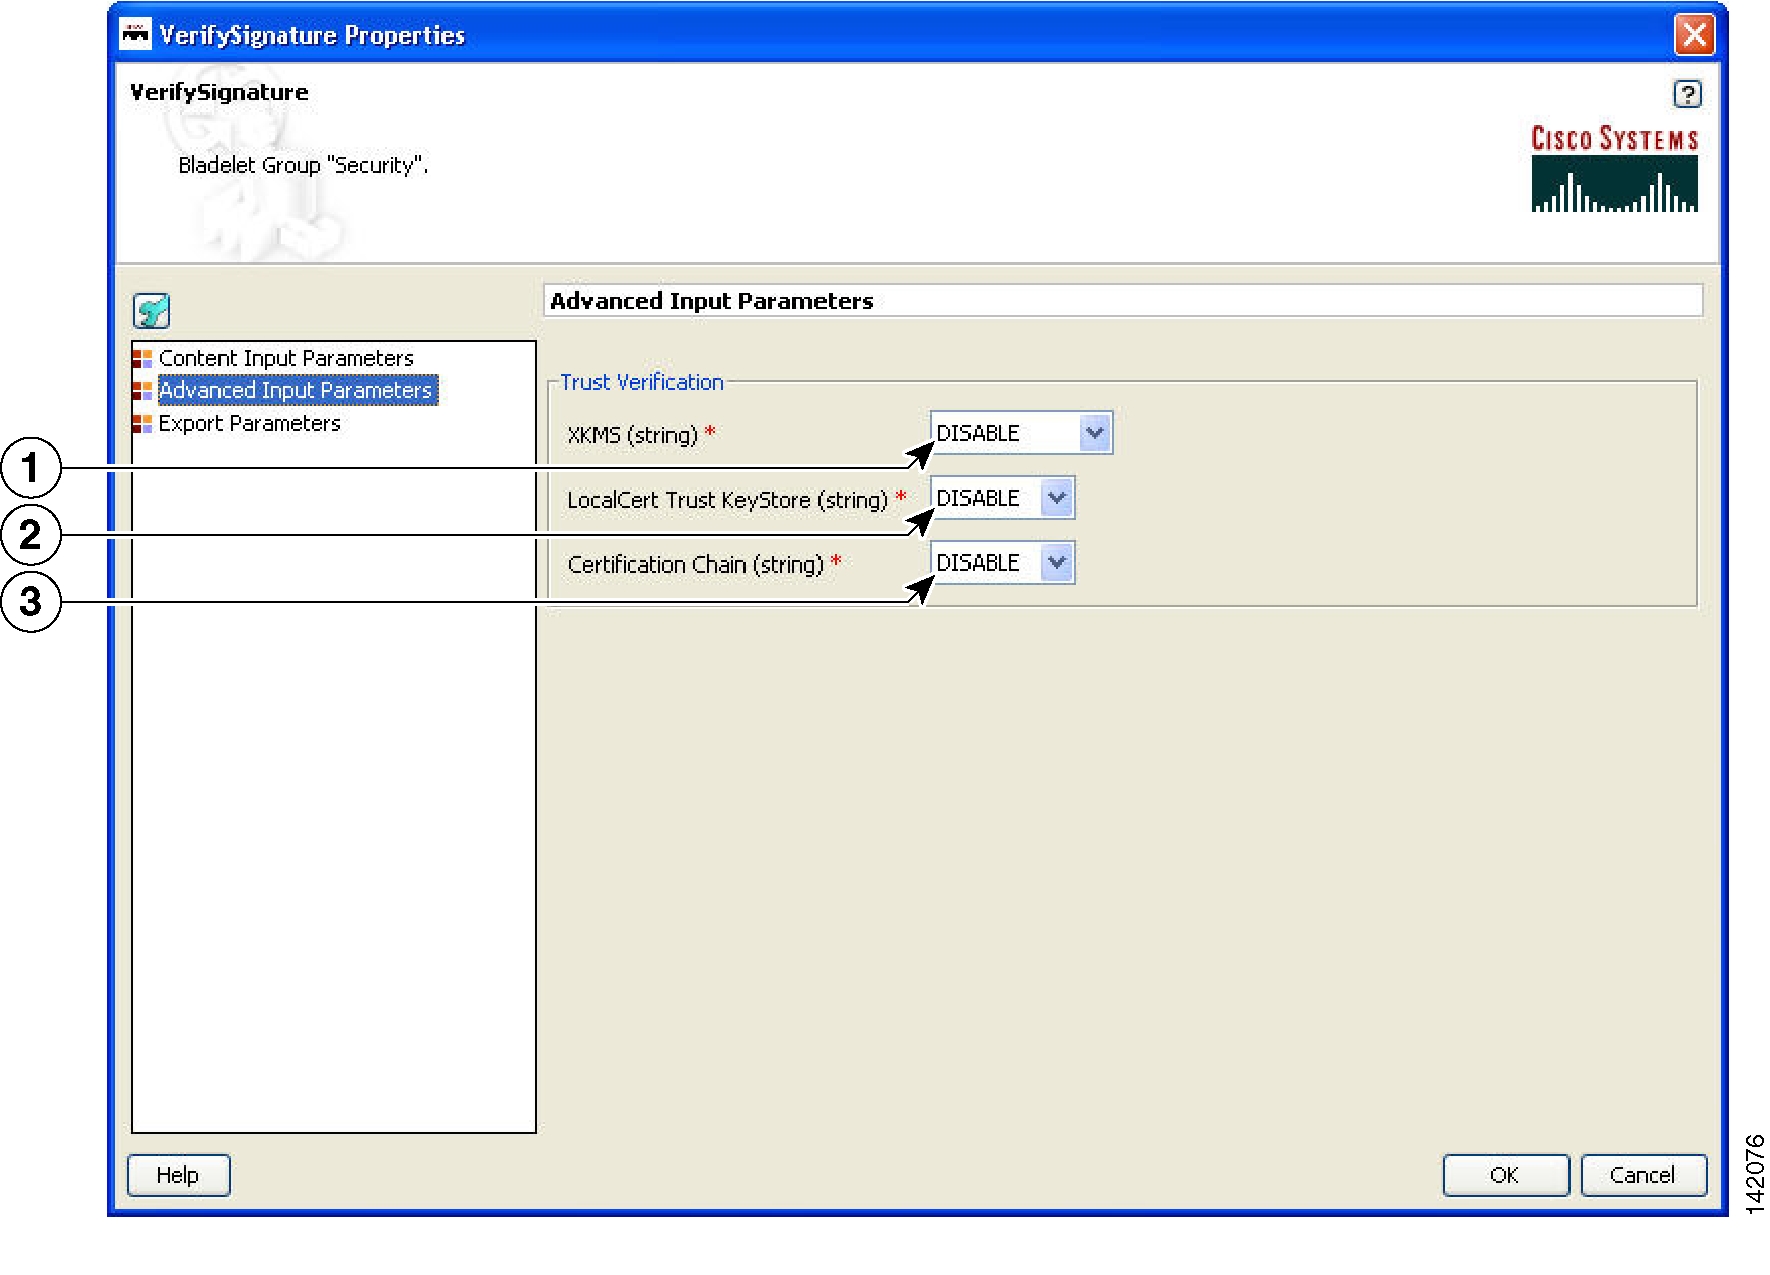
If Local Certificate Trust and/or Certificate Chain Verification is enabled, then configure the local Trust Store. The Certificate found in the Signature is expected to be found in the local Trust Store.
Figure 124 Verify Signature Properties Window—Advanced Input Parameters
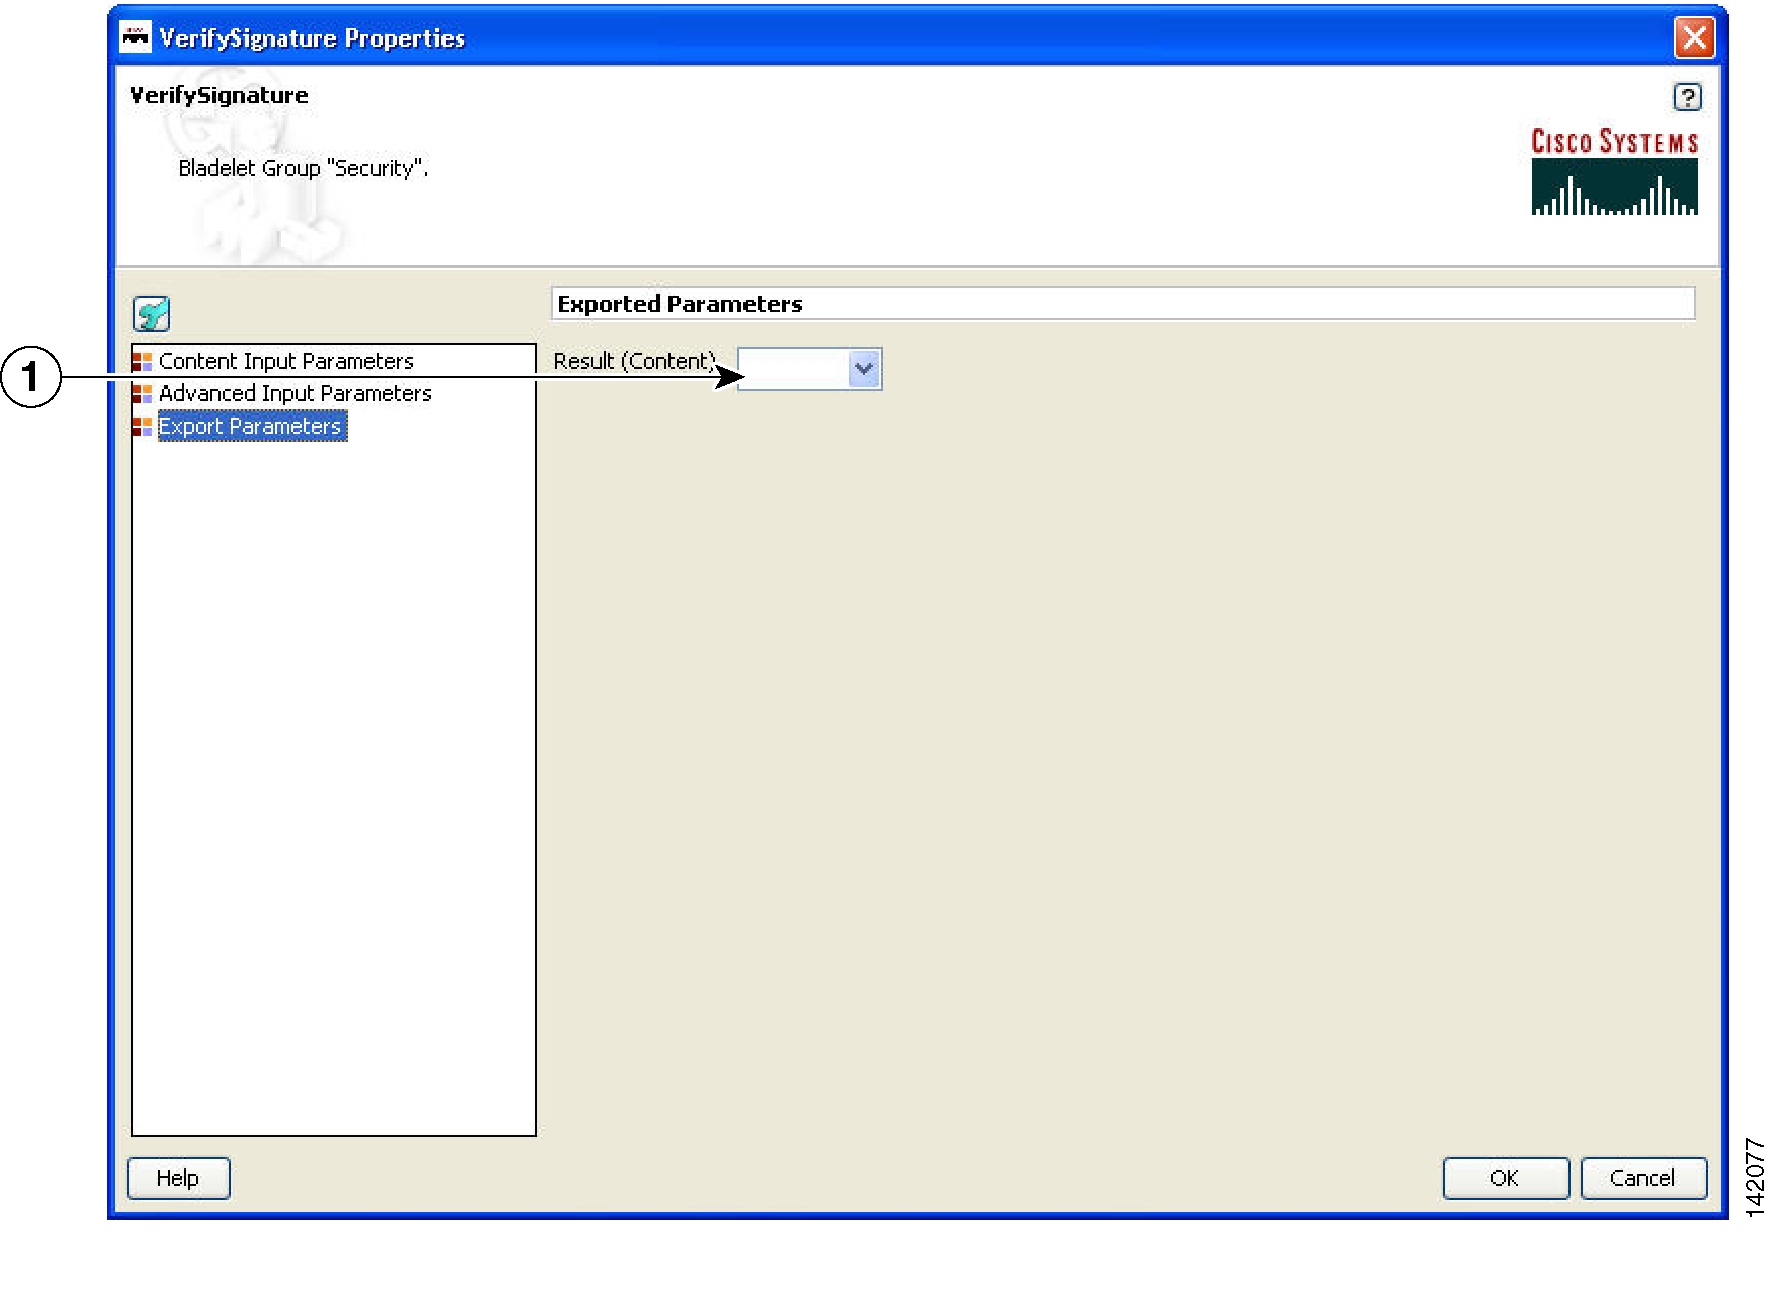
Figure 125 Verify Signature Properties Window—Export Parameters
Outcome
•
•
Exceptions
•
Sign
Summary
Sign Bladelet basically creates digital signature on partial or entire SOAP/XML documents. This Bladelet is capable of signing non-XML and multipart messages. In summary:
•
•
•
Prerequisites and Dependencies
•
•
Details
If you use the Sign Bladelet to sign relevant parts of MIME message, execute the Extract Composite Content Bladelet before the signing Bladelet so as to obtain contentListIterator variables that can be used in the Sign Bladelet.
Create a new export variable to contain the signed MIME message. Integrate this signed MIME message back into the original message by using the Create Message Bladelet.
For a non-MIME message, the original message is modified inline and hence no need to configure the export parameter.
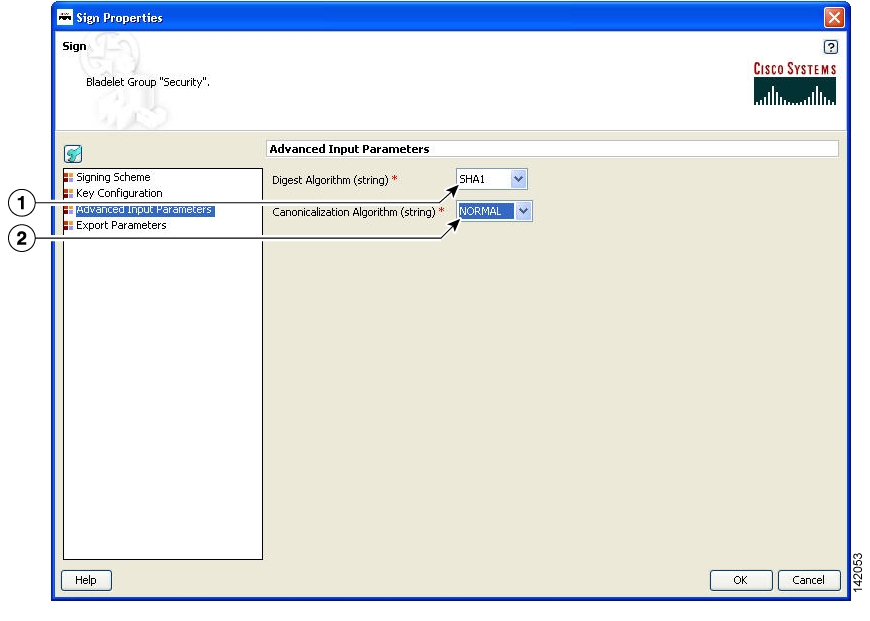
Figure 126 Sign Properties Window—Advanced Input Parameters
Digest Algorithm
Type of digest algorithm to be used to create digital signature.
Canonicalization Algorithm
Type of canonicalization algorithm to be used to create digital signature.
Figure 127 Sign Properties Window—Key Configuration, Node Based
Node Based
Type of key configuration. Use node-based key alias instead of any signing policy. Uses the AON key for signing. Must already be configured in AMC-Keystore.
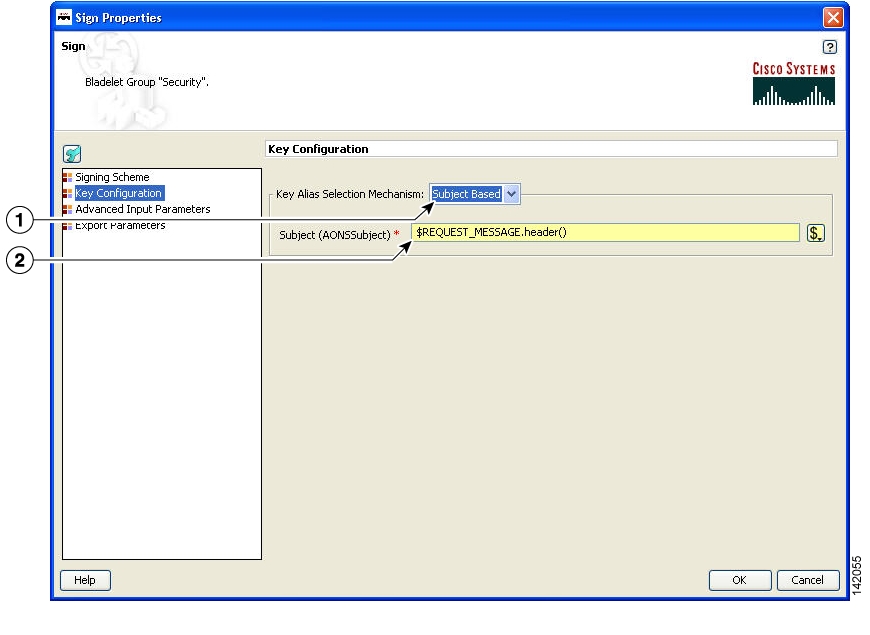
Figure 128 Sign Properties Window—Key Configuration, Subject Based
Subject Based
Type of key configuration. Key alias is extracted based on the value of the AONSSubject PEP variable.
Subject
Select subject form the auto complete text field.
Figure 129 Sign Properties Window—Key Configuration, Policy Based
Policy Based
Type of key configuration. Signing policy containing configuration to the key alias.
Policy
Policy. Must already be configured on the AMC server.
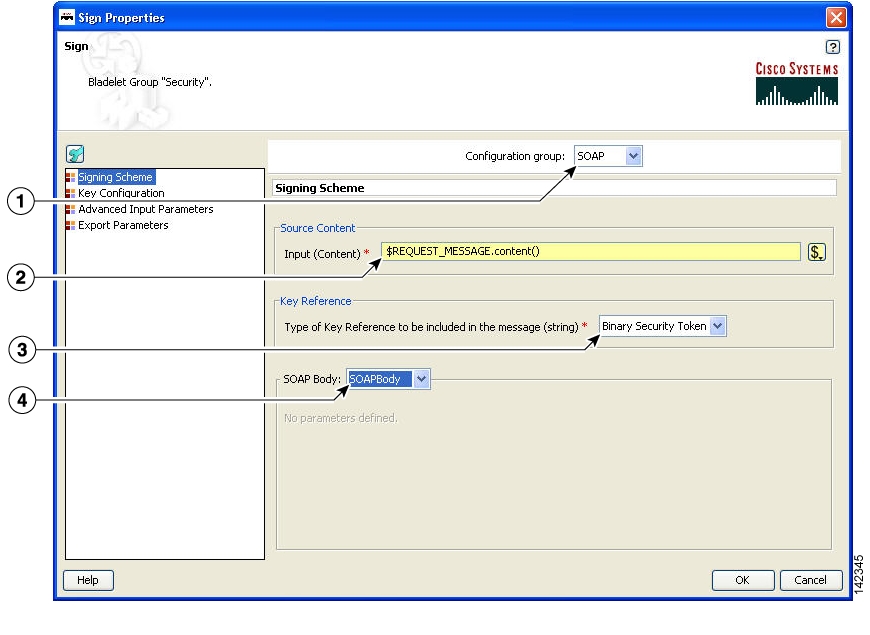
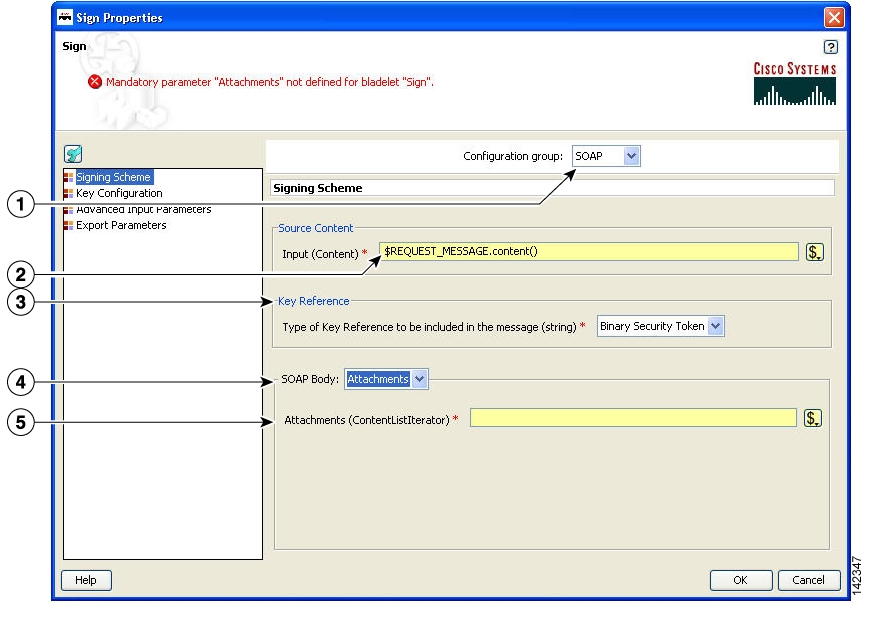
Figure 130 Sign Properties Window—Signing Scheme, SOAP, SOAPBody
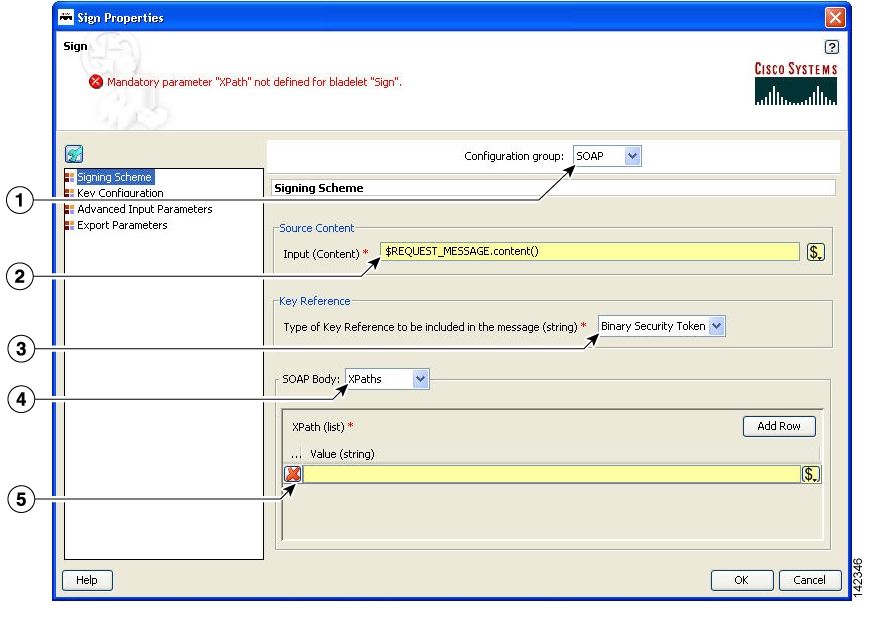
Figure 131 Sign Properties Window—Signing Scheme, SOAP, XPaths
Figure 132 Sign Properties Window—Signing Scheme, SOAP, Attachments
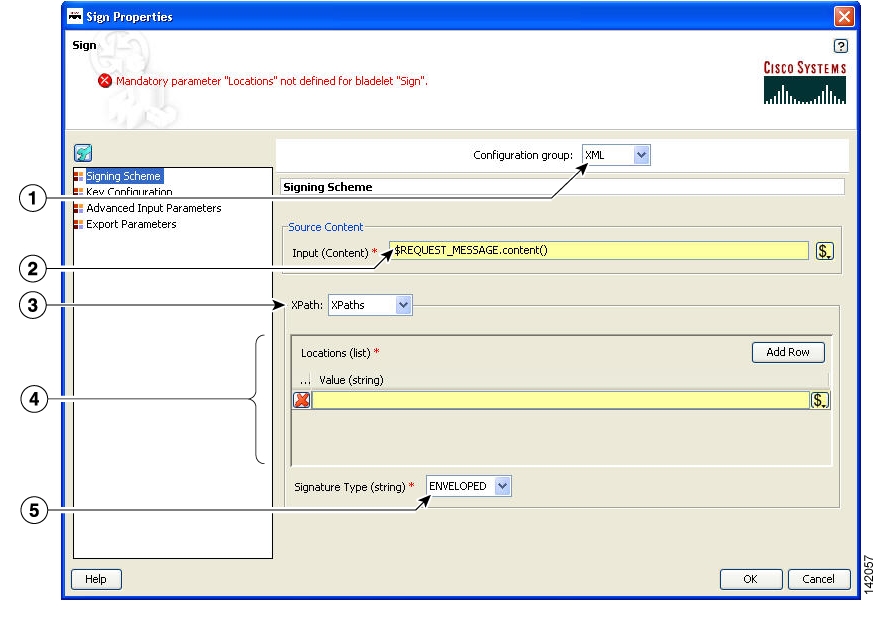
Figure 133 Sign Properties Window—Signing Scheme, XML, XPaths
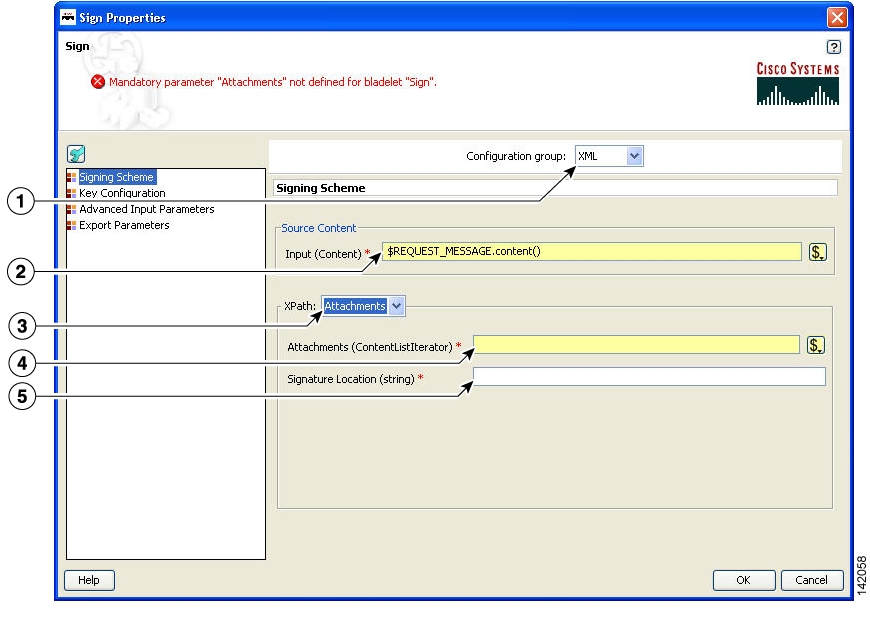
Figure 134 Sign Properties Window—Signing Scheme, XML, Attachments
Figure 135 Sign Properties Window—Signing Scheme, Non-XML, Source Content
Configuration Group
Configuration group, set here to Non-XML.
Source Content
Base content of the original MIME message.
Input
Input content.
Figure 136 Sign Properties Window—Signing Scheme, Non-XML, Attachments
Figure 137 Sign Properties Window—Export Parameters
Result
Signed content. Usually use when the original message is a MIME message or non-XML message.
Outcome
•
Exceptions
•
•
Decrypt
Summary
The Decrypt Bladelet decrypts encrypted XML, SOAP or non-XML messages as well as attachments.
Prerequisites and Dependencies
•
Details
The Decrypt Bladelet decrypts SOAP messages containing data that has been encrypted with a symmetric key that has also been encrypted using an asymmetric public key. Given the private key of the recipient message as an input parameter, this Bladelet moves the CPU-intensive decryption operation to AON. Decrypt any or all of the encrypted data in a SOAP document by specifying the corresponding elements using XPath expressions. AON checks the destination URI of the message to determine the key alias for Decryption. For asymmetric key decryption, the Decryption key alias is identical to the destination hostname.
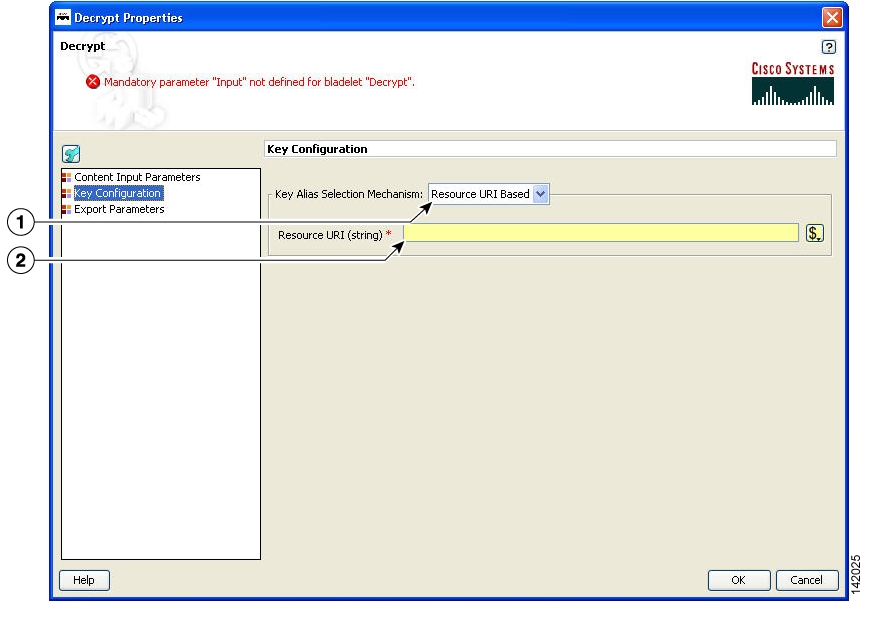
Figure 138 Decrypt Properties Window—Key Configuration, Resource URI Based
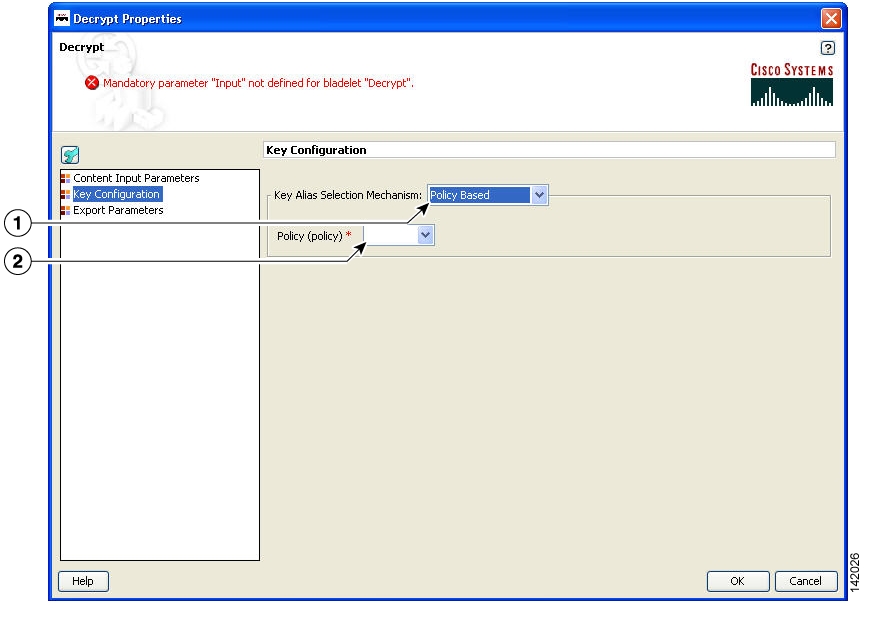
Figure 139 Decrypt Properties Window—Key Configuration, Policy Based
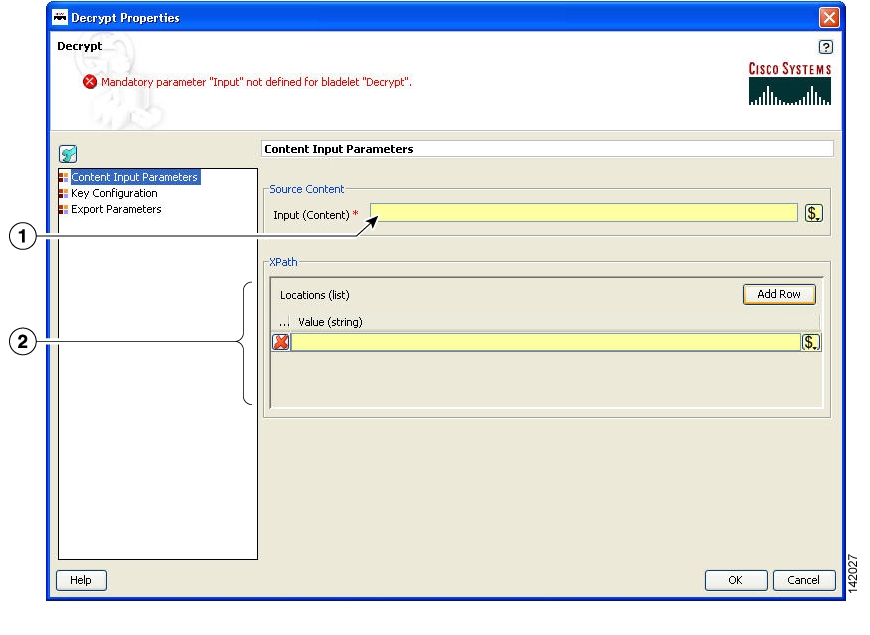
Figure 140 Decrypt Properties Window—Content to Decrypt
Input
Input content that contains the encrypted data.
Xpath Locations
One or more XPaths for elements to be decrypted in the message. If blank, decrypts all encrypted data in the message.
Figure 141 Decrypt Properties Window—Export Parameters
Result
Output variable that contains the decrypted output of this Bladelet. Need not be set if the message being encrypted is of plain XML, SOAP or non-XML types (without attachments).
Outcome
•
•
Exceptions
•
•
Identify
Summary
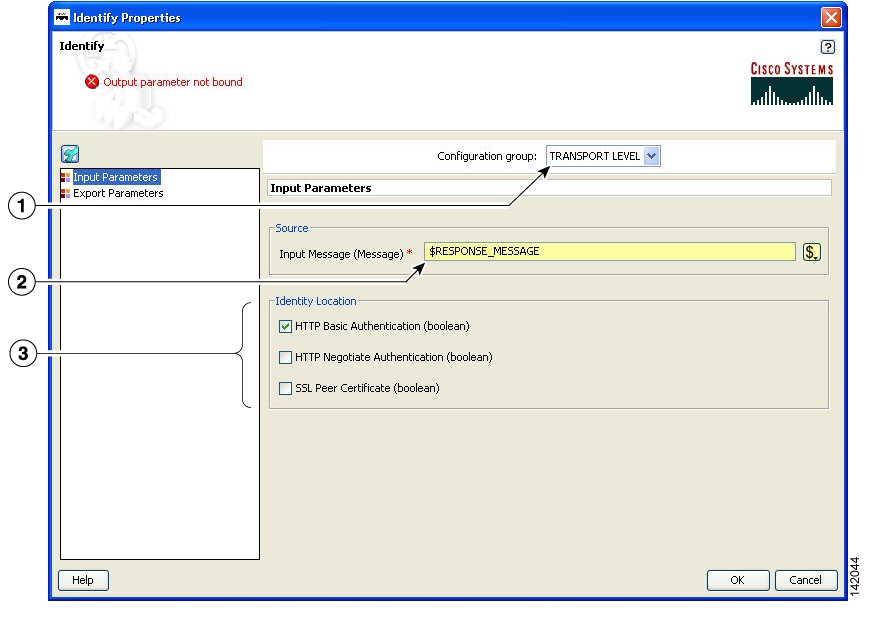
AON messages can use several types of claims or proof of identity. These items are generically referred to as "subjects." This Bladelet can extract all subjects of specified types from the message being processed by the PEP.
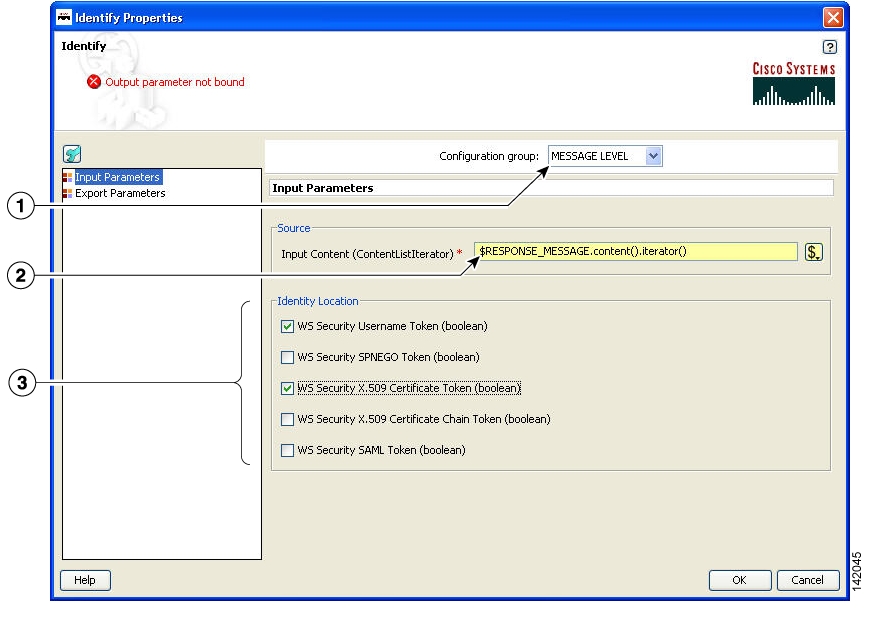
Extract multiple types of identities at either the transport or message level, but not both.
Different types of identities are put into different sublists in SecurityContext and can be retrieved with different get functions.
As long as there is one identity extracted, the output path is "Success." When no identity is extracted, the output path is "Failure."
When there is no identity extracted, no HTTP-level challenge or soapfault is generated. Those message can be generated only by subsequent Bladelets that try to use the identity information for different purposes, such as authenticate and identity verify.
Prerequisites and Dependencies
None.
Details
Figure 142 Identify Properties Window—Input Parameters, Transport Level Identity
Figure 143 Identify Properties Window—Transport Layer Identity, Message Level Identity
Figure 144 Identify Properties Window—Export Parameters
Outcome
•
•
Exceptions
None.
Authenticate
Summary
The Authenticate Bladelet authenticates various credentials from the Identify Bladelet. An HTTP header or SOAP message are among the variety of sources that the Authenticate Bladelet can obtain identities from. You can set various property types for the Authenticate Bladelet.
Prerequisites and Dependencies
•
Details
An Authenticate Bladelet authenticates only one type of identity. To authenticate multiple types of identity, you must use multiple instances of Authenticate Bladelet in the PEP.
To perform HTTP-based authentication, put an Authenticate Bladelet on the "Failure" path of the Identify Bladelet used to extract the credential to generate proper HTTP authentication challenge.
In order to generate HTTP response or proper soapfault message on exception cases, no Bladelet should be put on the exception path of the Authenticate Bladelet.
Note
Figure 145 Authenticate Properties Window—Advanced Input Parameters
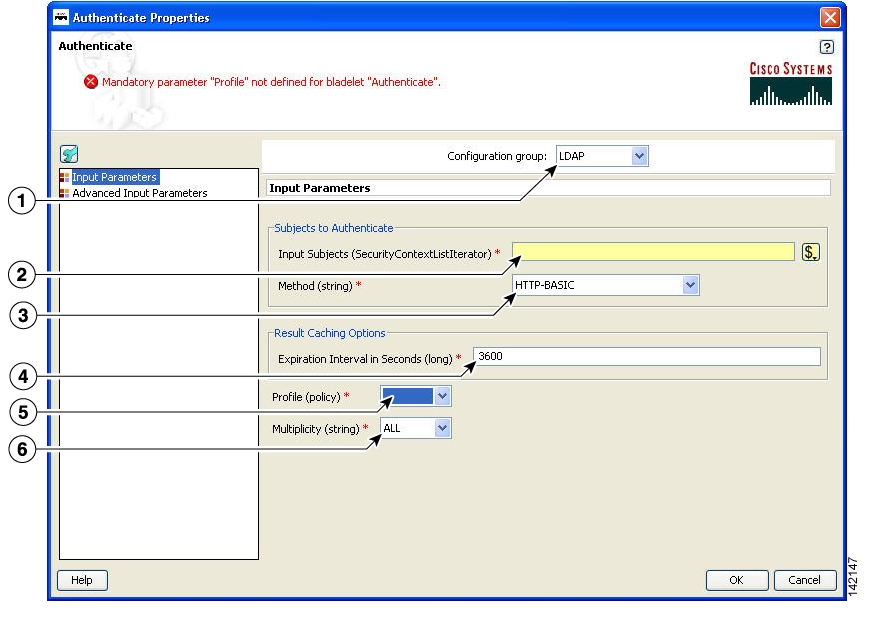
Figure 146 Authenticate Properties Window—Input Parameters, LDAP
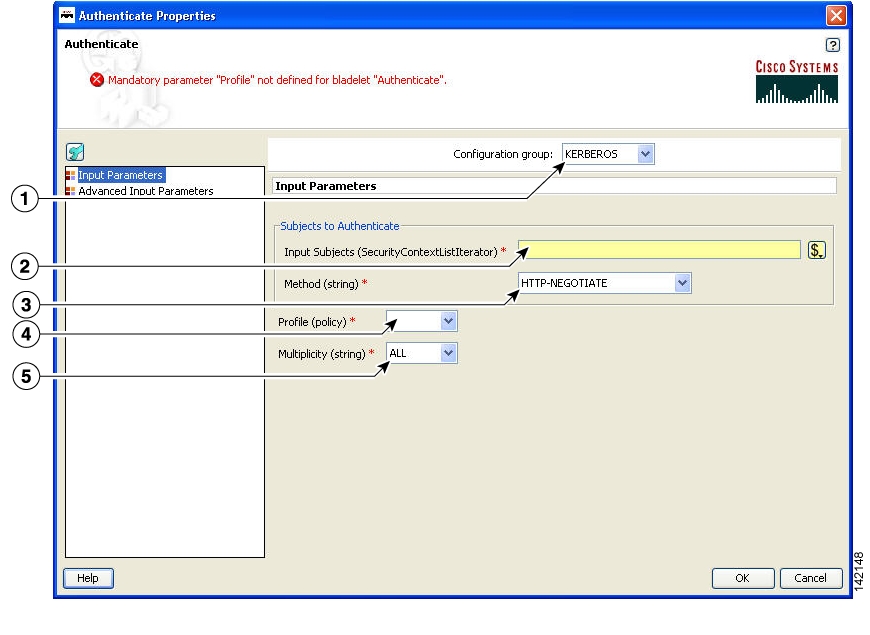
Figure 147 Authenticate Properties Window—Input Parameters, Kerberos
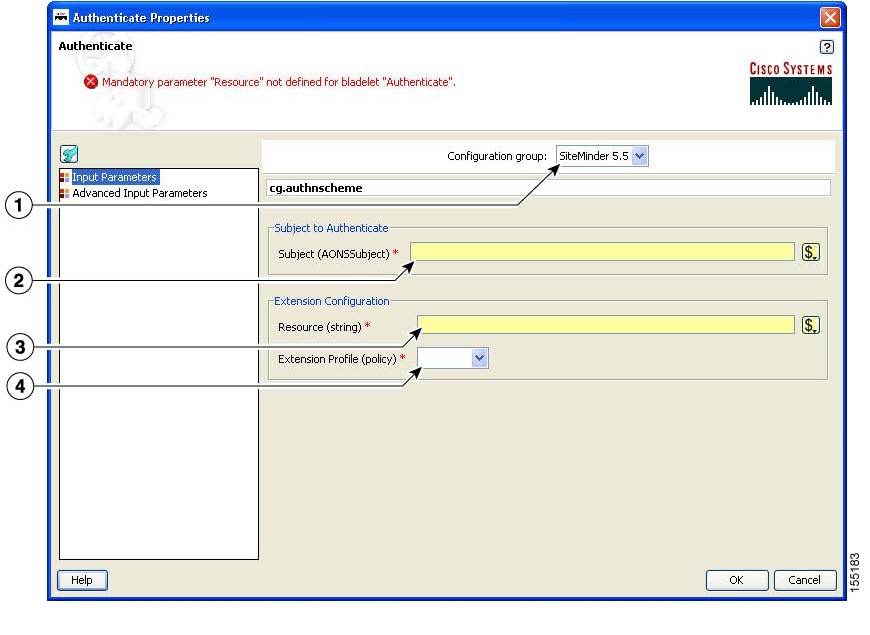
Figure 148 Authenticate Properties Window—Input Parameters, SiteMinder 5.5
Outcome
•
–
–
–
–
Exceptions
•
•
•
Verify Identity
Summary
This Bladelet verifies whether the following types of identities are trusted by the AON node. The trust can be verified by CA root trust only or you can enforce that the certificate itself has to be present in the node's trust store.
Prerequisites and Dependencies
•
•
Details
A Verify Identity Bladelet can verify only one type of identity. To verify multiple types of credentials, multiple instances of Verify Identity Bladelets need to be used in the PEP.
In order to generate proper soapfault messages for exception cases, no Bladelet should be put on the exception path of the Verify Identity Bladelet.
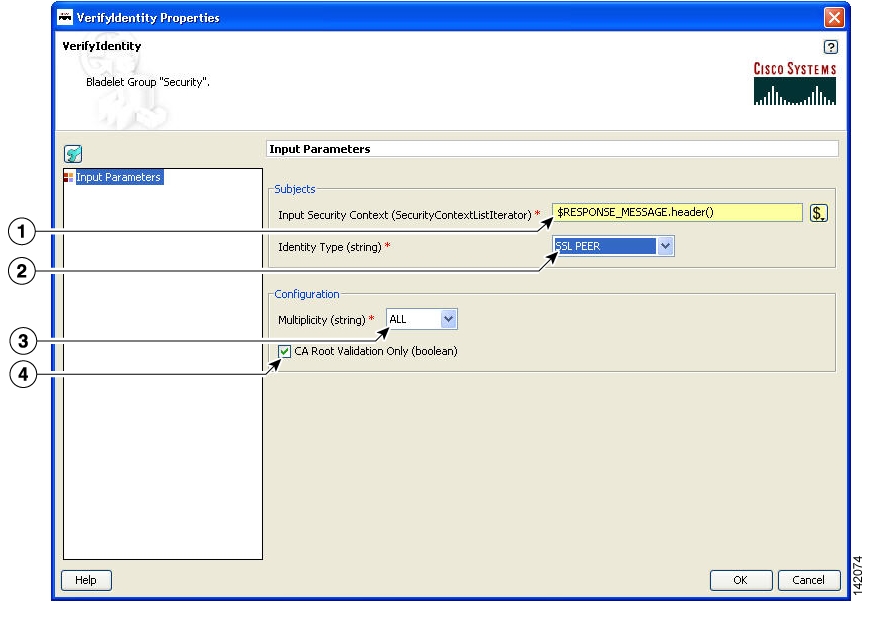
Figure 149 Verify Identity Properties Window—Input Parameters
Outcome
•
–
–
–
–
Exceptions
•
•
Transformation Category
The Transformation Category has one Bladelet:
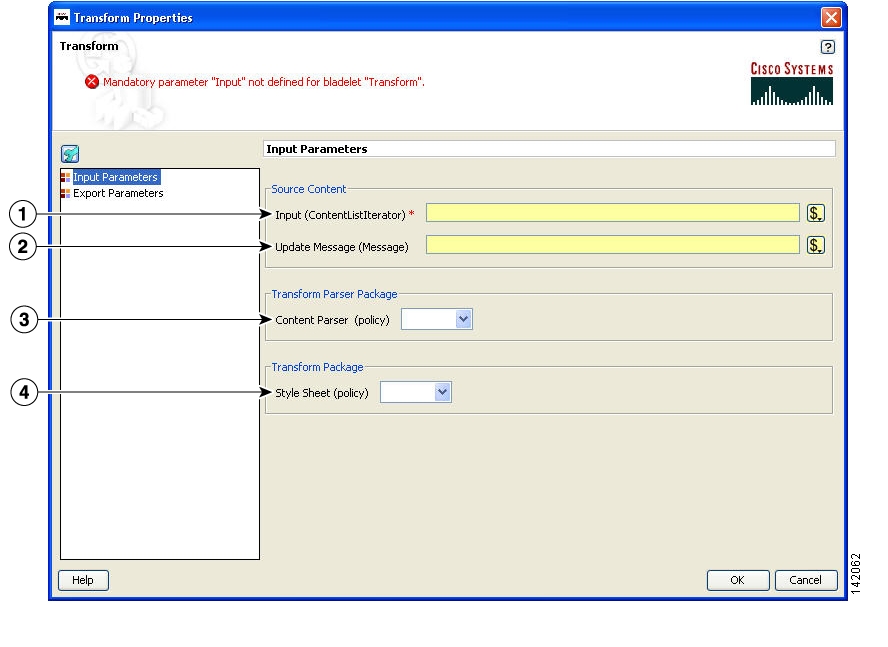
Transform
Summary
This Bladelet performs transformation on AON Message Content. It can transform an XML message content to an XML or Non-XML content using XSLT Based Transformation mechanism. Further, Non-XML message content can also be transformed to XML or Non-XML message content by providing a content parser extension.
If the message is not a multipart message, then its contents can be transformed and result of the transformation can be placed in the specified message and additionally can be exported as a PEP variable.
If the message is a multipart message and the list of contents are transformed in to a list of result contents, you must use BuildCompositeMessage to build a result multipart message.
Prerequisites and Dependencies
•
•
•
•
Details
Figure 150 Transform Properties Window—Input Parameters
Figure 151 Transform Properties Window—Export Parameters
Outcome
•
If transformation is successful, Success output path is set. In case of failure, Fail output path is set.
Exceptions
None.
Miscellaneous Category
The Miscellaneous category contains no Bladelets.
![]()
![]()
![]()
![]()
![]()
![]()
![]()
![]()
Posted: Fri Oct 6 17:50:24 PDT 2006
All contents are Copyright © 1992--2006 Cisco Systems, Inc. All rights reserved.
Important Notices and Privacy Statement.