|
|

The Cisco Access Server 5100 uses a T1 network application card (NAC) and T1 network inter-face card (NIC) to terminate two T1 span lines and process up to 48 incoming DS0s.
Together, the T1 NIC and NAC perform the same functions as external channel service units (CSUs) and channel banks.
The T1 NIC per-forms all the critical functions of a CSU:
The T1 NAC per-forms digital service unit (DSU) and private branch exchange (PBX) functions. The T1 NAC demul-tiplexes the DS0s from the T1 line and distributes them to the modem NACs. The T1 NAC has the following features:
The T1 NAC is compatible with both North American (T1) and European (E1) applications. You can install an optional E1 NIC to accommodate European digital trunks (2.048 Mbps).
You can use the T1 operator interface to configure the T1 NAC. Connect a terminal or PC to the port labeled RS-232 on the T1 NIC with the supplied EIA/TIA-232 cable. The T1 NAC may also be configured with SNMP software.
The T1 NIC provides an EIA/TIA-232 serial port, Bantam jacks, and RJ-48C connectors. The RJ-48C connectors provide a CSU interface, which recovers clock and data from incoming T1 signals.
The recovered data from the T1 NIC passes to the T1 NAC through the mid-plane connec-tor. The midplane connector also allows the T1 NAC's CPU to manage the T1 NIC.

The T1 NIC (see Figure 6-1) has two RJ-48C connectors and two Bantam jacks. The RJ-48C connectors are dedicated to span lines coming into the chassis. Each T1 span line contains twenty-four 64-kbps DS0 chan-nels that are multiplexed into the 1.544-Mbps DS1 rate.
Bantam jacks are provided to monitor equipment. These jacks, which are labeled TX and RX are passively coupled so that the moni-tor-ing equipment can be installed while the T1 NIC is powered on without causing errors. See the "Cable and Port Specifications" appendix for RJ-48C pinout information.
You can use the T1 operator interface to configure the T1 NAC. Connect a terminal or PC to the port labeled RS-232 on the T1 NIC with the supplied EIA/TIA-232 cable. The T1 NAC may also be configured with SNMP software.
The T1 NIC port labeled RS-232 is an RJ-45 connector configured as a data terminal equipment (DTE) device. Use the EIA/TIA-232 cable to connect the following equipment:
When connecting a PC to the NIC, use the DB-25 female-to-male adapter provided. You must supply your own interface adapter if your application uses something other than a DB-25 connector. See the "Cable and Port Specifications" appendix for EIA/TIA-232 pinout information.
If the T1 NIC is shipped as separate equipment, perform the following steps to install it:
Step 1 Remove the safety panel for slot 1 at the back of the chassis by unscrew-ing the top and bottom screws of the panel. Save the screws and safety panel in case you need them in the future.
Step 2 Slide the T1 NIC into the slot's upper and lower card guides until the DIN connec-tor is firmly seated in the midplane.
Step 3 Tighten the screws that are attached to the T1 NIC. Pay careful attention to the alignment of the screws before tightening them. Problems could arise if the screws are not threaded properly.
Step 4 Attach the serial port and span line cables.
The T1 NIC provides the line interface circuitry between the T1 span line(s) and the T1/CEPT frames on the T1 NAC. The T1 NIC has a line interface unit (LIU) to provide the interface to each T1 span line.
The LIU contains automatic gain control, auto-equalization, and data recovery. It also recovers the T1 1.544-MHz network clock, which is used by the T1 NAC to clock the data to the T1 frames. Depending on the con-figuration, the network clock may be used by the Access Server 5100 chassis as a tim-ing source.
The T1 NIC has the drivers and receivers for the EIA/TIA-232 serial inter-face in order to perform a software download. However, there is no software-driven component on the T1 NIC. It is man-aged completely by the T1 NAC.
The T1 NIC provides a DS1 signal that is capable of driving and receiv-ing signals from distances up to 6,000 feet. If you are connecting to an exter-nal CSU, make sure that the T1 NIC can accept a DS1 signal.
When the T1 NIC's CSU is in the default state (that is, when the T1 NAC is removed), it sends a nonframed, all 1's pattern to the telephone company. This is a standard alarm sequence that signals the telephone company that the equip-ment is down.
If the T1 NAC is removed for extended periods of time, the telephone company may elect to make the span lines inactive. Also, while sending out all 1's, the NIC responds to network loopbacks. This is useful when diagnosing span line problems.
Although the T1 NIC does not use it as a power source, it termi-nates span power. This lets the telephone company know that a CSU is attached to the span line.
This section guides you through the initial configuration and installa-tion of the T1 NAC.
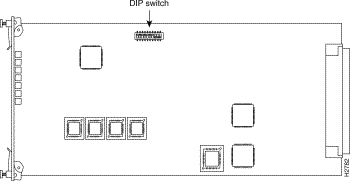
There are ten DIP switches located on the upper middle portion of the T1 NAC, as shown in Figure 6-2. DIP switches 1 and 2 are used to set the serial port rate of the EIA/TIA-232 interface. DIP switch 3 is used to enable or disable hard-ware flow control. DIP switches 4 through 10 are reserved for future use. See Table 6-1 for a description of the DIP switch settings.
| Switch | Factory Setting | Function | ||
|---|---|---|---|---|
1, 2 | On, On | EIA/TIA-232 serial port rate select | ||
| Set DIP 1: | Set DIP 2: | Selects: | |
Off | Off | 2400 bps | ||
Off | On | 9600 bps | ||
On | Off | 19200 bps | ||
On | On | 38400 bps | ||
3 | On | Hardware flow control: | ||
| Off | Disabled | ||
On | Enabled | |||
4-10 | Off | Reserved | ||
Make sure you set the DIP switches to your required specifica-tions before you install the T1 NAC. The EIA/TIA-232 serial port is used to configure the T1 NAC and to view DS0 and modem status. This requires that you attach either a terminal or PC to the EIA/TIA-232 serial port.The EIA/TIA-232 serial port is also used to download software, which also requires a PC. Check your terminal or PC documentation to determine the maximum serial port rate your equipment supports. Do this before installing the T1 NAC so that you can set the DIP switches correctly.
The T1 NAC has seven LEDs: a run/fail LED, two carrier LEDs (one for each line), two alarm LEDs, and two loopback LEDs. Table 6-2 describes the status conditions indicated by the LEDs. Figure 6-3 shows the T1 NAC front panel.

| LED | Status | Meaning |
|---|---|---|
Run/fail (RN/FL) | Solid green Solid red Flashing red/green Flashing green | Indicates whether the T1 NAC is in normal operation or critical failure mode because of a hardware or software failure. Critical failure Noncritical failure Power-up self-test, or software download in process, or T1 NAC is reinitializing |
Carrier | Solid green Solid red Off | Indicates carrier presence on a T1 span line. An unframed signal occurs with an out-of-frame con-dition. The signal is present but not usable. Carrier is assumed to be not present when a loss of signal condition occurs. The signal is reported as not present. Unframed signal Not present |
Alarm | Off Solid red | Indicates an alarm condition on a T1 span line. The alarm LED is active when at least one of the following conditions exists: line format violation, frame alignment error, change of frame alignment, remote frame alarm, alarm indication signal, frame slip, out of frame, or excessive cyclical redundancy check error. Alarm condition |
Loopback (LPBK 1 and LPBK 2) | Off Green | No loopback Indicates whether a remote loopback test, initiated by the telephone company, is in progress. |
If your T1 NAC was shipped as a separate component, perform the following steps to install it:
Step 1 Make sure all DIP switches are set to your specifications.
Step 2 Unscrew and remove the safety panel covering the leftmost slot of the chassis (slot 1). Keep the screws and the safety panel in case you need them in the future.
Step 3 With the DIN connector facing the rear of the chassis and the LEDs facing the front, insert the T1 NAC in the upper and lower card guides of slot 1. (Make sure the DIP switches are on the right side of the card as you insert it.) Slide the card toward the rear until its DIN connector is firmly plugged into the midplane. Once the DIN connector is plugged in and the T1 NAC has power, it begins running self-diagnostic tests. See the next section, "Self-Diagnostic Tests," for more information.
Step 4 Tighten the captive screws on the front panel of the T1 NAC. Pay careful attention to the alignment of the screws before tighten-ing them. Problems could arise if the screws are not threaded properly.
Once the T1 NAC is installed and power is applied to the chassis, the T1 soft-ware performs the self-diagnostic tests listed in Table 6-3.
| Test | Failure Level |
|---|---|
SRAM | Critical |
Flash memory | Critical |
Watchdog | Noncritical |
Nonmaskable interrupt (NMI) | Noncritical |
EEPROM | Noncritical |
Time-space interchange (TSI) | Noncritical |
Framer A & B | Noncritical |
CSU A & B | Noncritical |
UI/MGT Bus DUART | Noncritical |
TDM bus clock | Noncritical |
Internal clock | Noncritical |
After each successful test is completed, the top three LEDs flash green. If a test detects a noncritical failure, the run/fail LED flashes red once, and then goes back to green. If a test detects a critical fail-ure, testing stops and the T1 NAC reboots.
Once all tests are completed, the following message is displayed if one or more tests failed:
x power up self tests failed
To display any errors that occurred, connect a terminal to the EIA/TIA-232 interface on the NIC, and open the Status menu. For information on the operator interface, see the section "T1 NAC Menus" later in this chapter.
When all the diagnostic tests have been performed, the run/fail LED turns solid green if no failures were found.
The run/fail LED flashes red three times and green three times if any noncritical failures were found. Connect a terminal to the EIA/TIA-232 port of the T1 NIC and open the Status menu. This is were you can find the results of the power-up diagnostic tests. This information will be useful in troubleshooting.
If a critical failure is detected, the run/fail LED turns solid red and the T1 NAC reboots. A failure is considered criti-cal if it affects soft-ware execution. A critical failure can occur in either the static RAM or Flash memory. Any critical failure is probably a hardware problem; contact your customer service representative.
Table 6-4 shows the default assignments of the DS0 channels and quad modem cards in the Access Server 5100 chassis. Because the Access Server 5100 contains AS51 cards in some of these slots, you may have to reassign the DS0 channels using the T1 NAC operator interface.
| Slot | Card | Channel |
|---|---|---|
1 | T1/E1 | T1 span line 1 and 2, DS0 1-48 |
2 | Quad modem | Channel 1-4, T1 span line 1, DS0 1-4 |
3 | Quad modem | Channel 1-4, T1 span line 1, DS0 5-8 |
4 | Quad modem | Channel 1-4, T1 span line 1, DS0 9-12 |
5 | Quad modem | Channel 1-4, T1 span line 1, DS0 13-16 |
6 | Quad modem | Channel 1-4, T1 span line 1, DS0 17-20 |
7 | Quad modem | Channel 1-4, T1 span line 1, DS0 21-24 |
8 | Quad modem | Channel 1-4, T1 span line 2, DS0 1-4 |
9 | Quad modem | Channel 1-4, T1 span line 2, DS0 5-8 |
10 | Quad modem | Channel 1-4, T1 span line 2, DS0 9-12 |
11 | Quad modem | Channel 1-4, T1 span line 2, DS0 13-16 |
12 | Quad modem | Channel 1-4, T1 span line 2, DS0 17-20 |
13 | Quad modem | Channel 1-4, T1 span line 2, DS0 21-24 |
This section describes how to connect a terminal or PC to the T1 EIA/TIA-232 inter-face in order to configure the T1 NAC.
You can have a dedicated PC con-nected to the EIA/TIA-232 interface at all times to perform both configuration and soft-ware down-load tasks. When performing configuration tasks, sim-ply run a ter-minal emulation program to make your PC act like a terminal. Win-dows offers a terminal option, and many communica-tions software programs allow you to establish a TTY connection.
The following items are provided with your T1 package:
If you intend to configure the T1 NAC from a remote site, a modem can be connected to the T1 EIA/TIA-232 inter-face with the EIA/TIA-232 cable provided. If you intend to connect a terminal or PC to the T1 EIA/TIA-232 interface, use both the EIA/TIA-232 cable and the DB-25 female-to-female adapter.
The default serial port rate at the T1 EIA/TIA-232 interface is set at 38,400 bps. The rate can be changed by adjusting the set-tings of DIP switches 1 and 2 on the T1 NAC, as shown in Table 6-5.
| DIP 1 | DIP 2 | Speed Selected |
|---|---|---|
Off | Off | 2400 bps |
Off | On | 9600 bps |
On | Off | 19200 bps |
On | On | 38400 bps |
The data format is 8 data bits, no parity, and 1 stop bit.
Connecting a terminal, or a PC using a terminal emula-tion program, to the EIA/TIA-232 port on the T1 NIC allows you to con-figure and manage the T1 NAC via menu-driven screens. Once connected, press Return to display the following menu.
	U.S. ROBOTICS

	Dual T1 Application Card Revision 2.0.0
	Boot Code Linked Date: Fri Jun 10 08:22:17 1994
	Operational Code Linked Date: Tue Jun 07 15:15:23 1994

Main Menu

1) Status
2) Command
3) T1 Card Configuration
4) DS0 Configuration
5) T1 Span Line 1 Configuration
6) T1 Span Line 1 Call Parameter Configuration
7) T1 Span Line 2 Configuration
8) T1 Span Line 2 Call Parameter Configuration

Enter menu selection and press Return.

Menu Selection (1-8):_
Type the number of the selection you want and press Return. At any point in the menu structure, press Esc to return to the pre-vious menu.
When you select Status from the main menu, the fol-lowing menu appears:
Status

1) Power-up Self-test Status
2) T1 Card Status
3) T1 Span Line 1 DS0/Modem Status
4) T1 Span Line 1 Alarm/Event Status
5) T1 Span Line 2 DS0/Modem Status
6) T1 Span Line 2 Alarm/Event Status

Enter menu selection and press Return or press Esc to exit.

Menu Selection (1-6):_
These options report various status conditions on the T1 NAC, T1 span line(s), and the quad modems, as well as any alarms or events taking place. The dis-played status is a snapshot of the events and/or condi-tions at the time you request the status report.
On power-up, the T1 software performs various tests to ensure proper operation of the T1 hardware. Select option 1 from the Status menu to display the results of those tests:
Power-up Self-test Status

RAM: Passed
Flash ROM: Passed
Non-maskable Interrupt: Passed
Watch Dog: Passed
EEPROM: Passed
Management UART: Passed
User Interface UART: Passed
Time/space Switch: Passed
Framer 1: Passed
Framer 2: Passed
Line Interface Unit 1: Passed
Line interface Unit 2: Passed
Internal Clock (INT): Passed
TDM Bus Clock (BUS): Not Present
Table 6-6 describes the power-up self tests.
| Test | Description | Failure Level |
|---|---|---|
RAM | This test fills the static RAM of the NAC with a pattern sequence and then performs a comparison check. | Critical |
Flash ROM | This test performs a CRC check on Flash memory. | Critical |
Nonmaskable interrupt | This is a write-to-ROM test, which should result in a nonmaskable interrupt (NMI). Any attempt to write to ROM should cause the NMI test code to run. | Noncritical |
Watchdog | This test verifies the watch-dog circuitry on the T1 NAC. | Noncritical |
EEPROM | This test performs a CRC check as well as a check for a unique string stored in EEPROM. | Noncritical |
Management UART | This is a simple loopback test to verify the UART that communicates with the management bus. | Noncritical |
User interface UART | This is a simple loopback test to verify the UART that communicates with the user interface port. | Noncritical |
Time/space switch | The T1 software runs two built-in self-tests of the time space interchange (TSI), as well as a write/read test of the TSI registers. | Noncritical |
Framer 1/2 | The T1 software performs various diagnostic exercises to test the framer chips. | Noncritical |
Line interface unit 1/2 | The power-up code first checks if the T1 NIC is present, and then configures the CSU on the NIC to local loopback mode. | Noncritical |
Internal clock (INT) | The test code selects the internal clock as a timing source and then checks to see if the UART's counter is running | Noncritical |
TDM bus clock (BUS) | The test code selects the TDM bus as a timing source and then checks to see if the UART's counter is running. | Noncritical |
Select option 2 from the Status menu to view the current timing source, the type of NIC installed with the T1 NAC, and the slot in which the T1 NAC is installed.
Select option 3 or option 5 from the Status menu to view a snapshot of DS0/modem status:
T1 Span Line 1<2> DS0/Modem Status

DS0   DS0        Modem     Slot/  DS0  DS0       Modem      Slot/
     Status      Status    Chan       Status    Status      Chan

1   BUSY-OUT    IDLE       2/1    13  CONNECT-OUT CONNECT-OUT 5/1
2   CONNECT-IN  CONNECT-IN 2/2    14  BUSY-OUT    IDLE        5/2
3   CBUSY-OUT   UNAVAIL    2/3    15  IDLE        IDLE        5/3
4   TRANSPTEST  TRANSPTEST 2/4    16  FRAC-UNUSED UNUSED      5/4
5   ·          ·                  17              ·
6   ·          ·                  18              ·
7   ·          ·                  19              ·
8   ·          ·                  20              ·
9   ·          ·                  21              ·
10  ·          ·                  22              ·
11  ·          ·                  23              ·
12  ·          ·                  24              ·

Press Return to update status or press Esc to exit.
Table 6-7 describes the DS0 status values and Table 6-8 describes the modem status.
| Status | Description |
|---|---|
Alarm | An alarm condition was detected on the DS0, or the DS1 associated with the DS0 trunk. An out-of-frame or loss-of-signal DS1 condition places associated DS0 trunks into an alarm state. |
Busy-Out | The DS0 is not available for use. If a call goes to the DS0, a busy signal is returned. |
Call Ignore | A command has been issued from the modem or the T1 to ignore all calls on the speci-fied DS0(s). |
CBusy-Out | The DS0 has been assigned a configuration state of busy-out. This setting may be saved to and restored from NVRAM. |
Connect-In | The DS0 line is in use with a call origi-nating from a remote device through the telephone company. |
Connect-Out | The DS0 line is in use with a call originating from a modem in the chassis. |
Dialing-In | A call is originating from the telephone company and is being answered by the T1 or modem. Call setup is in progress. |
Dialing-Out | A call is originating from a chassis modem. |
Frac-Unused | The DS0 has been assigned a time slot of 0 (disconnected from the TDM bus) and a configuration state of frac-unused for a fractional T1 application. |
Idle | The DS0 line is available and waiting for a call. |
Test | A test is taking place on the DS0. |
Transparent | The DS0 has been placed in a transparent mode in order to perform Signaling System 7 with a properly configured compatible modem. When the DS0 is in this state, all DS0 commands are ignored. An alarm state overrides the transparent state, but returns the DS0 to transparent when the alarm clears. |
Transptest | The DS0 has been placed in a transparent test mode in order for the modem to carry out a tone test on the channel. When in this state, all DS0 commands are ignored except for the restore DS0 command, which returns the DS0 to the idle state. |
Unavailable | No T1 span line is connected to the T1 NIC. All DS0s also display unavailable if no T1 span line is attached. |
Unused | The DS0 has been assigned a time slot of 0 (disconnected from the TDM Bus) and a configuration state of normal, busy out or transparent. |
| Status | Description |
|---|---|
Busy-Out | The modem is not available for use. If a call goes to the modem, a busy signal is returned. |
Connect-In | A modem is in use with a call originating from a remote device through the telephone company. |
Connect-Out | A modem is originating a call. |
Dialing-In | A call is originating from the telephone company and is being answered by the modem. Call setup is in progress. |
Dialing-Out | A call is originating from a chassis modem. |
Idle | The modem is available and waiting for an incoming or out-going call request. |
Transparent | The modem has been placed in a transparent test mode in order to perform Signaling System 7 with a properly configured DS0 channel. |
Transptest | The modem is performing a transparent tone test on the DS0 channel. |
Unavailable | The modem has failed or is not installed. |
Unused | The modem is not currently connected to a DS0. |
Select option 4 or option 6 in the Status menu to view a snapshot of Alarm/Event status:
T1 Span Line 1<2> Alarm/Event Status

Receiver Gain: 0 dB

Errored Seconds: xxxx seconds
Severely Errored Seconds: xxxx seconds
Failed Seconds: xxxx seconds
Bursty Errored Seconds (ESF Only): xxxx seconds

Bipolar Violations: xxxx
Framing Bit Errors: xxx
CRC Errors (ESF Only): Axxxx

Change in Frame Alignment: xxx
Remote Frame Alarm: y/n
Alarm Indication Signal: y/n
Frame Slips: xxx
Out of Frame: y/n
Excessive CRC Error: xxx
Loss of Signal: y/n
Excessive CRC Error (ESF Only): xxx

Press return to update status, press Ctrl-R to reset counters or
press Esc to exit.
Table 6-9 describes the Alarm/Event status conditions.
| Status | Description |
|---|---|
Receiver Gain | This is a function of the line inter-face units and indicates T1 span line signal attenu-ation in 7.5 dB increments: 0 dB, 7.5 dB, 15 dB, and 22.5 dB. |
Errored Seconds | Depending on framing format, this indi-cates an out-of-frame condition, frame slip condition, or error events. For superframe signalling, it reports the number of sec-onds during which the frame was in either out-of-frame or slip condition. For extended superframe signalling, it reports error events in seconds. |
Severely Errored Seconds | Reports error events or frame slip conditions in seconds. |
Failed Seconds | Indicates the number of seconds spent in a failed state. A failed state is defined as ten consecutive seconds during which severely errored seconds occur. |
Bursty Errored Seconds | Occurs in extended super frame format only. It reports CRC1 error conditions in seconds. |
Bipolar Violations | Indicates bipolar violations in the line format being used. When no line coding or ZCS line coding is used, this argument indicates any bipolar violations. When B8ZS line coding is used, it indicates any invalid bipolar violations. The number of bipolar violations detected from both T1 span lines is reported. A bipolar violation occurs whenever two consecutive nonzero elements of the same polarity occur in an Alternate Mark Inversion (AMI) signal. |
Framing Bit Errors | Indicates an error in the framing bit used to determine frame alignment. The count of framing bit errors is reported. |
CRC Errors | Occurs when a CRC bit is in error. The count of CRC errors is reported. This is only for extended super frame mode. |
Change in Frame Alignment | Indicates that a receiver has reframed on a new framing pattern, and has synchronized at a new frame align-ment because of an out of frame condition. The status report indicates whether or not a change in frame alignment has occurred, and a counter records the number of times this has occurred since the last counter reset. |
Remote Frame Alarm (RFA) | This indicates that an out-of-frame condition has occurred at the remote end. It is also known as a yellow alarm. The status report indicates whether or not a remote frame alarm is present. |
Alarm Indication Signal (AIS) | This indicates to the remote end a loss of the received signal. It is also known as a blue alarm. AIS occurs when a stream of 1's is received. The status report indi-cates the presence of an AIS condition. |
Frame Slips | These can be caused by frames that are repeated because of buffer overflow or frames that are deleted because of buffer underflow. The status report indi-cates if either condition has occurred. A counter records the number of times this has occurred since the last counter reset. |
Out of Frame | This indicates that a framing pattern for a T1 line has been lost and data cannot be extracted prop-erly. In super frame and extended super frame, out-of-frame occurs when any two of four con-secutive frame synchro-ni-zation bits are in error. The status indicates whether or not out-of-frame conditions are present. |
Loss of Signal | This occurs when 175 consecu-tive 0's are detected in the T1 NIC. The signal is recov-ered if the density of 1's reaches 12.5 percent, that is, four 1's are received within a 32-bit period. The status report indicates the pres-ence of a loss of signal condition. |
Excessive CRC Error Indication | This is reported only in extended super frame format, when 32 of any 33 consecutive CRCs are in error. The status report indi-cates if this has occurred, and a counter records the number of times this has occurred since the last counter reset. |
Reset Counter | The reset command function is executed by pressing Ctrl-R. You can clear counters for errored sec-onds, bursty errored seconds, severely errored sec-onds, failed seconds, CRC errors, bipo-lar violations and framing bit errors, with-out changing device configuration. After the reset command function has been executed by pressing Ctrl-R, you can verify that the counters are cleared by selecting this function to display the new count. |
| 1CRC = cyclic redundancy check |
When you select Command from the Main menu, the follow-ing menu appears.
Command

	1)	 Reset to Highest Priority Timing Source
	2)	 Reset T1 NAC
	3)	 Soft Busy Out DS0(s) on T1 Span Line 1
	4)	 Hard Busy Out DS0(s) on T1 Span Line 1
	5)	 Restore DS0(s) on T1 Span Line 1
	6)	 Disconnect Call on T1 Span Line 1 DS0(s)
	7)	 Ignore Calls on T1 Span Line 1 DS0(s)
	8)	 Force Receiver Reframe on T1 Span Line 1
	9)	 Set DS0(s) for Transparent Test on Span Line 1
	10)	 Soft Busy Out DS0(s) on T1 Span Line 2
	11) 	Hard Busy Out DS0(s) on T1 Span Line 2
	12)	 Restore DS0(s) on T1 Span Line 2
	13)	 Disconnect Call on T1 Span Line 2 DS0(s)
	14)	 Ignore Calls on T1 Span Line 2 DS0(s)
	15)	 Force Receiver Reframe on T1 Span Line 2
	16)	 Set DS0(s) for Transparent Test on Span Line 2

Enter menu selection and press Return or press Esc to exit.

Menu Selection (1-16):_
From the command menu, you can tell the T1 NAC to perform functions on the individual T1 span lines and DS0 channels. (See Table 6-10.)
| Function | Description |
|---|---|
Reset to Highest Priority Timing Source | Resets the T1 NAC's tim-ing source to the next highest priority source. |
Reset T1 NAC | Resets the T1 NAC and restores the factory configuration. This action takes place immediately and does not prompt for confirmation. |
Soft Busy Out DS0(s) on T1 Span Line 1/2 | Allows you to perform a soft busy out on individual DS0 channel(s). The channels that are manually busied out remain in that state until they are manually restored. If the line is in use when a soft busy out is exe-cuted, the busy out takes place after the call is disconnected. This is a good way to take a T1 span line out of service without dis-rupting any calls. |
Hard Busy Out DS0(s) on T1 Span Line 1/2 | Allows you to perform a hard busy out on individual DS0 channel(s). The channels that are manually busied out remain in that state until they are manually restored. Hard busy out can also be used to seize the M-Lead, which is sometimes useful when diagnosing T1 span lines. Caution: If the line is in use when a hard busy out is exe-cuted, the connection is immediately terminated. |
Restore DS0(s) on T1 Span Line 1/2 | Allows you to manually restore individual DS0 channel(s). |
Disconnect Call on T1 Span Line 1/2 DS0(s) | Allows you to disconnect a call on one or more DS0 channels. |
Ignore Calls on T1 Span Line 1/2 DS0(s) | All incom-ing calls are ignored on the specified T1 span line. |
Force Receiver Reframe on T1 Span Line 1/2 | Forces the T1 framer for either T1 span line 1 or 2 to reframe. Causes data errors and call disconnects. |
Set DS0(s) for Transparent Test on T1 Span Line 1/2 | Allows you to perform a transparent test on DS0 channel(s). |
When you select T1 Card Configuration from the Main menu, the fol-lowing menu appears.
T1 Card Configuration                         Current Setting
	1)	Save Current Configuration to NVRAM
	2)	Restore NVRAM Configuration
	3)	Restore Default Configuration
	4)	Timing Source Priority Assignment	     T1-1=1 T1-2=2 INT=0 BUS=0

(NOTE: Changing configuration parameters may affect calls in progress.)

Enter menu selection and press Return or press Esc to exit the Menu
Selection (1-4):_
These options pertain to the T1 NAC as a whole. To return to the T1 Card Con-figuration menu from one of these submenus, press Esc. See Table 6-11 for detailed descriptions of the T1 card configuration options.
| Option | Description |
|---|---|
Save Current Configuration to NVRAM | If you made changes to the default configuration of the T1 NAC, and you wish to retain these changes, select this option to save the new configuration to NVRAM. You are prompted to confirm the operation. |
Restore NVRAM Configuration | If you made changes to the NVRAM settings, and you wish to reset the T1 NAC to its previ-ous settings, select this option. You are prompted to confirm the operation. If you made changes to the NVRAM set-tings and selected the "Save Current..." option, you cannot restore the previous NVRAM configuration. |
Restore Default Configuration | Use this option to reload all fac-tory defaults. You are prompted to confirm the operation. |
Current Timing Source Priority | A number from 1 (highest priority) to 4 is assigned to the timing sources. The timing source with the highest priority clocks data on the T1 span line(s) and drives the TDM bus. Any timing source can be disabled by assigning a priority of 0. If not disabled, two or more tim-ing sources cannot be assigned the same priority. Priority assignment of timing sources allows switching to the next high-est timing source if the current source fails. The timing source does not switch unless a failure is detected on the current choice. For example, if the primary timing source fails, the secondary timing source takes over. The secon-dary source remains active as long as it does not fail, even if the primary source returns. From the Command menu, select Reset to Highest Priority Timing Source. The primary timing source once again becomes active. See Table 6-12 for timing source priority. |
Table 6-12 summarizes the options and defaults for timing source priority.
| Parameter | Options | Default |
|---|---|---|
T1 span line 1 timing source priority | 0 (disabled) | 1 |
Internal oscillator timing source priority | 0 (disabled) | 0 |
TDM bus timing source priority | 0 (disabled) | 0 |
When you select DS0 Configuration from the Main menu, the fol-lowing menu appears.
DS0 Configuration

	1 	Modem Assignment (Span DS0s to TDM Bus' Time Slots)
	2	 Fractional T1 (Span's DS0s Ignored)
	3	 Disconnect (Put DS0(s) in 'UNUSED' State)
	4	 Configuration Status of DS0 1 to 24  (T1 Span Line 1)
	5	 Configuration Status of DS0 25 to 48 (T1 Span Line 2)

(NOTE: Changing configuration parameters may affect calls in progress.)
Enter menu selection and press Return or press Esc to exit.
Menu Selection (1-4):
To return to the DS0 Con-figuration menu from one of these submenus, press Esc. Table 6-13 describes the DS0 configuration options.
| Option | Description |
|---|---|
Modem Assignment | Use this option to connect a DS0 to a specific TDM bus time slot using a certain type of signaling (normal signaling, transparent signaling, or busy out). This option can also be used to configure the signaling for one or more DS0s. The following syntax rules apply:
|
Fractional T1 | Use this option to configure one or more DS0s with a TDM bus time slot of 0 and a configuration state of frac-unused (fractional T1 application). |
Disconnect | Use this option to configure one or more DS0s with a TDM bus time slot of 0 and a configuration state of unused. |
Configuration Status | This option shows the current status of all DS0s on the span line. It shows whether the DS0 is connected to the TDM bus or another span line, the number of the connected time slot or DS0, and the configuration state. |
The following screen is an example of selecting option 4 from the DS0 Configuration menu, and shows status for DS0s on T1 span line 1. A screen with an identical layout is displayed for span line 2 by selecting option 5 from the DS0 Configuration menu.
Configuration Status of DS0 1 to 24 (T1 Span Line 1)
DS0 Conn.To DS0/TS Cfg.State   DS0 Conn.To DS0/TS Cfg.State
 1     TDM     25   Busy-Out    13    TDM     37   Normal
 2     TDM      6   Busy-Out    14    TDM     18   Normal
 3     TDM     None Busy-Out    15    TDM     None Normal
 4     TDM      4   Busy-Out    16
 5     TDM     None Busy-Out    17
 6                              18
 7                              19
 8                              20
 9                              21
10                              22
11                              23
12                              24
Press Esc to Exit.
When you select T1 Span Line 1/2 Configuration from the Main menu, the fol-lowing menu appears.
T1 Span Line 1 <2> Configuration               Current Setting
1) Framing Mode                                SF
2) Line Coding                                 AMI
3) Remotely Initiated Loopback                 Ignore
4) Jitter Attenuation                          Transmitter
5) Transmit Line Build Out                     0.0 dB
6) Automatic Busy-out                          Disabled
7) Fractional T1 Byte Sent to TELCO            FE Hex.
Enter menu selection and press Return or press Esc to exit
Menu Selection (1-7):_
To return to the T1 Span Line 1/2 Con-figuration menu from one of these submenus, press Esc. See Table 6-14 for options and defaults for arguments configurable per T1 span line.
| Option | Description |
|---|---|
Framing mode | Allows you to specify which framing for-mat to use, superframe or extended superframe, for T1 span line 1/2. The super frame format has 12 DS1 frames, each with 193 bit posi-tions. The extended super frame format has 24 DS1 frames and the extended super frame alignment signal, a CRC, and a data link share the frame overhead-bit position. In extended super frame mode, the T1 card reports yellow alarms on the facilities data link. However, it does not provide per-formance monitoring or respond to diagnostic commands. |
Line coding | Allows you to select a line cod-ing scheme, or Alternate Mark Inversion (AMI), for T1 span line 1/2. A line coding scheme ensures a sufficient density of 1's in the bit stream, required by the T1 standard for clock synchronization. In select-ing AMI (no line coding), you risk los-ing data. Usually the telephone company specifies the type of framing mode and line coding on the T1 line. Make sure these options are set according to the type of T1 line you have purchased. |
Line loopback (LLB) | Allows you to enable or dis-able LLB mode for T1 span line 1/2. This argument allows the T1 NAC to respond to a repeating pattern from the telephone company. When enabled, the T1 NAC enters LLB mode when it receives the pattern 00001 for 5 seconds, and exits LLB mode when it receives the pattern 001 for 5 seconds. In LLB mode, the T1 NAC loops back the received signal to the T1 line; the system side goes to an idle condition. While in loopback mode, the loopback LED for the appropriate T1 line is green. |
Jitter attenuation | The T1 NIC hardware provides a 193-bit frame buffer to compensate for low frequency jitter with the synchroni-zation to the T1 network. This buffer can be placed in either the receive or transmit data path. The default setting is the transmitter. The transmitter is rec-om-mended when the T1 card is using internal timing instead of timing from the span line. |
Transmit line build out | This is a function of the line interface unit and can be selected for 0 dB, 7.5 dB, 15 dB or 22.5 dB, indi-vidually for each line interface unit. Transmit line build out is used to eliminate crosstalk problems when the transmitter energy causes errors on the low amplitude receive line. |
Automatic busy out | Automatic busy-out enables or dis-ables automatic mode to busy out and restore T1 span line 1/2 based on the availability of the corresponding modem channel. Busy out is accomplished by setting the DS0 to an off-hook condition. Some telephone companies may react to this as an error condition and remove the DS0 trunk from service. If this is the case, you should disable automatic busy out. |
Fractional T1 | T1 equipment requires a sufficient number of 1's in the bit stream to derive clock synchronization. For a fractional T1 application, this argument can be set to send a "stuffed byte" to the telephone company on inactive DS0s to satisfy this requirement. The argument is configurable so that it can be adjusted to satisfy the 1's density required by the telephone company; the default is FE (hexadecimal). |
When you select T1 Span Line 1/2 Call Parameter Configuration from the Main menu, the fol-lowing menu appears. Options 1 and 2 permit selection of the default settings for feature group B or D; options 3 through 6 permit you to customize the call arguments as needed.
T1 Span Line 1 <2> Call Parameter Configuration
1)Set to Feature Group B Defaults
2)Set to Feature Group D Defaults
                                         Current Setting
3) Dial-in/Dial-out Trunk Start                  Wink
4) Dial-in Expected Address                      DNIS
5) Dial-in Address Acknowledge Address           Disable
6) Dial-out Address Delay                        70 ms
(NOTE: Changing configuration parameters may

affect calls in progress.)
Enter menu selection and press Return or press Esc to exit.
Menu Selection (1-6):_
To return to the T1 Span Line 1/2 Call Parameter Con-figuration menu from one of these submenus, press Esc. Table 6-15 describes the T1 span line call parameter configuration options.
| Option | Description |
|---|---|
Feature group defaults | The first two options permit you to set the call arguments for the span line(s) to the default values for either feature group B or D. |
Dial-in/dial-out trunk start | Set this argument to specify whether wink start or immediate start should be used. Wink is required for feature groups B and D. Immediate start signaling is similar to feature group B signaling, except a wink start is not returned in response to a trunk seizure. Immediate start does provide a slightly faster call setup, but provides no trunk integrity checking. |
Dial-in address | Set this argument to specify what type of feature group addressing will be used on a dial-in call. The choice depends on the type of T1 service you have purchased from the telephone company. |
Dial-in address acknowledge wink | Set this argument to enable/disable an acknowledge wink for a dial-in call. This is used with feature group D and will be enabled if you have selected feature group D defaults. |
Dial-out address delay | Set this argument to change the delay implemented between the T1 NIC sending a trunk seizure signal to the telephone company and the T1 NAC sending a call start acknowledge pattern to the modem. Enter the address delay in milliseconds ranging from 70 ms (default) to 3000 ms (3 seconds) and press Return or Esc to exit. |
You can reprogram Flash memory single in-line memory modules (SIMMs) on the T1 NAC by downloading new software. Software can be downloaded by connecting a PC to the EIA/TIA-232 user interface port on the T1 NIC, and running the software provided with the new updates.
There are two main reasons to download software.
This section describes the T1 NAC software modules.
The software download program, which runs on a PC, performs a soft-ware download to the NAC over the NIC EIA/TIA-232 interface. The software download program communicates with both the NAC loader and the NAC software download program.
The T1 NAC loader, located in a protected boot-section of Flash memory, runs on the T1 NAC to load the software download pro-gram that updates Flash memory.
The NAC loader stores the NAC software download program in RAM.
The NAC boot code is located in Flash memory. It does a CRC check on the software and, if it is bad, listens for the software download AT sequence from the PC and the network management NAC. Also, the run/fail LED blinks green. If the CRC of the software is bad, an alarm indicator signal is sent out on the T1 span line(s) while waiting for software download.
If the NAC reboots because an error has tripped the watchdog circuit, the NAC boot code looks for the software download AT sequence from the PC for a short period of time. (When the watchdog circuit is tripped, the run/fail LED blinks green.)
You need to perform several tasks before downloading software. They are as follows:
The following sections describe these tasks.
Make sure the DIP switches are set correctly on the T1 NAC.
DIP switches 1 and 2 on the T1 NAC select the serial port rate of the EIA/TIA-232 interface port on the T1 NIC. Select the fastest speed that the PC supports.
Table 6-16 shows how the DIP switch settings select different port speeds.
| Switch 1 | Switch 2 | Speed |
|---|---|---|
Off | Off | 2400 bps |
Off | On | 9600 bps |
On | Off | 19200 bps |
On | On | 38400 bps1 |
| 1Factory default. |
You need to connect a PC to the EIA/TIA-232 user interface port of the T1 NIC to per-form a software download. This port is configured as a DTE port. Connect the PC to the NIC's serial port with the EIA/TIA-232 cable and null modem adapter provided.
Each T1 NAC is shipped with a disk containing replacement NAC software, whether the NAC is installed in an Access Server 5100 chassis or shipped as a separate component. This disk also contains the software download program, and should be loaded on a PC. You should make a copy of the original disk.
To install the software on your PC, perform the following steps:
Step 1 Insert the installation disk in your floppy drive.
Step 2 At the DOS prompt, enter the following command (substituting the name of the floppy drive that holds the disk):
drive:INSTALL <Enter>
This command installs the software in the directory c:\usr_sdl. You may specify a different directory when prompted.
The Flash memory software for the card is now loaded on the PC.
Before starting software download, unload any terminate-and-stay-resident (TSR) programs running on the PC that may slow down the software download program.
Commands can be entered in either uppercase or lowercase letters. Leave one space after each command line argument. The d command is optional; the other commands are required.
| Filename | Version # | File Type |
|---|---|---|
t1010003.nac | 1.0.3 (01 00 03) | NAC |
t1010001.sdl | 1.0.1 (01 00 01) | Software download |
The following example shows the command syntax:
pcsdl -p1 -r38400 -vsdn.n.n -vnan.n.n -nsdt1 -nnat1 -dc:\usr_sdl
<Enter>
Table 6-18 explains each argument.
| Argument | Description |
|---|---|
-p | Selects the communication port on the PC that is connected to the card (required); possible ports are 1 or 2 |
-r | Selects the serial port rate (required); possible rates are 2,400, 9,600, 19,200, and 38,400 bps |
-vsd | Version of the software download file (required) |
-vna | Version of the software .nac operation code (required) |
-nsd | Specifies the .sdl filename prefix (required): t1 = T1 NAC |
-nna | Specifies the .nac filename prefix (required): t1 = T1 NAC |
-d | Specifies the directory path name (optional); should be followed by the directory name where the software is stored |
The d argument tells the software download program to retrieve the operation and software download program files from the specified directory. Other-wise, the software download program assumes that the program files are in the current directory.
Filename prefixes are required to specify both the type of .sdl (software download utility) and .nac (operational code) files used in the download. In many cases, this means using the same prefix for both arguments.
Table 6-19 lists all currently defined prefixes used with the -nsd and -nna arguments of the pcsdl command. These prefixes may change in future versions of some NAC software. For each type of card, the necessary software download and NAC filename prefixes are shown.
| Software Download Prefix | NAC Prefix | Card |
|---|---|---|
NM | NM | Network management card |
QF | QF | Quad V.34 modem, (analog, digital, analog/digital) |
QM | QM | Quad V.32 bis digital modem |
QT | QT | Quad V.32 bisPlus modem, (analog, digital, analog/digital) |
T1 | T1 | T1 NAC |
Once the software download program begins, the PC sends a special AT sequence to the NAC. The NAC's software always monitors for this sequence and, when it is detected, the NAC enters software download mode. Con-trol is then transferred to the loader, and the run/fail LED blinks green.
Once the NAC enters software download mode, no other application code can run. The software download program first verifies the initialization and opera-tion software, then begins the download. As the program executes, various status mes-sages display.
Table 6-20 lists fatal errors that cause the PC software download to halt. If one of these errors is detected, you must restart the PC software download.
| Error Message | Meaning |
|---|---|
Bad address in downloadable data | The NAC software download program detects an invalid address while pars-ing through the Intel records. Intel records are down-loaded in RAM and used for Flash memory programming. |
Bad CRC on downloadable code in ROM | The CRC of the software programmed in ROM is corrupted. |
Bad CRC in program loaded in RAM | The CRC of the program just loaded in the NAC's RAM is corrupted. |
Bad file number | The file system in the software download program detects a bad file number when trying to close the file. This normally indicates either a programming error or program corruption. |
Bad message buffer | The communication buffer is too small or invalid because of program corruption. |
Bad message CRC | The CRC associated with each message is bad because of noise on the transmission line. |
Bad message length | The software download program detects an invalid message length at the data link layer. The message length is either larger or smaller than the length required by the protocol. This error normally indi-cates message corruption because of noise on the transmission line. |
Bad start of text characters | The data link layer of the software download program detected an invalid start-of-text characters sequence. |
Command line error | The PC software download program detected unknown command line arguments. |
Communication error | The PC software download program detected unknown communication errors. |
File CRC error | During file verification prior to software download, a bad CRC was found on the program file. This indicates file corruption. |
File error | The PC software download program detected unknown information in the file header of the program to be downloaded. |
File I/O error | The PC software download program detected unknown file I/O errors. |
Indicator unknown | The PC software download program detected an unrecognized indicator in the message returned from the NAC software. |
Insufficient number of arguments | The number of arguments in the command line is less than the number of required arguments. See Table 6-18 for a list of arguments. |
Insufficient work space to download program | The work space returned from the loader is too small to accom-mo-date software download for the initialization or NAC operation program. |
Invalid access code | The file system software of the software download program denies access to the file because of an invalid access code. This error probably indi-cates a corruption in the software download program. |
Invalid argument | The file system software does not recognize the arguments passed from the application software. This normally indicates program corruption. |
Invalid baud rate | The valid baud rates are 2,400, 9,600, 19,200, and 38,400 bps. |
Invalid code returned from Flash ROM erase | An error was detected while erasing Flash memory. |
Invalid code returned from Flash ROM program | An error was detected while programming Flash memory. |
Invalid COM port | The valid COM ports are 1, 2, 3, and 4. |
Invalid COM port handler | The communication driver software detected an invalid com-munication port handler. This normally indicates program corruption. |
Invalid control word | The software download application layer does not recognize the control word returned from the NAC. |
Invalid device/manufacturing ID in Flash | There was a problem reading the ID in Flash memory because of a wrong or bad chip. |
Invalid directory path | The directory path specified in the command line does not comply with DOS naming conventions. |
Invalid filename prefix | In issuing the pcsdl command, the filename prefix specified for either the .sdl file (-nsd) or .nac file (-nna) did not match the prefix stored in the file header. |
Invalid file type | The PC software download program detected an invalid file marker in the file to be downloaded. |
Invalid Flash ROM ID for this card | The NAC software download program does not recognize the Flash memory ID sent from the PC software download program. |
Invalid Intel record found | This error occurs when the NAC software download software detects unrec-ognized Intel record types while parsing through Intel records in RAM for Flash memory programming. |
Invalid software version | The software version specified in the command line (-vsd or -vna) was expressed incorrectly. The valid syntax is xxx.xxx.xxx, where xxx is a decimal number 0-255. |
Missing required argument | There is a sufficient number of arguments, but some required arguments are missing. See Table 6-18 for a list of arguments. |
No response from NAC within the time-out period | The PC sent a message to the NAC three times and failed to receive a response. |
No such file or directory | The program to be downloaded is not in the specified or default directory. |
Permission denied | The software download program tried to open a file and was denied access. |
Problem erasing Flash ROM | The PC software could not erase the Flash memory. |
Programming Flash ROM error | An error was detected during Flash memory programming. |
Software download error | Unknown error occurs during software download. |
Too many open files | The number of open files exceeded the number of open files allowed by the file system software. |
Unknown error returned from NAC | The PC software download program does not recognize the error code returned from the NAC. |
Unknown information received from NAC | The CRC is good but the application layer detected unrecog-nized information. |
VPP programming voltage low | The voltage is too low for Flash memory programming. |
Work space buffer overflow | There is no more space left in the NAC's buffer for the PC to down-load its data. Because the PC software knows the RAM buffer size and can determine when the buffer is filled, this should not happen unless the software is corrupted. |
Wrong card type | Software download maintains backward compatibility with earlier file versions (before 1.0.3). For earlier versions, the filename prefixes that are now used have to be mapped to a numeric equivalent to match the card type. This error message indicates that the prefix specified in the file header of the software to be downloaded does not match the filename prefixes specified in the command line (-nsd or -nna). |
Wrong card type for software download | The card ID returned from the NAC does not match the card ID for the file to be downloaded. This normally indicates that you may be trying to download software to the wrong card, or the card ID stored in EEPROM is corrupted. |
Wrong file type | There is an invalid file type in the program to be downloaded. |
Wrong software type | There is an invalid software type in the program to be downloaded. |
Wrong software version | The software version specified in the command line does not match the one in the file header of the software to be downloaded. |
DS0 configuration can be performed through the local operator interface. This section discusses the underlying concepts of DS0 configuration.
The individual DS0 channels on each T1 span line can be configured in the following ways:
These configurations are all stored in the NVRAM on the T1 NAC.
A request to place a DS0 in a configuration state always takes effect immediately. There are four configuration states:
The T1 NAC can be in any physical slot from 1 through 16. Time slot assignment enables you to manage individual DS0s to fit a desired application. A DS0 can be assigned to a time slot on the TDM bus, ignored entirely, or temporarily disconnected.
1. A single DS0 on a given span line cannot be connected to multiple time slots on the TDM bus.
2. Multiple DS0s on a given span line cannot be connected to a single time slot on the TDM bus.
3. Assigning a DS0 a time slot of 0 places it into one of two states:
4. Based on rules 1, 2 and 3, valid time slot assignments are as follows:
5. Time slot assignment configuration is executed in the order that was received, so that any DS0s associated with the current connection are first disconnected before a new DS0 connection takes effect. Any call in progress associated with DS0s involved in the current and new connection will be disconnected.
6. Time slot assignments override any DS0 state that is issued by command, as opposed to configuration states. For example, if a DS0 has been placed in a call-ignore state by command and is then configured for fractional T1, the DS0 is placed in a fractional-unused state, which cannot be overridden by any other DS0 command.
Although a DS0 channel can be assigned to any slot on the TDM bus, modems are assigned to a fixed time slot based on the slot in which they are installed.
Modem slot or channel numbering is based on the time slot number on the TDM bus. (See Table 6-21.)
| Slot # | Channel # | TDM Time Slot # |
|---|---|---|
1 | 1-4 | 61-64 |
2 | 1-4 | 1-4 |
3 | 1-4 | 5-8 |
4 | 1-4 | 9-12 |
5 | 1-4 | 13-16 |
6 | 1-4 | 17-20 |
7 | 1-4 | 21-24 |
8 | 1-4 | 25-28 |
9 | 1-4 | 29-32 |
10 | 1-4 | 33-36 |
11 | 1-4 | 37-40 |
12 | 1-4 | 41-44 |
13 | 1-4 | 45-48 |
14 | 1-4 | 49-52 |
15 | 1-4 | 53-56 |
16 | 1-4 | 57-60 |
Configuring a DS0 for a modem assignment application disrupts any call in progress associated with the DS0. After the new connection is made, modems that were previously assigned to the DS0s that are now disconnected and left unassigned become unused and available for other connections or applications. The unassigned DS0s are left in an unused state.
![]()
![]()
![]()
![]()
![]()
![]()
![]()
![]()
Posted: Tue Oct 1 04:02:13 PDT 2002
All contents are Copyright © 1992--2002 Cisco Systems, Inc. All rights reserved.
Important Notices and Privacy Statement.
