|
|

This chapter describes the installation procedures for Cisco ConnectPro. To install Cisco ConnectPro software on a PC, follow the installation and login procedures in this chapter.
Before you use Cisco ConnectPro, both the Cisco ConnectPro software and your Access Unit hardware must be properly installed.
You should make a backup copy of the Cisco ConnectPro distribution disk before you attempt to install Cisco ConnectPro.
Your PC must be equipped with an Ethernet card with support for a Network Driver Interface Specifications (NDIS) or Open Data-Link Interface (ODI) driver before you can use Cisco ConnectPro.
If you are familiar with Windows and installation applications, follow the instructions in this section and then proceed to the chapter "Simple and Advanced Windows." If you prefer to be guided through the installation, see "Guided Installation."
You install Cisco ConnectPro by running the setup.exe program that is distributed on the Cisco ConnectPro 3.5-floppy disk.
Step 1 Insert the disk into the disk drive.
Step 2 In Program Manager, choose the Run command from the File menu.
Enter the drive and the setup command. For example:
A:\setup.exe
This example uses Drive A. If you are using a different drive, substitute that drive letter for A.
When you have installed Cisco ConnectPro, the installation process does the following:
If you would like to be guided through your installation, do the following steps:
Step 1 Start Windows.
Step 2 Insert the installation disk into a floppy drive.
Step 3 Choose the Run command from the Windows Program Manager menu.
Step 4 Enter the drive and the setup.exe command. For example:
A:\setup.exe
Or double-click on setup.exe from the distribution disk, if you have File Manager running.
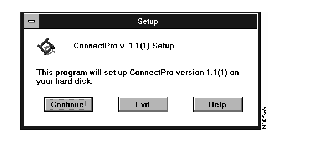
The CiscoPro ConnectPro Setup dialog box is displayed, as shown in Figure 2-1.

Step 5 Click on Continue to continue the installation process. You can click on Exit at any time to terminate the installation process.
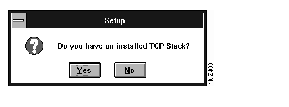
Step 6 The installation process inquires whether you have a Transmission Control Protocol/Internet Protocol (TCP/IP) stack installed on your computer. The TCP/IP Stack Inquiry dialog box is displayed, as shown in Figure 2-2.

Step 7 Click on Yes if you have an installed TCP/IP stack.
Click on No if you do not have an installed TCP/IP stack.
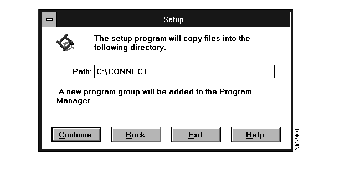
The Installation Process dialog box is displayed, as shown in Figure 2-3.
Step 8 Specify in the Installation Process Setup dialog box the drive and directory where you want to install CiscoPro ConnectPro.

By default, the installation path is C:\CONNECT, but you can enter a different drive and directory by reentering a new directory path.
Step 9 Click on Continue to continue the installation process.
Step 10 The installation process begins and it displays its progress as it copies files.
Step 11 When the installation process is completed, you must reboot your computer. The Do You Wish to Reboot dialog box is displayed, as shown in Figure 2-4.

Step 12 Click on Yes to end the installation process, shut down Windows, and restart your computer.
|
|