|
|

This chapter describes the contents of your VNS system shipping package and the physical characteristics of the VNS front and back panels. It includes the following sections:
If the shipping container is damaged, or if any of the various shipping indicators show improper handling of the container, contact your local shipping representative.
Figure 3-1 illustrates the unpacking of the VNS.
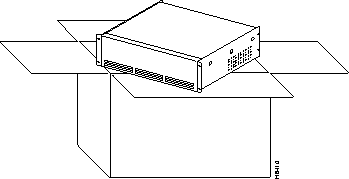
The shipping container contains:
And a publication:
This section provides descriptions the front and rear-panels of the two VNS models:
The external physical differences in the VNS models are pointed out in this section.
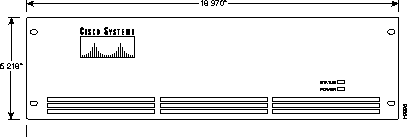
The VNS-AC-E or VNS-DC-E front panel, illustrated in Figure 3-2, are identical. They display the Cisco logo, the product name, and have the following two indicators:
This section contains descriptions of the VNS-AC-E and VNS-DC-E rear panels.
The VNS-AC-E contains the components and connectors shown in Figure 3-3. The Power On/Off Switch is to the left of the AC-Power Input connector.
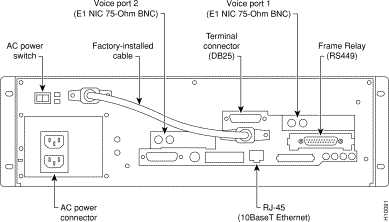
The VNS-AC-E has the following connectors and switches:
The VNS-DC-E rear panel contains the components and connectors shown in Figure 3-4. As shown, the VNS-DC-E has inputs for two DC power inputs (DC Input A and DC Input B). Typically these DC inputs are from separate DC power sources to provide for protection against a DC power source failure. Each DC input has its own circuit breaker.
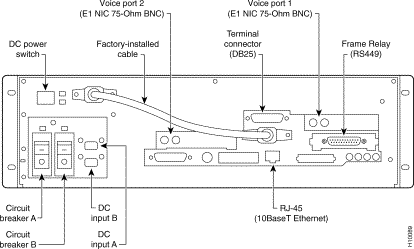
The VNS-DC-E has the following connectors and switches:
The only status indicators on the rear panel of the VNS are the four LEDs on each E1 NIC. Figure 3-5 illustrates the location and the color of these LEDS. Table 3-1 describes what each LED indicates.
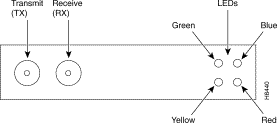
| LED | Function |
|---|---|
Green | Link is active. |
Blue | Loss of sync. |
Red | Loss of carrier. |
Yellow | Remote alarm. |
To ensure safe performance as well as to maintain the integrity of your VNS, please observe a few safety measures as you proceed with this installation.
|
|