|
|

This chapter provides procedures for using the HP OpenView tools on the StrataView Plus Workstation to place INS objects on your topology map. For DAS 1.4 operating with StrataView Plus Release 8.4, you have to add both a DAS Server Shelf (INS) object and a DAS Daemon (INSD) object. Previous releases of DAS only required the INS object. This chapter includes the following sections:
After you determine that StrataView Plus and the DAS Server Shelf are ready for operation (as a result of PING), you need to install a network map icon at StrataView Plus which represents the DAS Server Shelf. This process requires access to the HP OpenView network topology main menu.
To add a DAS Server Shelf object (INS icon), follow these steps:
Step 1 At the DAS Server Shelf, turn off the INS processes. Log in, and at the /opt/ins/admin directory, run:
Step 2 At the StrataView Plus Workstation open an HP OpenView window (at the UNIX prompt, change to the OV directory, then enter Ovw).
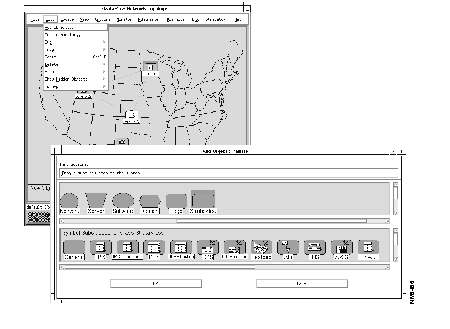
Step 3 Double-click your network icon to open a Network Topology window and map, shown in Figure 9-1. (The example Network Topology window--and other examples in this section-- is from StrataView Plus 8.1; the window may appear slightly different in StrataView Plus 8.4.)
Step 4 Select the Edit - Add Object... menu. The Add Object: Palette window, shown in Figure 9-1, appears.

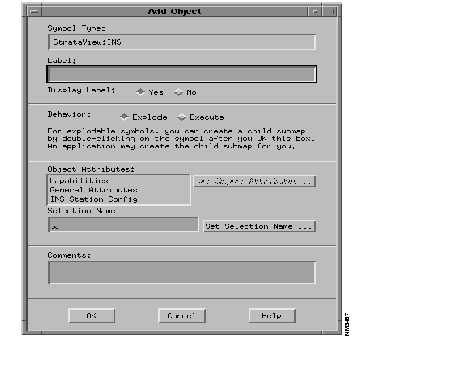
Step 5 Drag and drop the INS symbol from the Palette to the map. The Add Object window, shown in Figure 9-2, appears.
Step 6 In the Add Object window, you name the INS (DAS Server Shelf) object and call up another window to set its object attributes by identifying the Cisco wide-area switch to which it is attached. To name the INS object:

Step 7 Next Select INS Station Config in the Object Attributes: box. This will activate the Set Object Attributes... button.
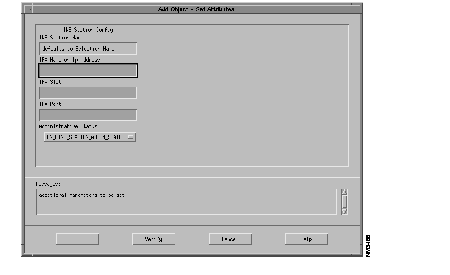
Step 8 Click the Set Object Attributes... to present the Add Object - Set Attributes window for INS Station Config, shown in Figure 9-3. The host name of the INS (DAS Server Shelf) that you entered in the previous window will appear in the INS Station Name box.

Step 9 In the next three boxes, you enter information about the Cisco wide-area switch to which the INS (DAS Server Shelf) is attached:
Step 10 Select the ON.LINE.STATION.ADMIN.STATUS button to indicate the Admin Status (ON-LINE , powered up; or OFF-LINE, not powered up).
Step 11 If you have entered your information correctly, press the Verify button. The OK button will activate.
Step 12 Press the OK button, you will return to the Add Object window. Press the OK button on the Add Object window and you will return to the HP OpenView network topology map.
Step 13 At the DAS Server Shelf, log in to /opt/ins/admin and restart the DAS processes:
INS_START
With operating with StrataView Plus Release 8.4, you also have to add a DAS Daemon (INSD) to the HP OpenView topology map. StrataView Plus 8.4's Add Object: Palette also contains a icon for the INSD (DAS daemon) as shown in Figure 9-4.

The procedure for adding the INSD icon is nearly identical to that for adding an INS (DAS) object to the topology map as described in the previous section, Set Up a DAS Server Shelf Object.
Since the DAS Daemon software runs on the StrataView Plus Workstation, when adding the INSD icon, you must remember the following information:
You must use the StrataCom pull down menu to remove an INS icons from a network topology map. Using any of the other HP OpenView tools, such as Edit--Delete, will cause an error.
To remove the INS icon from you network topology map, follow these steps:
Step 1 With your network topology map displayed, select the INS icon on the map.
Step 2 Pull down the StrataCom menu from the top menu bar.
Step 3 Select Remove INS Station from the StrataCom pull down menu.
|
|