|
|

This chapter provides instructions for the installation of the optional cable management tray that may be used to route cables in an open rack non-redundant configuration.
You'll need to obtain the optional cable management tray kit and one each BXM T3/E3 cable bracket kit for each BXM T3/E3 card.
This chapter contains the following:
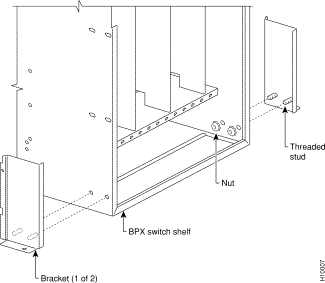
Step 2 Install left and right brackets, using 2 nuts to secure each bracket, Figure 10-1.
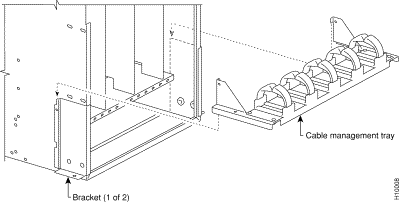
Step 2 Lower tray into lower rest position Figure 10-3.
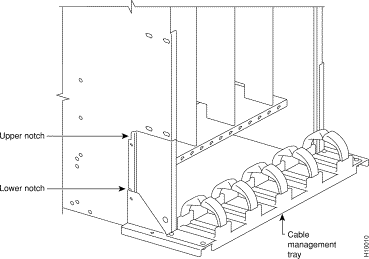
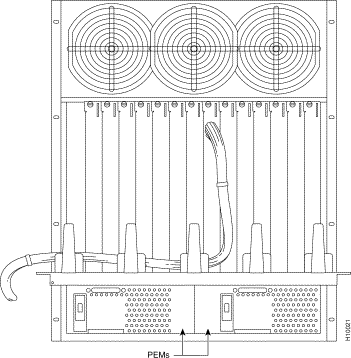
The tray is raised only when necessary to access the Power Entry Modules (PEMs), typically for replacement or to install a second PEM. Figure 10-4 shows the tray in the raised position. To raise the tray to provide access to the PEMs proceed as follows:
Step 2 With two hands, pull tray towards you and up.
Step 3 Raise tray to upper position and lower onto upper slots.
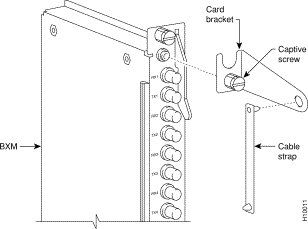
Attach the BXM T3/E3 cable bracket to each BXM T3/E3 card as follows, Figure 10-5:
Step 2 Place bracket in position as shown.
Step 3 Screw in and tighten captive screw.
Step 4 Insert one end of cable tie through hole in bracket.
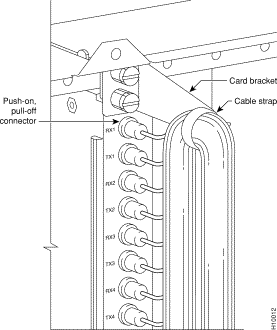
Route cables as follows, Figure 10-6 and Figure 10-7:
Step 2 Dress cables upward to provide service loop.
Step 3 Bundle cables using cable ties.
Step 4 Wrap cable strap around cables and secure to cable management bracket.
Route cables as follows, Figure 10-8:
Step 2 Route cables from cards through cable clamps on cable management tray.
Step 3 Secure cable management tray to cable tray brackets by inserted and tightening securing screw, one to each bracket.
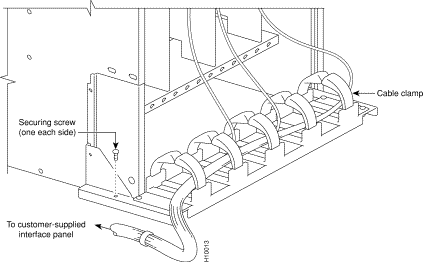
Figure 10-9 shows how the cable management tray is raised with cables in place, to provide access to the Power Entry Modules (PEMs).
![]()
![]()
![]()
![]()
![]()
![]()
![]()
![]()
Posted: Thu Jul 26 18:25:35 PDT 2001
All contents are Copyright © 1992--2001 Cisco Systems, Inc. All rights reserved.
Important Notices and Privacy Statement.