This chapter describes the Baseline View in the Cisco Voice Routing Center (VRC) server application.
The VRC Baseline View provides the currently distributed dial plan and topology for the entire managed network. The baseline dial plan is the currently distributed dial plan.
From the Baseline View you can:
Browse the baseline dial plan
Export the baseline dial plan
Distribute the baseline dial plan
Execute the Discovery operation
You can execute the following in both the Baseline View and the Design View. See "Design View" for more information on these operations.
View the VRC-generated command line interface (CLI)
Open a telnet session or CLI console for a particular element
Generate Reports
Verify call paths
Check element accessibility.
Find Terminating Gateways
Opening the Baseline View
To open the Baseline View:
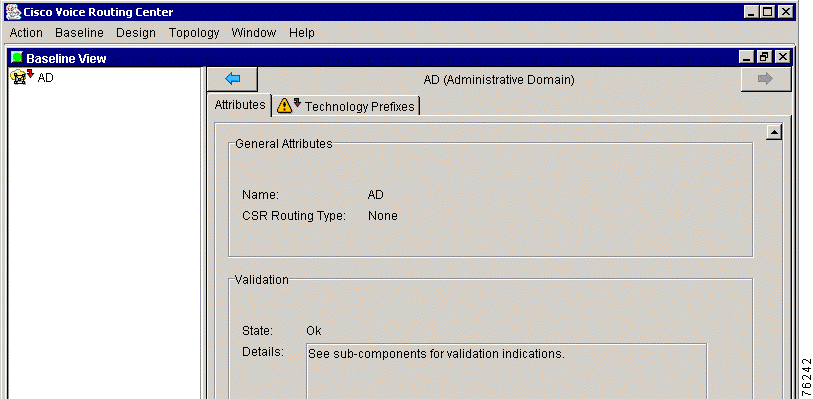
Step 1 Choose Open Baseline from the Baseline menu. The Baseline View window appears (Figure 3-1).
Figure 3-1 Cisco VRC Baseline View
The Baseline View window is divided into two panes.
The left pane shows the dial plan tree for Administrative Domain (AD).
The right pane shows the information related to the dial plan entity that is highlighted in the dial plan tree.
Exporting the Baseline Dial Plan
The Export process exports the baseline dial plan to a browser window to view or save. You can upload this saved file to the server using tftp, to the /tftpboot/clientinput directory and then reopen it in a future design session.
To export the baseline dial plan to your desktop, follow these steps:
Step 1 From the Baseline menu, choose Export Baseline.
A dialog box appears and prompts you to confirm your decision.
Step 2 Click OK. A processing window appears and a browser window opens.
A copy of the baseline dial plan appears in a browser window. For example, the browser window displays:
This section describes how to distribute the baseline dial plan to the elements in the specified scope. You can distribute the dial plan to a specified scope (the entire AD, a single managed region, or to a single network element).
Note Distribution occurs implicitly during the commit operation, or you can request a distribution explicitly
by choosing Distribute from the right-click menu in the Baseline View.
To distribute a dial plan:
Step 1 Expand the AD to view all elements.
Step 2 Locate the scope that you want to perform a distribution on.
Step 3 Right-click and choose Distribute from the menu. A confirmation dialog box appears and asks you to confirm your decision. Click OK.
Before the distribution takes place, the VRC checks if all network elements receiving the updated dial plan configuration are connected. The distribution process starts at the lowest level in the AD hierarchy to minimize the impact on the AD if a failure occurs. VRC distributes the dial plan to the specified scope.
Step 4 An information dialog box appears when the operation is successful. Click OK.
Discovering a Dial Plan
VRC uses the Discovery operation to create a new design based on the current actual configuration of the network elements. The discovered dial plan design does not become part of the baseline until it is committed. When you execute a Discovery from the Baseline View, a Design View session opens with the discovered dial plan displayed.
Note You must execute your first Discovery at the AD level.
During the Discovery operation, VRC does the following:
Queries each device for its dial plan and displays the results in the window
Reports and flags all errors to help you resolve inconsistencies
Prerequisites
Read this information before you begin the Discovery operation.
When you execute the Discovery operation from the Design View, the baseline dial plan is not automatically updated. You can view the discovered dial plan in a discovery design session and make changes without affecting the baseline dial plan. To change the baseline dial plan, you must commit the dial plan.
When a network element is discovered by VRC, and its running configuration is not already in the directory /opt/cisco/vnm/gdpm/data/dialplan/origconfig, the element's running configuration is saved in that directory. If you need to restore an element's original configuration, you can manually retrieve it from this location.
If you begin using VRC by discovering an existing operational network and you want to revert to the network as it was before the VRC Discover was executed, you can execute a Rollback operation from the VRC console. This operation installs all files found in the origconfig directory as the running config on the respective elements.
To discover a dial plan:
Step 1 Select the AD.
Step 2 Right-click the AD and choose Discover from the menu. The Open Discovery Design Session dialog box appears. You are prompted for the CSR route type.
Step 3 From the drop-down menu choose the CSR route type. Values are None (the default), Carrier, and Trunk-Label.
If you choose:
None—VRC disables all CSR-related dial plan features in the AD.
Carrier—VRC assumes that all CSR-related dial plan features utilized in the dial plan are carrier based.
Trunk-Label—VRC assumes that all CSR-related dial plan features utilized in the dial plan are trunk-label based.
Step 4 Choose a normal or forced Discovery operation. Checking the box results in a forced Discovery.
Normal Discovery—The VRC looks for the dial plan and if any of the following errors are encountered, the process stops and informs you of the errors:
If the element is unreachable.
If the running configuration for the element does not match the element defined in topology. Two examples of this are: The running configuration is for a gateway but the topology lists this element as a gatekeeper. There is an IP address mismatch where the running configuration does not contain the voice-enabled IP address that the element should have.
For gateways only—A gateway has no voice ports defined.
Forced Discovery—The VRC looks for the dial plan and the process continues regardless of any errors. The errors are listed on the VRC server in a user log.
Step 5 Click Discover. The VRC reads the running configurations for the elements and the dial plan information for the AD. Or click Cancel to cancel the operation.
Step 6 Click Continue to display the dial plan in a discovery design session window.
Important Information about Discovery
During the Discovery operation:
VRC might rename your route scope. To change the route scope name back after Discovery, you must manually edit this attribute in the Design View.
VRC reads the running configurations for the elements and the dial plan information for the AD. Dial peers that are shut down are ignored.
VRC constructs routes based on dial peers.
It creates an ingress route for every outbound-VoIP dial peer by associating an inbound-pots dial peer to it using a destination pattern. If there are dial peers that cannot be put into association because there is no destination pattern match, VRC creates ingress routes for each of those dial peers provided they have some parameters. In this case, VRC generates multiple routes.
Similarly, VRC creates an egress route for every outbound-pots dial peer by associating an inbound-VoIP dial peer to it using a destination pattern. If there are dial peers that cannot be put into association because there is no destination pattern match, VRC creates egress routes for each of those dial peers provided they have some parameters. In this case, VRC generates multiple routes.
Even though VRC generates multiple routes and route scopes, the network configuration reflected in the client after Discovery is equivalent to the actual configuration of the discovered network. You can commit the dial plan design as it exists after Discovery or you can manually consolidate the routes in your design session before committing it.
From a discovery design session you can:
Commit the Discovered dial plan. This overwrites the baseline dial plan. If VRC detects any errors during Discovery, you might be required to edit the dial plan before you can commit a design.
Edit the Discovered dial plan and commit the modified dial plan to the baseline. This overwrites the baseline dial plan and distributes the modified dial plan to the network elements affected by the modifications.
Exit the Discovery design session and discard any changes.
Note The running configuration for all discovered elements is stored in the origconfig directory, even if the
Discovery is discarded.
Note The discovery process produces a design that is comparative, but not identical, to the configuration that
is generated by VRC. If you want the configuration stored on the VRC server to exactly reflect the
discovered dial plan, use the Distribution process. For more information on Distribution, see
Distributing the Dial Plan.