|
|

CiscoWorks Blue SNA View extends the functions of the CiscoWorks Blue Maps (RSRB, DLSw, and APPN applications) by implementing these items from the Maps application window:
Before you start CiscoWorks Blue SNA View, you will probably want to start one of the CiscoWorks Blue Map applications to view network maps. Then start SNA View to extend the maps into the SNA network.
Step 1 First, start the RSRB, DLSw, or APPN Map application. Open a custom topology file or create a map showing the devices of interest in an appropriate view. Refer to the CiscoWorks Blue Maps Installation Guide for information about starting and using the CiscoWorks Blue Map applications.
Step 2 Do one of the following:
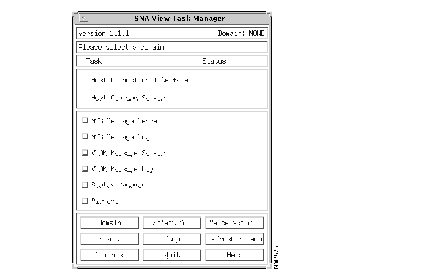
Before you can use the SNA View functions, connect SNA View to an SNA domain:
Step 1 From the SNA View Task Manager window, click the Domain button. The Available Domains window is displayed, as shown in Figure 4-2.

Step 2 In the Available Domains window, highlight a domain name and click the Connect button. The SNA View Task Manager will attempt to connect to the SNA View application on the mainframe, if the connection is IP. If the connection is LU 6.2 and the SNA View mainframe application is started, then the SNA View workstation application should already be connected. Figure 4-3 shows the SNA View Task Manager window.
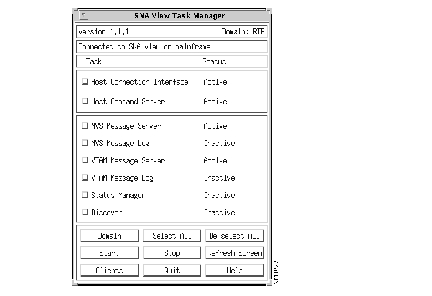
Step 3 Verify whether the Host Command Server and Host Connection Interface processes (at the top of the window) are Active. If they are Inactive and the connectivity is IP, select both processes and click the Start button at the bottom of the SNA View Task Manager window. Both processes should now be Active. If the connectivity is LU 6.2 and the tasks are inactive, verify that the SNA View mainframe application is active, and that LU 6.2 has been properly configured on the mainframe and workstation.
If this is the first time you are using SNA View with this domain, or if you suspect that not all of the PUs have been discovered, you will want to re-construct the database of SNA data for this domain and start the status manager to keep the Maps database updated.
Step 1 From the SNA View Task Manager window, click Status Manager.
Step 2 Click the Start button to start the SNA View status manager. The status manager maintains the CiscoWorks Blue Maps Sybase database with the existence and status of SNA resources. When the status of an LU or PU changes, the status manager receives status from the mainframe. However, the status of a PU is not automatically refreshed. Use the Refresh menu item on the View menu to refresh PU status periodically.
Step 3 From the SNA View Task Manager window, click Discover.
Step 4 Click the Start button. The Discover process retrieves information about the PUs and LUs in the selected SNA domain. This may take some time to complete. When discovery is complete, the Discovery process become inactive.
From the SNA View Task Manager, after you connect to a domain, you can view VTAM and MVS messages. To view these messages, follow this procedure:
Step 1 Start the SNA Task Manager, connect to a domain, and ensure that the Host Command Interface and Host Command Server are active.
Step 2 From the SNA View Task Manager, select the MVS Message Server or the VTAM Message Server.
Step 3 At the bottom of the Task Manager window, click Start to activate the servers.
Step 4 After the message servers have become active, as indicated on the task manager window, you can start the message clients. At the bottom of the Task Manager window, click Clients to activate the VTAM or MVS message clients. The Clients window is displayed, as shown in Figure 4-4.

Step 5 From the Clients window, select VTAM Messages or MVS Messages.
Step 6 Click Activate. The SNA View VTAM or MVS Messages window is displayed, as shown in Figure 4-5.
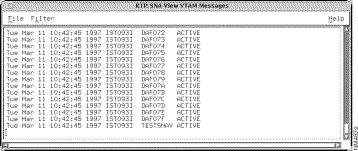
Step 7 Sometimes the flow of mainframe messages can be overwhelming. You can filter any unwanted messages, so that you do not see all of them. To filter messages, select Filter from the menu bar.
Step 8 From the Filter menu, select Add Filter. The Add Filter window is displayed, as shown in Figure 4-6.
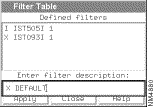
Step 9 Type a filter statement in the Enter filter description field. Filters entered in the Add Filter window are temporary, and last only until you stop SNA View. If you want to create more permanent filters, and for a complete description of filters and filter statements, see the chapter "Filtering Mainframe Messages."
Here are some sample filter statements:
| Filter Statement | Purpose |
|---|---|
| I IST505I 1 | Include all messages with the token IST105I in the first token position in the message. |
| X IST093I 1 | Exclude all messages with the token IST093I in the first token position in the message. |
| X DEFAULT | Exclude all other messages. |
From the SNA View Task Manager, after you connect to a domain, you can issue mainframe commands. Follow this procedure:
Step 1 Start the SNA Task Manager, connect to a domain, and ensure that the Host Command Interface and Host Command Server are active.
Step 2 From the bottom of the SNA View Task Manager click Clients. The Clients window is displayed, as shown in Figure 4-4.
Step 3 From the Clients window, select Mainframe Commands and Click Activate. If you are using a secure installation, the Mainframe Logon window is displayed (Figure 4-7). Otherwise, the SNA View Mainframe Commands window is displayed, as shown in Figure 4-8 For information about using the secure version of SNA View mainframe commands, see the section "Configuring Secure Mainframe Commands" in Chapter 3.
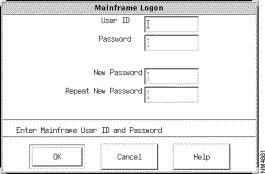
Step 4 In the Mainframe Logon window, enter your user ID and password, and click OK. If you want to change your password, enter the new password in the New Password field, then again in the Repeat New Password field, and click OK. The SNA View Mainframe Commands window is displayed, as shown in Figure 4-8.
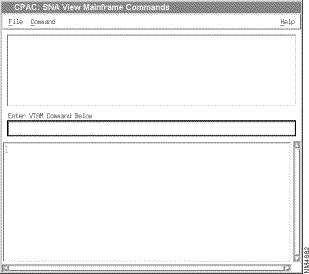
Step 5 Type an MVS, VTAM, or NetView command in the command field in the middle of this window.
Step 6 From the menu bar, select Command.
Step 7 From the Command menu, select VTAM Command, MVS Command, or NetView Command, depending on the kind of command you entered in Step 5.
Step 8 Press Enter to issue the command.
You can retrieve dependency view information for a physical unit (PU) or logical unit (LU) from any CiscoWorks Blue Maps application. There are several ways to retrieve PU and LU information, depending on whether you know the PU or LU name.
You can display dependency information about specified LUs and PUs and their paths through the network.
Use the View menu on the DLSw or RSRB Map application's menu bar to specify a PU or LU to view.
Step 1 From the RSRB or DLSw main window, select the View menu item. The View menu is displayed.
Step 2 From the View menu, select PU to view a physical unit, or LU to view a logical unit. The PU/LU Prompt window is displayed, as shown in Figure 4-9.

Step 3 Type the name of the PU or LU you want to view.
Step 4 Click OK.
Use the Tools menu on any Map application's menu bar to select a PU or LU from a list.
Step 1 From the Map application's main window, select Tools. The Tools menu is displayed.
Step 2 From the Tools menu, select PU to display the PU Filter window or select LU to display the LU Filter window for the PU to which the selected LU is attached.
From the DLSw or RSRB Application:
The PU Filter or LU Filter window is displayed as shown in Figure 4-10.
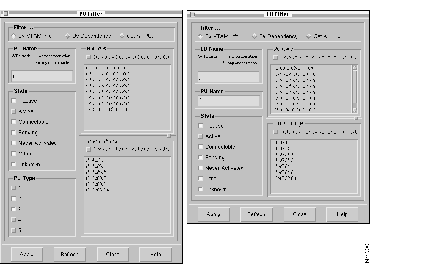
Step 3 In the LU or PU Filter window, select the method for filtering PU or LU names.
Step 4 Click Apply. The PU List or LU List window is displayed, showing all the PUs or LUs you requested, as shown in Figure 4-11 and Figure 4-12.
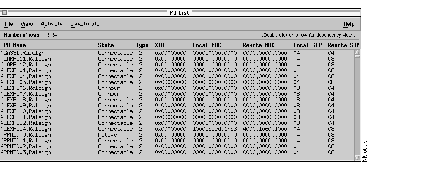
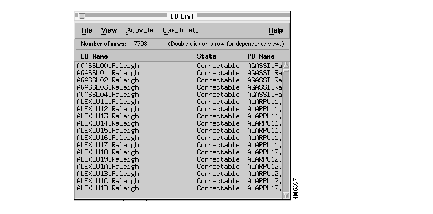
Step 5 From the PU List or LU List window, you can click an entry to display a Map showing the dependency view for that LU or PU.
The PU-LU States window is a control panel for PUs and LUs that are located on the specified physical ring. To access the PU-LU Info window:
Step 1 Point to a real ring (oval) on the RSRB Map.
Step 2 Press the right mouse button.
Step 3 Select PU-LU Info on the popup menu. The PU-LU States window is displayed, as shown in Figure 4-13.
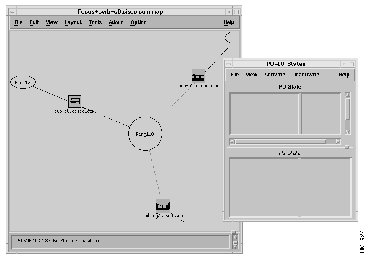
The PU-LU Info window lists the PU or PUs that are handled by the real ring you pointed to. When you select View>Show LU, the LU list in the lower part of the PU-LU Info window contains the LUs that are dependant on the PU that is highlighted in the upper part.
After you highlight a PU or LU of interest, you can:
To terminate the PU-LU Info window and return to the main window of the CiscoWorks Blue Maps application, select File> Close.
|
|