The Add/Remove Group Members dialog box opens when you do one of the following:
Click Add/Remove on the Device Group dialog box.
Select a device group and select Devices>Device Group>Add/Remove Members.
Select a device group, right-click, and select Add/Remove Members.
Description
Use the Add/Remove Group Members dialog box to add interfaces to a device group or to remove them from the group.
Table B-1 Add/Remove Group Members Dialog Box
Field
Description
Notes
Available Interfaces
The interfaces that you can add to the group. This does not include interfaces that already belong to the group or to a different group, or interfaces that do not satisfy the interface characteristics defined for the group.
You cannot place a single interface into more than one device group.
Only interfaces defined in the database appear in this list.
Group Members
The interfaces that are already part of the device group.
>> button
Click this button to add the interface selected in Available Interfaces to the Group Members list.
<< button
Click this button to remove the selected interface from the Group Members list. The interface is returned to the Available Interfaces list.
When you remove interfaces, the QoS property and associated policies (for example, for priority queuing and custom queuing interfaces) are copied to the interface. You are asked whether other policies defined on the group, such as coloring or shaping policies, should be copied to interfaces that you are removing. If you click Yes or Yes All, the policies are copied, meaning there is no change to the services provided by the interface. If you click No, the policies are not copied to the interface, changing the services provided by the interface.
The Application Service dialog box opens when you click Add or Edit from the Application Services window.
Description
Use the Application Service dialog box to add, view, or change the properties of an application service alias. You can use an application service alias in a policy to simplify the creation of policies that apply to a type of network traffic from a host or subnet.
Table B-2 Application Service Dialog Box
Field
Description
Name
The name of the application service alias.
Protocol
The protocol used by the packets. If the protocol you want to use is not listed in the drop-down list, enter the protocol's number. For a list of protocol numbers, see RFC1700, "Assigned Numbers," at http://www.ietf.org/rfc/rfc1700.txt.
Host
The host name or IP address of the server or subnet from which the packets originate.
Mask
Optionally, the subnet mask that, combined with the IP address, signify the subnet from which the packets originate.
Port
Optionally, the port from which the packets originate.
You can indicate a range of ports by entering the start and end ports separated by a hyphen. For example, to specify ports 100 to 110, enter 100 - 110.
The Application Services dialog box opens when you do any of the following:
Click the Application Services button.
Select Tools>Application Services.
Click the application services button (...) in the Properties of Policy—Filter Properties Sender field when selecting an application service (by selecting Is App. Service for Type).
Description
Use the Application Services dialog box to view the application service aliases that you have defined, edit them, or add new ones. You can use an application service alias in a policy to simplify the creation of policies that apply to a type of network traffic from a host or subnet.
Table B-3 Application Services Dialog Box
Field
Description
Table of application services
Each row in this table represents a separate application service, with these properties:
Name—The name of the alias.
Protocol—The protocol used by the packets.
Host—The host name or IP address of the server whence the data flows.
Mask—The subnet mask which, combined with the IP address, signifies a subnet.
Port—The port used by the packets.
Add button
Click this button to add an alias to the list.
Edit button
Click this button to change the properties of the selected alias.
The Detect Interfaces dialog box opens when you do one of the following:
Click OK on the New Device or Device Properties dialog boxes when Detect Interfaces is selected.
Click Detect Interfaces on the New Device or Device Properties dialog boxes.
Note Open the New Device dialog box by selecting Devices>Device>New, or the Device
Properties dialog box by selecting a device in the tree view and selecting
Devices>Device>Properties.
Description
Use the Detect Interfaces dialog box to select which device interfaces to add to the QoS database. You must add an interface to the database in order to create QoS policies for it.
Table B-4 Detect Interfaces Dialog Box
Field
Description
Notes
Available Interfaces
The device's interfaces that are available but not selected to be added to the QoS database
Use Ctrl+click to select more than one interface at a time, Shift+click to select a range of interfaces.
Selected Interfaces
The device's interfaces that are selected to be added to the QoS database.
Use Ctrl+click to select more than one interface at a time, Shift+click to select a range of interfaces.
When you click OK, these interfaces are added to the database.
>> button
Click this button to add the interfaces selected in Available Interfaces list to the selected interfaces list.
<< button
Click this button to remove the interfaces from the Selected Interfaces list. The interfaces are returned to the available interfaces list.
If the interface already exists in the QoS database, any policies defined for the interface are removed. If the interface belongs to a device group, it is removed from the device group. These database changes are not made until you click OK.
The Device Group dialog box opens when you do one of the following:
Select File>New>Device Group.
Select Devices>Device Group>New.
Right-click in the tree view and select New Device Group.
Select the device group in the tree view and select Devices>Device Group>Properties.
Right-click the device group in the tree view and select Device Group Properties.
Description
Use the Device Group dialog box to create a device group, which is a group of interfaces to which you will apply identical policies. Device groups simplify the deployment of common policies. Also use this dialog box to view and change a device group's properties.
Table B-5 Device Group Dialog Box
Field
Description
Notes
Name
The name of the device group.
Device Model
The device model on which the interfaces reside.
Besides specific device models, you can select these groups of devices:
Select Any if you do not want to restrict the group to a specific type of interface.
To use Frame Relay traffic shaping on Frame Relay interfaces, the group can only contain frame-relay interfaces.
Card Type
Whether the interfaces are on a VIP or non-VIP card.
The QoS capabilities for interfaces on VIP cards are different from those available on non-VIP cards.
Group Contains
Whether the group contains regular interfaces or subinterfaces.
If you are limiting the device group to frame-relay subinterfaces, you must further distinguish the type of subinterface:
Select Subinterface to only include subinterfaces whose interface does not have FRTS enabled.
Select Subinterface with FRTS to only include subinterfaces whose interface does have FRTS enabled.
In either case, you cannot change the interface's use of FRTS while one of its subinterfaces belongs to a group.
You cannot combine regular interfaces and subinterfaces in a single group.
Also, if you do not enable FRTS for Frame Relay groups, then you can only add interfaces that do not have FRTS enabled on them to the group.
QoS Property
The QoS queuing property that should be assigned to the interfaces in the group.
Select Defined By Interface if you do not want the device group to define the interface's QoS property, and you instead want to define the property on each interface. This is appropriate if you are using the device group mainly to apply common policy statements rather than common queuing properties.
Selecting some QoS properties adds additional fields to the window. These fields are settings specific to the selected queuing property, or they are other QoS techniques that require the queuing property.
Queue Limits
The limit for the number of packets allowed in each priority queue. You can enter limits in any combination of the four queues. Once the limit is reached, packets are dropped.
Queues can be from 1 to 32767 packets.
Available only if you select Priority Queuing for QoS Property.
Packet Size (bytes)
The typical packet size that traverses the interface. QPM uses this value to calculate the byte size of the custom queues, the queues being a multiple of this packet size. You do not have to carefully calculate this value. Instead, pick a number that you feel would be an appropriate size for the smallest queue on the interfaces.
Available only if you select Custom Queuing for QoS property.
WRED Weight
A factor used to determine the rate at which packets are dropped when traffic congestion occurs. The weight must be between 1 and 16. Use the default of 10 unless you determine a different factor is desirable.
Advanced button—Click this button to configure advanced WRED properties (described in the "WRED Advanced Properties Dialog Box" section.) Available only on groups that require an IOS software version that supports advanced WRED configuration.
Available only if you select WRED for QoS property. See the IOS software documentation for a detailed discussion of the random-detect weighting factor.
Enable Frame Relay Traffic Shaping
Select this if you want to use the rate control features of Frame Relay traffic shaping (FRTS) on the interfaces or subinterfaces in the group.
The rate control parameters available are:
Rate (Kbit/sec)—The average kilobits per second rate for the virtual circuit, typically the minimum rate you are committed to provide on the circuit. The default is 56. The rate should be less than or equal to the rate of the interface.
Burst Size—Optionally, the sustained number of kilobits that can be transmitted per interval over the virtual circuit. The burst size can be from 1 to 16000. The default is 7.
The interval is determined by dividing the burst size by the rate. For example, if the rate is 128, and the burst size is 16, the interval is 0.125 seconds.
Exceed Burst Size—Optionally, the maximum number of kilobits in excess of the burst size that can be transmitted during the first interval when congestion occurs. The exceed burst size can be from 0 to 16000. The default is 7.
Adaptive Shaping—Select this field to have the interface reduce the traffic rate when it is notified that congestion is occurring at other interfaces along the path.
Available only if you select frame-relay for Interface Type and something other than Defined by Interface for QoS Property.
If you enable FRTS on a group, you cannot create shaping policies (GTS) for that group, and any shaping policies currently defined for the group and its members are removed. Also, if the group members are interfaces, enabling FRTS enables FRTS on all of the interface's subinterfaces, if any.
If the group is for subinterfaces, and FRTS is enabled for the group, you cannot change the FRTS setting for any of the interfaces whose subinterfaces are members of the group.
Enable Voice Configuration
Select this if you want to configure the bandwidth and fragmentation for Voice over Frame Relay. These settings help you ensure that real-time, delay-sensitive voice traffic can be carried over Frame Relay links.
Bandwidth—The percentage of the bandwidth on the interfaces in the group to reserve for voice traffic.
The bandwidth percentage should not be higher than the FRTS rate (as a percentage of the overall rate on the interfaces). For example, if you set the FRTS rate on a group of 1544 Kbps interfaces to 772 Kbps (50%), voice bandwidth should be no more than 50.
Fragment—The frame size used when fragmenting data frames, not including Frame Relay headers and fragmentation headers. Long data frames are fragmented and interleaved with real-time voice frames, so that data and voice can share the link while maintaining the required voice quality.
The fragment size is in bytes, and can be from 16 to 1600. The default is 53 bytes.
Voice over Frame Relay frames are never fragmented.
Fragment is only available if you are using the WFQ QoS property.
Available only if you select Enable Frame Relay Traffic Shaping and a device model and version of IOS software that supports Frame Relay voice configuration (FRF.11 and FRF.12).
WFQ Properties
Properties related to Voice over Frame Relay.
Discard Threshold—The number of messages allowed in a weighted fair queue. For high-bandwidth conversations, once this threshold is met, additional high-bandwidth messages are discarded.
The threshold can be from 1 to 4096. The default is 64.
Dynamic Conversation—The number of dynamic queues to use for conversations that do not require special network services ("best-effort conversations").
The dynamic conversation can be 16, 32, 64, 128, 256, 512, 1024, 2048, or 4096. The default is 256.
Reservable Conversation—The number of reservable queues used for RSVP reserved conversations.
The reservable conversation can be from 0 to 100, unless you configure a fragment size for FRTS voice configuration, in which case the value can be from 2 to 100. The default is 0.
Max Buffer Size—The maximum buffer size for the weighted fair queues, in number of messages. The buffer size can be from 0 to 4096.
Available only if you select WFQ for QoS Property, frame-relay for Interface Type, and a version of IOS software that supports Frame Relay fair queue.
Aggregate Limit
The total number of packets that can be buffered in all of the queues on the group's interfaces before packets can be dropped.
When the number of packets reaches the aggregate limit, the interfaces enforce the individual limit on each queue, and if a queue has more packets in its buffer than the individual limit, new packets for that queue are dropped. However, no packets are dropped that are already in the queue.
The aggregate limit can be from 1 to 32768. The interfaces calculate the default limit based on the transmission rate of the interface and the total buffering space available on the VIP card.
Available only when you select CBWFQ or Fair Queue for QoS Property and VIP for Card Type.
Cisco recommends that you use the default unless you determine that your particular situation would benefit from a different value.
Individual Limit
The number of packets that can be buffered in each individual queue when congestion occurs on the group's interfaces.
When the interface is not congested, each queue can exceed this limit until the aggregate limit for the interface is reached. Once the aggregate limit is reached, each queue is limited by the individual limit, and packets cannot be added to the queue until it is below the individual limit.
The individual limit can be from 1 to 32768. The default is half the aggregate limit.
Available only when you select CBWFQ or Fair Queue for QoS Property and VIP for Card Type.
Cisco recommends that you use the default unless you determine that your particular situation would benefit from a different value.
Enable WRED Drop
Select this if you want the group to use weighted random early detection (WRED) for the drop mechanism. WRED proactively drops packets before maximum threshold limits are reached in an attempt to throttle traffic at the source when an interface becomes congested.
Weight—A factor used to determine the rate at which packets are dropped when traffic congestion occurs. The weight must be between 1 and 16. 10 is usually an effective factor.
Advanced button—Click this button to configure advanced WRED properties (described in the "WRED Advanced Properties Dialog Box" section.) Only available on groups that require an IOS software version that supports advanced WRED configuration.
Available only when you select CBWFQ or Fair Queue for QoS Property and VIP for Card Type.
Enable RSVP
Select this if you want to allow applications to make RSVP reservations on the interfaces in the group. Some applications, such as voice over IP, video, or audio broadcasts, use RSVP reservations to ensure that sufficient bandwidth is available at network devices along a traffic flow. This ensures that real-time traffic can flow through the network reliably, without delay and packet loss that can make the traffic flow useless.
UDP Encapsulation—Select this to have the interfaces produce a UDP-encapsulated multicast packet whenever they receive an IP-encapsulated multicast packet. If you do not select this field, the interfaces only use UDP-encapsulated packets if they receive a UDP-encapsulated RSVP message (some hosts depend on the router to initiate UDP-encapsulation). The interfaces use the 224.0.0.14 multicast address and UDP port 1699.
Single Flow—The percentage of the interface's bandwidth that one traffic flow can reserve. The single flow limit can be from 1 to the aggregate limit. The default is 75.
Aggregate—The percentage of the interface's bandwidth that all traffic flows combined can reserve. The aggregate limit can be from 1 to 75. The default is 75.
Available only if you select WFQ, WRED, or CBWFQ for QoS Property, non-VIP for Card Type, and a version of IOS software that supports RSVP.
Not available if you select Enable Frame Relay Traffic Shaping.
When configured on CBWFQ groups, RSVP and CBWFQ work independently, as if the other technique were not configured on the interface.
When configured on WFQ groups, RSVP provides guaranteed rate service, which is good for delay-sensitive applications like voice over IP.
When configured on WRED groups, RSVP provides controlled load service, which is good for adaptive real-time applications like the playback of a recorded conference call.
You must understand the bandwidth requirements of the RSVP-enabled applications on your network to make reasonable bandwidth settings.
Enable IP RTP Priority
Select this if you want to create a strict-priority queue for real-time transport protocol (RTP) traffic. This is typically used to provide absolute priority to voice traffic, which uses RTP ports.
Port Range—The starting and ending RTP port numbers. RTP traffic for these ports is placed in the absolute-priority queue. Other traffic is handled by the interfaces's standard queuing mechanism.
The range can be from 2000 to 65535. There is no default port range, but the voice ports range is from 16384 to 32767.
Bandwidth—The percentage of the interfaces's bandwidth for the absolute-priority queue. All packets in the queue are transmitted before any other queues are handled.
Traffic in the queue cannot exceed this bandwidth. Any packets that exceed the bandwidth are dropped, so ensure you allocate adequate bandwidth. Any unused bandwidth is available to the other queues on the interface.
The bandwidth can be between 0 and 75, and you can use decimal places (for example, 10.5). There is no default. On CBWFQ interfaces, this bandwidth is added to the combined CBWFQ queue bandwidths, and the total must be 75% or less.
Available only if you select WFQ or CBWFQ for QoS Property, non-VIP for Card Type, and a version of IOS software that supports IP RTP Priority.
Not available if you select Enable Frame Relay Traffic Shaping.
IP RTP Priority is mainly useful on interfaces whose speed is less than 1.524 Mbps.
Voice typically uses 24 Kbps. However, IP RTP Priority ignores voice compression, so a 12 Kbps stream is treated like a 24 Kbps stream. Because of overhead, ensure the bandwidth percentage you select accommodates at least 25 Kbps per call.
To determine the bandwidth required, estimate the number of concurrent calls that must be supported on the interface, and multiply by 25 Kbps. Then divide by the interface's bandwidth to get the bandwidth percentage.
You can use the max-reserved-bandwidth IOS software command to change the maximum allocatable bandwidth.
Trust State
The trust state for the Catalyst switch ports. The trust state affects how frames are marked when they enter the port.
Untrusted—Change the frame's class of service (CoS) and type of service (ToS) values to the ones defined for the port.
This is the switch's default trust state.
Trust CoS—Trust the CoS value on the packet and use it to change the packet's ToS value.
Trust DSCP—Trust the packet's CoS and ToS values without change.
Trust IP Prec—Trust the packet's CoS and ToS values, although the ToS field is set as IP precedence.
Available only if you select Cat6000 for device model and 2Q2T for QoS property.
You must define the port's CoS value using the device's command line interface (CLI). QPM does not configure the port's CoS value.
Group Members
The interfaces that belong to the device group.
These interfaces must be defined in the database before you can add them to a group.
Add/Remove button
Click this button to add members to the group or remove them from the group.
The DNS Host to IP Address Resolution dialog box opens when you do any of the following:
Select Tools>DNS Resolution>Resolve Unresolved Host Names, when there are unresolved host names in the QoS database.
Select Tools>DNS Resolution>Resolve All Host Names.
Click Yes when QPM asks if you want to resolve unresolved host names (typically when saving a database.)
Description
Use the DNS Host to IP Address Resolution dialog box to resolve host names to their IP addresses.
Table B-6 DNS Host to IP Address Resolution Dialog Box
Field
Description
Notes
Location
The location within the QoS database that contains the host name, one of:
Interface \ policy name
Interface \ policy name \ host group name
Host group name
Aliases \ application alias name
Name
Type
The type of location within the QoS database, one of,
Group—The name is used in a host group.
Filter—The name appears in a policy filter, possibly in a host group.
Device Name—The name is used for a device.
Host Name
The host name that needs to be resolved to an IP address.
Resolution Status
The status of the host-name-to-IP-address resolution, one of,
Pending—The host name has not yet been resolved.
Resolving—The host name is currently being resolved.
Resolved to IP Address—The host name has been resolved to the indicated IP address.
Skipped—You clicked Skip Resolution while QPM was trying to resolve the name.
FAILED!!!—The host name could not be resolved to an IP address.
An arrow indicates the host name that is currently being resolved.
Skip Resolution button
Click this button to skip the resolution of the name currently being resolved. You might want to do this if the name is taking a long time to resolve, or if you know it is an incorrect name.
Show Unresolved button
Click this button to filter the list so that correctly-resolved host names are not displayed. This helps you locate any resolution failures.
This button toggles with the Show All Hosts button.
Show All Hosts button
Click this button to switch the list back to showing all hosts, including those whose IP addresses were successfully found.
This button toggles with the Show Unresolved button.
Abort button
Click this button to stop the DNS resolution process.
The Host Groups dialog box opens when you do any of the following:
Click the Host Groups button.
Select Tools>Host Groups.
Click the groups button (...) in the Properties of Policy—Filter Properties Sender or Destination fields when a host group (by selecting In Group for Type).
Description
Use the Host Group dialog box to create, modify, or delete host groups. A host group is a collection of network hosts or subnets. You can use a host group in a policy to simplify the creation of policies that apply to a set of network hosts or subnets.
Table B-7 Host Group Dialog Box
Field
Description
Notes
Host Groups list
A list of available host groups.
New button
Click this button to create a new host group.
Duplicate button
Click this button to duplicate the selected host group.
Edit button
Click this button to edit the membership or change the name of the selected group.
You can also edit a group by double-clicking it.
Delete button
Click this button to delete the selected host group.
You cannot delete a host group if it is used in a policy. Remove all occurrences of the host group from your policies before deleting the group.
The Import Device dialog box opens when you select Devices>Import and then select a device inventory. The title of the window includes the name of the file that contains the inventory displayed in the window.
Description
Use the Import Devices dialog box to import devices into the QoS database from an inventory that you exported from either CiscoWorks2000 Resource Manager Essentials or Cisco Resource Manager (CRM). By importing devices from your existing inventory, you can quickly populate the QoS database and avoid typing errors while entering each device manually.
While QPM is querying the devices in the inventory, you can edit the QoS database. Once the queries are finished, however, you must complete (or cancel) the importation process before returning to the main Policy Manager window.
Table B-8 Import Devices Dialog Box
Field
Description
Notes
Known Devices
The list of devices from the selected inventory, including IP address, device model, and IOS software version.
QPM queries the devices as it adds them to this list. This query can take a long time if there are a lot of devices. If a device cannot be queried, either because it is unavailable, or the SNMP query failed, this is indicated, and you cannot import the device. Devices that are supported and available are listed first.
Devices to Import to QoS Database
The devices you select to import into the QoS database.
These devices are not added to the Devices folder until you click OK. If you click Cancel, the importation is aborted and the database is left unchanged.
>>button
Click this button to add the selected devices to the devices to import list.
<< button
Click this button to remove the selected devices from the devices to import list.
Stop button
Click this button to stop the querying of devices in the external database.
The query stops with the last completed device. You can add all the valid known devices to the QoS database.
The Logon Information dialog box opens when you initially start Policy Manager or Distribution Manager.
Description
Use the Logon Information dialog box to log into QPM. You only have to log into QPM once. If one program is running, you can start the other program without having to log in again.
Table B-9 Logon Information Dialog Box
Field
Description
Notes
User name
Your QPM user name. This name must be defined in one of the QPM Windows NT groups: the user group if you want read-write access, the guest group if you want read-only access.
The QPM groups are defined on the machine that is running the QoS Manager service. Unless you selected different groups, QPM_Users is the read-write group, QPM_Guests is the read-only group.
If QPM created the QPM_Users group during installation, it created a user named QPM_User with no password.
Password
The password for this user account.
Domain
The domain in which your user account is defined.
If you are using the QPM_User account, the domain is the name of the QoS Manager machine.
New Interface and Properties of Interface Dialog Boxes
The New Interface and Properties of Interface dialog boxes are the same. They open when you do one of the following:
New Interface dialog box
Properties of Interface dialog box
Click Define Interface in the New Device or Device Properties dialog boxes.
Select the device and select Devices>Interface>New.
Right-click the device and select New Interface.
Select an interface and select Devices>Interface>Properties.
Right-click an interface and select InterfaceProperties.
Description
Use the New Interface dialog box to manually define an interface for a device. However, it is easier to define a device's interfaces by clicking Detect Interfaces when adding the device (in the New Device dialog box), or by viewing the device properties (in the Device Properties dialog box, accessed by selecting the device and selecting Devices>Device>Properties).
You must manually define a device's interfaces if you are adding a device that is not connected to the network, either because it is not installed yet, or a network problem has made it temporarily unavailable.
Use the Properties of Interface dialog box to view or change the interface's properties as defined in the QoS database.
Table B-10 New Interface and Properties of Interface Dialog Boxes
Field
Description
Notes
Name
The name of the interface, for example, Ethernet0. For Catalyst switches, this is the name of the port.
Name is the only field you must fill in when defining an interface.
IP Address
The IP address for the interface.
Leave this field blank for Catalyst switches.
Mask
The subnet mask for the interface.
Leave this field blank for Catalyst switches.
Rate (Kbit/sec)
The transmission rate for the interface or switch port, in kilobits per second. For example, the rate of a standard 10 Mb/sec ethernet interface is 10000.
Type
The type of interface, for example, ethernet. Select the interface type from the list of available types.
Card Type
Whether the interface or switch port is on a VIP or non-VIP card.
The QoS capabilities for interfaces on VIP cards are different from those available on non-VIP cards.
QoS Property
The QoS queuing property that should be assigned to the interface or switch port.
Select Do Not Change if you do not want QPM to configure the queuing property.
The limit for the number of packets allowed in each priority queue. You can enter limits in any combination of the four queues. Once the limit is reached, packets are dropped.
Queues can be from 1 to 32767 packets.
Available only if you select Priority Queuing for QoS Property.
Packet Size (bytes)
The typical packet size that traverses the interface. QPM uses this value to calculate the byte size of the custom queues, the queues being a multiple of this packet size. You do not have to carefully calculate this value. Instead, pick a number that you feel would be an appropriate size for the smallest queue on the interface.
Available only if you select Custom Queuing for QoS property.
WRED Weight
A factor used to determine the rate at which packets are dropped when traffic congestion occurs. The weight must be between 1 and 16. Use the default of 10 unless you determine a different factor is desirable.
Advanced button—Click this button to configure advanced WRED properties (described in the "WRED Advanced Properties Dialog Box" section.) Available only on interfaces that support advanced WRED capabilities.
Available only if you select WRED for QoS property. See the IOS software documentation for a detailed discussion of the random-detect weighting factor.
Enable Frame Relay Traffic Shaping
Select this if you want to use the rate control features of Frame Relay traffic shaping (FRTS) on the interface or subinterface.
The rate control parameters available are:
Rate (Kbit/sec)—The average kilobits per second rate for the virtual circuit, typically the minimum rate you are committed to provide on the circuit. The default is 56. The rate should be less than or equal to the rate of the interface.
Burst Size—Optionally, the sustained number of kilobits that can be transmitted per interval over the virtual circuit. The burst size can be from 1 to 16000. The default is 7.
The interval is determined by dividing the burst size by the rate. For example, if the rate is 128, and the burst size is 16, the interval is 0.125 seconds.
Exceed Burst Size—Optionally, the maximum number of kilobits in excess of the burst size that can be transmitted during the first interval when congestion occurs. The exceed burst size can be from 0 to 16000. The default is 7.
Adaptive Shaping—Select this field to have the interface reduce the traffic rate when it is notified that congestion is occurring at other interfaces along the path.
Available only if you select frame-relay for Type and something other than Do Not Change for QoS Property.
If you enable FRTS on an interface, you cannot create shaping policies (GTS) on that interface. Also, enabling FRTS on an interface enables FRTS on all of the interface's subinterfaces, if any.
If you do not enable FRTS on an interface that has subinterfaces, you cannot set the QoS property for the subinterfaces. Subinterfaces use the QoS property defined for the interface.
You can use FRTS on a subinterface only if its interface is defined in the database and you enable FRTS on the interface.
Enable Voice Configuration
Select this if you want to configure the bandwidth and fragmentation for Voice over Frame Relay. These settings help you ensure that real-time, delay-sensitive voice traffic can be carried over Frame Relay links.
Bandwidth—The percentage of the bandwidth on the interface to reserve for voice traffic.
The bandwidth percentage should not be higher than the FRTS rate (as a percentage of the overall rate on the interface). For example, if you set the FRTS rate on a 1544 Kbps interface to 772 Kbps (50%), voice bandwidth should be no more than 50.
Fragment—The frame size used when fragmenting data frames, not including Frame Relay headers and fragmentation headers. Long data frames are fragmented and interleaved with real-time voice frames, so that data and voice can share the link while maintaining the required voice quality.
The fragment size is in bytes, and can be from 16 to 1600. The default is 53 bytes.
Voice over Frame Relay frames are never fragmented.
Fragment is only available if you are using the WFQ QoS property.
Available only if you select Enable Frame Relay Traffic Shaping on certain devices running a version of IOS software that supports Frame Relay voice configuration (FRF.11 and FRF.12).
WFQ Properties
Properties related to Voice over Frame Relay.
Discard Threshold—The number of messages allowed in a weighted fair queue. For high-bandwidth conversations, once this threshold is met, additional high-bandwidth messages are discarded.
The threshold can be from 1 to 4096. The default is 64.
Dynamic Conversation—The number of dynamic queues to use for conversations that do not require special network services ("best-effort conversations").
The dynamic conversation can be 16, 32, 64, 128, 256, 512, 1024, 2048, or 4096. The default is 256.
Reservable Conversation—The number of reservable queues used for RSVP reserved conversations.
The reservable conversation can be from 0 to 100, unless you configure a fragment size for FRTS voice configuration, in which case the value can be from 2 to 100. The default is 0.
Max Buffer Size—The maximum buffer size for the weighted fair queues, in number of messages. The buffer size can be from 0 to 4096.
Available only if you select WFQ for QoS Property on Frame Relay interfaces on devices running a version of IOS software that supports Frame Relay fair queue.
Aggregate Limit
The total number of packets that can be buffered in all of the queues on the interface before packets can be dropped.
When the number of packets reaches the aggregate limit, the interface enforces the individual limit on each queue, and if a queue has more packets in its buffer than the individual limit, new packets for that queue are dropped. However, no packets are dropped that are already in the queue.
The aggregate limit can be from 1 to 32768. The interface calculates the default limit based on the transmission rate of the interface and the total buffering space available on the VIP card.
Available only when you select CBWFQ or Fair Queue for QoS Property for an interface on a VIP card.
Cisco recommends that you use the default unless you determine that your particular situation would benefit from a different value.
Individual Limit
The number of packets that can be buffered in each individual queue when congestion occurs on the interface.
When the interface is not congested, each queue can exceed this limit until the aggregate limit for the interface is reached. Once the aggregate limit is reached, each queue is limited by the individual limit, and packets cannot be added to the queue until it is below the individual limit.
The individual limit can be from 1 to 32768. The default is half the aggregate limit.
Available only when you select CBWFQ or Fair Queue for QoS Property for an interface on a VIP card.
Cisco recommends that you use the default unless you determine that your particular situation would benefit from a different value.
Enable WRED Drop
Select this if you want the interface to use weighted random early detection (WRED) for the drop mechanism. WRED proactively drops packets before maximum threshold limits are reached in an attempt to throttle traffic at the source when an interface becomes congested.
Weight—A factor used to determine the rate at which packets are dropped when traffic congestion occurs. The weight must be between 1 and 16. 10 is usually an effective factor.
Advanced button—Click this button to configure advanced WRED properties (described in the "WRED Advanced Properties Dialog Box" section.) Available only on interfaces that support advanced WRED configuration.
Available only when you select CBWFQ or Fair Queue for QoS Property for an interface on a VIP card.
Enable RSVP
Select this if you want to allow applications to make RSVP reservations on the interface. Some applications, such as voice over IP, video, or audio broadcasts, use RSVP reservations to ensure that sufficient bandwidth is available at network devices along a traffic flow. This ensures that real-time traffic can flow through the network reliably, without delay and packet loss that can make the traffic flow useless.
UDP Encapsulation—Select this to have the interface produce a UDP-encapsulated multicast packet whenever it receives an IP-encapsulated multicast packet. If you do not select this field, the interface only uses UDP-encapsulated packets if it receives a UDP-encapsulated RSVP message (some hosts depend on the router to initiate UDP-encapsulation). The interface uses the 224.0.0.14 multicast address and UDP port 1699.
Single Flow—The percentage of the interface's bandwidth that one traffic flow can reserve. The single flow limit can be from 1 to the aggregate limit. The default is 75.
Aggregate—The percentage of the interface's bandwidth that all traffic flows combined can reserve. The aggregate limit can be from 1 to 75. The default is 75.
Available only if you select WFQ, WRED, or CBWFQ for QoS Property for an interface on a non-VIP card that supports RSVP.
Not available if you select Enable Frame Relay Traffic Shaping.
When configured on CBWFQ interfaces, RSVP and CBWFQ work independently, as if the other technique were not configured on the interface.
When configured on WFQ interfaces, RSVP provides guaranteed rate service, which is good for delay-sensitive applications like voice over IP.
When configured on WRED interfaces, RSVP provides controlled load service, which is good for adaptive real-time applications like the playback of a recorded conference call.
You must understand the bandwidth requirements of the RSVP-enabled applications on your network to make reasonable bandwidth settings.
Enable IP RTP Priority
Select this if you want to create a strict-priority queue for real-time transport protocol (RTP) traffic. This is typically used to provide absolute priority to voice traffic, which uses RTP ports.
Port Range—The starting and ending RTP port numbers. RTP traffic for these ports is placed in the absolute-priority queue. Other traffic is handled by the interface's standard queuing mechanism.
The range can be from 2000 to 65535. There is no default port range, but the voice ports range is from 16384 to 32767.
Bandwidth—The percentage of the interface's bandwidth for the absolute-priority queue. All packets in the queue are transmitted before any other queues are handled.
Traffic in the queue cannot exceed this bandwidth. Any packets that exceed the bandwidth are dropped, so ensure you allocate adequate bandwidth. Any unused bandwidth is available to the other queues on the interface.
The bandwidth can be between 0 and 75, and you can use decimal places (for example, 10.5). There is no default. On CBWFQ interfaces, this bandwidth is added to the combined CBWFQ queue bandwidths, and the total must be 75% or less.
Available only if you select WFQ or CBWFQ for QoS Property for an interface on a non-VIP card that supports IP RTP Priority.
Not available if you select Enable Frame Relay Traffic Shaping.
IP RTP Priority is mainly useful on interfaces whose speed is less than 1.524 Mbps.
Voice typically uses 24 Kbps. However, IP RTP Priority ignores voice compression, so a 12 Kbps stream is treated like a 24 Kbps stream. Because of overhead, ensure that the bandwidth percentage you select accommodates at least 25 Kbps per call.
To determine the bandwidth required, estimate the number of concurrent calls that must be supported on the interface, and multiply by 25 Kbps. Then divide by the interface's bandwidth to get the bandwidth percentage.
You can use the max-reserved-bandwidth IOS software command to change the maximum allocatable bandwidth.
Trust State
The trust state for the Catalyst switch port. The trust state affects how frames are marked when they enter the port.
Untrusted—Change the frame's class of service (CoS) and type of service (ToS) values to the ones defined for the port.
This is the switch's default trust state.
Trust CoS—Trust the CoS value on the packet and use it to change the packet's ToS value.
Trust DSCP—Trust the packet's CoS and ToS values without change.
Trust IP Prec—Trust the packet's CoS and ToS values, although the ToS field is set as IP precedence.
Available only if you select 2Q2T for QoS property on Catalyst 6000 devices.
You must define the port's CoS value using the device's command line interface (CLI). QPM does not configure the port's CoS value.
The New Device and Device Properties dialog boxes are the same. They open when you do one of the following:
New Device dialog box
Device Properties dialog box
Select Devices>Device>New.
Right-click in the tree view and select New Device.
Select a device and select Devices>Device>Properties.
Right-click a device and select Device Properties.
Description
Use the New Device dialog box to add a device to the QoS database.
Use the Device Properties dialog box to view or change the device's properties as defined in the QoS database.
The properties on these dialog boxes do not affect the device's configuration.
Table B-11 New Device and Device Properties Dialog Boxes
Field
Description
Notes
Device Name
The host name or IP address of one of the device's interfaces.
This is a required field.
Community
The SNMP read community string for the device.
This is a required field.
User Name
The user name for accessing the device through Telnet, if a user name is required.
Password
The password required for accessing the device through Telnet.
This is a required field.
Enable Password
The password required for entering Enable mode on the device.
This is a required field.
Vendor
The vendor who made the device.
Device Model
The model number for the device.
QPM can get this information from the device if you select Verify Device Information and click OK, or if you click the Verify Device Info button.
If you do not let QPM get the information from the device, this is a required field.
Software Revision
The version level of the software running on the device.
QPM can get this information from the device if you select Verify Device Information and click OK, or if you click the Verify Device Info button.
If you do not let QPM get the information from the device, this is a required field.
Prompt
The prompt configured on the device if you changed it from the default prompt.
Only specify the prompt if you changed the device's default prompt.
Write Memory
Select this field to have QPM write your configuration changes to the device's memory.
If you do not select Write Memory, when you reboot the device, your configuration changes are lost, and the device uses its last saved configuration.
Verify Device Information
Select this field to have QPM obtain the device model and software version from the device when you click OK.
The device must be online, and the password correct, in order for QPM to verify this information.
Detect Interfaces
Select this field to have QPM obtain a list of interfaces from the device when you click OK. After discovering the interfaces, QPM opens the Detect Interfaces dialog box, where you can select which interfaces to add to the QoS database.
You can also click the Detect Interfaces button to get a list of interfaces from which to choose. If you do not want QPM to obtain interface information, you must click the Define Interface button and manually define the device's interfaces (unless the device does not have manageable interfaces).
View Configuration button
Click this button to view the device's configuration.
The device must be online, and the password correct, in order for QPM to display the configuration.
View Commands button
Click this button to view how the policies and QoS configuration for the device is translated into the device's commands. These commands implement the policies you created on the interfaces on the device.
See the device's software documentation for information on how to read these commands.
Verify Device Info button
Click this button to have QPM determine the software version and device model information from the device, so that you do not have to enter the information manually.
Clicking this button is equivalent to selecting Verify Device Information and clicking OK.
The device must be online, and the password correct, in order for QPM to obtain this information.
If you upgrade the device's software, or you replace the device with a new model, click this button so that QPM can change the device's properties in the QoS database.
Detect Interfaces button
Click this button to have QPM obtain a list of interfaces and their characteristics from the device. After discovering the interfaces, QPM opens the Detect Interfaces dialog box, where you can select which interfaces to add to the QoS database.
Clicking this button is equivalent to selecting Detect Interfaces and clicking OK.
The device must be online, and the password correct, in order for QPM to obtain this information.
Define Interface button
Click this button to manually define the interfaces on the device.
If the device is online, it is easier to define the interfaces by selecting Detect Interfaces and clicking OK, or by clicking Detect Interfaces.
Properties of 2 Queues 2 Thresholds QoS Property Dialog Box
The Properties of 2 Queues 2 Thresholds QoS Property dialog box opens when you click QoS Property in the New Device or Device Properties windows for a Catalyst 6000 family switch.
Description
Use the Properties of 2 Queues 2 Thresholds QoS Property dialog box to configure the transmit queues and thresholds used in 2Q2T queuing. These properties configure the transmit queues used for outbound traffic based on the IP precedence setting in the packets.
The percentage of the port's bandwidth allocated to each queue. The minimum queue percentage is 1.
The default settings are 80% for Queue 1 (the low-priority queue) and 20% for Queue 2 (the high-priority queue).
The values for the queues must add up to 100%. When you enter the value for one queue, QPM determines the correct value for the other queue.
Although all characteristics of these queues have default values, you must configure all values if you want to change any value.
Weight
The relative weight for the queue. This weight is used to determine how much traffic is transmitted from the queue using the weighted round-robin (WRR) technique before servicing the next queue.
The weight is from 1 to 255. The higher the weight, the more traffic is transmitted from the queue before servicing the next queue.
The default weights are 100 for Queue 1 and 255 for Queue 2.
Threshold 1
The percentage of the queue's bandwidth to use as the first threshold limit. In the precedence assignment table, you assign traffic to this limit. Any assigned traffic that exceeds the limit is dropped.
The threshold 1 default is 40% for each queue. The minimum threshold is 1%.
Threshold 1 and 2 are not exclusive: they do not have to add up to 100.
Threshold 2
The percentage of the queue's bandwidth to use as the second threshold limit. In the precedence assignment table, you assign traffic to this limit. Any assigned traffic that exceeds the limit is dropped.
The threshold 2 default is 100% for each queue. The minimum threshold is 1%.
Threshold 2 is typically larger than threshold 1. The difference between threshold 2 and 1 is the amount of the queue's bandwidth that is exclusively reserved for threshold 2 traffic.
For example, if threshold 2 is 100% and threshold 1 is 40%, 60% of the queue's bandwidth can only be used by traffic assigned to threshold 2.
Precedence assignment table
The queue to which packets are assigned based on the IP precedence value of the packet. All packets of a particular precedence must be assigned to the same queue and threshold limit.
The default assignments are:
Queue 1, Threshold 1—Precedence 0, 1
Queue 1, Threshold 2—Precedence 2, 3
Queue 2, Threshold 1—Precedence 4, 5
Queue 2, Threshold 2—Precedence 6, 7
You can configure the queues without changing the default precedence assignments.
Reset Default button
Resets the precedence assignment table to the default queue-threshold assignments.
The Properties of Host Groups dialog box opens when you click New or Edit in the Host Group dialog box.
Description
Use the Properties of Host Group dialog box to name a host group and to add or remove members.
Table B-14 Properties of Host Group Dialog Box
Field
Description
Notes
Group Name
The name of the host group.
Host
The name or IP address of a network host.
To add a host to this list, click an empty box in the Host column. If there are no empty boxes, click in the last row and press Enter to create a new row.
Mask
The subnet mask for the IP address in the associated host field. You can use the IP address and mask combinations to identify a subnet.
Delete button
Click this button to remove the selected host and its associated mask, if any.
The Properties of Policy dialog box is opened when you do one of the following:
Select an interface, device, or device group that supports policies and click the New Policy button.
Select an interface, device, or device group that supports policies and select File>New>Policy.
Double-click an existing policy in the list pane.
Select a policy and select Devices>Policy>Properties.
The action properties appear when you select Action in the left pane of the Properties of Policy dialog box.
Description
Use the Action Properties on the Properties of Policy dialog box to add, view, or change the properties of a policy action.
The available fields differ depending on the policy action you choose. The actions available for a given policy depend on the type of device and interface queuing property defined on the selected interface, device, or device group. These tables describe the elements for the various actions:
Table B-15, Part 1 Properties of Policy—Action Properties Dialog Box Coloring Action
Field
Description
Notes
Action
Select Coloring to create a policy that sets the IP precedence value for packets that match the policy filter.
Precedence
The IP precedence value to be assigned to packets that match the policy filter.
If you click Advanced, the value in this field is ignored, and the Conform Priority and Exceed Priority values are used instead.
Advanced button
Click this button to define a complex coloring action that takes advantage of committed access rate (CAR) classification.
The Advanced button only appears if the device and IOS software version supports CAR classification. These features are not available on Catalyst switches.
Rate
The target rate for the traffic that the policy covers in Kbps. If a traffic flow is lower than or equal to this rate, the policy applies your conforming action (that is, the traffic flow is conforming to your defined rate). If a traffic flow is greater than this rate, the policy applies your exceeding action. Thus, you can create different actions based on a specific level of service.
Available only if the device and IOS software version supports CAR classification.
The rate must be a multiple of 8.
Burst Size
Optionally, the amount of KB allowed to the traffic flow to accommodate bursty traffic. This defines how large the burst can be before some traffic is marked as exceeding the rate limit.
Available only if the device and IOS software version supports CAR classification.
The minimum burst size is the rate divided by 2000. The recommended burst size is greater than the normal rate, for example, if the rate is 10Mbps, a recommended burst size would be 10 to 20 Mbps.
Exceed Burst Size
Optionally, the amount of KB allowed to the traffic flow to accommodate bursty traffic in excess of the normal burst size. This defines how large the burst can be before all traffic is marked as exceeding the rate limit.
Available only if the device and IOS software version supports CAR classification.
The recommended exceed burst size is greater than the burst size, for example, if the burst size is 10 to 20 Mbps, the recommended exceed burst size would be 20 to 40 Mbps. If the exceed burst size is not larger than the burst size, the traffic gets no added benefit.
Direction
The direction of the traffic to which this policy applies
IN—The policy applies only to traffic entering the interface.
OUT—The policy applies only to traffic leaving the interface.
BOTH—The policy applies to all traffic traversing the interface.
Available only if the device and IOS software version supports CAR classification.
Conform Priority
The IP precedence value to be applied to traffic that conforms to the rate for the policy. Select None to not assign a priority to conforming flows.
Continue—Select Continue to indicate that the device should examine subsequent policies for conforming flows after applying the conforming priority (if any). If a subsequent policy matches the flow, that policy is also applied to the flow.
Available only if the device and IOS software version supports CAR classification.
A common use of the Continue attribute is to classify several traffic flows with the same precedence, and then create a limiting statement that applies to traffic of that precedence.
Exceed Priority
The IP precedence value to be applied to traffic that exceeds the rate for the policy. Select None to not assign a priority to exceeding flows.
Continue—Select Continue to indicate that the device should examine subsequent policies for exceeding flows after applying the exceeding priority (if any). If a subsequent policy matches the flow, that policy is also applied to the flow.
Available only if the device and IOS software version supports CAR classification.
A common use of the Continue attribute is to classify several traffic flows with the same precedence, and then create a limiting statement that applies to traffic of that precedence.
Back button
Click this button to return to the previous page in the policy definition, if there is one.
Next button
Click this button to go to the next page in the policy definition, if there is one.
Finish button
Click this button to save the policy and close the policy definition wizard. You can only click Finish if all properties of the policy are valid.
Table B-15, Part 2 Properties of Policy—Action Properties Dialog Box Shaping Action
Field
Description
Notes
Action
Select Shaping to create a policy that limits the bandwidth available for packets that match the policy filter.
Shaping policies do not form an absolute rate limit. If traffic flow exceeds the shaping limit, the device begins dropping packets to get the sender to lower its transmission rate. This only works with protocols like TCP, which respond to dropped packets by lowering the transmission rate.
Use a limiting policy if you want to create rigid rate limits.
Rate
The target average rate for the traffic that the policy covers, in kilobits per second.
Burst Size
Optionally, the sustained number of kilobits that can be transmitted per interval over the interface.
The interval is determined by dividing the burst size by the rate. For example, if the rate is 128, and the burst size is 16, the interval is 0.125 seconds.
Exceed Burst Size
Optionally, the maximum number of kilobits in excess of the burst size that can be transmitted during the first interval when congestion occurs.
Back button
Click this button to return to the previous page in the policy definition, if there is one.
Next button
Click this button to go to the next page in the policy definition, if there is one.
Finish button
Click this button to save the policy and close the policy definition wizard. You can only click Finish if all properties of the policy are valid.
Table B-15, Part 3 Properties of Policy—Action Properties Dialog Box Limiting Action on Routers
Field
Description
Notes
Action
Select Limiting to create a policy that limits the bandwidth available for packets that match the policy filter.
Limiting rates are more rigid than shaping rates: when a rate limit is met, all packets over the rate are dropped, and there is no attempt to smooth the transmission rate. Shaping attempts to smooth the transmission rate by buffering traffic.
Rate
The target average rate for the traffic that the policy covers. If a traffic flow is lower than or equal to this rate, the policy applies your conforming priority, if any, and transmits the traffic. If a traffic flow is greater than this rate, the traffic is dropped unless you specify burst sizes.
The rate must be a multiple of 8.
Burst Size
Optionally, the amount of KB allowed to the traffic flow to accommodate bursty traffic. This defines how large the burst can be before some traffic is marked as exceeding the rate limit.
The minimum burst size is the rate divided by 2000. The recommended burst size is greater than the normal rate, for example, if the rate is 10Mbps, a recommended burst size would be 10 to 20 Mbps.
Exceed Burst Size
Optionally, the amount of KB allowed to the traffic flow to accommodate bursty traffic in excess of the normal burst size. This defines how large the burst can be before all traffic is marked as exceeding the rate limit.
You must specify an exceed burst size if you specify a burst size.
The recommended exceed burst size is greater than the burst size, for example, if the burst size is 10 to 20 Mbps, the recommended exceed burst size would be 20 to 40 Mbps. If the exceed burst size is not larger than the burst size, the traffic gets no added benefit.
Direction
The direction of the traffic to which this policy applies
IN—The policy only applies to traffic entering the interface.
OUT—The policy only applies to traffic leaving the interface.
BOTH—The policy applies to all traffic traversing the interface.
Conform Priority
The IP precedence value to be applied to traffic that conforms to the rate for the policy. Select None to not assign a priority to conforming flows.
Continue—Select Continue to indicate that the device should examine subsequent policies for conforming flows after applying the conforming priority.
Back button
Click this button to return to the previous page in the policy definition, if there is one.
Next button
Click this button to go to the next page in the policy definition, if there is one.
Finish button
Click this button to save the policy and close the policy definition wizard. You can only click Finish if all properties of the policy are valid.
Table B-15, Part 4 Properties of Policy—Action Properties Dialog Box Limiting Action on Switches
Field
Description
Notes
Action
Select Limiting to create a traffic policing policy that limits the bandwidth available for packets that match the policy filter.
Rate
The target average rate for the traffic that the policy covers, in kilobits/second. Traffic that exceeds this rate, combined with the allowable burst size, is dropped.
The rate must be a multiple of 32, from 32 to 8000000 (8Gbps), or 0. Enter 0 to drop all selected traffic.
Burst Size
The maximum burst size for the traffic that the policy covers, in kilobits. The burst size is used in combination with the rate to determine the drop threshold for the traffic.
The burst size must be from 1 to 32000 (32Mb).
Precedence
The IP precedence value to be applied to traffic that does not conform to the rate for the policy.
Select None to not assign a priority to non-conforming flows.
Back button
Click this button to return to the previous page in the policy definition, if there is one.
Next button
Click this button to go to the next page in the policy definition, if there is one.
Finish button
Click this button to save the policy and close the policy definition wizard. You can only click Finish if all properties of the policy are valid.
Table B-15, Part 5 Properties of Policy—Action Properties Dialog Box Priority Queuing Action
Field
Description
Notes
Action
Select Priority Queue to create a policy that directs traffic to a priority queue.
The QoS property for the interface must be Priority Queuing in order to create priority queuing policies.
Priority Level
The priority queue to which filtered traffic should be directed. These queues are serviced from the highest to lowest queue, with higher queues being emptied before lower queues are serviced, in this order:
1. High
2. Medium
3. Normal
4. Low
Unfiltered traffic is placed in the Normal queue.
Back button
Click this button to return to the previous page in the policy definition, if there is one.
Next button
Click this button to go to the next page in the policy definition, if there is one.
Finish button
Click this button to save the policy and close the policy definition wizard. You can only click Finish if all properties of the policy are valid.
Table B-15, Part 6 Properties of Policy—Action Properties Dialog Box Custom Queuing Action
Field
Description
Notes
Action
Select Custom Queue to create a policy that creates a custom queue for the filtered traffic.
The QoS property for the interface must be Custom Queuing in order to create custom queuing policies.
Ratio
The percentage of the bandwidth to allocate to the traffic.
The value must be in increments of 5, and the total allocation for all custom queue policies on the interface or device group must not exceed 95%. The remaining 5% is used for unfiltered traffic.
Limit
The maximum number of packets that can be held in the queue, from 0 to 32767.
Back button
Click this button to return to the previous page in the policy definition, if there is one.
Next button
Click this button to go to the next page in the policy definition, if there is one.
Finish button
Click this button to save the policy and close the policy definition wizard. You can only click Finish if all properties of the policy are valid.
Table B-15, Part 7 Properties of Policy—Action Properties Dialog Box Queue Weight Action
Field
Description
Notes
Action
Select Queue Weight to create a policy that configures the weighted round-robin (WRR) queues used for the ports selected in the filter properties.
You can use Queue Weight policies only on layer 3 switches (switch routers).
Queue Number and Weight
The weight for the four weighted round-robin (WRR) queues used on the layer 3 switch's egress ports. These weights are only used if the port is congested. When there is no congestion, all queues are treated the same.
The layer 3 switch places packets in these queues based on the IP precedence value of the packet.
The weight can be from 0 to 15. The sum of the weights for all queues on the interface should be 15. The default weights, and the packets assigned to the queues, are:
Queue 0—Weight 1; IP precedence 0, 1.
Queue 1—Weight 2; IP precedence 2, 3.
Queue 2—Weight 4; IP precedence 4, 5. Voice traffic typically falls into this queue.
Queue 3—Weight 8; IP precedence 6, 7.
The weight implies a bandwidth for the queue, although the queue is not given an explicit bandwidth. The higher the weight, the higher the implied bandwidth. You can calculate the implied bandwidth using this equation:
where:
W is the weight
S is the sum of the weight on all active queues on the port
B is the bandwidth for the port in Mbps
n is the bandwidth for the queue in Mbps
For example, if the queue weight is 4, the sum of the queue weights is 15, and the bandwidth on the interface is 100 Mbps, the bandwidth for the queue is 26 Mbps.
Back button
Click this button to return to the previous page in the policy definition, if there is one.
Next button
Click this button to go to the next page in the policy definition, if there is one.
Finish button
Click this button to save the policy and close the policy definition wizard. You can only click Finish if all properties of the policy are valid.
Table B-15, Part 8 Properties of Policy—Action Properties Dialog Box CBWFQ Action
Field
Description
Notes
Action
Select CBWFQ to create a policy that creates a queue for a class of traffic on a CBWFQ interface.
You can configure up to 64 classes on an interface.
The QoS property for the interface must be CBWFQ in order to create CBWFQ policies.
Bandwidth
The percentage of the bandwidth to allocate to the traffic. This is the minimum bandwidth the class receives during times of congestion. It also implies a weight for the queue, which is used in WFQ processing to fairly weight the packets in the queue for transmission.
For interfaces on non-VIP cards, the bandwidth can be from 1 to 75.
For interfaces on VIP cards, the bandwidth can be from 1 to 99.
For model 7500 routers, there are these additional fields:
Priority—Select this to place the traffic in a priority queue. This is not a strict priority queue—other queues get serviced even if there are packets in the priority queue. Selecting Priority is equivalent to entering 99 for Bandwidth.
None—Select this if you do not want to make a specific bandwidth assignment on the default class policy. This is only available on the default policy.
The bandwidth must be a whole number. The total bandwidth allocated for all class policies on an interface must be equal to or less than 75 (for non-VIP interfaces) or 99 (for VIP interfaces).
However, you can use the max-reserved-bandwidth IOS software command to change the maximum allocatable bandwidth.
WFQ
Select this to have the default class use WFQ processing for traffic that does not belong to another class.
Number of Queues—The number of hashed queues to be reserved for the default class policy. Traffic that ends up in the default class is placed in one of these queues and serviced using WFQ. The number can be from 16 to 4096. There is no default.
Individual Limit—The limit on the number of packets that can be held in each queue after the queue limit (for Tail drop) is reached. If a queue has exceeded the individual limit during a congestion event, packets are not dropped from the queue, but additional packets are not added until the queue is beneath the individual limit. The limit can be from 1 to 32768.
The WFQ setting is only available for the default CBWFQ policy unless you are creating the policy for model 7500 routers (in which case it is available for any class policy). The default CBWFQ policy is not created on interfaces on VIP cards.
Whether you configure the number of queues or the individual limit is determined by the IOS software version running on the interface. QPM presents you with only one of these fields.
Drop Mechanism
The mechanism used to determine how packets are dropped when congestion occurs. Selections are:
Tail—With tail drop, all packets are queued together, and when the queue is full all packets are dropped until there is room in the queue.
WRED—With WRED drop, packets are queued according to IP precedence, and packets are dropped in a weighted manner based on precedence. WRED attempts to throttle traffic before the queue threshold is reached by dropping packets early on the assumption that the sender will reduce its transmission rate.
Available only on interfaces on non-VIP cards. For interfaces on VIP cards, you can configure WRED drop on the interface properties.
Queue Limit
The maximum number of packets that can be held in the queue.
If you specify a limit, it can be from 1 to 64. The default is 64.
Available only if you select Tail for the drop mechanism.
WRED Weight
A factor used to determine the rate at which packets are dropped when traffic congestion occurs. The weight must be between 1 and 16. Use the default of 10 unless you determine a different factor is desirable.
The Properties of Policy dialog box opens when you do one of the following:
Select an interface, device, or device group that supports policies and click the New Policy button.
Select an interface, device, or device group that supports policies and select File>New>Policy.
Double-click an existing policy in the list pane.
Select a policy and select Devices>Policy>Properties.
The application properties only appear if you select CBWFQ for the policy action on a device that supports network-based application recognition (NBAR). Select Application in the left pane of the Properties of Policy dialog box to view the application properties.
Description
Use the Application Properties on the Properties of Policy dialog box to view or change the network-based application recognition (NBAR) properties of a policy. You are not required to select an application—you can leave this page blank.
Table B-16 Properties of Policy—Application Properties Dialog Box
Field
Description
Notes
Application
The application that produces the traffic flow. If you select an application, then every packet must not only satisfy the policy's filter conditions, it must also satisfy the application condition. If your filter conditions are inconsistent with your application selection, no traffic will satisfy the policy, and the policy will not be applied to any packets.
Ensure that the filter conditions are generic enough to include the application you select (click on Filter in the left pane to go back and redefine your filter if necessary). For example, if your goal is to identify all RealAudio traffic and apply the policy to it, select RealAudio, then ensure that your only filter condition is TCP for protocol. Only RealAudio traffic will satisfy this combined filter-application condition.
URL
If you select HTTP for the application, the URL for the traffic, if you want to target a specific page or set of pages. You can use these wildcard characters to match more than one web page:
* (asterisk) matches zero or more characters.
? (question mark) matches one character.
[0-9] (brackets with a hyphen between two characters) matches any one character within the expressed range of characters. For example, 0-9 would match any numerical digit, a-z any lower-case letter.
\ (forward slash) is the escape character. You must use the escape character to match the special characters that are used as wildcards.
MIME
If you select HTTP for the application, the MIME type of the traffic, if you want to distinguish traffic based on MIME type.
Enter the MIME type in the field. You can use wildcard characters to express more than one MIME type. The valid wildcard characters are the same ones you can use for the URL field.
For a complete list of MIME types, see the Media Types page at the Internet Assigned Numbers Authority: ftp://ftp.isi.edu/in-notes/iana/assignments/media-types/media-types
Back button
Click this button to return to the previous page in the policy definition, if there is one.
Next button
Click this button to go to the next page in the policy definition, if there is one.
Finish button
Click this button to save the policy and close the policy definition wizard. You can only click Finish if all properties of the policy are valid.
The Properties of Policy dialog box opens when you do one of the following:
Select an interface, device, or device group that supports policies and click the New Policy button.
Select an interface, device, or device group that supports policies and select File>New>Policy.
Double-click an existing policy in the list pane.
Select a policy and select Devices>Policy>Properties.
The filter properties appear when you select Filter in the left pane of the Properties of Policy dialog box.
Description
Use the Filter Properties on the Properties of Policy dialog box to add, view, or change the properties of a policy filter element.
The available filter elements differ depending on the type of device on which you are defining the policy. These tables describe the elements for the various devices:
Routers and switches, including routing modules in switches—Table B-17, Part 1
Table B-17, Part 1 Properties of Policy—Filter Properties Dialog Box, Router and Switch Interface Fields
Field
Description
Notes
Protocol
The protocol of the traffic you are identifying. When you click in the Protocol field, a drop-down button appears. Click the button and select the desired protocol. You can also type the protocol number in the field. Valid protocol numbers are 0 through 255, or you can enter the predefined values TCP, IP, or UDP.
This is a required field.
For a list of protocol numbers, see RFC1700, "Assigned Numbers," at http://www.ietf.org/rfc/rfc1700.txt.
Precedence
The IP precedence value of the packets you are identifying, if you are trying to filter on IP precedence.
This field is not available for policies on switches.
When you click in the Precedence field, a drop-down button appears. Click the button and select the desired precedence value. Leave blank if you want the filter to match any IP precedence value.
Sender
The source of the packet, if you are trying to identify traffic based on source. When you click in the Sender field, a drop-down button appears. When you click the button, additional fields appear that allow you to delimit the type of sender.
The fields available depend on the selection in the Type field:
Host Name—Select Host Name if you are specifying a specific machine or subnet. Enter the IP address or host name in the IP field. If you are specifying a subnet as the sender, enter the subnet mask in the Mask field.
In Group—Select In Group if you are specifying the name of a host group you created in QPM. Select the name of a host group in the Group field. If the packet comes from any of the hosts defined in the group, it matches this filter condition. Click the ... button to create or edit host groups. See the "Working with Host Groups" section for more information.
Is App. Service—Select Is App. Service if you are specifying the name of an application service you created in QPM. Select the name of an application service in the App. Service field. If the packet comes from any of the applications defined in the group, it matches this filter condition. Click the ... button to create or edit application services. See the "Working with Application Services Aliases" section for more information.
Leave Sender blank if you want the filter condition to apply to all sources.
If you enter a name without opening the expansion box, QPM assumes that you are entering a single host name.
Sender Port
The port that is the source of the packet, if you are trying to identify traffic based on port. For example, 80 is the typical port used by web traffic. When you click in the Sender Port field, a drop-down button appears. When you click the button, additional fields appear that allow you to either select a port or a range of ports:
Port Number—Select this if you want to match a single port. Either type in a port number or select it from the list.
Port Range—Select this if you want to match any port within the range. Either type in port numbers for the start and end ports, or select them from the lists. The From port must be smaller than the To port.
Leave Sender Port blank if you want the filter to match any sender port.
You cannot specify a sender port if you select IP for Protocol.
If the port you want is not in the drop-down list, type it into the field. For a list of port numbers, see RFC1700, "Assigned Numbers," at http://www.ietf.org/rfc/rfc1700.txt.
Destination
The destination of the packet, if you are trying to identify traffic based on destination. When you click in the Destination field, a drop-down button appears. When you click the button, additional fields appear that allow you to delimit the type of destination.
The fields available depend on the selection in the Type field:
Host Name—Select Host Name if you are specifying a specific machine or subnet. Enter the IP address or host name in the IP field. If you are specifying a subnet as the destination, enter the subnet mask in the Mask field.
In Group—Select In Group if you are specifying the name of a host group you created in QPM. Select the name of a host group in the Group field. If the packet is going to any of the hosts defined in the group, it matches this filter condition. Click the ... button to create or edit host groups. See the "Working with Host Groups" section for more information.
Leave Destination blank if you want the filter condition to apply to all destinations.
If you enter a name without opening the expansion box, QPM assumes you are entering a single host name.
Dest. Port
The port that is the destination of the packet, if you are trying to identify traffic based on port. For example, 80 is the typical port used by web traffic. When you click in the Dest. Port field, a drop-down button appears. When you click the button, additional fields appear that allow you to either select a port or a range of ports:
Port Number—Select this if you want to match a single port. Either type in a port number or select it from the list.
Port Range—Select this if you want to match any port within the range. Either type in port numbers for the start and end ports, or select them from the lists. The From port must be smaller than the To port.
Leave Dest. Port blank if you want the filter to match any destination port.
You cannot specify a destination port if you select IP for Protocol.
If the port you want is not in the drop-down list, type it into the field. For a list of port numbers, see RFC1700, "Assigned Numbers," at http://www.ietf.org/rfc/rfc1700.txt.
Back button
Click this button to return to the previous page in the policy definition, if there is one.
Next button
Click this button to go to the next page in the policy definition, if there is one.
Finish button
Click this button to save the policy and close the policy definition wizard. You can only click Finish if all properties of the policy are valid.
Table B-17, Part 2 Properties of Policy—Filter Properties Dialog Box, Layer 3 Switch Fields
Field
Description
Notes
Source
The interface that is the source of the traffic flow, that is, the interface through which the traffic enters the layer 3 switch.
If you select only a source, all traffic from the interface uses your selected WRR weights.
Destination
The interface that is the destination of the traffic flow, that is, the interface through which the traffic exits the layer 3 switch.
If you select only a destination, all traffic going to the interface uses your selected WRR weights.
Back button
Click this button to return to the previous page in the policy definition, if there is one.
Next button
Click this button to go to the next page in the policy definition, if there is one.
Finish button
Click this button to save the policy and close the policy definition wizard. You can only click Finish if all properties of the policy are valid.
Table B-17, Part 3 Properties of Policy—Filter Properties Dialog Box, LocalDirector Fields
Field
Description
Notes
Protocol
The protocol of the traffic you are identifying. When you click in the Protocol field, a drop-down button appears. Click the button and select the desired protocol. You can also type the protocol number in the field. Valid protocol numbers are 0 through 255, or you can enter the predefined values TCP or UDP.
For a list of protocol numbers, see RFC1700, "Assigned Numbers," at http://www.ietf.org/rfc/rfc1700.txt.
Virtual IP
The virtual IP address that users use to access the servers that LocalDirector load balances.
Port
The port for the virtual server, if the virtual server is defined with a specific port. For example, 80 is the typical port used by web traffic. Either type in a port number or select it from the list.
Leave Port blank if you want the filter to match any port.
If the port you want is not in the drop-down list, type it into the Port Number field. For a list of port numbers, see RFC1700, "Assigned Numbers," at http://www.ietf.org/rfc/rfc1700.txt.
Bind
The bind ID for the virtual server.
Back button
Click this button to return to the previous page in the policy definition, if there is one.
Next button
Click this button to go to the next page in the policy definition, if there is one.
Finish button
Click this button to save the policy and close the policy definition wizard. You can only click Finish if all properties of the policy are valid.
The Properties of Policy dialog box opens when you do one of the following:
Select an interface, device, or device group that supports policies and click the New Policy button.
Select an interface, device, or device group that supports policies and select File>New>Policy.
Double-click an existing policy in the list pane.
Select a policy and select Devices>Policy>Properties.
The general properties appear when you select General in the left pane of the Properties of Policy dialog box.
Description
Use the General Properties on the Properties of Policy dialog box to view or change the general properties of a policy.
Table B-18 Properties of Policy—General Properties Dialog Box
Field
Description
Notes
Policy Name
The name of the policy. The policy's name is anything you find meaningful. You might consider developing a convention that will help you identify policies more easily once you have an extensive set of policies.
Policy Status
Whether the policy is enabled or disabled. Enabled policies are written to the associated devices when they are deployed on the network, whereas disabled policies are not.
To disable a policy that has been distributed to the devices, select disable for Policy Status, and then save and distribute the QoS database. The policy is removed from the device.
Policy Comment
Information about the policy. The policy's comments are anything you find meaningful, such as a description of the purpose of the policy.
Back button
Click this button to return to the previous page in the policy definition, if there is one.
Next button
Click this button to go to the next page in the policy definition, if there is one.
Finish button
Click this button to save the policy and close the policy definition wizard. You can only click Finish if all properties of the policy are valid.
The Save Database dialog box opens when you do one of the following:
Click the Save Database button to save a newly-created database.
Select File>Save As.
Description
Use the Save Database dialog box to initially name or to rename a database. When you initially save a newly-created database, you must name the database.
Table B-19 Save Database Dialog Box
Field
Description
Notes
Name
The names of existing QoS databases.
The databases reside on the machine running the QoS Manager service.
Modified
The last day and time the database was saved.
Size
The size of the database.
Database Name
The new name of the database currently open in Policy Manager.
Enter a new name for the database.
If you want to replace an existing database, select the database you want to replace from the list of existing databases.
Delete button
Click this button to delete the selected database.
The WRED Advanced Properties dialog box opens when you do one of the following:
Click Advanced on the New Interface or Properties of Interface window after selecting WRED for the QoS Property or when enabling WRED drop.
Click Advanced on the Device Group window after selecting WRED for the QoS Property or when enabling WRED drop.
Click Advanced on the Properties of Policy—Action Properties window after selecting WRED for the drop mechanism on a CBWFQ policy.
Description
Use the WRED Advanced Properties dialog box to configure the queues and weights for each IP precedence value for WRED interfaces or CBWFQ policies that use WRED drop.
Table B-20 WRED Advanced Properties Dialog Box
Field
Description
Notes
Precedence
The IP precedence value in the packet, or RSVP if it is part of an RSVP flow. You can define threshold values for any of these precedence values. If you enter settings for a precedence, you must fill in all cells in the row for that precedence.
You can leave any combination of rows blank. Precedence values that do not have settings are handled using default values.
If the interface resides on a VIP card, the RSVP row is not shown.
The default WRED settings should be adequate for your needs. Only change them if you determine the change would benefit your network.
Min Threshold
The minimum number of packets held in the queue. When the average queue length falls between the minimum and maximum thresholds, packets are dropped based on the probability denominator. If the average queue size is lower than the minimum threshold, all packets are queued.
The minimum threshold can be from 1 to 4096. The default minimum threshold for precedence 0 is half the maximum threshold. The default minimums for the remaining values fall at even intervals between this value and the max threshold.
The average queue size is based on the current size of the queue, the last calculated average queue size, and the WRED weighting factor for the interface. See the IOS software documentation for the exact formula.
Max Threshold
The maximum threshold for the queue. When the average queue length exceeds the maximum threshold, all new packets for the queue are dropped until the queue drops below the max threshold.
The maximum threshold must be larger than the minimum threshold up to 4096. The default is based on the output buffer capacity of the device and the speed of the interface.
Probability Denominator
The denominator for the number of packets that are dropped if the queue length reaches the minimum threshold. The higher the denominator, the fewer packets are dropped from the queue.
The probability denominator can be from 1 to 65556. The default is 10, that is, one packet in every 10 is dropped from a queue once the maximum threshold is reached.
The higher you set the probability denominator, the higher the chance that the maximum threshold will be reached.

 Select an interface, device, or device group that supports policies and click the New Policy button.
 Click the Application Services button.
 Click the Host Groups button.
 Click the Open Database button.
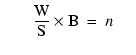
 Click the Save Database button to save a newly-created database.