|
|

This chapter provides a tutorial using the Connectivity Tools configuration changes feature to provide information about modifications made to a router's attributes and how to produce an IOS delta file of the modifications for inclusion into the router's configuration file.
The following tasks are performed and described in this tutorial:
In previous chapters, router configurations have been changed within a scenario. The Connectivity Tools allow such changes to be exported in several ways, which are demonstrated in this scenario.
Having proceeded through the steps of creating and opening the tutorial_baseline baseline, as described in the first tutorial, the Connectivity Tools window, shown in Figure 12-1, is displayed. See "Creating and Opening a Baseline" for information on how to create and open a baseline.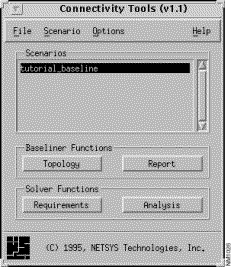
Step 1 Choose the Scenario>Create New menu option from the Connectivity Tools window.
Step 2 Open the Router Configuration window for the netsys5 router, by either double-clicking on the netsys5 router icon in the Topology window, or by selecting the netsys5 entry in the Results list in the Find Device window and then clicking on the Parameters button.
In Step 3 through Step 15, several configuration changes will be made to the router netsys5. In the course of modeling an enterprise network using the Connectivity Tools, similar configuration changes may be made to the model which you may eventually want to implement in your live network. The Connectivity Tools Configuration Changes feature provide several ways to accomplish this.
Step 3 Click on the IP Static Routes button in the netsys5 Router Configuration window.
Step 4 Delete the 199.35.112.0 static route entry in the IP Static Routes window, then click on the Apply button.
The modification is now in effect for the netsys5 router configuration.
Step 5 Select the Context>Router option to return to the netsys5 Router Configuration window.
Step 6 Click on the IP View Algorithms button.
The IP Routing Algorithms window is displayed.
Step 7 Click on the Add button.
The Edit IP Routing Algorithms List window is displayed.
Step 8 Select the rip algorithm entry then click on the OK button.
The RIP algorithm is added to the Algorithms list in the IP Routing Algorithms window.
Step 9 Click on the Apply button in the IP Routing Algorithms window.
Step 10 Select the rip entry in the Algorithms list then click the View IP Routing Algorithm button.
The RIP Algorithm window is displayed.
Step 11 Click on the Add button in the Networks pane.
The Edit Network List window is displayed.
Step 12 Select the 199.35.30.0 entry from the Network Addresses pane, then click on the OK button.
The 199.35.30.0 network address is added to the Networks list in the RIP Algorithm window.
Step 13 Click on the Add button in the Networks pane.
The Edit Network List window is displayed again.
Step 14 Select the 199.35.110.0 entry from the Network Addresses pane, then click on the OK button.
The 199.35.110.0 network address is added to the Networks list in the RIP Algorithm window.
Step 15 Click on the Apply button in the IP Routing Algorithms window.
The two network addresses are now in effect for the netsys5 router configuration.
Step 16 Select the Scenario>Configuration Changes menu option from the Connectivity Tools window.
The Configuration Changes window, shown in Figure 12-2, is displayed. Notice the Modified this Session pane contains an entry for the netsys5 router.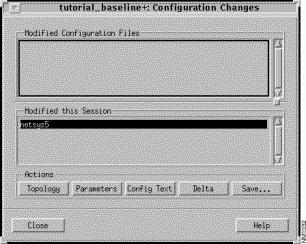
Step 17 Click on the Config Text button.
The Configuration Text window is displayed. The router's configuration text file is displayed in this window. The configuration text file is a version of the router's configuration file as it is currently understood by the Connectivity Solver program, including any router attribute modifications you have made in a scenario. The purpose of this file is to more easily allow you to track the changes made to routers during "what-if" analysis.
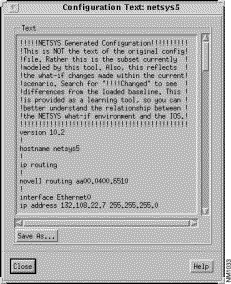
Step 18 Click on the Save As button to save the configuration text to a file.
Step 19 Click on the Delta button in the Configuration Changes window.
The Configuration Delta-Baseline window is displayed. Scroll through the text in the Configuration Delta window. This window generates the actual IOS router commands associated with the router modifications made earlier, including no commands to disable options that were previously enabled on a router.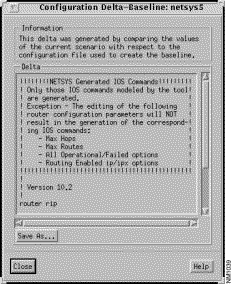
Step 20 Click on the Save As button to save the IOS delta commands to a file.
The contents of this file can be appended to the router's configuration file thereby assuring the modifications you made during your "what-if" analysis can be used in your actual network if you desire.
|
|