|
|

Table Of Contents
Viewing Proxy Services Details
Editing Proxy Service Configuration
Assigning NAT Pools to Proxy Services
Selecting Available Certificate Trustpoints
How Do I Setup a Proxy Service?
Troubleshooting Proxy Services
Managing Proxy Services
CVDM-SSLSM allows you to view, configure, and edit Proxy Services. The Proxy Service Wizards helps you set up proxy services.
This chapter contains the following topics:
•
Viewing Proxy Services Details
•
You can configure the virtual IP address and port associated with the proxy service, and the associated target server IP address and port. You can define TCP and SSL policies for both client (virtual) and server sides of the proxy.
You can configure SSL client proxy services to specify that the proxy service accepts clear text traffic, encrypts the traffic into SSL traffic, and forwards the traffic to the backend SSL server.
While you are required to configure a certificate for the SSL server proxy, you are not required to configure a certificate for SSL client proxy. If you configure the certificate for the SSL client proxy, that certificate is sent in response to the Certificate Request message that is sent by the server during the client authentication phase of the handshake protocol.
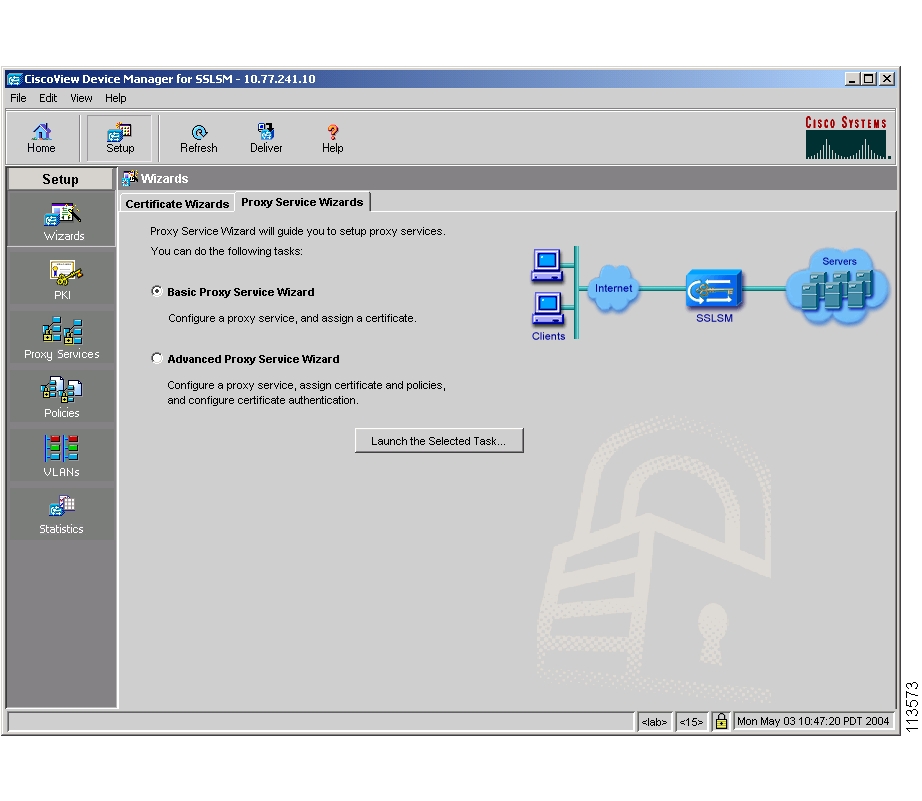
Proxy Service Wizards
CVDM-SSLSM supports the following proxy service wizards. You can use the basic Proxy Service Wizard to configure a proxy service and assign a certificate. The advanced proxy service wizards helps you to configure the proxy service, assign a certificate and policies, and configure peer certificate authentication.
•
Figure 7-1 Proxy Service Wizards
Basic Proxy Service Wizard
The Basic Proxy Service wizard helps you set up a server proxy service or a client proxy/backend encryption service.
To launch the basic proxy service wizard:
Step 1
Step 2
Step 3
Step 4
Step 5
To create a proxy service:
Step 1
Step 2
Step 3
Defining Proxy Service Name and Type
This page of the basic proxy service setup wizard helps you define the name and type of the proxy service.
The following fields appear:
Click < Back to read the welcome page.
Click Next > to move to step 2 of the task.
Configuring Client Side (Virtual) and Server Parameters
This page of the basic proxy setup wizard helps you in configuring the client side parameters and server parameters. You can configure NAT and also enable SSL Version 2.0 connections to be forwarded to a server using this page.
The following fields appear:
Click < Back to move back to Step 1 of the basic setup wizard.
Click Next > to move to step 3 of the basic setup wizard.
Assigning Certificate to Proxy Services
This page of the Basic Proxy Service setup wizard helps you assign a certificate to the proxy service.
The following fields are displayed:
Certificate
Certificate Trustpoint
Select one of the following options:
•
•
Status
Displays the status of the certificate.
Selecting Available Certificate Trustpoints
The available certificate Trustpoints dialog box provides information on the certificate Trustpoints available for the proxy services.
The following fields appear:
Select a Trustpoint, then click OK to select an existing certificate Trustpoint.
Viewing Proxy Service Setup Summary
From this window you can view a summary of the configured settings. You can review the configuration information.
Click < Back to move to the previous page of the wizard.
Click Finish to complete the setting up of proxy service.
Advanced Proxy Service Wizard
The Advanced Proxy Service wizard helps you in setting up a server proxy service or a client proxy/backend encryption service, and allows you to configure certificate authentication. The wizards also helps you set up policies for client (virtual) side and server connections.
To launch the advanced proxy service wizard:
Step 1
Step 2
Step 3
Step 4
Step 5
To create a proxy service:
Step 1
Step 2
Step 3
Step 4
Defining Proxy Service Name and Type
This page of the Advanced Proxy Service setup wizard helps you in defining proxy service name and type.
The following fields appear:
Configuring Client Side (Virtual) and Server Parameters
This page of the advanced proxy setup wizard helps you in configuring the client side parameters and server parameters. You can configure NAT using this page and also enable SSL Version 2.0 connections to be forwarded to a server.
The following fields appear:
Click < Back to move back to Step 1 of the basic setup wizard.
Click Next > to move to step 3 of the basic setup wizard.
Assigning Certificate to Proxy Service
This page of the advanced proxy setup wizard helps you in assigning a certificate to the proxy service.
The following fields appear:
Assigning Policies to Proxy Services
This page of the wizard helps you to assign policies to virtual and server proxy services.
The following fields appear:
The dialog box helps you to:
•
•
•
Assigning TCP Policy to Proxy Services
This page of the wizard helps you to assign policies to virtual and server proxy services.
The following fields appear:
To assign a policy:
Step 1
Step 2
Step 3
Viewing Advanced Proxy Service Setup Summary
The summary page of the Advanced Proxy Service setup wizard provides the details of the proxy service you have configured.
Click < Back to move to step 3 of the wizard.
Click Finish to complete the setting up of proxy service.
Selecting Available NAT Pools
The Available NAT Pools dialog box provides information on the NAT Pools configured on the SSLSM.
Select a NAT Pool from the list, then click OK to select a NAT Pool.
The following fields appear:
Selecting Available CA Pools
The Available CA Pools dialog box provides information on the CA Pools configured on the SSLSM.
Select a CA Pool from the list, then click OK to select a CA Pool.
The following fields appear:
Name
The name of the CA Pool.
Number of Trustpoints
The number of Trustpoints associated to each CA Pool.
Status
The status of the CA Pool.
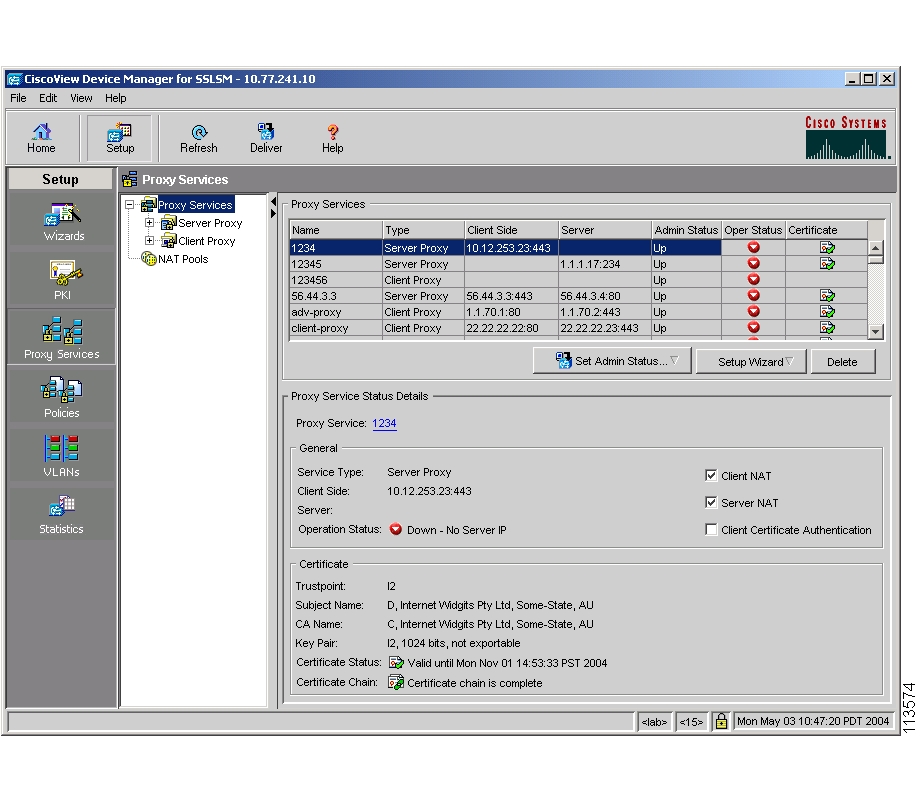
Viewing Proxy Services
Figure 7-2 Proxy Services
To view proxy services:
Step 1
Step 2
Step 3
•
•
Step 4
The following fields appear:
Select any of the proxy service from the table, the following information appears for the selected service:
Proxy Service Status Details
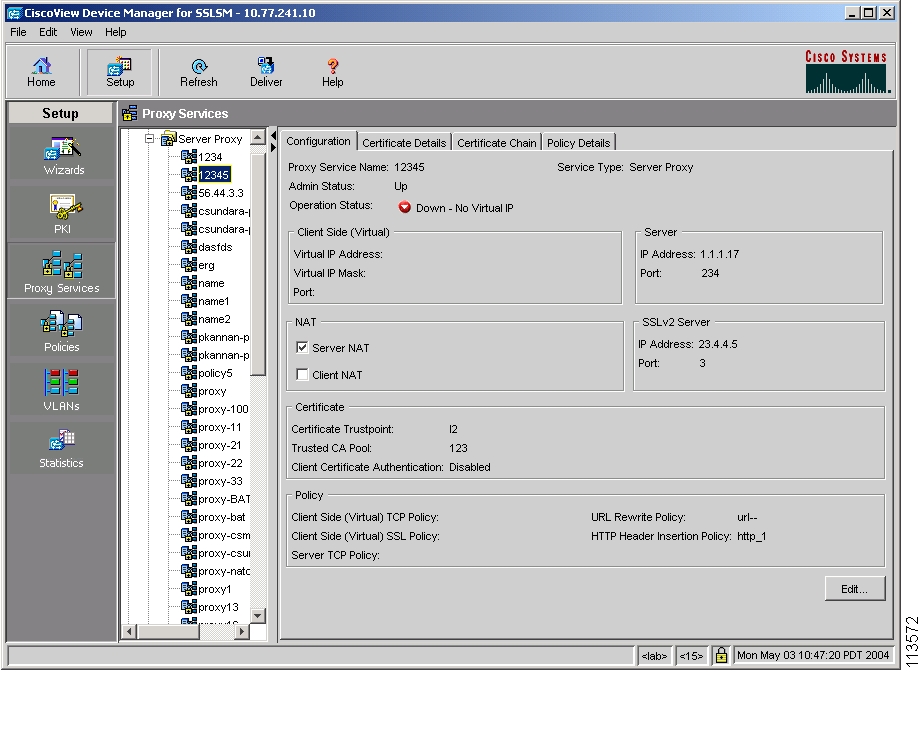
Viewing Proxy Services Details
Figure 7-3 Proxy Service Details
To view the configured proxy services:
Step 1
Step 2
Step 3
•
•
Step 4
You can also view the details by clicking the proxy service hyperlink in the proxy service status details panel
The following fields appear:
Click Certificate Details Tab to view the Certificate details.
Click Certificate Chain Tab to view the Certificate chain.
Figure 7-4 Proxy Service - Certificate Chain
Click Policy Details Tab to view the Certificate chain.
Editing Proxy Service Configuration
Step 1
Step 2
Step 3
•
•
Step 4
Step 5
The following information appears:
To edit the certificate details of the service, click Certificate tab. The following fields appear:
To edit the policy details of the service, click Policy tab. The following fields appear:
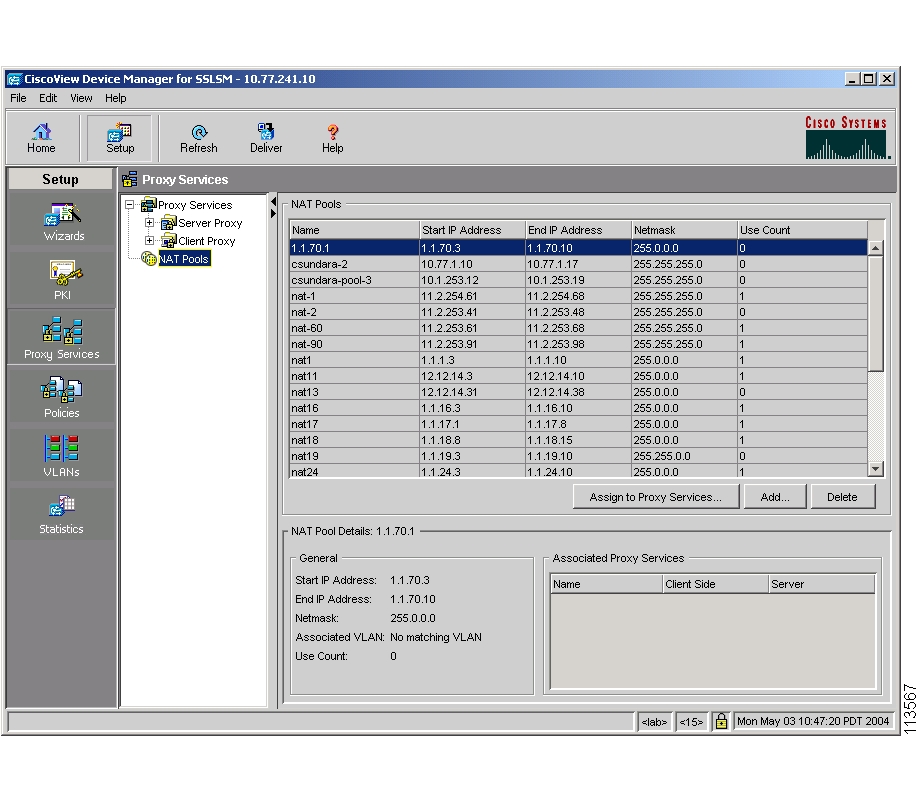
NAT Pools
CVDM-SSLSM allows you to create Network Address Translation (NAT) pools.
Figure 7-5 NAT Pools
This section describes the following topics:
•
Understanding NAT Pools
Client connections originate from the client and are terminated on the SSL Services Module. Server connections originate from the SSL Services Module.
You can configure client NAT, server NAT, or both, on the server connection.
Server NAT
If you configure server NAT, the server IP address is used as the destination IP address for the server connection. If the server NAT is not configured, the destination IP address for the server connection is the same as the virtual IP address for which SSL Services Module is a proxy.
Client NAT
If you configure client NAT, the server connection source IP address and port are derived from a NAT pool. If client NAT is not configured, the server connection source IP address and port are derived from the source IP address and source port of the client connection.
Allocate enough IP addresses to satisfy the total number of connections supported by the SSL Services Module (256,000 connections). Assuming you have 32,000 ports per IP address, configure 8 IP addresses in the NAT pool. If you try to configure fewer IP addresses than required by the total connections supported by the SSL Services Module, the command is rejected.
Viewing NAT Pools
Step 1
Step 2
Step 3
The following information appears:
Select a NAT Pool, then click Assign to Proxy Services to assign a NAT Pool to a proxy service
Click Add... to add a new NAT Pool.
Select a NAT Pool, then click Delete to delete a NAT Pool.
Step 4
Adding NAT Pools
Step 1
Step 2
Step 3
Step 4
Alternatively, you can add NAT Pools using the Wizards.
Deleting NAT Pools
Step 1
Step 2
Step 3
Step 4
Assigning NAT Pools to Proxy Services
Step 1
Step 2
Step 3
Step 4
Step 5
You can remove the a proxy service from the list. Select a service from the list, then click << Remove.
You can clear all the services selected for assigning to a policy. Select a service from the list, then click Clear All.
Step 6
Selecting Available CA Pools
The following information appears:
Name
Name of the CA Pool.
Number of Trustpoints
Number of Trustpoints associated with the CA Pool.
Status
Indicates the status of the CA Pool.
Select a CA Pool from the table, then click OK.
Selecting Available NAT Pools
The following information appears:
Select a NAT Pool from the table, then click OK.
Selecting Available Certificate Trustpoints
The following information appears:
Trustpoint
The name of the Trustpoint.
Certificate Authority (CA)
The certificate authority details in the certificate.
Subject
The subject in the certificate.
Select a Certificate Trustpoint from the table, then click OK.
How Do I...
This section describes on how to achieve a task. The following question is answered:
•
How Do I Setup a Proxy Service?
You can use Proxy Service Setup Wizards to create a proxy service.
The Basic Proxy Service wizard helps you set up a server proxy service or a client proxy/backend encryption service.
Step 1
Step 2
Step 3
Step 4
Step 5
Step 6
Step 7
Step 8
Step 9
Step 10
Troubleshooting Proxy Services
This section describes the proxy service operations status and the possible cause.
![]()
![]()
![]()
![]()
![]()
![]()
![]()
![]()
Posted: Fri Apr 15 04:03:19 PDT 2005
All contents are Copyright © 1992--2005 Cisco Systems, Inc. All rights reserved.
Important Notices and Privacy Statement.