cc/td/doc/product/rtrmgmt/cnm_uc/cnm_uc10
hometocprevnextglossaryfeedbacksearchhelp
PDF

Table Of Contents

Using the Web Interface

Navigating Through the Web Interface

Home Workspace

Devices Tab

Reports Tab

Stopping and Starting the Web Server

Configuring the Web Interface to use IIS


Using the Web Interface


You can connect to the Cisco netManager web interface from any browser by entering its web address. This web address consists of the hostname of the Cisco netManager host and the web server port number. The default port number is 80.

For example, if your Cisco netManager host is named monitor1.cisco.com, then the web address will be: http://monitor1.cisco.com:80.


Note When you use the default port number (80), you do not have to include the port number in the address.


There are two default users on the Web server:

Administrator (Username: admin Password: admin)

Guest (Username: guest Password: <password box left blank>)

For more information about user privileges, see "User Management" section.

Navigating Through the Web Interface

The main menu for the web interface is housed within the Go button, located in the upper-left corner of your browser. The Go menu is visible from anywhere within the web interface.

From the Go menu, you can navigate to the areas you will use most in Cisco netManager, including your Home workspace views; your monitored devices list; Diagnostic Tools; the configuration of the Passive, Active, and Performance Monitor libraries; and Help.

The web interface is organized into three areas:

Home

Devices

Reports

You can access each of these areas by:

Clicking on an icon from the Go menu.

Selecting one of the web interface tabs.

Home Workspace

The Cisco netManager Home Workspace is the first screen you see after logging in to the web interface. For more information on your Home Workspace, see "Understanding Workspaces."

Figure 4-1 shows an example of the Home Workspace page.

Figure 4-1 Home Workspace Page

Workspace Toolbar

The Workspace Toolbar provides links for accessing the Cisco netManager workspaces, and tools for managing workspace views and content.

Figure 4-2 shows an example of the Workspace Toolbar.

Figure 4-2 Workspace Toolbar

Add Content. Use this button to add workspace content to your workspace views.

Workspace View. Use this drop-down menu to edit your workspace views and to switch between workspace views.

Help. Use this button to view the Cisco netManager Help for the window you are currently viewing.

Cisco netManager Tabs

These tabs open the following Cisco netManager pages:

Home. Use this tab to access the Home workspace. See Home Workspace

Devices. Use this tab to access the Devices page. See Devices Tab.

Reports. Use this tab to access the Reports page. See Reports Tab.

Figure 4-2 shows an example of the Cisco netManager Tabs.

Figure 4-3 Cisco netManager Tabs

Devices Tab

The Devices tab is where you can manage and display monitored devices. For more information, see Chapter 5, "Managing Devices."

Figure 4-4 shows an example of the Devices page.

Figure 4-4 Devices Page
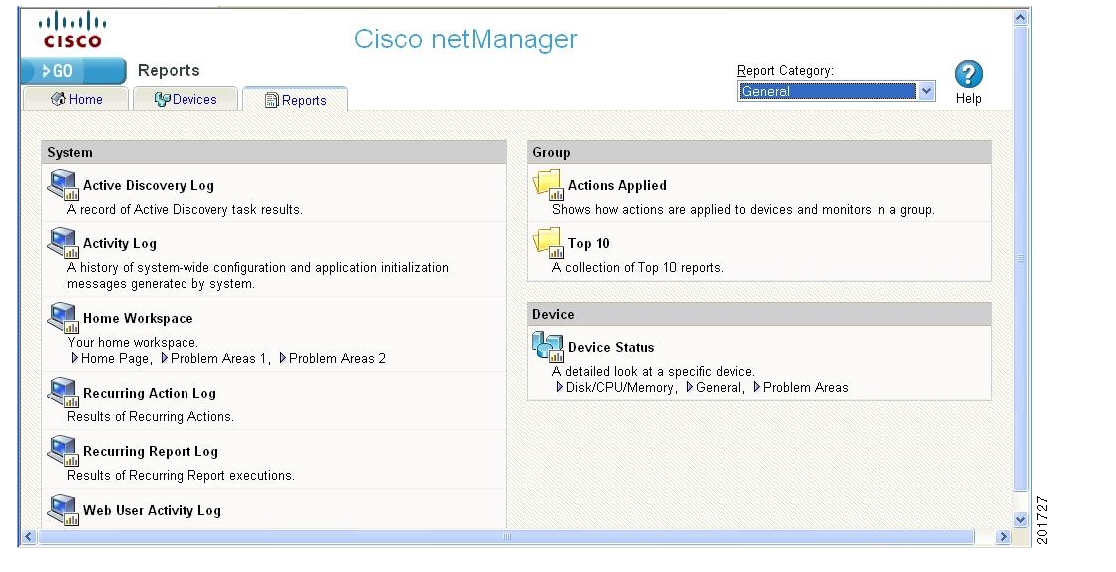
Reports Tab

The Reports tab opens the Reports page, which contains all of the Cisco netManager Full Reports. Reports are used to monitor and display historical data that has been collected during the operation of Cisco netManager. Once configured, these reports can help you troubleshoot problem areas on your network and allow easy access to important network information.

For more information, see Chapter 14, "Using Full Reports."

Reports can be sent on a regular basis to an email address you identify through the Recurring Report feature. Reports configured and viewed from the Reports tab are fully-functioning reports. Mini-versions of these reports, or workspace content, are available for display purposes only in a workspace.

Figure 4-5 shows an example of the General Reports page.

Figure 4-5 General Reports Page

Report Category Menu

The Report Category drop-down list allows you to jump to different report categories.

Stopping and Starting the Web Server

For troubleshooting purposes, the first thing you may want to try is to restart the web server. This stops and restarts all Cisco netManager processes. To stop and restart the web server:


Step 1 Select Start > Programs > Cisco netManager 1.0 > Daemons > Stop. This stops the web server.

Step 2 Select Start > Programs > Cisco netManager 1.0 > Daemons > Start. This restarts the web server.


Configuring the Web Interface to use IIS

Follow these steps to run the Cisco netManager web interface through an IIS (Internet Information Services) Web server.


Step 1 Stop the following services and applications:

Cisco netManager Engine service

Cisco netManager Web service

Task Tray application

Step 2 Allow MSDE to use SQL Server Authentication. Use Regedit.exe to set:

HKEY LOCAL MACHINE\Software\Microsoft\Microsoft SQL Server\WHATSUP\MSSQLServer\LoginMode=0

Step 3 Restart the MSSQL$WHATSUP service.

Step 4 Specify a username and password for Cisco netManager to use when connecting to MSDE:

c. Go to Control Panel > Administrative Tools > Data Sources and select the System DSN tab.

d. Select the Cisco netManager DSN and click Configure. The Configuration wizard appears.

e. Verify that the fields in the first dialog are correct and click Next.

f. On the second dialog, verify that the With SQL Server authentication using login ID and password entered by the user option is selected. On this same dialog specify user=sa and password=wug_sa and click Next.

g. On the third dialog, ensure that the first option is selected and Cisco netManager appears in the drop-down menu and click Next.

h. Continue to click Next until you come to the final dialog, and then click Finish.

Step 5 Stop IIS.

Step 6 Create a virtual directory in IIS named NmConsole which points to <Cisco netManager install path>\HTML\NmConsole\. Go to Windows Control Panel > Administrative Tools > Internet Information Services. Right-click on Default Web Site  and choose New > Virtual Directory. We strongly recommend that you name this new directory NmConsole.

Step 7 Enable Parent Paths for the default web site (to support use of the relative paths used to navigate in the Cisco netManager web interface).

a. Go to Control Panel > Administrative Tools > Internet Information Services.

b. In the IIS Manager, expand Web sites, then right-click on the newly created NmConsole virtual directory and choose Properties.

c. On the Virtual Directory tab, click Configuration.

d. On the Options tab, select Enable parent paths. Click OK.

Step 8 Set authentication for the virtual directory you set up in Step 6. To do this:

a. In IIS Manager, right-click the virtual directory and select Properties, then select the Directory Security tab.

b. In Anonymous access and authentication control, click Edit. Enable anonymous access and set the username and password to a local administrator. Click OK.

Step 9 For IIS version 6:

In IIS Manager, select Web Service Extensions and allow Active Server Pages.

Step 10 Restart IIS.

Step 11 Set the internal web server to port 8080, or disable it. If you disable the Cisco netManager web interface, ensure that the reports still load correctly.

Step 12 Restart the services and applications you stopped in Step 1.

Step 13 Connect to the web interface by opening a browser and entering the following address in the Address box: http://ip_address/NmConsole/

Notes:

There is a known issue with IIS when adding a device through IIS. You may receive an "error scanning device" error. There are two methods of resolving this issue:

The simplest is to set the virtual directory to run under low application protection (http://support.microsoft.com/?id=326086). Use this if Cisco netManager is the only application using IIS.

If you have other sites/services running in IIS, you'll need to change the account used to launch the Cisco netManager processes. Follow these steps:

Open the Component Services control panel (Start > Run > dcomcnfg.exe)

Navigate to the COM+ Applications folder (Component Services > Computers > My Computer).

Right-click the IIS Out-Of-Process Pooled Applications item and choose Properties.

Select the Identity tab and change the user in the This user section to an account with administrator access.

Restart IIS (be sure to restart the entire IIS suite, not just the web services).

For IIS 6 you will also need to change the account used for the Application Pool that Cisco netManager is using in IIS.

Open the IIS manager (Start > Run > inetmgr).

Browse to Application Pools, then right click on DefaultAppPool and select properties.

Select the Identity tab, set the Application Pool Identity to Configurable, then enter an account with administrator access and click OK.

Restart IIS (be sure to restart the entire IIS suite, not just the web services).


hometocprevnextglossaryfeedbacksearchhelp

Posted: Fri Dec 21 13:53:35 PST 2007
All contents are Copyright © 1992--2007 Cisco Systems, Inc. All rights reserved.
Important Notices and Privacy Statement.