Creating User Groups and Using the Technology-Specific Commands
This appendix includes information and instructions for creating user groups through the Cisco EMF Groups application and for using the technology-specific commands from the Tools menu.
You can customize user access to certain software functions by using the Cisco EMF user access control feature. Access to features can be restricted on the basis of user access level to a subset, or group, of these features. For example, users for a particular site or region in which a site belongs should administer objects that are within that site.
Accessibility includes the following four levels of user access:
Technical support (T)
Provisioning (P)
Operations (O)
Network management (N)
Creating User Groups
To create a user group, complete the following steps:
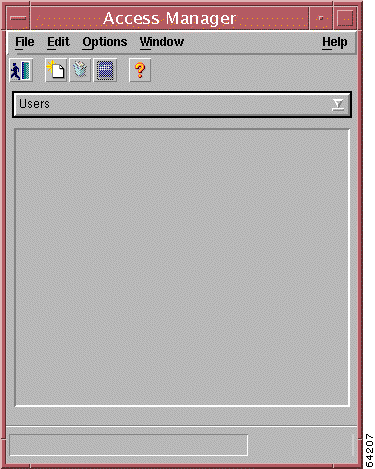
Step 1 Click the Access icon on the Cisco EMF Launchpad window to open the Access Manager window. (See Figure B-1.)
Figure B-1 Access Manager Window
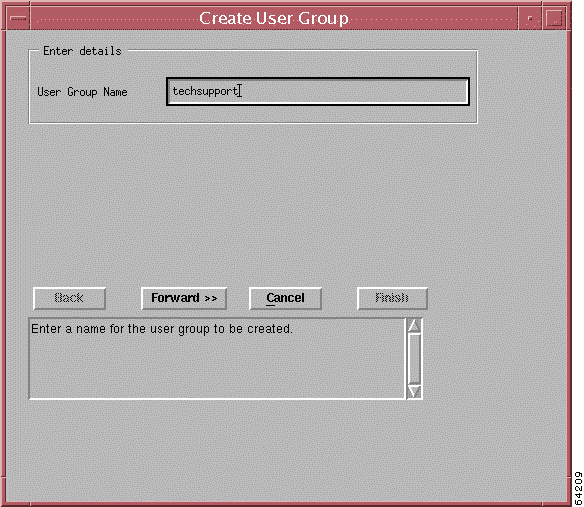
Step 2 Choose Create > User Group from the Edit menu.
The Create User Group window opens. (See Figure B-2.)
Figure B-2 Create User Group Window
Step 3 In the User Group Name field, enter the name of the user group that you want to create, for example, techsupport.
Step 4 Click Forward.
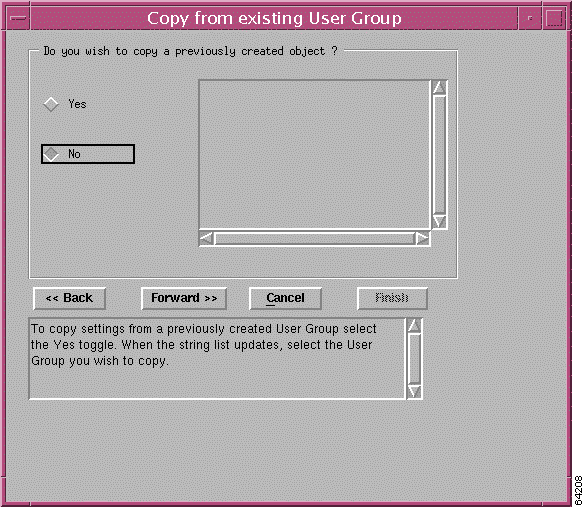
The Copy from Existing User Group window opens. (See Figure B-3.)
Figure B-3 Copy from Existing User Group Window
If you want to use the specifications of a current group, you can click Yes and choose a group whose specifications you want to copy.
Step 5 If you are creating a new, customized user group, click No, and then click Forward.
The Select Users window opens.
Note An administrator will have already set up the users on the system for which you are creating a
user group.
Step 6 In the Available Users column on the left side of the window, highlight the names of the users that you want to include in this user group.
Step 7 Click the right-pointing arrow to move the name of that user to the Selected Users column on the right.
Step 8 Repeat Step 7 for each user that you want to add to the Selected Users column.
Step 9 Click the left-pointing arrow to move a user from the Selected Users column back to the Available Users column if you do not want that user to be a part of the group you are creating.
Step 10 Click Forward.
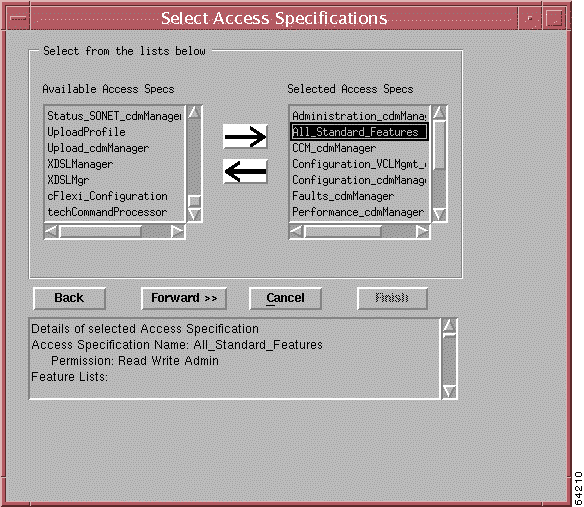
The Select Access Specification window opens. (See Figure B-4.)
Figure B-4 Select Access Specification Window
Step 11 Highlight the specifications that you want to include in this user group from the Available Access Specifications list on the left side of the window.
Step 12 Click the right-pointing arrow to move the name of that specification to the Selected Access Specifications column on the right.
Step 13 Repeat Step 11 for each specification that you want to add to the Selected Access Specifications column.
Note For all groups, be sure that you click All_Standard_Features in the Available Access
Specifications column on the Select Access Specifications window.
Step 14 Click the left-pointing arrow to move a user from the Selected Access Specifications column back to the Available Access Specifications column if you do not want that specification to be a part of the user group definition.
Step 15 Click Forward.
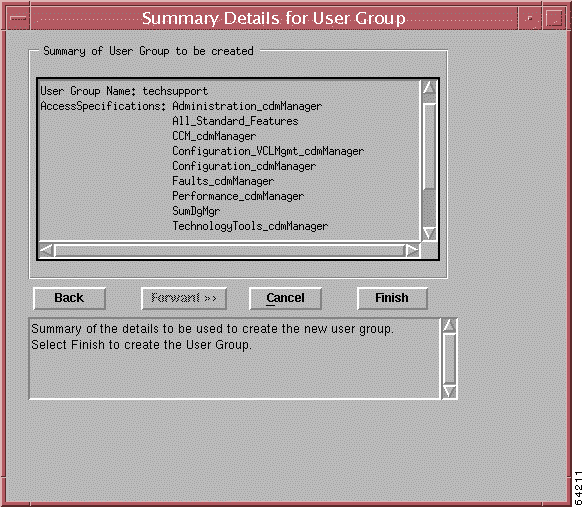
The Summary Details for User Group window opens. (See Figure B-5.)
Figure B-5 Summary Details for User Group
This window displays the following information about the group that you have created (with examples):
User Group Name: techsupportexample
Users: techsupport
Access Specification: ADSL_Configuration
Step 16 Click Finish to complete the creation of the user group.
Access Specifications for the User Groups
The following sections list the specifications for each of the four user groups. Table B-1 provides an overview of each specification and its purpose, and it indicates the user group in which the specification is included.
Table B-1 Access Specifications for User Groups
Access Specification
Purpose/Service
Technical Support
Provisioning
Operations
Network Management
Administration_cdmManager
IOS password, SNMP, Backup/Restore windows
x
x
All_Standard_Features
Basic Cisco EMF functionality
x
x
x
x
CCM_cdmManager
Cross connection management
x
x
cdmManager
Deploy DSLAM
x
cFlexi_Configuration
Flexi card configuration
x
Configuration_cdmManager
Generic configuration windows
x
x
Configuration_E3_cdmManager
E3/DS3 configuration windows
x
Configuration_VCLMgmt_ cdmManager
VCL management configuration
x
DMT_Status
x
x
Faults_cdmManager
Fault Management windows
x
x
x
FrAtmCM
x
Performance_ADSL
ADSL Performance
x
Performance_cdmManager
Generic Performance windows
x
Performance_VCLMgmt_cdmManager
VCL management performance
x
Profile_XDSLMgr
XDSL Interface Manager window
x
x
QoS_cdmManager
Quality of Service windows
x
Status_ADSL(Status)
x
x
x
Status_DMT_cdmManager
DMT Inventory Status
x
x
StatusInvSum_ISSMgr
Status and Inventory windows
x
x
x
StatInvSumm_cdmManager
Status and Inventory windows
x
x
x
subtendManager
Subtend Manager windows
x
SumDgMgr
Chassis Summary windows
x
x
x
techCommandProcessor
Technology-specific commands
x
x
x
TechnologyTools_cdmManager
Telnet commands
x
x
x
Upload_cdmManager
Upload Profile windows
x
ViewLogs_cdmManager
Syslog and Event Command windows
x
x
x
x
The following sections list the access specifications for each group.
Technical Support Group (T)
The technical support (T) group should contain the following access specifications:
Administration_cdmManager
All_Standard_Features
CCM_cdmManager
cdmManager
cFlexi_Configuration
Configuration_cdmManager
Configuration_E3_cdmManager
Configuration_VCLMgmt_cdmManager
DMT_Status
Faults_cdmManager
FrAtmCM
Performance_ADSL(Performance)
Performance_cdmManager
Performance_VCLMgmt_cdmManager
Profile_XDSLMgr
QOS_cdmManager
StatInvSum_cdmManager
Status_ADSL(Status)
Status_DMT_cdmManager
StatusInvSum_ISSSMgr
subtendManager
SumDgMgr
techCommandProcessor
TechnologyTools_cdmManager
Upload_cdmManager
ViewLogs_cdmManager
Provisioning Group (P)
The provisioning (P) group should contain the following access specifications:
All_Standard_Features
CCM_cdmManager
Configuration_cdmManager
Faults
Profile_cdmManager
Profile_XDSLMgr
QoS_cdmManager
StatInvSumm_cdmManager
Status_ADSL(Status)
Status_DMT_cdmManager
StatusInvSum_ISSMgr
SumDgMgr
techCommandProcessor
TechnologyTools_cdmManager
ViewLogs_cdmManger
Operations Group (O)
The operations (O) group should contain the following access specifications:
All_Standard_Features
DMT_Status
Faults_cdmManager
Status_ADSL(Status)
StatInvSum_cdmManager
StatusInvSum_ISSMgr
SumDgMgr
techCommandProcessor
TechnologyTools_cdmManager
ViewLogs_cdmManager
Network Management Group (N)
The network management (N) group should contain the following access specifications:
Administration_cdmManager
All_Standard_Features
ViewLogs_cdmManager
Using the Technology Commands and Tools
This section describes how to invoke certain IOS commands and initiate a Telnet session from the object menu. The IOS commands are executed by using Telnet sessions to the node. You can access the technology commands from the chassis, module (or line card), and interface levels. The choices that display depend on the type of object you click to access the menu and include:
Save Running Config (chassis)
Check Alarms on the Chassis (chassis)
Set Chassis Temperature-rating as Commercial (chassis)—sets the temperature for commercial Cisco 6015 DSLAMs
Set Chassis Temperature-rating as OSP (chassis)—sets the temperature for Cisco 6015 DSLAMS that are specified as outside plant
Check Chassis Temperature Status (chassis)
Show run int atm (interface)
Show dsl int atm (interface)
Show atm vc traffic int atm (interface, PVC, and SPVC objects)
Show atm vc int atm (interface)
Clear ATM int (interface)
Shut (interface)
No Shut (interface)
The Technology Tools menu item contains one choice, Telnet, which opens a telnet window.
Invoking IOS Commands Using the Technology-Specific Commands Menu Choices
Complete the following steps to invoke the IOS commands:
Step 1 Right-click the icon for an object on the left side of the Map Viewer window from the Component Managed view or the Physical view.
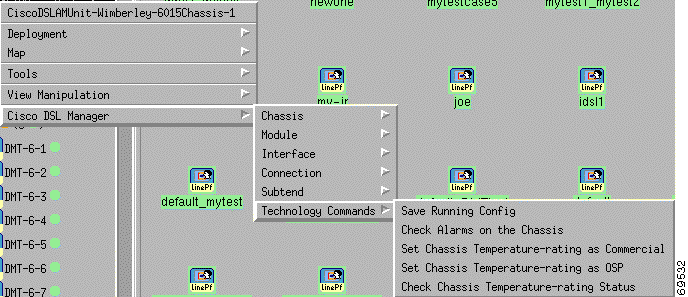
The Technology Commands menu displays. Examples of the menus are shown in Figure B-6and Figure B-7.
Figure B-6 Example of Chassis Technology Commands Menu
Figure B-7 Example of Interface Technology Commands Menu
Step 3 Place your cursor over Technology Commands on the object menu and choose from the options that display.
The menu that displays depends on whether you place your cursor over a DSLAM (chassis) or an interface. Figure B-6 shows an example of an object menu that opens when you access this menu from a module. Table B-2 describes the menu choices.
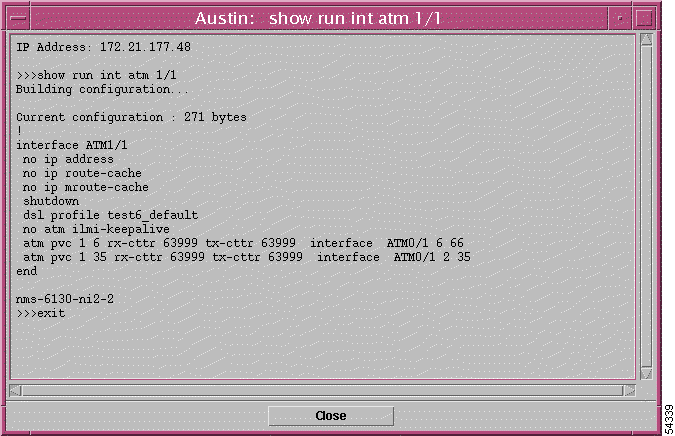
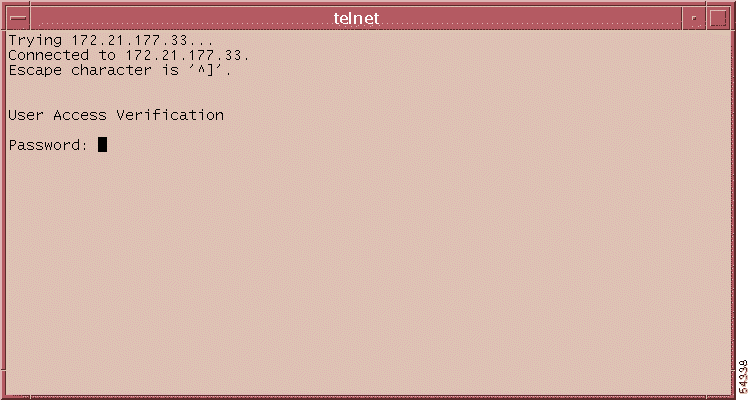
A CLI output window opens when you choose an item from the Technology Specific Commands menu. The name of the window that opens corresponds to the name of the DSLAM, the menu item that you choose, and the related module and slot numbers. An example of the CLI output window is shown in Figure B-8.
Figure B-8 Example of a CLI Output WIndow
In Figure B-8, the window that opens is a result of placing your cursor over a module and choosing Technology Specific Commands > show run int atm. The 1/1 in the window title refers to module 1 slot 1.
Table B-2 describes the Technology Specific Commands menu choices, which open a telnet window and issue an IOS command to the IP address of the associated DSLAM.
Table B-2 Technology Specific Commands
Command
Description
Restrictions
Chassis Technology Commands
Save Running Config
Choose this item from a DSLAM (chassis object) to issue the Save Running Config command and manually sync up the IOS running configuration or the IOS startup configuration.
Note After you apply a DSL profile, you need to use the Save Running Config option to sync up the two configurations. This process is different from that used in earlier CDM releases.
None
Check Alarms on the Chassis
Choose this item from a DSLAM (chassis object) to issue the show facility-alarm status command and transfer the IOS login user name and login password.
None
Set Chassis Temperature-rating as Commercial
Choose this item from a DSLAM (chassis object) to issue the set temperature rating command to for commercial Cisco 6015 DSLAMs. This is the default.
A temperature rating mismatch alarm is triggered when any installed system component has a different temperature rating than the system temperature rating setting.
Commercial Cisco 6015 DSLAMs only.
Set Chassis Temperature-rating as OSP
Choose this item from a DSLAM (chassis object) to issue the set temperature rating command for outside plant environment (OSP) Cisco 6015 DSLAMs.
OSP Cisco 6015 DSLAMs only.
Check Chassis Temperature-rating Status
Choose this item from a DSLAM (chassis object) to issue the show environment command and display information about system temperature settings.
Interface Technology Commands
show run int1 atm
Choose this item from an interface object (line card) to issue the show run int atm command and transfer the IOS login user name, login password, enable password, slot number, and port number.
None
show dsl int atm
Choose this item from an interface object (line card) to issue the show dsl int atm command and transfer the IOS login user name, login password, enable password, slot number, and port number.
None
show atm vc traffic int atm
Choose this item from an interface object (line card), PVC, or SPVC object to issue the show atm vc traffic int atm command and transfer the IOS login user name, login password, enable password, slot number, and port number.
None
show atm vc int atm
Choose this item from an interface object (line card) to issue the show atm vc int atm command and transfer the IOS login user name, login password, enable password, slot number, and port number.
None
clear atm int
Choose this item from an interface object (line card) to issue the clear ATM int command and transfer the login user name, login password, slot number, and port number.
Only DSL line cards support this command.
shut
Choose this item from an interface object (line card) to issue the shut int atm command and transfer the login user name, login password, slot number, and port number.
Only DSL line cards support this command.
no shut
Choose this item from an interface object (line card) to issue the no shut int atm command and transfer the login user name, login password, slot number, and port number.
To open a Telnet session from the CDM GUI, complete the following steps:
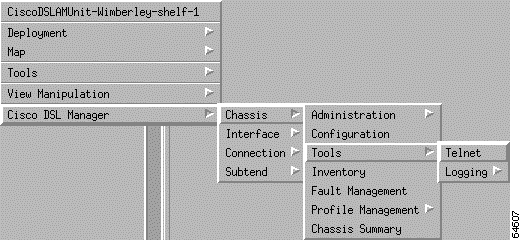
Step 1 From the left side of the Map Viewer window within any view, right-click the chassis to access the object menu opens. (See Figure B-9.)
Figure B-9 Chassis Tools Menu
Step 2 Choose Cisco DSL Manager > Chassis > Tools > Telnet to open the Telnet window.