|
|

This chapter describes how to use the Cisco ONS 15200 web interface software to perform administrator functions on the Cisco ONS 15200 system. An administrator can assign three different user levels:
Additionally, an administrator can access certain administrative functions of the Cisco ONS 15200 system. These functions are:
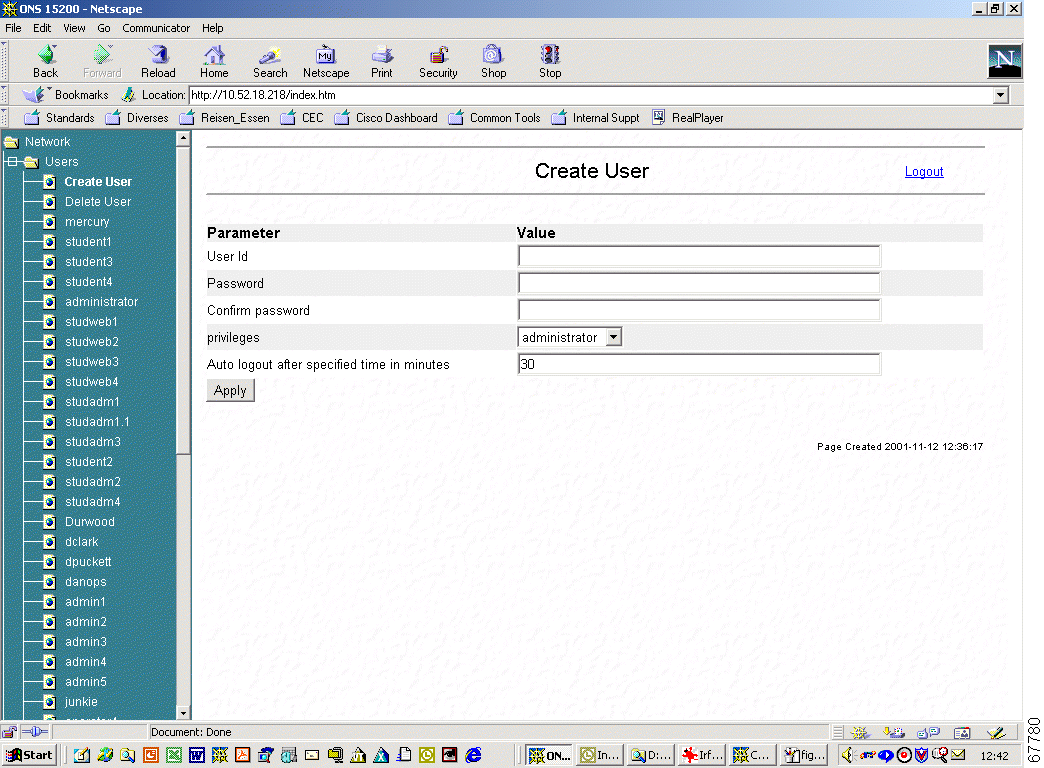
After logging in, click Users in the navigation area to view the screen in Figure 5-1.
Step 2 Type the new user's ID into the User Id field. The User Id (or user name) can be any string of 6 to 30 characters; valid characters are all the letters a to z, all the letters A to Z, the figures 0 to 9, and the underscore "_" character. The User Id cannot begin with a numeral.
Step 3 Type the password for the new user into the Password field. The Password can be any string of 6 to 30 characters; valid characters are all the letters a to z, all the letters A to Z, the figures 0 to 9, and the underscore "_" character.
Step 4 Retype the password for the new user in the Confirm Password field.
Step 5 Set the privileges—administrator, operator, or guest— for the new user in the Privileges field.
Step 6 Type the Auto logout time in minutes (the time of inactivity after which a user will automatically be logged out) into the Auto logout after specified time in minutes field.
Step 7 Click Apply.
Step 2 Click the check box of the user you want to delete.
Step 3 Click Apply. The user's access rights to the system are cancelled.

Step 2 Change the parameters shown in Table 5-1, as necessary.
| Parameter | Possible Values |
|---|---|
Privileges | Guest Operator Administrator |
State | Online Offline Disabled Suspended |
Timeout | Time of inactivity until logout, in minutes |
Password | See the "Create a New User" procedure for password requirements |
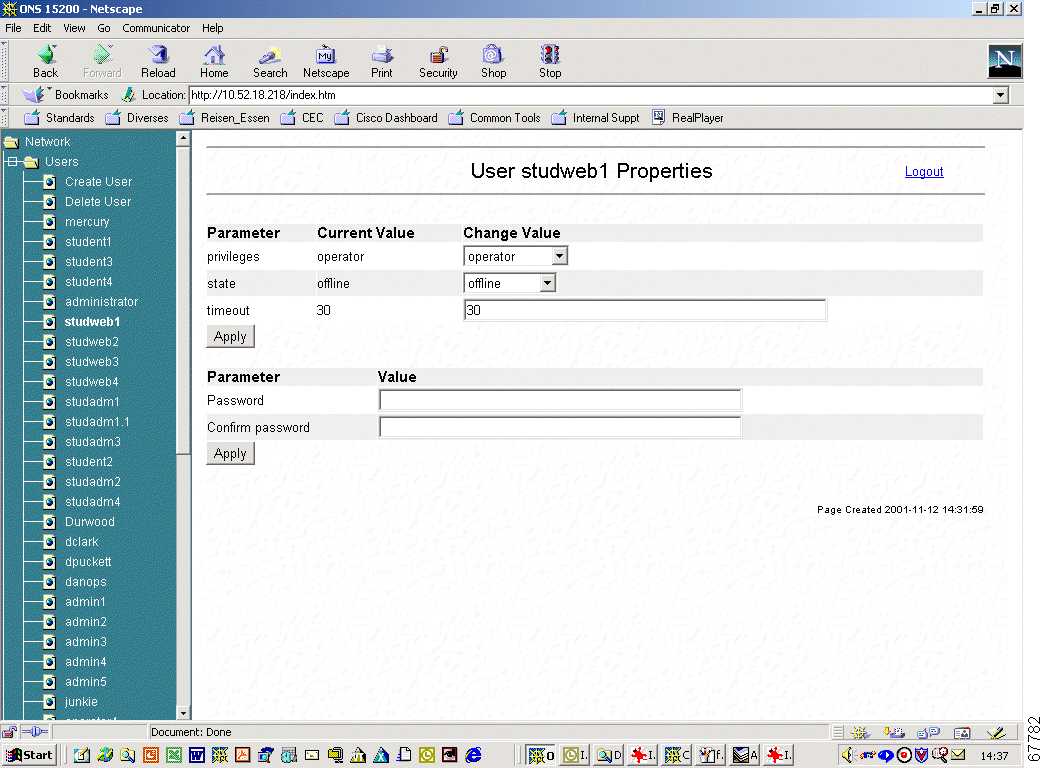
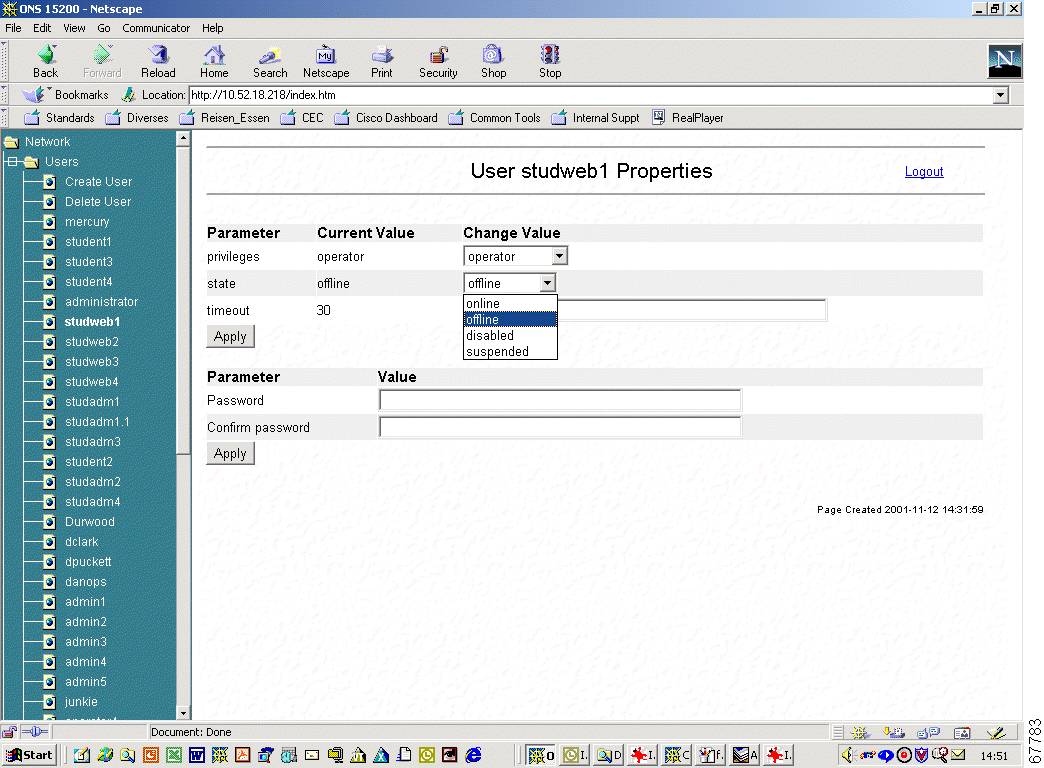
Figure 5-5 shows an example of possible values for the state parameter.
System administrative functions of the Cisco ONS 15200 system include:
Click This NCB in the navigation area to display the screen shown in Figure 5-6. The NCB Summary screen shows the status of the network element and its inventory data, software versions, and addresses.

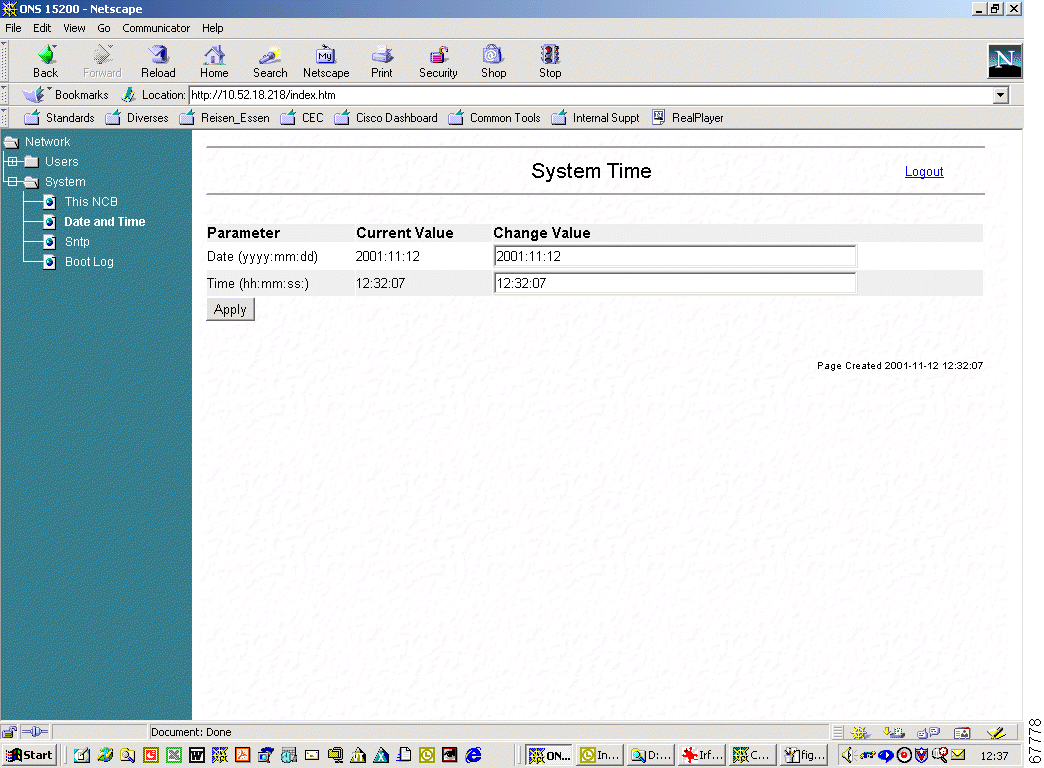
Step 2 To change the date, type the correct date using the format yyyy:mm:dd.
Step 3 To change the time, type the correct time using the format hh:mm:ss.
Step 4 Click Apply.
 |
Note If SNTP is configured, manually setting the date and time is obsolete. |
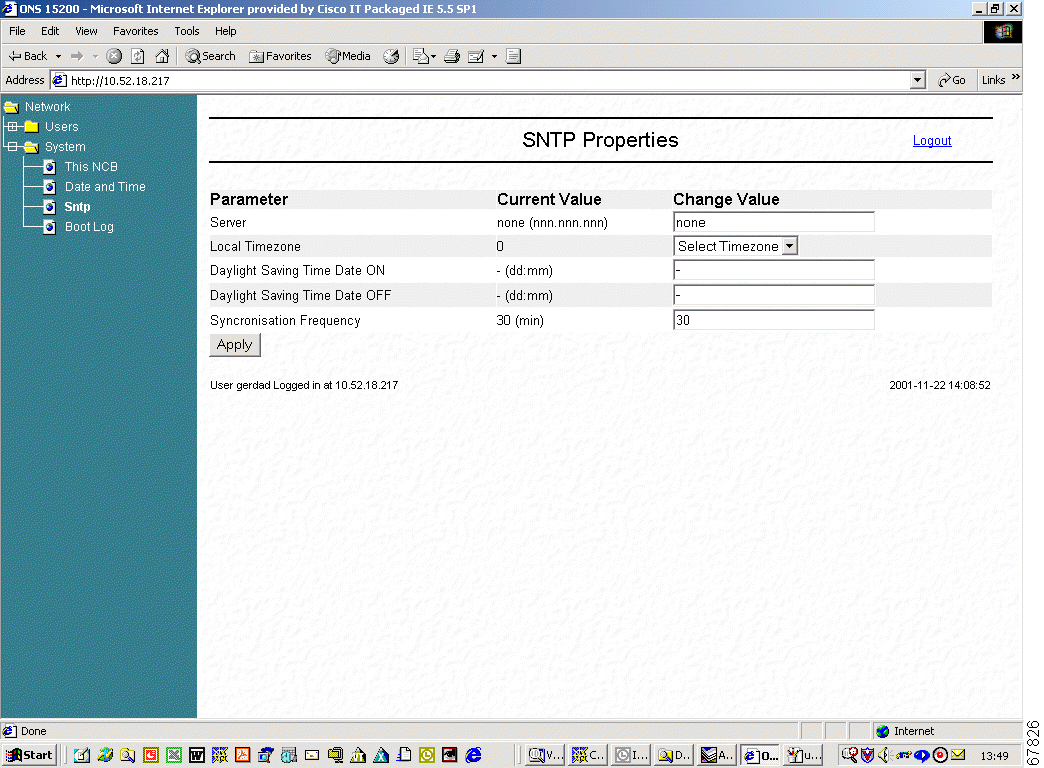
Step 2 To change any value, click the corresponding bar and edit the value.
Step 3 Click Apply.
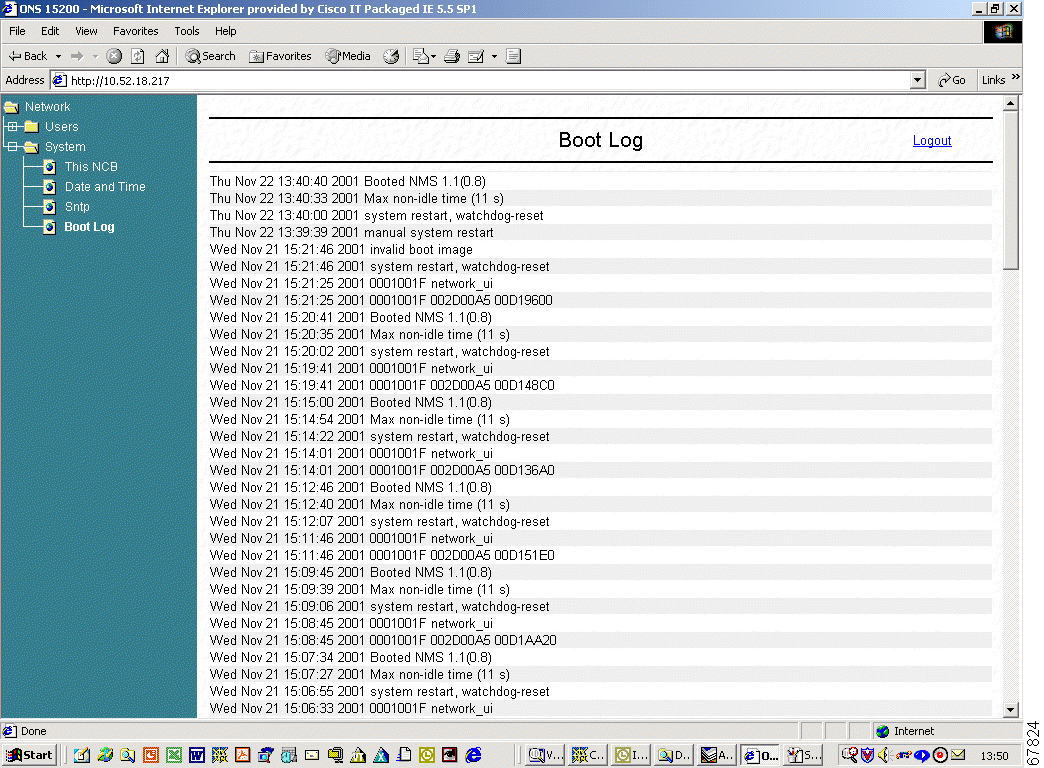
Click Boot Log to open the screen shown in Figure 5-9. This screen shows the boot activities including restarts and power failures, as well as their associated date and time stamps.
To terminate the session with this Cisco ONS 15200 system, click the logout symbol and close the web browser window.
|
Note You are logged out just by leaving the web page. |
Clicking the browser´s reload button also terminates the session.
![]()
![]()
![]()
![]()
![]()
![]()
![]()
![]()
Posted: Fri Jan 4 17:08:53 PST 2002
All contents are Copyright © 1992--2002 Cisco Systems, Inc. All rights reserved.
Important Notices and Privacy Statement.