|
|

Before running the Network Data Collector Installation Wizard, make sure your workstation meets the hardware and software requirements described in the following section.
The following are required and recommended workstation requirements for the Network Data Collector tool.
The installation process is straight forward with very little user intervention required. The entire process takes approximately 30 minutes. To install the Network Data Collector tool, complete the following steps:
Step 2 Click Next.
Step 3 A dialog box appears prompting you to enter the authentification key you obtained when ordering Network Data Collector. Enter the key and click Next.
Step 4 When prompted, select Custom or Default installation. Default installation will install Network Data Collector into the following directory: c:\Progam Files\CSCOpx. Choose Custom installation to select a different directory.
Step 5 Installation Wizard will then confirm the the following:
(a) Selected Components
(b) Target Directory
(c) Program Folder
Step 6 Installation Wizard then checks for required components on your workstation.
Step 7 Click OK when prompted.
Step 8 Installation Wizard then verfies that there is enough disk space on your workstation. If it determines there is enough, the required files are installed into the directory chosen in step 2.
Step 9 One installation is done, you will be prompted to restart your computer. Click OK to restart.
Before launching Network Data Collector for the first time, you'll need to set up your browser as shown below.
(a) For Netscape Navigator, select Edit > Preferences > Advanced. Select the Enable Java and Enable JavaScript check boxes, then click OK.
(b) For Microsoft Internet Explorer, select Tools > Internet Options > Advanced. Select the three checkboxes under the Java VM heading (Java logging enabled, Java JIT compiler enabled, and Java console enabled) , then click Apply.
(a) For Netscape Navigator, select Edit > Preferences > Advanced > Cache. Set both the Memory Cache and the Disk Cache to at least 4096 KBytes, then click OK.
(b) For Microsoft Internet Explorer, select Tools > Internet Options > General, then click Settings. Set the cache size to at least 4 MB using the Amount of disk space to use slider bar, then click OK. Click OK to close the Internet Options dialog box.
(a) For Netscape Navigator, select Edit > Preferences > Advanced. Select the Accept all cookies radio button, then click OK.
(b) For Microsoft Internet Explorer, select Tools > Internet Options > Advanced. Double-click the Security icon to display the items it contains, if they are not already displayed. Double-click the Cookies icon to display the items it contains, if they are not already displayed. Select the Always accept cookies radio button, then click OK.
(a) For Netscape Navigator, select Edit > Preferences > Advanced Cache. Select the Every Time radio button, then click OK.
(b) For Microsoft Internet Explorer, select Tools > Internet Options > General, then click Settings. Select the Every visit to the page radio button, then click OK.
After all browser settings have been set, you can launch the Network Data Collector tool by doing the following:
Step 2 Enter the username and password assigned to you.
Step 3 Click Connect.
The Network Data Collector drawer will be appear, displaying the eight Network Data Collector processes and an Advanced Settings folder.

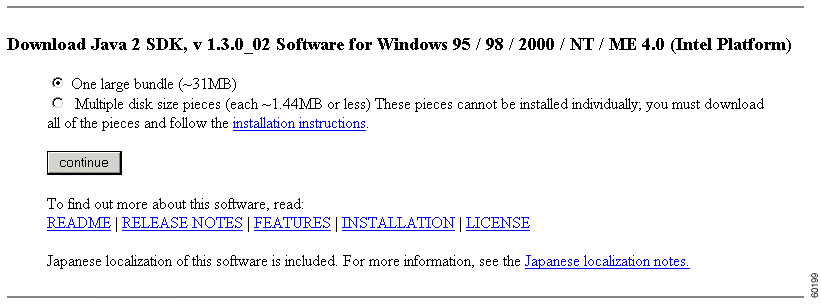
Step 2 Click Continue.
Step 3 Click Accept.
Step 4 Click on FTP Download.
If you have Netscape's "SmartDownload" activated, the Java Runtime Environment installation file will be downloaded to a pre-selected folder on your computer. If you do not have "SmartDownload" activated, you'll need to select a folder on your computer to download the file to.
Step 5 If you have Netscape's "SmartDownload" activated, the installation process will automatically start once the file has been downloaded to your computer. If you do not have "SmartDownload" activated, you'll need to go to the folder where you downloaded the file and click on Java Runtime Environment installation file begin the installation process.
Step 6 Follow all installation steps.
Step 7 Once Java 2 Runtime Environment has been installed, you can return to the Network Data Collector tool and re-select one of the eight processes.
The following processes must be running in Resource Manager Essentials (RME) for Network Data Collector to work correctly.
Verify the above processes are running by doing the following:
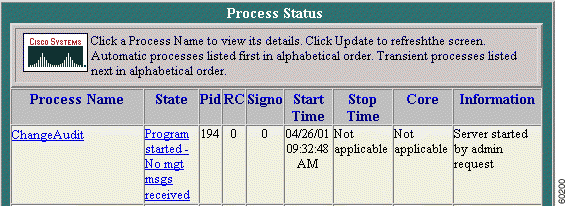
Step 2 Locate the above processes on the Process Status page that appears. 
Step 3 Verify in the State column that all of the processes are running or have been started.
Step 4 If a process is not running, select Process Management/Start Process from the Advanced Settings folder in the Network Data Collector drawer.

Step 5 Under Start, select Process.
Step 6 Select the process from the Process Name pull-down menu.
Step 7 Click Finish.
To switch authentication keys, do the following:
Step 2 Navigate to installation drive:\Program Files\CSCOpx
Step 3 Type replaceaudit (the key for the new audit). Make sure to type the new key correctly (case sensitive) and there are no space between numbers. Be careful with 0 and o, 1 and I.
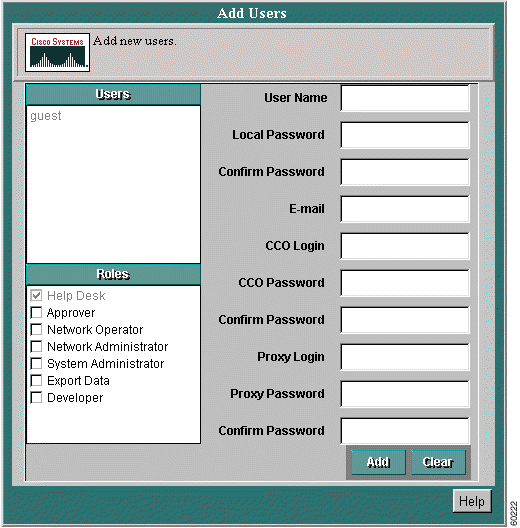
It is possible that you may not want every user to see every page or do certain things in Network Data Collector. The system administrator can assign who will see and have access to what.

![]()
![]()
![]()
![]()
![]()
![]()
![]()
![]()
Posted: Mon Mar 25 15:06:15 PST 2002
All contents are Copyright © 1992--2002 Cisco Systems, Inc. All rights reserved.
Important Notices and Privacy Statement.