|
|

This chapter contains setup information for installing the Micro Webserver 200 within your existing LAN using the Network Wizard. This chapter contains the following sections:
If you do not have a Dynamic Host Configuration Protocol (DHCP) server on your network, you must run the Network Wizard before configuring the Micro Webserver 200. The setup program for the Network Wizard is described throughout much of this chapter. If you do have a DHCP server on your network, refer to the setup information in the "Advanced Setup," "UNIX Network Wizard Setup," and "Sun Solaris Network Wizard Setup" sections at the end of this chapter.
Before you can use the Network Wizard, you must have Java Runtime Environment (JRE) version 1.1.3 (or later) installed on your client. In addition, your Micro Webserver 200 and your client PC or workstation must be on the same subnet to communicate with each other.
JRE is shipped on your Cisco Micro Webserver 200 Installation Tools and Utilities
CD-ROM. If you do not have JRE installed, the setup program will automatically detect that JRE is missing from your system, and it will install JRE. Once the setup program installs JRE on your PC or workstation, you can use the Network Wizard and other Java-based applications. If you have JRE installed on your client, the setup program automatically detects JRE and bypasses JRE installation.
Before you install the Cisco Micro Webserver 200 Installation Tools and Utilities
CD-ROM and use the Network Wizard, be sure that your system or network administrator verifies that your PC or workstation client is on the same subnet as the Micro Webserver 200 that you plan to set up. If it is not on the same subnet, the Network Wizard cannot communicate with the Micro Webserver 200.
The Network Wizard allows you to establish the Micro Webserver 200's IP address easily. The Micro Webserver 200 requires both an Ethernet address and an IP address to function properly on your network. Depending on how your network is designed, you might require a gateway address and a subnet mask address.
The following sections describe the installation sequence for the Network Wizard. You should use the Network Wizard when you first deploy your Micro Webserver 200. Most likely, you will only use this program one time. However, the initial installation of the Micro Webserver 200 is not the only time you should use this program. The following list identifies the circumstances that warrant using the Network Wizard.
For Windows 95 and Windows NT installations:
Step 1 Place the Cisco Micro Webserver 200 Installation Tools and Utilities CD-ROM into the CD-ROM drive of your Windows 95 or Windows NT system.
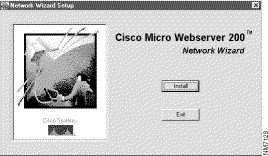
Step 2 The initial installation screen appears as shown in Figure 3-1.
Step 3 Click the Install button on the initial installation screen.
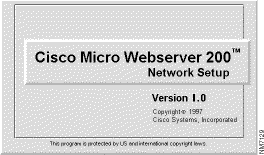
Step 4 The Network Wizard Setup screen appears as shown in Figure 3-2.
Step 5 If the setup program detects that your system does not have JRE version 1.1.3 (or later) installed, it will install JRE.
Step 6 The Network Wizard Setup program starts as shown in Figure 3-3.
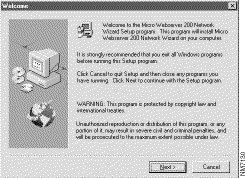
Step 7 When the Select Components screen appears, select Program File; then click the Next button.
Step 8 Read the Java Runtime Environment Binary Code License Agreement as shown in Figure 3-4, and click the Yes button.
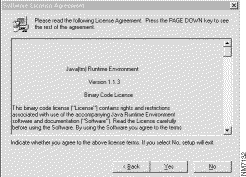
Step 9 Now the Wizard asks you to select a directory for JRE and associated files. Click the OK button.
Step 10 The Wizard checks for available disk space, and asks you to select a program folder as shown in Figure 3-5.
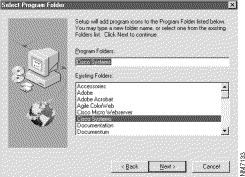
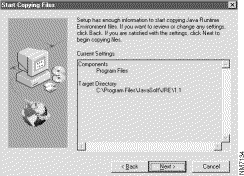
Step 11 After you verify the settings, click the Next button. The files are then copied to the directory you selected as shown in Figure 3-6.
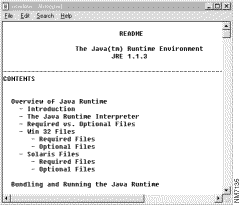
Step 12 The JRE README file is available for viewing as shown in Figure 3-7.
Step 13 The Cisco logo screen automatically displays.
Step 14 If you would like to launch the Network Wizard immediately, check the box as shown in Figure 3-8, and click the Finish button. If you do not want to launch the Network Wizard, leave the box unchecked and click the Finish button.
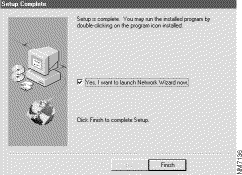
If you decide to launch the Network Wizard immediately and checked the checkbox in Step 14, a window flash with the Wizard's version number before the Wizard appears. Simultaneously, a menu bar will appear in your Windows taskbar for the Network Wizard.
The Wizard's Assign Network Address screen appears ready for entries. Using the Network Wizard, you can specify the network settings that are required to allow communication with the Micro Webserver 200. The settings that you can specify are as follows:
This network information can also be provided to the Micro Webserver 200 by a DHCP server residing on your network. However, if you do not have a DHCP server on your network or you have not configured your DHCP server to provide a permanent lease for the Micro Webserver 200, you must use the Network Wizard to define and store this information on the Micro Webserver 200. The following procedure walks you through the initial setup of your Micro Webserver 200.
Step 1 Enter the Host Name for your Micro Webserver 200. See Figure 3-9. Press the Tab key to move through the fields.
A name can consist of up to 15 alphanumeric characters. It cannot include any special characters, symbols, or punctuation. The name should be registered with your Domain Name Service (DNS) in order to be used by Web browsers to access the Micro Webserver 200.
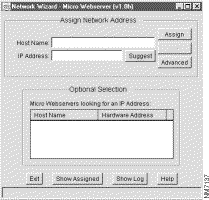
Step 2 Either enter an IP address that is not currently being used on the network, or click the Suggest button for the Network Wizard to suggest an IP address.
The IP address box displays the suggested value. The address is based on the IP address of the computer on which you are running the Network Wizard. When you click the Suggest button the Network Wizard also suggests a value for the subnet mask.
Step 3 If the value displayed in the IP Address field is acceptable, press the Tab key. Otherwise, type the number of a valid, unused IP address on this network, and press the Tab key.
Step 4 If you do not wish to modify the advanced settings for this Micro Webserver 200, go to Step 7. Otherwise, to get to the advanced features, click the Advanced button.
The Subnet Mask and Default Gateway fields are displayed as shown in Figure 3-10.
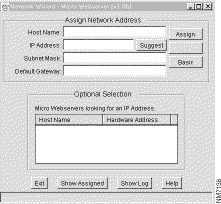
Step 5 If the value displayed in the Subnet Mask box is acceptable, press the Tab key. Otherwise, type the number of the subnetwork on which the Micro Webserver 200 will reside, and press the Tab key.
Step 6 In the Default Gateway box, type the IP address of the computer or router on your network that serves as the default gateway.
This value is not required, and if you leave this box empty, the Micro Webserver 200 will determine the appropriate default gateway.
Step 7 Click the Assign button to make this address available to a Micro Webserver 200.
Step 8 Soon, a Status window will appear to notify you that your IP address has been accepted and assigned to your Micro Webserver 200.
Step 9 If you want to view the list of Micro Webservers with IP address assignments, click the Show Assigned button.
Step 10 After you perform the initial configuration of your Micro Webserver 200, you can view the history of your changes by clicking the Show Log button from within the Network Wizard. This log is updated each time you make changes to your Micro Webserver 200 using the Network Wizard.
Congratulations! The Micro Webserver's host name and IP address are assigned. You have configured the initial network settings for your new Micro Webserver 200.
Step 11 The Network Wizard prompts you to complete configuration using a Web browser.
Step 12 Click the Yes button to proceed with installation.
Step 13 You can now ping your Micro Webserver 200 using any TCP/IP Ping utility. For example, if you set your IP address to 191.168.240.120, enter:
ping 191.168.240.120If you get an error message, try pinging another accessible host but not the Micro Webserver 200. Verify that all cables are connected and that you have correctly installed the Micro Webserver 200. If the problem persists, contact Cisco's Technical Assistance Center (TAC) at tac@cisco.com.
Now you should continue with the next chapter "Administrative Wizard."
As an alternative to the Network Wizard, you may set the Micro Webserver 200 IP address from the command line as follows:
Step 1 Using the supplied blue serial console cable, connect the console port on the rear panel of the Micro Webserver 200 to the serial port on your computer using the supplied DB9 to RJ-45M server serial adapter.
Step 2 Open your terminal emulator application, and change the port setting to the serial port you used first.
Step 3 In your terminal emulation program, set the communications parameters as follows:
Step 4 Log in to your Micro Webserver 200 as "admin". The default password is null.
Step 5 Press the Enter key at the Password prompt:
Username:adminPassword:mweb200#Step 6 Set the Micro Webserver 200 terminal to accept configuration commands. Through your terminal emulator program, enter:
mweb200#:configureStep 7 Set the Micro Webserver 200 host name, enter:
mweb200(config)#:hostname my-web(Where my-web is your Micro Webserver 200 host name.)
Step 8 Set the Micro Webserver 200 IP address and the subnet mask.
my-web(config)#ip address 175.17.0.0 255.255.255.0(Where 175.17.0.0 and 255.255.255.0 are the IP address and subnet mask.)
Step 9 Set the default-gateway address:
my-web(config)#ip default-gateway 175.17.0.0(Where 175.17.0.0 is the IP address.)
Step 10 To "write" the IP address, subnet mask, and default-gateway to memory, first "end" the configuration level of the system:
my-web(config)#endStep 11 Now save the configuration:
my-web#writeStep 12 Reboot the Micro Webserver 200:
my-web#reloadYou may want to ping your Micro Webserver 200 before you continue with the next chapter, "Administrative Wizard."
To ping your Micro Webserver 200 use any TCP/IP Ping utility. For example, if you set your IP address to 173.79.73.115, enter:
ping 173.79.73.115If you get an error message, try pinging another accessible host but not the Micro Webserver 200. Verify that all cables are connected and that you have correctly installed the Micro Webserver 200. If the problem persists, contact Cisco's Technical Assistance Center (TAC).
To set up the Micro Webserver 200 IP address, subnet mask, and default-gateway address on a UNIX system you have a few alternatives depending upon your site's network. You can use:
If your network has a RARP server in continuous operation, the IP address can be automatically assigned the first time the Micro Webserver 200 boots. To use this approach, insert an entry for Micro Webserver 200 in both the RARP server's Host and Ethernet tables.
For Sun Solaris installations, use the following steps to install the Network Wizard software:
Step 1 Before you install the Cisco Micro Webserver 200 Installation Tools and Utilities CD-ROM and use the Network Wizard, be sure that your system or network administrator verifies that your system is on the same subnet as the Micro Webserver 200 that you plan to configure. If it is not on the same subnet, the Network Wizard cannot communicate with the Micro Webserver 200.
Step 2 Log in to your system as the root user.
Step 3 Install the Cisco Micro Webserver 200 Installation Tools and Utilities
CD-ROM.
Step 4 Change directories:
#cd solsparc #pkgadd -d NetWizard.dsStep 6 Select the packages you want to install. Enter:
#allStep 7 Enter the directory path to the package base directory if you have a directory path in mind. If you do not specify a new directory, you might use:
#/usr/local/binStep 8 Enter the letter "y" for a new directory to be created:
#yStep 9 Enter the letter "y" if you want to proceed with installation:
#yStep 10 Your system will respond with a message such as:
#######################################################Run /usr/local/bina/1.0netsetup/MWNetWizard/netwizardto start the Micro Webserver 200 Network Wizard.#######################################################Step 11 Change to the directory indicated by the message your system returns. For example:
#cd /usr/local/bina/1.0netsetup/MWNetWizard/netwizardStep 12 Continue with the "Network Address Assignment" section in earlier in this chapter.
![]()
![]()
![]()
![]()
![]()
![]()
![]()
![]()
Posted: Tue Dec 17 19:14:45 PST 2002
All contents are Copyright © 1992--2002 Cisco Systems, Inc. All rights reserved.
Important Notices and Privacy Statement.