|
|

Your Micro Webserver 200 provides an Administrative Wizard for you to perform initial administrative tasks. This chapter provides information about using this Wizard in the following sections:
Step 1 Start either the Microsoft Internet Explorer browser or the Netscape Navigator browser.
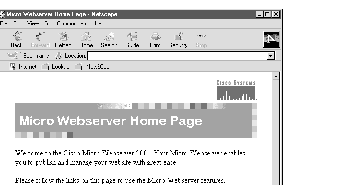
Step 2 Enter your Micro Webserver 200's Uniform Resource Locator (URL) in the Address or Location field of your Java-enabled browser. The URL is either the IP address or your Micro Webserver 200's host name [if your LAN is connected to a Domain Name Service (DNS)]. See Figure 4-1.

Step 3 The Micro Webserver 200 Home Page displays.
Step 4 Click the Administrative Wizard hyperlink.
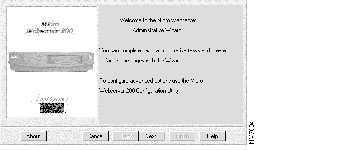
The following sections present each panel in the Administrative Wizard. Each figure associated with a panel is followed by a discussion of the concepts presented on the panel as well as the steps required to complete that panel correctly. The Welcome Panel is shown in Figure 4-2.
Your Micro Webserver 200 has a default name that identifies it on your network. Commonly, this name is referred to as a host name. A host name is a meaningful name that uniquely identifies a computer on the network for the purpose of electronic information interchange, such as presenting Web pages to a reader. Enter the host name as shown on the panel in Figure 4-3.
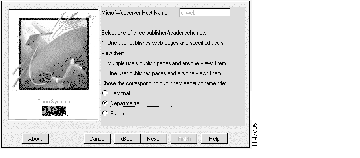
The Web site publisher/reader scheme determines who can store Web pages on your
Micro Webserver 200 (publisher), as well as who can read those Web pages from
the Micro Webserver 200 (reader). You must select a reader/publisher scheme for your Micro Webserver 200, and you can choose only one scheme.
The system administrator (or "admin") is responsible for administering the Micro Webserver 200, which includes defining the group members and creating user accounts for those members. However, the admin can modify the scheme on your Micro Webserver 200 later using the Micro Webserver 200 Configuration Utility. To select the publisher/reader scheme for the Micro Webserver 200, perform the following steps:
Step 1 From the list of options, check the scheme that you want to use on your Micro Webserver 200.
Step 2 To continue, click the Next button.
The following list describes each of the supported schemes:
The information that you provide on the screen shown in Figure 4-4 defines the administrative account for your Micro Webserver 200's administrator. The Micro Webserver 200 uses this information to verify that the user who is logging in to it has permission to modify its settings. (Throughout the remainder of this chapter, we refer to the user with such permission as the administrator.)
The process of verifying the identify of a user is called authentication. To authenticate a user, the Micro Webserver 200 compares a piece of secret knowledge against the username of the user who shares the secret knowledge. This secret knowledge is called a password. Each username has a password associated with it. The correct combination of the two allows someone to authenticate to the Micro Webserver 200. Enter this information as shown in Figure 4-4.
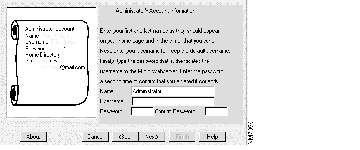
Step 1 In the Name box, type the full name of the user who will act as the administrator for this Micro Webserver 200.
The full name includes the first and last name of the user.
Step 2 In the Username box, type the account name that the user identified in the Name box will use to log in to the Micro Webserver 200 to perform administrative tasks.
Step 3 In the Password box, type the password that will be used to authenticate the user who logs in to the Micro Webserver 200 using the account name identified in the Username box.
The Password box identifies the secret information that is shared between the administrator and the Micro Webserver 200. It is used to authenticate the user logging in to the Micro Webserver 200 against the username. To select a secure password, review the following guidelines:
Step 4 In the Confirm Password box, re-type the password that you typed in the Password box.
The Confirm Password box ensures that you did not mistype the desired password in the Password box. If the value in the Password box does not match the value in the Confirm Password box, you must re-enter the password in both boxes until they match.
A home directory refers to the folder in which a particular user stores all of Web pages and other files that user creates or uses. Home directories are tied to people by their usernames, which means only one username can be used to log in to the Micro Webserver 200, and modify the files that are stored within a particular home directory. See Figure 4-5 for an example of the Administrator's Home Directory Panel.
For example, if the user Pat, whose username is "pat2" has a home directory (also "pat2"), then only people who authenticate themselves to the Micro Webserver 200 using the "pat2" username can modify the files in this directory. Also, with regard to the administrator's directory, only the administrator can access and view the files that are stored under that directory.
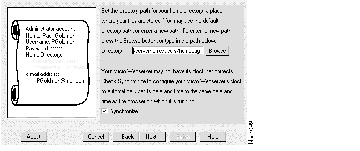
Step 1 In the Directory box, type the full path of the directory that you want to use for the administrator's home directory (for example, /local/cisco/mw200/users/homepages/administrator).
If the directory that you typed in does not exist, it will be created. In addition, you can click Browse to view the current directory structure and select an existing directory. You must prefix the directory path with /local/cisco/mw200/users/homepages.
Step 2 The Micro Webserver 200's time is set to synchronize with the time of your system because the Synchronize checkbox is checked by default. If you do not want to synchronize time, uncheck the checkbox.
Step 3 To continue, click the Next button.
You may choose to link the administrator's existing e-mail account to the Micro Webserver 200 as shown in Figure 4-6. If you decide to establish the link, you must specify your current e-mail server's name by its IP address or host name. In addition, you must enter the domain name for your Micro Webserver 200. For example, in the e-mail address, "pat@www.com," "www.com" is the domain name. Your Micro Webserver 200 will create your Micro Webserver 200 e-mail name with this information. Lastly, the DNS IP address will allow DNS to resolve the IP address and host name for a specific location.
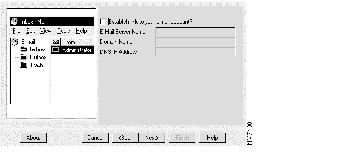
Step 1 Check the box "Establish link to your e-mail account?"
Step 2 Enter your e-mail server name (IP address or host name).
Step 3 Enter your Micro Webserver 200's domain name.
Step 4 Enter the DNS IP address of the DNS running on your LAN. The DNS will resolve the IP address with a host name.
Step 5 To continue, click the Next button.
You can add new users to your Micro Webserver 200 as new readers or as new publisher/readers based upon the Web site publisher/reader scheme selection you made in the previous section, "Select Web Site Publisher/Reader Scheme." See Figure 4-7.
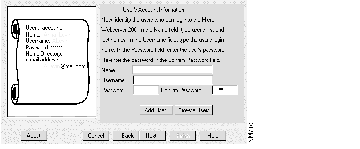
Step 1 In the Name box, type the full name of the user you want to add to the list of valid users for this Micro Webserver 200.
The full name includes the first and last name of the user. The name that you type in this box will be used on the Web page for this user. A Web page for a particular user is called the user's home page.
Step 2 In the Username box, type the account name that the user identified in the Name box will use often (for example, to log in to the Micro Webserver 200).
Step 3 In the Password box, type the password that will be used to authenticate the user who logs in to the Micro Webserver 200 using the account name identified in the Username box.
Step 4 In the Confirm Password box, re-type the password that you typed in the Password box.
Step 5 To add the user whom you have just defined, click the Add User button.
Step 6 For each additional user that you want to add, repeat Step 1 through Step 5.
Step 7 To continue, click the Next button.
Depending on which Web site publisher/reader scheme you selected earlier, the Administrative Wizard will either create default home pages for previously defined users and the administrator account, or only create a default home page for the administrator account. The following list identifies your options based upon your previous Web site publisher/reader scheme selection:
Step 1 Click the Yes button on the bottom half of the screen indicating that you do want the Administrative Wizard to create home pages for the users identified previously. See Figure 4-8.
Step 2 To complete the Wizard click the Finish button.
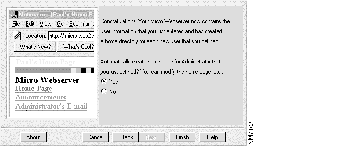
The Micro Webserver 200's default Web site is available for viewing, and an e-mail message is sent to the administrator to acknowledge successful completion of the Micro Webserver 200's default Web site.
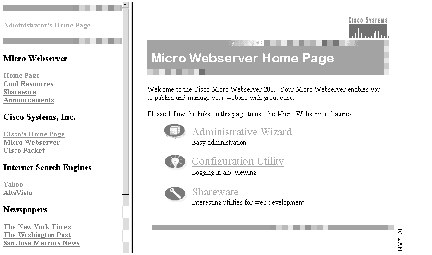
The Micro Webserver 200 will automatically create an Administrator's Home Page and send e-mail (if this option was checked) for the administrator who completes administration tasks using the Administrative Wizard. See Figure 4-9. From this Web page, the administrator can access the following:
The Micro Webserver 200 creates a default Web page for users added to the Micro Webserver 200 list of users under the Department publisher/reader scheme. This Web page is very similar to the Administrator's home page in design and may be modified by the user with third-party Web authoring applications. In addition to the default user home pages, the Micro Webserver 200 creates a default Administrator's Announcements Page.
The purpose of the Administrator's Announcements Page (also called "Latest News") is for the Micro Webserver 200 administrator to provide news and information regarding the Micro Webserver 200 and the Micro Webserver 200's environment to all users. To access this page, enter http://yourmw200IPaddress/~admin (where yourmw200IPaddress is your Micro Webserver 200's IP address and admin is the administrator's username).
From the Administrator's Announcements Page, the administrator can progress to the Micro Webserver 200 home page as shown in Figure 4-10.
From the Micro Webserver 200 home page, the administrator may choose to continue configuration by advancing to the Configuration Utility, further explained in the next chapter, "Configuration Utility." See Figure 4-11.
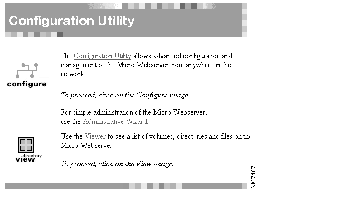
The View tool allows you to view the directory structure of your Micro Webserver 200 SCSI drives.
You will need to use your own tools to create additional custom home pages and Web sites. The Shareware link provides a path to shareware available on the Internet.
In addition, more advanced Web site resources are contained on the Cool Resources page (see Figure 4-12). The link is available from a link on the Shareware page, which is accessible from the Micro Webserver 200 home page.
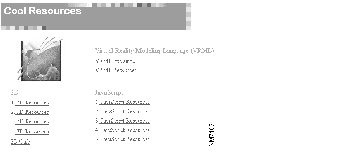
Web site authoring tools eliminate the need to know HTML; however they involve a minor initial investment. You may be interested in trying programs such as NetObjects Fusion and Microsoft FrontPage9x to create and enhance your Web sites.
If you design a custom Web site with your favorite authoring tools and want to transfer the contents to the Micro Webserver 200, be sure to organize the entire directory structure before you transfer the content. You must transfer this full directory structure below the document root level on your Micro Webserver 200 using the File Transfer Protocol (FTP) or similar file transfer utility. The default document root level is /local/cisco/mw200.
Now transfer the custom Web site files to /local/cisco/mw200. If you need to set permissions on specific files or directory paths, modify index files, or create aliases for your custom Web site, refer to Chapter 5, "Configuration Utility."
|
|