|
|

This chapter describes how to install the NetWare Loadable Module (NLM) version of the Cisco IPeXchange Internet Gateway and describes some related topics. It includes the following sections:
To install the software onto the NetWare server that you want to be your IPeXchange gateway, you can run the setup program on a Windows 3.x PC or perform a manual installation from a Windows 95 PC. The NetWare client must be able to access the NetWare server and must meet these requirements:
Following are the minimum requirements for the NetWare server:
For Internet access, you also need to perform these tasks:
Table 2-1 lists the versions of NLMs that are required with the IPeXchange NLM version.
| NLM Module | Description | NetWare 4.1x Version (or higher) | NetWare 3.1x Version (or higher) |
|---|---|---|---|
| CLIB.NLM | NetWare C NLM Runtime Library | 4.10f | 3.12i |
| IPXS.NLM | NetWare IPX STREAMS Driver | 4.10 | 3.12a |
| NETDB.NLM | Network Database Access NLM | 3.17o | 2.20a |
| STREAMS.NLM | NetWare STREAMS | 4.10b | 3.12b |
| TCPIP.NLM | Novell TCP/IP Module | 3.10 | 3.101 |
| TLI.NLM | NetWare Transport Level Interface Library | 4.10a | 3.12a |
When the prerequisites for installation are met, you need to verify that TCP/IP and IPX network services are running and properly configured before you install the IPeXchange gateway.
As described in the Novell documentation, following are the basic steps for installing the LAN drivers and configuring TCP/IP on the server.
Step 1 Load the appropriate network driver with the following command:
For example:
load NE2000 port=300 int=3 frame=ETHERNET_II name=ether_tcp
Make sure you are loading the driver with the correct frame type. For example, you might use ETHERNET_II when running on Ethernet; use Token_Ring_Snap when running on Token Ring.
Step 2 Load TCP/IP at the NetWare console by entering the following command:
Step 3 Bind the IP address and the IP mask to the network interface card using the following command:
For example:
bind ip to ether_tcp addr=1.2.3.4 mask=255.255.255.0 gate=1.2.8.9
Step 4 Configure TCP/IP by editing the following files, which reside on the NetWare server, path SYS:\ETC:
1.2.3.4 mynwsvr
domain mycompany.com
nameserver 1.2.8.9
Net 0.0.0.0 Gateway 1.2.3.1 Metric 1 Passive
Before you install the IPeXchange NLM version and after you install it, you can ping the TCP/IP network, such as the Internet or an intranet, by using PING.NLM. After you install the IPeXchange NLM version, you can ping the TCP/IP network from an IPeXchange client through the gateway by using a Windows ping application.
If you cannot successfully ping a given site, you need to correct the network connectivity problem before you can use the IPeXchange gateway. Always check for TCP/IP connectivity from your NetWare server to the Internet or your intranet before calling Cisco Technical Support. Remember that if you cannot successfully ping a host, that host could not be operational or it could be unreachable. Make sure that your default gateway settings and RESOLV.CFG file on the NetWare server are configured properly.
Before you install the IPeXchange NLM version, make sure that the target NetWare server can connect to the Internet or the intranet for which you want TCP/IP access. To do so, you can use the PING.NLM to ping various sites from the server you will use as the gateway.
The Novell PING.NLM asks you to enter an IP address or host name of any site or host, and then tests whether there is connectivity between the NetWare server and that site or host. (You can use host names only if the names are present in your SYS:\ETC\HOSTS file.)
If you have trouble accessing sites on the Internet or your intranet, make sure that you have TCP/IP access from the NetWare server (the IPeXchange gateway) to the sites that you are having trouble accessing. To do so, you can use the PING.NLM to ping various sites from the gateway. In addition, the IPeXchange NLM version supports the ICMP protocol, so if you have a ping application based on Windows you can use it to ping hosts and routers on the Internet or an intranet -- from an IPeXchange client through the IPeXchange gateway.
From the NetWare client PC you will use for installation, follow these steps to install the IPeXchange NLM version software on the server PC.
Step 1 From the remote NetWare client PC, log in to the destination NetWare server as a Supervisor or Admin, or with equivalent privileges.
Step 2 Map a network drive to the SYS:\SYSTEM volume and directory of the destination NetWare server, or to the SYS volume and make sure the SYSTEM directory is in this volume.
You can map the drive from DOS or from the Network Connections window of the Windows File Manager. Following is the DOS command:
For example:
Step 3 Insert the install diskette, called Cisco IPeXchange NLM Version, in a drive of your client PC.
Step 4 From the Windows Program Manager, choose Run from the File menu.
Step 5 Run the setup program by entering this command:
A welcome dialog appears. 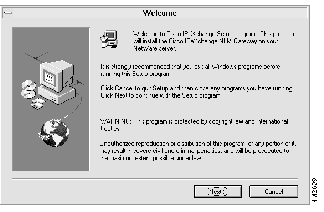
Step 6 Click Next.
A dialog listing installation prerequisites appears. 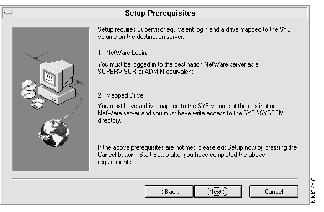
Step 7 To continue, click Next. If you do not meet the requirements, click Cancel.
If you clicked Next, a dialog listing NetWare servers appears. This list is made of NetWare servers that meet these criteria: your PC can access it, a network drive is mapped to the SYS volume, and a SYSTEM directory exists in the SYS volume. 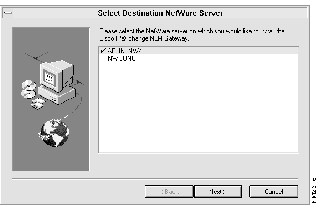
Step 8 Click the server that you want to install the IPeXchange gateway software on, then click Next.
A dialog appears that lets you specify the directory where the software will reside. The default is the SYSTEM directory. 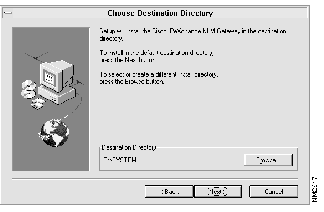
You can click Back to go back to the previous dialog, if needed.
Step 9 To specify a directory other than the default, click Browse. Click OK to accept your changes or Cancel to close the dialog without saving the changes.
In the standard file dialog, you can navigate through the list to find an existing directory or you can type the name of a new directory. The directory must reside on the server you specified and in the SYS volume. 
Step 10 To continue, click Next.
A dialog that asks you to confirm the destination server and directory appears. We recommend you note their names for future reference, such as if you want to upgrade or remove the installation. 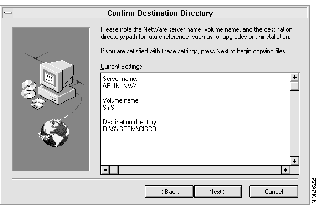
You can click Back to go back to the previous dialog, if needed.
Step 11 Click Next.
A dialog prompting you for the serial number appears. 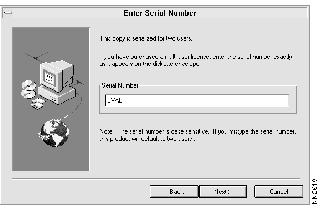
Step 12 Type the serial number.
The serial number is found on the envelope that contained the install diskette. Remember that the serial number is case-sensitive.
 | Caution If you type an incorrect serial number, the IPeXchange gateway license defaults to two users. You would have to reinstall the software from the beginning, or edit the IPEXCHNG.CFG file by replacing the string in the file with your case-sensitive serial number and then save the file, to get the correct license. |
Step 13 Click Next.
A dialog appears. If the IPeXchange NLM version software is already installed in this location, the dialog will notify you. If you continue with the installation, the software is installed and the previous version is stored as IPEXNLM.SAV, IPEXREAD.SAV, IPEXSTAT.SAV, and IPEXCFG.SAV (the configuration file). 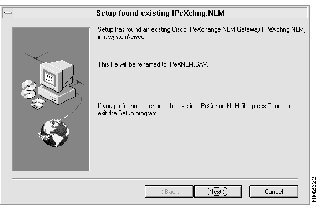
Step 14 To install the software, click Next.
After the installation is complete, a Setup Complete dialog appears. The README file checkbox should be selected so you can read this file next. 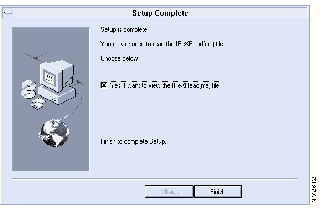
Step 15 Click Finish.
If you checked the box in the previous dialog, the README file appears.
If your installation fails when you use the installation program (as described in the previous section), you can install the files manually. Follow these steps:
Step 1 From a NetWare client PC, log in to the destination NetWare server as a Supervisor or Admin, or with equivalent privileges.
Step 2 Map a network drive to the SYS:\SYSTEM volume and directory of the destination NetWare server, or to the SYS volume and make sure a SYSTEM directory is in this volume.
You can map the drive from the Windows NetWare Connections window or from DOS. Following is the DOS command:
For example:
Step 3 Insert the install diskette, called Cisco IPeXchange NLM Version, in a drive of your client PC.
Step 4 Copy the files on the install diskette from the INSTALL.BAK directory to the SYS:\SYSTEM volume and directory of the destination NetWare server:
Copy all the files in the INSTALL.BAK directory, including IPEXCHNG.NLM, IPEXSTAT.NLM, IPEXREAD.TXT, and IPEXSMPL.CFG, but you do not need to copy IPEXREAD.WRI. (If it is there, it does nothing, however.)
For example:
Step 5 On the destination drive, copy the sample configuration file and rename it:
Step 6 Edit the IPEXCHNG.CFG file and replace EVAL with your case-sensitive serial number. Then save the file.
To start the IPeXchange NLM version software, enter this command at the IPeXchange gateway console:
load ipexchngEnter this command to verify that the software is loaded:
modulesYou can also press Control-Esc to view the Cisco IPeXchange Internet Gateway screen.
Follow these steps at the IPeXchange gateway console:
Step 1 Load IPEXSTAT by entering this command:
An IPEXSTAT.TXT file is created.
Step 2 View the status screen by entering this command:
To remove the Cisco IPeXchange NLM version software, follow these steps:
Step 1 At the IPeXchange gateway console, unload IPEXCHNG by entering this command:
Step 2 Delete the IPeXchange NLM version files from the server.
You could find any of the following files: IPEXCHNG.NLM, IPEXSTAT.NLM, IPEXSTAT.TXT, IPEXREAD.TXT, IPEXREAD.WRI, IPEXCHNG.CFG, and IPEXSMPL.CFG, and .SAV versions of some of these files.
You have now installed IPeXchange gateway software. To install IPeXchange clients, continue with the chapter "Installing the IPeXchange Client Software."
|
|