Cisco IOS Software Configuration for the Cisco 12000 Series One-Port Channelized OC-12/STM-4 (DS1/E1) ISE Line Card
Product Number: CHOC12/DS1-IR-SC
This software configuration note contains instructions for configuring the Cisco 12000 Series One-Port Channelized OC-12/STM-4 (DS1/E1) ISE Line Card single-mode (SM), intermediate-reach (IR), Internet Services Engine (ISE) line card for the Cisco 12000 Series routers. Throughout this document, this line card is referred to as the 1-Port CHOC-12 ISE line card.
The Cisco 1-Port CHOC-12 ISE line card is built on the Cisco IP Services Engine (ISE) technology designed for telcos and Internet service providers (ISPs), the line card can channelize an STS-12 or STM-4 signal into a maximum of 70 channel groups per supported path (STS-1, TUG-3, or AU-3), with up to 840 channel groups of DS1, fractional DS1, or n x DS0 signals. (That is, 12 paths per line card with 70 channel groups maximum per path). The line card also supports up to 168 Multilink Frame Relay (MLFR) or Multilink Point-to-Point Protocol (MLPPP) T1 bundles, each of which supports up to 8 DS1 channel groups. The concatenated, or unchannelized SONET and SDH modes are not supported.
The Cisco 1-Port CHOC-12 ISE card supports four quality of service (QoS) queues per channel group or T1 bundle, with Weighted Random Early Detection (WRED) and Modified Deficit Round Robin (MDRR). For traffic with low-latency requirements such as voice over IP (VoIP), the line card supports link fragmentation and interleaving (LFI) and the FRF.12 standard protocol. The Cisco 1-Port CHOC-12 ISE Line Card can be used in any of the Cisco 12000 Series Routers and supports "hitless" online insertion and removal (OIR).
For descriptions and procedures that relate to the physic al installation of the line card see the document, Cisco 12000 Series 1-Port Channelized OC-12/STM-4 (DS1/E1) ISE Line Card Installation and Configuration at the following URL:
http://www.cisco.com/univercd/cc/td/doc/product/core/cis12000/linecard/lc_chan/13921c12.htm
|
Release |
Modification |
12.0(27)S1
|
1-Port CHOC-12 ISE line card is introduced.1
|
|
|
No Cisco IOS commands were created or modified specifically for the linecard in this release. |
Feature History
Finding Support Information for Platforms and Cisco IOS Software Images
Use Cisco Feature Navigator to find information about platform support and Cisco IOS software image support. Access Cisco Feature Navigator at http://www.cisco.com/go/fn . You must have an account on Cisco.com. If you do not have an account or have forgotten your username or password, click Cancel at the login dialog box and follow the instructions that appear.
Contents
Network Management Feature Descriptions
Administrative and management access to the 1-Port CHOC-12 ISE line card is provided through the standard console and Telnet CLI as well as through SNMP network management software such as CiscoWorks 2000. For MIB information, see the "MIBs" section.
Layer 1 Software Feature Descriptions
The following subsections sections identify the major software supported features provided by the
1-Port CHOC-12 ISE line card.
SONET and SDH
The following options are configured and monitored at the port level:
- SONET or SDH framing
- Internal and line clocking mode
- Local (diagnostic) and network (line) loopbacks
- Performance and error processing
- Receive and transmit alarms, performance and error processing
- LOS, LOF, LAIS, PAIS, LOP, LRDI, PRDI, SF, SD, LREI (Line FEBE), PREI (Path FEBE)
- Error counts for B1, B2, and B3
- Threshold Crossing Alerts (TCA) for B1, B2, B3 with configurable threshold
- North American SONET Virtual Tributary 1.5 (VT 1.5) mapping:
STS-1 to VTG to VT1.5 to DS1
- Plesiochronous Digital Hierarchy DS3 (PDH DS3) with M13 and C-bit mapping:
STS-1 to DS3 to DS1
- European SDH Virtual Container 12 (VC-12) mapping:
AU-4 to TUG-3 to TUG-2 to VC-12 to E1
- Japanese SDH VC-11 mapping:
AU-3 to TUG-2 to VC-11 to DS1
DS1 Features
DS1s can be configured and monitored on a per-T1 channel basis. The 1-Port CHOC-12 ISE line card supports the following DS1 features:
- Framing control— Extended Superframe (ESF) and Super Frame (SF) support
- ESF statistics
- Internal and line clocking modes
- Local (diagnostic), network (line), and remote loopback (including SF inband)
- BER Test at DS1 level
- Receive and transmit alarm processing
- Performance and Error Counters
E1 Features
E1s can be configured and monitored at the individual E1 channel level. The 1-Port CHOC-12 ISE line card supports the following E1 features:
- Framing control—E1 and E1 -CRC, as well as Unframed
- Internal and line clocking mode
- Local (diagnostic) and network (line) loopback
- BER Test at E1 level
- Receive and transmit alarm processing
- Performance and error counters
Automatic Protection Switching
Automatic Protection Switching (APS) provides redundancy on SONET equipment to guard against line failures. The 1-Port CHOC-12 ISE line card supports the following APS features:
- SONET Linear APS 1+1 mode.
- Bi-directional and Uni-directional modes.
- Linear APS is defined to provide protection at the line layer. Therefore all of the STS SPEs carried in an OC-12 signal are protected together (That is, if a switch occurs, all of the STS SPEs are switched together).
- Working and Protect channel can be on the same router, or in different routers.
Online Insertion and Removal
The Online Insertion and Removal feature (OIR) permits the removal or insertion of a
1-Port CHOC-12 ISE line card without disrupting the packet forwarding or routing of other line cards operating in the same chassis. For additional information on OIR, see the document, Cisco 12000 Series 1-Port Channelized OC-12/STM-4 (DS1/E1) ISE Line Card Installation and Configuration at the following URL:
http://www.cisco.com/univercd/cc/td/doc/product/core/cis12000/linecard/lc_chan/13921c12.htm
Layer 2 Software Feature Descriptions
The following subsections provide an overview of the wide area network protocols supported on the 1-Port CHOC-12 ISE line card:
Cisco High-level Data Link Control Protocol
The 1-Port CHOC-12 ISE line card supports standard Cisco HDLC encapsulation.
Frame Relay Protocol
The 1-Port CHOC-12 ISE line card supports the following frame relay features:
- ELMI address registration
- Cisco, ANSI and ITU LMI with autosensing
- 2-byte header
- Maximum of 1,024 data link connection identifiers (DLCIs) per interface, channel group or multilink bundle, with a total limit of 5,120 user defined DLCIs per line card.
 |
Note The current Cisco IOS limitations are 2,048 IDBs per line card. Because each interface requires
at least one hardware IDB and one software IDB, the limit of 1,024 DLCIs applies to each card.
|
- Link Fragmentation Reassembly (LFI) as specified by the Frame Relay Fragmentation Implementation Agreement (FRF.12). The available fragmentation sizes are 128, 256, and 512 bytes.
|
Note Forward explicit congestion notification (FECN) and backward explicit congestion notification
(BECN) signaling are not supported at this release.
|
Multilink Point to Point Protocol
Compliant with the PPP Multilink Protocol (MP) RFC 1990, The 1-Port CHOC-12 ISE line card supports the following Multilink Point to Point Protocol(MLPPP) features:
- Up to 8 DS1s per multilink bundle
- Bundle members are limited to a single line card
- Links in the bundle must have equal DS1 bandwidth
- Up to 168 MLPP bundles.
Multilink Frame Relay
Compliant with the Multilink Frame Relay UNI/NNI Implementation Agreement (FRF. 16), the1-Port CHOC-12 ISE line card supports the following features:
- Up to 8 DS1s per multilink bundle
- Bundle members limited to a single line card
- Links in the bundle must have equal DS1 bandwidth
- Maximum of 4 DLCIs per multilink bundle
- Layer 2 Virtual Private Networks (VPNs) and Tunnel Services
Layer 3 Software Feature Descriptions
The 1-Port CHOC-12 ISE line card layer 3 software features are a subset of Cisco IOS 12.0(27)S1 and Cisco IOS 12.0(26)S. These features are described or referenced in the document, Cross-Platform Release Notes for Cisco IOS Release 12.0 S, Part 2: New Features and Important Notes at the following URL:
http://www.cisco.com/univercd/cc/td/doc/product/software/ios120/relnote/xprn120s/120snewf.htm
How to Configure Layer 1 Features
The following sections provides the following configuration procedures for the 1-Port CHOC-12 ISE line card:
Restrictions
The 1-Port CHOC-12 ISE line card can be installed only in the Cisco 12000 Series Router. The hardware and software configuration procedures and tasks are similar to all other Cisco 12000 Series Router line cards.
Each 1-Port CHOC-12 ISE line card requires 512 interface description blocks (IDBs) describing the DS1 channels (one per DS1 channel). We recommend that you install no more than two 1-Port CHOC-12 ISE line cards on a Cisco 12000 Series Router chassis.
Configuring the SONET Controller
Summary Steps
1. enable
2. configure terminal
3. controller sonet slot/port
4. framing {sonet | sdh}
5. clock source {internal | line}
6. description string
7. report {all | event}
8. threshold type value
9. overhead s1s0 number
10. overhead c2 number
11. overhead j1 length [16 | 64]
12. overhead j1 message
Table 1 lists the SONET controller default values.
Table 1 Controller Parameters and Default Configuration Values
|
Parameter |
Configuration Command |
Default Value |
AIS shut—send LAIS when shut down
|
[no] ais-shut
|
on
|
APS—modify APS parameters
|
[no] aps ...
|
off
|
Clock source—specify the clock source for the SONET port
|
[no] clock source [internal | line]
|
line
|
Loopback—put the SONET port in loopback
|
[no] loopback [internal | line]
|
no loopback
|
Overhead—configure SONET overhead flags
|
[no] overhead [j0 | s1s0]
|
j1=1; s1s0=00
|
Report—enable reporting of selected alarms
|
[no] report [all | b1-tca | b2-tca | b3-tca | lais | lom | lrdi | pais | plop | prdi | puneq | sd-ber | sf-ber | slof | slos]
|
sf-ber, slos, slof, b1-tca, lais, b2-tca,
|
Shutdown—shut down channelized SONET controller
|
[no] shutdown
|
shutdown
|
Thresholds—set BER threshold values
|
[no] threshold [b1-tca | b2-tca | b3-tca | sd-ber] [3..9]
|
b1-tca=6 (10e-6)
b2-tca=6 (10e-6)
b3-tca=6 (10e-6)
sd-ber=6 (10e-6)
sf-ber=3 (10e-3)
|
|
Detailed Steps:
|
|
Command or Action |
Purpose |
| Step 1
|
Example:
|
Enables privileged EXEC mode.
- Enter your password if prompted.
|
| Step 2
|
Example:
Router# configure terminal
|
Enters global configuration mode.
|
| Step 1
|
controller sonet slot/ port
Example:
Router(config)# controller sonet 1/0
|
Selects the physical port to configure, and enters controller configuration mode. The 1-Port CHOC-12 ISE line card only has port 0.
To shut down the SONET controller, use the shutdown controller command. When shut down, the OC-12/STM-4 port transmits a Line AIS (MS-AIS) signal. The received signal is ignored.
Bring the SONET controller back up with the no shutdown controller command.
|
| Step 2
|
Example:
Router(config-controller)# framing sdh
|
Specifies SONET or SDH framing type. The default is SONET framing.
|
| Step 3
|
clock source { internal | line}
Example:
Router(config-controller)# clock source line
|
Sets the clock source for the 1-Port CHOC-12 ISE line card.
Typically, an 1-Port CHOC-12 ISE line card is connected to a SONET or SDH add/drop multiplexer (ADM). In this application, Cisco recommends using the default setting of clock source line, because:
- The clock source used by the SONET/SDH network is of higher accuracy than the internal clock source on the 1-Port CHOC-12 ISE line card.
- The SONET/SDH network is designed for optimal operation in synchronous mode, where all clocks used in the network can be traced to a single high-accuracy clock source. Using the internal clock on the line card port introduces an independent clock source into the network, and may cause synchronization-related anomalies to be detected by the SONET/SDH network elements.
When configured for line clocking, the 1-Port CHOC-12 ISE line card port will automatically default to internal clocking if the line clock source is considered unusable for any of the following reasons:
- The port detects a Loss of Signal (SLOS) defect.
- The port detects a Loss of Frame (LOF) defect.
- The port detects a Section (RS) Loss of Frame (SLOF) defect.
- The port detects a Line (MS) Alarm Indication Signal (LAIS) defect.
- The port receives the "Do not use for synchronization" code in byte S1 of the Line (MS) overhead.
- The port has been put into the local loopback mode through the use of the loopback local controller command. When the loopback is cleared, the port reverts to using the line clock source.
|
Note The OC-12/STM-4 port always sends the "Do
not use for synchronization" code in byte S1 of
the Line (MS) overhead toward the directly
connected ADM.
|
|
| Step 4
|
Example:
Router(config-controller)# description E1T1Card
|
(Optional). You can add a description of up to 80 characters about a controller to help you remember what is attached to it. The description is intended solely as a comment about the use of the controller. The description will appear in the output of the following commands:
- show configuration
- show system running config
- show controllers.
|
| Step 5
|
Example:
Router(config-controller)# report { all | event}
|
(Optional). Enable reporting of selected alarm and signal events.
The following alarm and signal events are enabled and reported by default:
- sf-ber
- slos
- slof
- b1-tca
- lais
- b2-tca
Enable reporting for the alarm and signal events individually, or use the all keyword to enable all of the available alarm and signal events.
|
| Step 6
|
Example:
Router(config-controller)# threshold all
|
(Optional). Set threshold values for the BER Threshold Crossing Alarms. For further information, see the document Bit Error Rate Testing on Channelized Line Cards in Cisco 12000 Series Internet Routers at the following URL:
http://www.cisco.com/univercd/cc/td/doc/product/software /ios120/120newft/120limit/120s/120s21/bert.htm
|
| Step 7
|
Example:
Router(config-controller)# overhead s1s0 2
|
(Optional). Sets S1 and S0 overhead bits. Legal values are 0 to 3. The default is 0 for SONET and 2 for SDH framing.
The values for these bits are set automatically with frame type. Change the values only to ensure operability with older or nonstandard equipment, or to ensure operability if the bit values in the network are other than the defaults. For example, SDH equipment in Australia might use 1 as the SDH value.
The S1 and S0 bits are located in the H1 Administrative Unit (AU) pointer byte, bit locations 5 and 6.
|
| Step 8
|
Example:
Router(config-controller)# overhead j0 82
|
(Optional). Sets identifier of transmitting equipment (0 to 255). Default is 1.
Section trace is a maintenance feature of SONET. One byte (J0) of the Section overhead associated with each SONET frame is used to carry information identifying the transmitting equipment.
|
| Step 9
|
Example:
Router(config-controller)# au-4 1 overhead c2
Router(config-controller)# au-3 3
Router(config-ctrlr-au3)# overhead c2 98
Router(config-controller)# sts-1
Router(config-ctrlr-sts1)# overhead c2 98
|
(Optional). Legal values are 0 to 255. Defaults are as follows:
- 02 for vt15, c11, and c12
- 04 for ct3
The Signal Label field is configured at the path level configuration mode.
The Path Signal Label field occupies one byte (C2) of the SONET STS Path overhead, and the SDH High Order Path overhead. This byte indicates the type of contents carried in the SONET Synchronous Payload Envelope (SPE), or SDH High Order Virtual Container (HOVC). Setting the Path Signal Label affects both the Transmitted (sent) value and the Expected value of the C2 overhead byte.
|
| Step 10
|
overhead j1 length [16 | 64]
Example: J1 configuration for SDH AU-4 mode
Router(config-controller)# au-4 1 overhead j1 length 16
Router(config-controller)# au-4 1 overhead j1 message
metro_SF
Example: J1 configuration for SDH AU-3 mode
Router(config-controller)# au-3 3
Router(config-ctrlr-au3)# overhead j1 length 16
Router(config-ctrlr-au3)# overhead j1 message
metro_LA
Example: J1 Configuration for SONET STS-1 mode
Router(config-ctrlr-sts1)# overhead j1 length 64
Router(config-ctrlr-sts1)# overhead j1 message
metro_washington gsr_0057/4/3
|
(Optional). The Path Trace identifier consists of two configuration settings, the message length and the message text.
The default message length is 16 for SDH framing, and 64 for SONET framing.
If you select a message length of 16, the actual message length can be up to 15 characters. An additional byte, prepended to the message, contains the result of a CRC7 calculated on the message. If the actual message text is fewer than 15 characters, the message text is padded to its full length with NULL characters.
If you select a message length of 64 and the actual message text is fewer than 62 characters, the message text is padded with NULL characters. The last two byte positions, 63 and 64, are always CR/LF (0x0D/0x0A).
The STS/High Order Path Trace Identifier (J1) is a maintenance feature of SONETand SDH.
One byte (J1) of the Path overhead associated with each path in the SONET/SDH frame is used to carry information identifying the originating Path Terminating Equipment (PTE).
In SDH with AU-4 mapping, the Path Trace identifier is configured at the controller level. In SDH with AU-3 mapping or in SONET framing, the Path Trace identifier is configured at the path level.
|
|
Configuring an STS-1 Mode of Operation with SONET Framing
Under SONET framing, each of the STS-1 paths can be configured to carry a set of T1s mapped into either a VT1.5 signal or a DS3 signal. The DS3 signal itself carries a set of T1s (thus becoming a channelized T3, or CT3).
Summary Steps
1. controller sonet slot/port
2. framing sonet {sonet | sdh}
3. sts-1 number
4. mode {vt-15 | ct3}
Detailed Steps
|
|
Command |
Purpose |
| Step 1
|
controller sonet slot/port
Example:
Router(config)# controller sonet 1/0
|
Selects the physical port to configure.
Enters controller configuration mode.
|
| Step 2
|
framing sonet {sonet | sdh}
Example:
Router(config-controller)# framing sonet
|
Specifis framing type. Choose SONET for STS-1 configuration.
|
| Step 3
|
Example:
Router(config-controller)# sts-1 3
|
Legal sts-1 number values are 1 to 12.
Enters STS-1 path configuration mode.
From the STS-1 path configuration mode, you can configure the mode of operation to be vt-15 (Virtual Tributary Group structure VT1.5, which is used for DS1 transport) or ct3 (channelized T3).
|
| Step 4
|
Example:
Router(config-ctrlr-sts1)# mode vt-15
|
Selects the STS-1 mode of operation.
Default is ct3.
DS1 signals are multiplexed in one of two methods: Virtual Tributary Group (VTG) structure VT1.5 mapping, which is used for DS1 transport, or T1 PDH M13 mapping (channelized T3, or CT3), which multiplexes DS1 signals asynchronously to form a DS3 signal.
When you select ct3, the specified STS-1 will carry a DS3 signal divided into 28 T-1s (multiplexed asynchronously). .
When you select vt-15, the specified STS-1 is divided into seven virtual tributary groups (VTGs). Each of those VTGs is then divided into four VT1.5s, each carrying one T1. .
|
|
Configuring T3 Links with SONET Framing
You can configure T3 links from the STS-1 path configuration level when ct3 is the STS-1 mode of operation.
Summary Steps
1. t3 framing [auto-detect | c-bit | m23
2. t3 clock source [internal | line]
3. t3 equipment {customer | network } loopback
Detailed Steps
|
|
Command |
Purpose |
| Step 1
|
t3 framing [ auto-detect | c-bit | m23]
Example:
Router(config-crtlr-sts1)# t3 framing m23
|
Specifies the framing type for the T3 link. Default is auto-detect.
|
Note The M23 framing type might be referred
to as M13 in other technical literature and
on test equipment.
|
Auto-detect identifies the framing type the line card is receiving from the far end and then transmits with that same framing type.
|
| Step 2
|
t3 clock source [ internal | line]
Example:
Router(config-crtlr-sts1)# t3 clock source line
|
Sets the clock source for the selected T3 link. The default is internal.
|
Note On a T3 circuit, at least one end must
provide the clock source (by using the
internal clock source). The other end of
the T3 circuit can use either line or
internal as the clock source.
|
|
| Step 3
|
t3 equipment {customer | network } loopback
Example:
Router(config-ctrlr-sts1)# t3 equipment customer loopback
|
The default is t3 equipment customer loopback.
The equipment customer loopback command enables the line card to respond to remote T3 link loopback commands from the remote T3 equipment .
The equipment network loopback command enables the line card to ignore remote T3 link loopback commands,
|
|
Configuring T1 Lines Under SONET Framing
With SONET framing, you can configure T1s in vt-15 or in ct3 mode.
Procedures and examples for configuring T1 channel-groups on the 1-Port CHOC-12 ISE line card are presented in the following sections:
Configuring a T1 in SONET Virtural Tributary Mode
Summary Steps:
1. vtg vtg-number t1 t1-line-number channel-group channel-group-number timeslots list-of-timeslots [speed {56 | 64}]
2. vtg vtg-number t1 t1-line-number framing {esf | sf [hdlc-idle {0x7E | 0xFF}]}
3. vtg vtg-number t1 t1-line-number clock source {internal | line}
|
|
Command |
Purpose |
| Step 1
|
vtg vtg-number t1 t1-line-number channel-group
channel-group-number timeslots list-of-timeslots
[ speed { 56 | 64}]
Example:
Router(config-crtlr-sts1)# vtg 1 t1 1 channel-group 15
timeslots 1-5, 20-23
|
Creates a logical channel group for a T1 line from the STS-1 configuration level.
In vt-15 mode, the range of the t1-line-number parameter is 1 to 5.
The channel-group keyword defines a logical channel group to identify the set of timeslots allocated to this n x DS0 channel in the channelized T1 line (where n ranges from 1 to 24 DS0 timeslots).
The timeslots keyword creates the combination of subranges .
The default speed for DS0 timeslots is 64 Kbps.
In this example, the first T1 line is assigned to logical channel group 15 with channelized timeslots 1 to 5, and 20 to 23. The DS0 speed per timeslot is 64 Kbps.
|
| Step 2
|
vtg vtg-number t1 t1-line-number framing { esf | sf
[ hdlc-idle { 0x7E | 0xFF}]}
Example:
Router(config-crtlr-sts1)# vtg 1 t1 1 framing esf
|
Specifies the T1 framing format.
The default framing format is Extended Super Frame (ESF). Super Frame (SF) format offers the hdlc-idle option, which can be set to use either 0x7E or 0xFF as the HDLC idle pattern.
|
Note When you select SF framing, consider
using the no t1-line-number yellow
detection command to turn off yellow
alarm detection, because the yellow alarm
can be incorrectly detected with SF
framing.
|
|
| Step 3
|
vtg vtg-number t1 t1-line-number clock source
{ internal | line}
Example:
Router(config-crtlr-sts1)# vtg 1 t1 1 clock source
line
|
Sets the internal or line (network) clock source.
The value of n depends on the mode of operation selected: In ct3 mode, n = 28; in vt-15 mode, n = 4.
Defines the clock source for the T1 line. The default clock source is internal.
Defines the clock source for the T1 line. The default clock source is internal.
|
|
Detailed Steps
Configuring a T1 in SONET CT3 Mode
The CT3 mode is the default mode for STS-1 with SONET framing
Summary Steps
1. t1 t1-line-number channel-group channel-group-number timeslots list-of-timeslots [speed {56 | 64}]
2. t1 t1-line-number framing {esf | sf [hdlc-idle {0x7E | 0xFF}]}
3. t1 t 1-line-number clock source {internal | line}
Detailed Steps
|
|
Command |
Purpose |
| Step 1
|
t1 t1-line-number channel-group channel-group-number
timeslots list-of-timeslots [ speed { 56 | 64}]
Example:
Router(config-ctrlr-sts1)# t1 1 channel-group 15 timeslots 1-5, 20-23
|
Configured in STS-1 configuration mode, creates a logical channel group on a T1 line. Default speed is 64 kbps.
- The example shows the configuring a logical channel group in ct3 mode. The first T1 line is assigned to logical channel group 15 with channelized timeslots 1 to 5, and 20 to 23.
|
| Step 2
|
t1 t1-line-number framing { esf | sf [ hdlc-idle { 0x7E |
0xFF}]}
Example:
Router(config-crtlr-sts1)# t1 1 framing sf
|
Specifies the T1 framing format.
Default is Extended Super Frame (ESF). Super Frame (SF) format offers the hdlc-idle option, which can be set to use either 0x7E or 0xFF as the HDLC idle pattern.
|
Note When you select SF framing, consider
using the no t1-line-number yellow
detection command to turn off yellow
alarm detection, because the yellow alarm
can be incorrectly detected with SF
framing.
|
|
| Step 3
|
t1 t1-line-number clock source { internal | line}
Example:
Router(config-crtlr-sts1)# t1 1 clock source line
|
Sets the internal or line (network) clock source.
Default is internal.
|
|
After a T1 channel group is configured, it appears to the Cisco IOS software as a serial interface; therefore, all the configuration commands for a serial interface are available, but not all commands are applicable to the T1 channel group.
All the encapsulation formats, such as PPP, HDLC, and Frame Relay are applicable to the configured T1 channel group. Be sure that you are in serial interface configuration mode when you set the encapsulation format.
All the switching types that are applicable to a serial interface are also applicable to the configured T1 channel group.
|
Note When a timeslot on a tributary is disabled, an idle pattern is transmitted on that slot. The idle pattern
number STS-1 configuration command changes the idle pattern globally for all the serial interfaces on
all 12 STS-1 paths. Under most operating circumstances there is no need to change the default values of
the idle pattern STS-1 configuration command.
|
Removing a Logical Channel Group from a T1 Line
You can remove a logical channel group from a T1 line (or a T1 line) with the no form of the t1 t1-line-number channel-group channel-group-number STS-1 path configuration command, using the extended command prefix that is appropriate to your channelized configuration.
To configure a T1 line, you must enter controller configuration mode and specify the line card slot and port. The following examples show a SONET controller in slot 6 and port 0.
- The following example shows the process of removing a logical channel group in vt15 mode:
Router(config)#
controller sonet 6/0
Router(config-controller)#
sts-1 1
Router(config-ctrlr-sts1)#
no vtg 1 t1 1 channel-group 15 timeslots 1-5, 20-23
Router(config-ctrlr-sts1)#
- The following example shows the process of removing a logical channel group in ct3 mode, which means that no extended command prefix is required:
Router(config)#
controller sonet 6/0
Router(config-controller)#
sts-1 1
Router(config-ctrlr-sts1)#
no t1 1 channel-group 15 timeslots 1-5, 20-23
Router(config-ctrlr-sts1)#
Using the ping Command to Verify Network Connectivity
Using the ping command, you can verify that an interface port is functioning properly. The ping command sends echo request packets out to a remote device at an IP address that you specify. After sending an echo request, the system waits a specified time for the remote device to reply. Each echo reply is displayed as an exclamation point (!) on the console terminal; each request that is not returned before the specified timeout is displayed as a period (.). A series of exclamation points (!!!!!) indicates a good connection; a series of periods (.....) or the messages [timed out] or [failed] indicate a bad connection.
Following is an example of a successful ping command to a remote server with the address 10.0.0.10:
Type escape sequence to abort.
Sending 5, 100-byte ICMP Echoes to 10.0.0.10, timeout is 2 seconds:
Success rate is 100 percent (5/5), round-trip min/avg/max = 1/15/64 ms
If the connection fails, verify that you have the correct IP address for the destination and that the device is active (powered on), then repeat the ping command.
Proceed to the next section, "Using T1 Interface Loopback Modes," to finish checking network connectivity.
Using T1 Interface Loopback Modes
If you have difficulty with the 1-Port CHOC-12 ISE line card configuration or installation, you can troubleshoot the problem using the t1 t1-line-number loopback [local | network {line | payload} | remote {line fdl {ansi | bellcore} | payload [fdl] [ansi]}] path configuration command, using the extended command prefix that is appropriate to your channelized configuration. In vt-15 mode, t1-line-number is a number in the range from 1 to 4; in ct3 mode, t1-line-number is a number in the range from 1 to 28. Table 2 describes the supported loopback modes within the syntax of this command.
|
Note fdl loopback commands are available only for T1 links configured for ESF framing.
|
Table 2 provides explanations of specific T1 loopback modes.
Table 2 Supported T1 Interface Loopback Modes
local
|
Optional. Loops the router output data back toward the router at the T1 framer.
|
network {line | payload}
|
Optional. Selecting network line loops the data back toward the network before the T1 framer.
Selecting network payload sets a loopback that works much like the network line loopback, except that the T1 framing bits are stripped at the receive side of the T1 framer and regenerated at the transmit side of the T1 framer (toward the network).
If the T1 channel is configured for internal clocking and you attempt to set a network payload loopback, you will receive the following warning message:
This channel is configured for Internal clocking. Data integrity in network payload loopback is guaranteed only if the opposite end is configured for Line clocking, or vice versa.
Either the local port should be internal, and the remote port line, or the local port should be line, and the remote port internal.
|
remote line fdl {ansi | bellcore}
|
Optional. Sends a repeating, 16-bit ESF data link code word (00001110 11111111 for ANSI; 00010010 11111111 for Bellcore) to the remote end, requesting that it enter into a network line loopback.
Specify the ansi keyword to enable the remote line facility data link (FDL) ANSI bit loopback on the T1 channel, per the ANSI T1.403 specification.
Specify the bellcore keyword to enable the remote SmartJack loopback on the T1 channel, per the TR-TSY-000312 specification.
|
remote payload [fdl] [ansi]
|
Optional. Sends a repeating, 16-bit ESF data link code word (00010100 11111111) to the remote end, requesting that it enter into a network payload loopback. Enables the remote payload Facility Data Link (FDL) ANSI bit loopback on the T1 channel.
You can optionally specify fdl and ansi, but it is not necessary.
|
|
Figure 1 T1 Link Loopbacks under SONET Framing with VT1.5 Mode

The following examples show how to specify loopbacks for a T1 line in vt-15 mode:
- To set a T1 line into local loopback mode, use the loopback local path configuration command.
Router#
configure terminal
Enter configuration commands, one per line. End with CNTL/Z.
Router(config)#
controller sonet 6/0
Router(config-controller)#
sts-1 1
Router(config-ctrlr-sts1)#
vtg 4 t1 1 loopback local
Router(config-ctrlr-sts1)#
- To set a T1 line into network line loopback mode, use the loopback network line path configuration command.
Router#
configure terminal
Enter configuration commands, one per line. End with CNTL/Z.
Router(config)#
controller sonet 6/0
Router(config-controller)#
sts-1 1
Router(config-ctrlr-sts1)#
vtg 4 t1 1 loopback network line
Router(config-ctrlr-sts1)#
- To set a T1 line into network payload loopback mode, use the loopback network payload path configuration command.
Router#
configure terminal
Enter configuration commands, one per line. End with CNTL/Z.
Router(config)#
controller sonet 6/0
Router(config-controller)#
sts-1 1
Router(config-ctrlr-sts1)#
vtg 4 t1 1 loopback network payload
Router(config-ctrlr-sts1)#
- To set a T1 line into remote line fdl ansi loopback, use the loopback remote line fdl ansi path configuration command.
Router#
configure terminal
Enter configuration commands, one per line. End with CNTL/Z.
Router(config)#
controller sonet 6/0
Router(config-controller)#
sts-1 1
Router(config-ctrlr-sts1)#
vtg 4 t1 1 loopback remote line fdl ansi
Router(config-ctrlr-sts1)#
- To set the first T1 line into remote payload fdl ansi bit loopback, use the loopback remote payload fdl ansi path configuration command.
Router#
configure terminal
Enter configuration commands, one per line. End with CNTL/Z.
Router(config)#
controller sonet 6/0
Router(config-controller)#
sts-1 1
Router(config-ctrlr-sts1)#
vtg 4 t1 1 loopback remote payload fdl ansi
Router(config-ctrlr-sts1)#
Enabling Remote Performance Reports
To enable and disable 1-second transmissions of performance reports through the Facility Data Link (FDL), use the t1 t1-line-number fdl ansi configuration command, using the extended command prefix that is appropriate to your channelized configuration. The command must be used on both ends of the connection. In this command, t1-line-number is a number in the range from 1 to 4 in vt-15 mode, and 1 to 28 in ct3 mode.
The following example shows how to enable performance reports for a T1 line in vt-15 mode:
Router(config)#
controller sonet 6/0
Router(config-controller)#
sts-1 1
Router(config-ctrlr-sts1)#
vtg 4 t1 1 fdl ansi
Router(config-ctrlr-sts1)#
|
Note You can use this command only when the T1 framing is ESF. Use the no form of the
command to disable remote performance reports. The 1-Port CHOC-12 ISE line card
supports the reporting of controlled slip seconds (CSS). Controlled slip seconds are
reported from the far end only when a network payload loopback is set.
|
|
Note If you do not first enable remote performance data with the t1 t1-line-number fdl ansi
command, the following message is displayed:
T1 1 - Remote Performance Data (Not available)
|
Configuring a BER Test on a T1 Line
For explanations on how to send, display and terminate a BER test on a T1 line, see the document, Bit Error Rate Testing on Channelized Line Cards in Cisco 12000 Series Internet Routers at the following URL:
http://www.cisco.com/univercd/cc/td/doc/product/software/ios120/120newft/120limit/120s/120s21/bert.htm
Configuring Attributes Under SDH Framing
Procedures and examples for configuring attributes under SDH framing are presented in the following sections:
Configuring the Mapping of an Administrative Unit Group (AUG)
In SDH, there are two possible mapping/multiplexing schemes for most payload types: ANSI and ETSI.
In ANSI mapping, the Low Order payloads are aggregated into a VC-3 High Order Path. An AU pointer is added to the VC-3 to create an AU-3 (Administrative Unit type 3). Three such AU-3s are then synchronously multiplexed into an AUG (AU group). The multiplexing scheme is as follows:
VC-3 to AU-3 (x3) to AUG to STM-1
SDH ANSI mapping is very similar to the SONET frame structure.
In ETSI mapping, the Low Order payloads are aggregated into a VC-4 High Order Path. An AU pointer is added to the VC-4 to create an AU-4 (Administrative Unit type 4). One AU-4 is "multiplexed" into an AUG (AU group), which is to say, the AUG is, in fact, equivalent to an AU-4. The multiplexing scheme is as follows:
TUG-3 (x3) to VC-4 to AU-4 (x1) to STM-1
To specify the AUG mapping, use the controller command aug mapping {au-3 | au-4}. The default is operation using AU-4 mapping.
|
Note This command is available only when SDH framing is configured.
|
The example that follows selects AU-3 mapping for port 1 of the 1-Port CHOC-12 ISE line card in slot 2 of a Cisco 12000 Series Router:
Router(config)#
controller sonet 2/0
Router(config-controller)# framing sdh
Router(config-controller)#
aug mapping au-3
Configuring a TUG-3 or AU-3
Under SDH framing with AUG mapping set to AU-4, the VC-4 High Order Path comprises three TUG-3s. Each TUG-3 can be configured to carry up to 21 E1s, mapped into VC-12s. The mode of operation of a TUG-3 is not configurable, and defaults to mode c-12.
Under SDH framing with AUG mapping set to AU-3, each VC-3 High Order Path can be configured to carry up to 28 T-1s, mapped into VC-11s. The mode of operation of an AU-3 is not configurable, and defaults to mode c-11.
|
Note When configured for SDH framing, the 1-Port CHOC-12 ISE line card supports
channelization to E1s when the AUG mapping is set to AU-4, and channelization to T-1s
when the AUG mapping is set to AU-3. Different combinations of payload types and AUG
mappings are not supported.
|
Entering TUG-3 Configuration Mode
To configure a TUG-3, use the au-4 au-4-number tug-3 tug-3-number controller configuration command to enter TUG-3 configuration mode, which is indicated by a change in the command prompt. Table 4 describes the syntax of this command.
Table 3 au-4 tug-3 Command Syntax
|
|
Range |
Description |
aug-4-number
|
1 to N
|
A number in the range from 1 to N, where N is the STM level. (For the 1-Port CHOC-12 ISE line card, N is 12.)
|
tug-3-number
|
1 to 3
|
A number in the range from 1 to 3.
|
|
In the example that follows, the second TUG-3 of the AU-4 of the 1-Port CHOC-12 ISE line card in slot 4 of a Cisco 12000 Series Router is selected for configuration:
Router(config)#
controller sonet 4/0
Router(config-controller)#
framing sdh
Router(config-controller)#
aug mapping au-4
Router(config-controller)#
au-4 1 tug-3 2
Router(config-ctrlr-tug3)#
Entering AU-3 Configuration Mode
To configure an AU-3, use the au-3 au-3-number controller configuration command to enter AU-3 configuration mode, which is indicated by a change in the command prompt. au-3-number is a number in the range from 1 to 3.
In the example that follows, the second AU-3 the 1-Port CHOC-12 ISE line card in slot 4 of a Cisco 12000 Series Router is selected for configuration:
Router(config)#
controller sonet 4/0
Router(config-controller)#
framing sdh
Router(config-controller)#
aug mapping au-3
Router(config-controller)#
au-3 2
Router(config-ctrlr-au3)#
Configuring T1 Lines Under SDH Framing
Procedures and examples for configuring T1 channel-groups on the 1-Port CHOC-12 ISE line card are presented in the following sections:
Using Extended Configuration Commands for T1 Lines in AU-3 Configuration Mode
In AU-3 configuration mode, you must add the tug-2 tug-2-number modal prefix to the commands used to configure T1 line attributes, where tug-2-number is a number in the range from 1 to 7. For example, the AU-3 configuration command to configure the T1 framing takes the form:
tug-2 tug-2-number t1 t1-line-number framing {esf | sf}
Similarly, when you want to negate or reset the effects of a command by using the no form of the command, you must apply the no form of the extended command.
Creating a Logical Channel Group on a T1 Line
You can create a logical channel group on a T1 line using the tug-2 tug-2-number t1 t1-line-number channel-group channel-group-number timeslots list-of-timeslots [speed {56 | 64}] AU-3 configuration command. Table 4 describes the syntax of this command.
Table 4 T1 Line Channel Group Syntax
|
|
Range |
Description |
tug-2 tug-2-number
|
1 to 7
|
When framing is SDH, AUG mapping is AU-3, and mode of operation is c-11, tug-2-number is a number in the range from 1 to 7.
|
t1 t1-line-number
|
1 to 4
|
In c-11 mode, a number in the range from 1 to 4.
|
channel-group channel-group-number
|
0 to 23
|
Defines a logical channel group, identifying the set of timeslots allocated to this n x DS0 channel in the channelized T1 line (where n ranges from 1 to 24 timeslots).
|
timeslots list-of-timeslots
|
1 to 24
|
Combination of subranges within 1 to 24 (each subrange is a list of timeslots that makes up the T1 line).
|
speed {56 | 64}
|
56 or 64 kbps
|
Optional keyword and argument that sets the DS0 speed. The default speed is 64 kbps.
|
|
To configure a T1 line, you must enter SONET controller configuration mode and specify the line card slot and port, and then enter AU-3 configuration mode.
The following example shows the process of configuring a logical channel group in c-11 mode. The first T1 line in the fourth TUG-2 group is assigned to logical channel group 15 with channelized timeslots 1 to 5, and 20 to 23:
Router(config)#
controller sonet 6/0
Router(config-controller)#
au-3 1
Router(config-ctrlr-au3)#
tug-2 4 t1 1 channel-group 15 timeslots 1-5, 20-23
Router(config-ctrlr-au3)#
|
Note After a T1 channel group is configured, it appears to the Cisco IOS software as a serial
interface; therefore, all the configuration commands for a serial interface are available, but
not all commands are applicable to the T1 channel group.
All the encapsulation formats, such as PPP, HDLC, and Frame Relay are applicable to the
configured T1 channel group. Be sure that you are in serial interface configuration mode
when you set the encapsulation format.
All the switching types that are applicable to a serial interface are also applicable to the
configured T1 channel group.
|
Removing a Logical Channel Group from a T1 Line
You can remove a logical channel group from a T1 line (or a T1 line) with the no form of the tug-2 tug-2-number t1 t1-line-number channel-group channel-group-number timeslots list-of-timeslots [speed {56 | 64}] AU-3 configuration command.
The following example shows the process of removing a logical channel group in c-11 mode, and uses port 0 of the 1-Port CHOC-12 ISE line card in slot 6 of a Cisco 12000 Series Router. The first T1 line in the fourth TUG-2 group is being removed from logical channel group 15 with channelized timeslots 1 to 5, and 20 to 23:
Router(config)#
controller sonet 6/0
Router(config-controller)#
au-3 1
Router(config-ctrlr-au3)#
no tug-2 4 t1 1 channel-group 15 timeslots 1-5, 20-23
Router(config-ctrlr-au3)#
Setting the Framing Format on a T1 Line
You can specify the T1 framing format using the tug-2 tug-2-number t1 t1-line-number framing {esf | sf} AU-3 configuration command. Table 5 describes the syntax of this command.
Table 5 T1 Line Framing Command Syntax
|
|
Range |
Description |
tug-2 tug-2-number
|
1 to 7
|
When framing is SDH, AUG mapping is AU-3, and mode of operation is c-11, tug-2-number is a number in the range from 1 to 7.
|
t1 t1-line-number
|
1 to 4
|
In c-11 mode, a number in the range from 1 to 4.
|
framing {esf | sf [hdlc-idle {0x7E | 0xFF}]}
|
Extended Super Frame (ESF) or Super Frame (SF)
|
Defines the type of framing for the T1 line. The default framing format is Extended Super Frame (ESF). Super Frame format offers the hdlc-idle option, which can be set to use either 0x7E or 0xFF as the HDLC idle pattern.
|
|
To configure a T1 line, you must enter controller configuration mode and specify the line card slot and port. The following examples use port 0 of a SONET controller in slot 6.
- The following example selects ESF framing for the first T1 line in the fourth TUG-2:
Router(config)#
controller sonet 6/0
Router(config-controller)#
au-3 1
Router(config-ctrlr-au3)#
tug-2 4 t1 1 framing esf
Router(config-ctrlr-au3)#
- The following example selects SF framing with an HDLC idle pattern of 0x7E for the first T1 line in the fourth TUG-2:
Router(config)#
controller sonet 6/0
Router(config-controller)#
au-3 1
Router(config-ctrlr-au3)#
tug-2 4 t1 1 framing sf hdlc-idle 0x7e
Router(config-ctrlr-au3)#
|
Note When you select SF framing, consider using the no t1-line-number yellow
detection command to turn off yellow alarm detection, because the yellow alarm
can be incorrectly detected with SF framing. You can use the [no] t1
t1-line-number yellow {detection | generation} command (where t1-line-number
is 1 to 28) to turn the detection or generation of a yellow alarm on and off.
|
Setting the Clock Source on a T1 Line
You can set the internal or line (network) clock source for a T1 line with the tug-2 tug-2-number t1 t1-line-number clock source {internal | line} AU-3 configuration command. Table 6 describes the syntax of this command.
Table 6 T1 Line Clock Source Command Syntax
|
|
Range |
Description |
tug-2 tug-2-number
|
1 to 7
|
When framing is SDH, AUG mapping is AU-3, and mode of operation is c-11, tug-2-number is a number in the range from 1 to 7.
|
t1 t1-line-number
|
1 to 4
|
In c-11 mode, a number in the range from 1 to 4.
|
clock source {internal | line}
|
internal or line
|
Defines the clock source for the T1 line. The default clock source is internal.
|
|
|
Note On a T1 circuit, one end must provide the clock source by using the internal clock source.
The other end of the circuit can use either line or internal as the clock source.
|
- The following example selects internal clocking for the first T1 line in the fourth TUG-2:
Router(config)#
controller sonet 6/0
Router(config-controller)#
au-3 1
Router(config-ctrlr-au3)#
tug-2 4 t1 1 clock source internal
Router(config-ctrlr-au3)#
- The following example selects line clocking for the first T1 line in the fourth TUG-2:
Router(config)#
controller sonet 6/0
Router(config-controller)#
au-3 1
Router(config-ctrlr-au3)#
tug-2 4 t1 1 clock source line
Router(config-ctrlr-au3)#
Using the ping Command to Verify Network Connectivity
Following is an example of a successful ping command to a remote server with the address 10.0.0.10:
Type escape sequence to abort.
Sending 5, 100-byte ICMP Echoes to 10.0.0.10, timeout is 2 seconds:
Success rate is 100 percent (5/5), round-trip min/avg/max = 1/15/64 ms
If the connection fails, verify that you have the correct IP address for the destination and that the device is active (powered on), then repeat the ping command.
Proceed to the next section, "Using T1 Interface Loopback Modes," to finish checking network connectivity.
Using T1 Interface Loopback Modes
If you have difficulty with the 1-Port CHOC-12 ISE line card configuration or installation, you can troubleshoot the problem using the tug-2 tug-2-number t1 t1-line-number loopback [local | network {line | payload} | remote {line fdl {ansi | bellcore} | payload [fdl] [ansi]}] AU-3 configuration command. In c-11 mode, t1-line-number is a number in the range from 1 to 4. Table 7 describes the supported loopback modes within the syntax of this command.
|
Note fdl loopback commands are available only for T1 links configured for ESF framing.
|
Table 7 provides explanations of specific T1 loopback modes.
Table 7 T1 Interface Loopback Modes under SDH Framing with AU-3 AUG Mapping
local
|
Optional. Loops the router output data back toward the router at the T1 framer.
|
network {line | payload}
|
Optional. Selecting network line loops the data back toward the network before the T1 framer.
Selecting network payload sets a loopback that works much like the network line loopback, except that the T1 framing bits are stripped at the receive side of the T1 framer and regenerated at the transmit side of the T1 framer (toward the network).
If the T1 channel is configured for internal clocking and you attempt to set a network payload loopback, you will receive the following warning message:
This channel is configured for Internal clocking. Data integrity in network payload loopback is guaranteed only if the opposite end is configured for Line clocking, or vice versa.
Either the local port should be internal, and the remote port line, or the local port should be line, and the remote port internal.
|
remote line fdl {ansi | bellcore}
|
Optional. Sends a repeating, 16-bit ESF data link code word (00001110 11111111 for ANSI; 00010010 11111111 for Bellcore) to the remote end, requesting that it enter into a network line loopback.
Specify the ansi keyword to enable the remote line facility data link (FDL) ANSI bit loopback on the T1 channel, per the ANSI T1.403 specification.
Specify the bellcore keyword to enable the remote SmartJack loopback on the T1 channel, per the TR-TSY-000312 specification.
|
remote payload [fdl] [ansi]
|
Optional. Sends a repeating, 16-bit ESF data link code word (00010100 11111111) to the remote end, requesting that it enter into a network payload loopback. Enables the remote payload Facility Data Link (FDL) ANSI bit loopback on the T1 channel.
You can optionally specify fdl and ansi, but it is not necessary.
|
|
Figure 2 T1 Link Loopbacks under SDH Framing with AU-3 AUG Mapping
The following examples set loopbacks for a T1 line in c-11 mode:
- To set a T1 line into local loopback mode, use the loopback local AU-3 configuration command.
Router(config)#
controller sonet 6/0
Router(config-controller)#
au-3 1
Router(config-ctrlr-au3)#
tug-2 4 t1 1 loopback local
Router(config-ctrlr-au3)#
- To set a T1 line into network line loopback mode, use the loopback network line AU-3 configuration command.
Router(config-ctrlr-au3)#
tug-2 4 t1 1 loopback network line
Router(config-ctrlr-au3)#
- To set a T1 line into network payload loopback mode, use the loopback network payload AU-3 configuration command.
Router(config-ctrlr-au3)#
tug-2 4 t1 1 loopback network payload
Router(config-ctrlr-au3)#
- To set a T1 line into remote line fdl ansi loopback, use the loopback remote line fdl ansi controller configuration command.
Router(config-ctrlr-au3)#
tug-2 4 t1 1 loopback remote line fdl ansi
Router(config-ctrlr-au3)#
- To set the first T1 line into remote payload fdl ansi bit loopback, use the loopback remote payload fdl ansi controller configuration command.
Router(config-ctrlr-au3)#
tug-2 4 t1 1 loopback remote payload fdl ansi
Router(config-ctrlr-au3)#
Enabling Remote Performance Reports
To enable and disable 1-second transmissions of performance reports through the Facility Data Link (FDL), use the tug-2 tug-2-number t1 t1-line-number fdl ansi AU-3 configuration command. The command must be used on both ends of the connection. In this command, t1-line-number is a number in the range from 1 to 4 in c-11 mode.
The following example shows how to enable performance reports for a T1 line in c-11 mode:
Router(config)#
controller sonet 6/0
Router(config-controller)#
au-3 1
Router(config-ctrlr-au3)#
tug-2 4 t1 1 fdl ansi
Router(config-ctrlr-au3)#
You can use this command only when the T1 framing is ESF. Use the no form of the command to disable remote performance reports. The 1-Port CHOC-12 ISE line card supports the reporting of controlled slip seconds (CSS). Controlled slip seconds are reported from the far end only when a network payload loopback is set.
|
Note If you do not first enable remote performance data with the t1 t1-line-number fdl ansi
command, the following message is displayed:
T1 1 - Remote Performance Data (Not available)
|
Configuring a BER Test on a T1 Line under SDH Framing with AU-3 AUG Mapping
For explanations on how to send, display and terminate a BER test on a T1 line, see the document,
Bit Error Rate Testing on Channelized Line Cards in Cisco 12000 Series Internet Routers at the following URL:
http://www.cisco.com/univercd/cc/td/doc/product/software/ios120/120newft/120limit/120s/120s21/bert.htm
Configuring E1 Lines under SDH Framing with AU-4 AUG Mapping
Procedures and examples for configuring E1 channel-groups on the 1-Port CHOC-12 ISE line card are presented in the following sections:
Creating a Logical Channel Group on a E1 Line under SDH Framing with AU-4 AUG Mapping
E1 channels are supported under SDH framing, with AUG mapping set to AU-4. Configuration of the 63 E1s is done per TUG-3 (see the "Entering TUG-3 Configuration Mode" section). Each TUG-3 comprises 7 TUG-2s. Each TUG-2 can be configured to carry up to 3 E1s mapped into TU-12s.
To configure a logical channel group on an E1 line, use the tug-2 tug-2-number e1 e1-line-number channel-group channel-group-number timeslots list-of-timeslots TUG-3 configuration command. Table 8 describes the syntax of this channel group command:
Table 8 E1 Line Channel Group Syntax
|
|
Range |
Description |
tug-2 tug-2-number
|
1to 7
|
Specifies the TUG-2 number in the selected TUG-3.
|
e1 e1-line-number
|
1 to 3
|
A TUG-2 can carry three TU-12s, each of which can carry a channelized E1 frame.
|
channel-group channel-group-number
|
0 to 30
|
Defines a logical channel group, identifying the set of timeslots allocated to this n x E0 channel in the channelized E1 line, where n is a timeslot number in the range from 1 to 31.
|
timeslots list-of-timeslots
|
1 to 31
|
Combination of subranges within 1 to 31 (each subrange is a list of timeslots that makes up the E1 line).
|
|
To configure an E1 line, you must enter SONET controller configuration mode and specify the line card slot and port, and then enter the command mode appropriate to the selected framing type and mode of operation for the for the TUG-3 of an AU-4. The following example shows the first E1 line in the fourth TUG-2 group being assigned to logical channel group 15 with channelized timeslots 1 to 5, and 20 to 23:
Router(config)#
controller sonet 6/0
Router(config-controller)#
framing sdh
Router(config-controller)#
aug mapping au-4
Router(config-controller)#
au-4 1 tug-3 2
Router(config-ctrlr-tug3)#
mode c-12
Router(config-ctrlr-tug3)#
tug-2 4 e1 1 channel-group 15 timeslots 1-5, 20-23
Router(config-ctrlr-tug3)#
|
Note After an E1 channel group is configured, it appears to the Cisco IOS software as a serial
interface; therefore, all the configuration commands for a serial interface are available, but
not all commands are applicable to the E1 channel group.
All the encapsulation formats, such as PPP, HDLC, and Frame Relay are applicable to the
configured E1 channel group. Be sure that you are in serial interface configuration mode
when you set the encapsulation format.
All the switching types that are applicable to a serial interface are also applicable to the
configured E1 channel group.
|
Removing a Logical Channel Group from an E1 Line under SDH Framing with AU-4 AUG Mapping
You can remove a logical channel group from an E1 line with the no tug-2 tug-2-number e1 e1-line-number channel-group channel-group-number TUG-3 configuration command, where:
- tug-2-number is 1 to 7.
- e1-line-number is 1 to 3.
- channel-group-number is 0 to 30.
To configure an E1 line, you must enter SONET controller configuration mode and specify the line card slot and port, and then enter the command mode appropriate to the selected framing type and mode of operation for the for the TUG-3 of an AU-4. The following example shows a SONET controller in slot 6 and port 0.
The following example removes logical channel group 10 from channelized E1 line 1 of TUG-2 number 4 in TUG-3 number 2.
Router(config)#
controller sonet 6/0
Router(config-controller)#
au-4 tug-3 2
Router(config-ctrlr-tug3)#
no tug-2 4 e1 1 channel-group 10
Router(config-ctrlr-tug3)#
Creating an Unframed Logical Channel Group on an E1 Line
You can configure any of the E1 lines as unframed E1 data lines. An unframed E1 line contains no framing byte in timeslot 0. Unframed E1s are not divided into timeslots, thus allowing the full 2048 kbps bandwidth to be allocated to user data. Having no framing byte nor CRC-4 error detection, unframed E1s offer fewer performance monitoring and alarm detection capabilities than framed E1s.
To configure an unframed E1 line, use the tug-2 tug-2-number e1 e1-line-number unframed TUG-3 configuration command, where:
- tug-2-number is a number in the range from 1 to 7.
- e1-line-number is a number in the range from 1 to 3.
To configure an E1 line, you must enter SONET controller configuration mode and specify the line card slot and port, and then enter the command mode appropriate to the selected framing type and mode of operation for the for the TUG-3 of an AU-4. The following example shows the first E1 line in the fourth TUG-2 group being configured as an unframed E1:
Router(config)#
controller sonet 6/0
Router(config-controller)#
au-4 1 tug-3 2
Router(config-ctrlr-tug3)#
tug-2 4 e1 1 unframed
Router(config-ctrlr-tug3)#
|
Note After an unframed E1 logical channel group is configured, it appears to the Cisco IOS
software as a serial interface with channel group number zero. The configuration
commands in the previous example will create a serial interface with the following address:
interface serial 6/0.1/2/4/1:0 (see
Table 10 for interface
naming details).
|
Setting the Framing Format on an E1 Line
You can specify the E1 framing format using the tug-2 tug-2-number e1 e1-line-number framing {crc4 | no-crc4} TUG-3 configuration command, where:
- tug-2-number is a number in the range from 1 to 7.
- e1-line-number is a number in the range from 1 to 3.
- e1-line-number is a number in the range from 1 to 3.
- crc4 sets the framing format to E1 with a 4-bit cyclic redundancy check (PCM31 CRC4). The default framing format is crc4.
- no-crc4 sets the framing format to E1 without a 4-bit cyclic redundancy check (PCM31).
To configure an E1 line, you must enter SONET controller configuration mode and specify the line card slot and port, and then enter the command mode appropriate to the selected framing type and mode of operation for the for the TUG-3 of an AU-4. The following examples use port 0 of a SONET controller in slot 6.
- The following example shows how to set crc4 framing format for E1 line 1:
Router(config)#
controller sonet 6/0
Router(config-controller)#
au-4 1 tug-3 2
Router(config-ctrlr-tug3)#
tug-2 4 e1 1 framing crc4
Router(config-ctrlr-tug3)#
- The following example shows how to set no-crc4 framing format for E1 line 1:
Router(config)#
controller sonet 6/0
Router(config-controller)#
au-4 1 tug-3 2
Router(config-ctrlr-tug3)#
tug-2 4 e1 1 framing no-crc4
Router(config-ctrlr-tug3)#
Setting the Clock Source on an E1 Line
To specify where the clock source is obtained for an E1 line, use the tug-2 tug-2-number e1 e1-line-number clock source {internal | line} TUG-3 configuration command, where:
- tug-2-number is a number in the range from 1 to 7.
- e1-line-number is a number in the range from 1 to 3.
- internal specifies that the internal clock source is used. The default clock source is internal.
- line specifies that the network clock source, recovered from the received signal, is used.
|
Note On an E1 circuit, one end must provide the clock source by using the internal clock source.
The other end of the circuit can use either line or internal as the clock source.
|
- The following example shows how to instruct E1 line 1 to use an internal clock source.
Router(config)#
controller sonet 6/0
Router(config-controller)#
au-4 1 tug-3 2
Router(config-ctrlr-tug3)#
tug-2 4 e1 1 clock source internal
Router(config-ctrlr-tug3)#
- The following example shows how to instruct E1 line 3 to use a line clock source.
Router(config)#
controller sonet 6/0
Router(config-controller)#
au-4 1 tug-3 2
Router(config-ctrlr-tug3)#
tug-2 4 e1 3 clock source line
Router(config-ctrlr-tug3)#
Setting the National Bits on an E1 Line
To configure the national reserve bit pattern for an E1 line, use the tug-2 tug-2-number e1 e1-line-number national bits pattern TUG-3 configuration command, where:
- tug-2-number is a number in the range from 1 to 7.
- e1-line-number is a number in the range from 1 to 3.
- pattern is a value in the range from 0x0 to 0x1F (hexadecimal) or 0 to 31 (decimal). The default value is 0x1F (or 31).
The following example sets the national bit pattern to 0x0 on the first E1 line in the fourth TUG-2.
Router(config)#
controller sonet 6/0
Router(config-controller)#
au-4 1 tug-3 2
Router(config-ctrlr-tug3)#
tug-2 4 e1 1 national bits 0x0
Router(config-ctrlr-tug3)#
Using the ping Command to Verify Network Connectivity
Following is an example of a successful ping command to a remote server with the address 10.0.0.10:
Type escape sequence to abort.
Sending 5, 100-byte ICMP Echoes to 10.0.0.10, timeout is 2 seconds:
Success rate is 100 percent (5/5), round-trip min/avg/max = 1/15/64 ms
If the connection fails, verify that you have the correct IP address for the destination and that the device is active (powered on), then repeat the ping command.
Proceed to the next section, "Using E1 Interface Loopback Modes," to finish checking network connectivity.
Using E1 Interface Loopback Modes
If you have difficulty with the 1-Port CHOC-12 ISE line card configuration or installation, you can troubleshoot the problem using the supported E1 interface loopback modes:
- Diagnostic, or local loopback, mode
- Network loopback mode:
- Line loopback
- Payload loopback
To set one of these loopback modes, use the tug-2 tug-2-number e1 e1-line-number loopback {local | network {line | payload}} TUG-3 configuration command, where:
- tug-2-number is a number in the range from 1 to 7.
- e1-line-number is a number in the range from 1 to 3.
To disable one of these loopback modes, use the no tug-2 tug-2-number e1 e1-line-number loopback {local | network {line | payload}} TUG-3 configuration command.
Table 9 describes the supported E1 interface loopback modes.
Table 9 1-port ChOC-12/STM-4 to DS1/E1 ISE Line Card E1 Loopback Modes
local
|
Loops the router output data back toward the router at the E1 framer.
|
network {line | payload}
|
Selecting network line loops the data back toward the network before the E1 framer.
Selecting network payload sets a loopback that works much like the network line loopback, except that the E1 framing bits are stripped at the receive side of the E1 framer and regenerated at the transmit side of the E1 framer (toward the network).
If the E1 channel is configured for internal clocking and you attempt to set a network payload loopback, you will receive the following warning message:
This channel is configured for Internal clocking. Data integrity in network payload loopback is guaranteed only if the opposite end is configured for Line clocking, or vice versa.
Either the local port should be internal, and the remote port line, or the local port should be line, and the remote port internal.
|
|
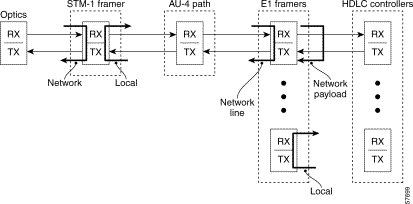
Figure 3 E1 Link Loopbacks under SDH Framing with AU-4 AUG Mapping
To set a local loopback on an E1 line, use the loopback local TUG-3 configuration command.
Router(config)#
controller sonet 6/0
Router(config-controller)#
au-4 tug-3 2
Router(config-ctrlr-tug3)#
tug-2 4 e1 1 loopback local
Router(config-ctrlr-tug3)#
To set a network line loopback on an E1 line, use the loopback network line TUG-3 configuration command.
Router(config-ctrlr-tug3)#
tug-2 4 e1 1 loopback network line
Router(config-ctrlr-tug3)#
To set a network payload loopback on an E1 line, use the loopback network payload TUG-3 configuration command.
Router(config-ctrlr-tug3)#
tug-2 4 e1 1 loopback network payload
Router(config-ctrlr-tug3)#
Configuring a BER Test on an E1 Line
For explanations on how to send, display and terminate a BER test on a E-1 line, see the document, Bit Error Rate Testing on Channelized Line Cards in Cisco 12000 Series Internet Routers at the following URL:
http://www.cisco.com/univercd/cc/td/doc/product/software/ios120/120newft/120limit/120s/120s21/bert.htm
Configuring the Serial Interfaces
The following sections describe how to enable an interface and specify IP routing. You may also need to enter other configuration commands, depending on your system configuration requirements. For descriptions of configuration commands and the configuration options available, refer to the appropriate software publications listed in the "Related Documents" section.
A serial interface is automatically created for each T-1and E1 configured. Table 10 lists the command syntax for the selected framing.
Table 10 Serial Interface Command Format
|
Framing Configuration |
Command Syntax |
SDH; AU-4 AUG mapping
|
interface serial slot/port.au-4-number/tug-3-number/
tug-2-number/e1-number:channel-group-number
|
SDH; AU-3 AUG mapping
|
interface serial slot/port.au-3-number/tug-2-number/t1-number:
channel-group-number
|
SONET; CT3 mode
|
interface serial slot/port.sts1-number/t1-number:
channel-group-number
|
SONET; VT1.5 mode
|
interface serial slot/port.sts1-number/vtg-number/t1-number:
channel-group-number
|
|
Follow these steps to configure the 1-Port CHOC-12 ISE line card interface, beginning in privileged EXEC mode:
Step 1 Enter the
configure terminal EXEC command to enter global configuration mode as follows:
Router#
configure terminal
Enter configuration commands, one per line. End with CNTL/Z.
Step 2 Specify the 1-Port CHOC-12 ISE line card interface by entering the interface serial global configuration command in the appropriate format (see Table 10).
Router(config)#
interface serial 2/0.1/2/4/1:15 (for SDH with au-4 AUG mapping)
or
Router(config)#
interface serial 3/0.3/4/1:15 (for SDH with au-3 AUG mapping)
or
Router(config)#
interface serial 4/0.3/5/1:15 (for SONET and vt-15 mode)
or
Router(config)#
interface serial 4/0.3/26:15 (for SONET and ct3 mode)
The prompt changes to interface configuration mode.
Step 3 Use the ip address interface configuration command to specify an interface by an IP address and subnet mask:
Router(config-if)#
ip address 10.0.0.1 255.255.255.0
Step 4 Add any additional configuration commands required to enable routing protocols and set the interface characteristics.
Step 5 To change the shutdown state to up and enable the interface, use the no shutdown interface command:
Router(config-if)#
no shutdown
Step 6 Repeat Step 2 through Step 5 to configure additional interfaces, as required.
Step 7 Enter exit to exit configuration mode:
Step 8 Write the new configuration to nonvolatile random access memory (NVRAM) by using the copy running-config startup-config command:
Router#
copy running-config startup-config
Using clear Commands on Serial Interfaces
To reset the hardware logic for a serial interface, use the clear interface serial slot/port.path:channel-group-number EXEC command, where:
- path depends on the interface configuration (SDH framing with AU-4 or AU-3 AUG mapping, or SONET framing in ct3 or vt-15 mode; see Table 10).
- channel-group-number is 0 to 30 for an E1 line, or 0 to 23 for a T1 line.
The following example clears serial interface 3/0.1/1/1:1, which is configured in the context of SONET framing in vt-15 mode. The number sequence .1/1/1/:1 corresponds to the sts-1-number/vtg-number/t1-line-number:channel-group number sequence.
Router#
clear interface serial 3/0.1/1/1:1
|
Note As long as the serial interface is available, you can enter this command immediately after
using the enable command to enter privileged EXEC mode.
|
To initialize the counters for a serial interface, use the clear counters serial slot/port.path:channel-group-number EXEC command, where:
- path depends on the interface configuration (SDH framing with AU-4 or AU-3 AUG mapping, or SONET framing in ct3 or vt-15 mode; see Table 10).
- channel-group-number is 0 to 30 for an E1 line, or 0 to 23 for a T1 line.
The following example clears the counters for serial interface 3/0.1/1/1:1, which is configured in the context of SONET framing in vt-15 mode. The number sequence .1/1/1:1 corresponds to the sts-1-number/vtg-number/t1-line-number:channel-group-number sequence.
Router#
clear counters serial 3/0.1/1/1:1
Clear "show interface" counters on this interface [confirm]
|
Note As long as the serial interface is available, you can enter this command immediately after
using the enable command to enter privileged EXEC mode.
|
Configuring Automatic Protection Switch
On the 1-Port CHOC-12 ISE line card, you configure APS at the SONET controller level, and not at the interface level as in Packet-Over-Sonet.
The minimum configuration tasks to complete for configuring APS are as follows:
- Configure APS working and protect interfaces
Use the aps working and the aps protect controller configuration commands to specify the working and protect channels.
- Configure other APS features (Optional)
Other APS features include the following:
- group
- lockout
- manual
- reflector
- revert
- signalling
- timers
- unidirectional
- Monitor and maintain APS (Optional)
Use the show aps, show controllers sonet, and show interfaces EXEC commands to monitor APS configurations.
- Configure SONET Alarm Reporting (Optional)
For procedures on how to configure automatic protection switching on the 1-Port CHOC-12 ISE line card, see the document, Automatic Protection Switching of Packet-over-SONET Circuits, at the following URL:
http://www.cisco.com/univercd/cc/td/doc/product/software/ios112/ios112p/gsr/posapsgs.htm
Two SONET connections are required to utilize APS and, in a Telco environment, the SONET circuits must be provisioned for APS. At the time of provisioning, the operation (ie. 1+1), mode (ie. bidirectional) and revert operation (that is, no revert) need to be specified. If the SONET connections are homed on two separate routers (the normal configuration), then a communications channel between the two routers (NOT utilizing the working and protect SONET circuits) needs to be set up for APS communication.
In enabling APS operation, it is recommended to configure the working channel first. Normal operation with 1+1 operation is to configure it as working channel 1.
Configuration on the router hosting the working channel:
Router#
configure terminal
Router(config)#
interface ethernet 0/0
Router(config-if)#
ip address 7.7.7.7 255.255.255.0
Router(config)#
controller sonet 4/0
Router(config-controller)#
aps working 1
Configuration on the router hosting the protect channel:
Router#
configure terminal
Router(config)#
interface ethernet 0/0
Router(config-if)#
ip address 7.7.7.6 255.255.255.0
Router(config)#
controller sonet 4/0/0
Router(config-controller)#
aps protect 1 7.7.7.7
How to Configure Layer 2 Features
This section contains the following procedures:
Configuring Distributed Multilink Point-to-Point Protocol
Configuring Multilink Frame-Relay
Configuring Distributed Multilink Point-to-Point Protocol
Configuring Distributed Multilink Point-to-Point Protocol (MLPPP) is presented in the following sections:
MLPPP allows you to increase the bandwidth of your network links beyond that of a single T1/E1 line without having to purchase a T-3/E3 line. You can combine T1/E1 lines in a 1-Port CHOC-12 ISE line card on a Cisco 12000 Series Router into a bundle that has the combined bandwidth of multiple T1/E1 lines. This is done by using an MLPPP link. You choose the number of bundles and the number of T1/E1 lines in each bundle.
An individual MLPPP bundle can span across multiple T1/E1s on the same line card, but bundles cannot span across multiple line cards.
|
Note Distributed Multilink PPP is not supported across multiple Cisco 12000 series line cards.
|
A bundle can be composed of the following:
- 1 to 8 T1/E1 lines
- Individual T1/E1 line that can span across both ports
- Each T1/E1 component must be of equal bandwidth
For additional information, refer to the document, Configuring Media-Independent PPP and Multilink PPP at the following URL:
http://www.cisco.com/univercd/cc/td/doc/product/software/ios120/12cgcr/dial_c/dcppp.htm.
Create a Multilink Bundle
A multilink bundle consists of a maximum of 8 T1/E1s. To create a multilink bundle, use the following commands beginning in global configuration mode:
Step 1 Enter multilink interface configuration mode:
Router# configure terminal
Router(config)# interface multilink group-number
Step 2 Assign an IP address to the multilink interface:
Router(config-if)# ip address address mask
Step 3 Enable PPP encapsulation:
Router(config-if)# encapsulation ppp
Step 4 Enable Multilink PPP:
Router(config-if)# ppp multilink
Step 5 Assign the multilink interface to a multilink bundle:
Router(config-if)# multilink-group group-number
Step 6 Optional. Enable Challenge Handshake Authentication Protocol (CHAP) authentication:
Router(config-if)# ppp chap hostname group group-number
|
Note If more than one bundle is configured on the Cisco 12000 series Internet Router,
you must add the ppp chap hostname group command to both the bundle and link
configurations.
|
Assign a Serial Interface to a Multilink Bundle
To assign a serial interface to a multilink bundle, use the following commands in interface configuration mode:
Step 1 Select the serial interface using the form of the
interface serial command that is appropriate to your configuration context (see
Table 10):
Router(config)# interface serial slot/port.number
Step 2 Remove any specified IP address.
Router(config-if)# no ip address
Step 3 Set the frequency of keepalive packets.
Router(config-if)# keepalive
Step 4 Enable PPP encapsulation.
Router(config-if)# encapsulation ppp
Step 5 Enable Multilink PPP.
Router(config-if)# ppp multilink
Step 6 Disable CDP on the serial link.
Router(config-if)# no cdp enable
|
Note CDP should be disabled on serial links belonging to an MLPPP bundle because
CDP packets cannot be encapsulated on these links. CDP can be enabled on the
MLPPP bundle, but not on individual serial links.
|
Step 7 Assign the interface to a multilink bundle.
Router(config-if)# multilink-group group-number
Step 8 Optional. Enable Challenge Handshake Authentication Protocol (CHAP) authentication.
Router(config-if)# ppp chap hostname group group-number
|
Note If more than one bundle is configured on the Cisco 12000 series Internet Router,
you must add the ppp chap hostname group command to both the bundle and link
configurations.
|
Disable PPP Multilink Fragmentation
By default, PPP multilink fragmentation is enabled. To disable PPP multilink fragmentation, use the following command in interface configuration mode:
- Disable PPP multilink fragmentation.
Router(config-if)# no ppp multilink fragmentation
|
Note Enabling fragmentation reduces the delay latency among bundle links, but adds
some load to the CPU. Disabling fragmentation can result in better throughput.
If your data traffic is consistently of a similar size, Cisco recommends that you
disable fragmentation. In this case, the benefits of fragmentation might be
outweighed by the added load on the CPU.
|
Configuring Multilink Frame-Relay
For additional configuration information on Multilink Frame-Relay and the Cisco 12000 Series Router, see the document, Multilink Frame Relay (FRF.16) at the following URL:
http://www.cisco.com/univercd/cc/td/doc/product/software/ios120/120newft/120limit/120s/120s17/17s _mfr.htm
Create an MFR Bundle
A multilink bundle consists of a maximum of 8 T-1s or E1s. To create a multilink bundle, complete the following steps:
Step 1 Enter MFR interface configuration mode:
Router# configure terminal
Router(config)# interface MFR 1
Step 2 Assign an IP address to the MFR interface:
Router(config-if)# ip address address mask
Step 3 Assign a bundle ID
Router(config-if)# frame-relay multilink bid BUNDLE1
Step 4 Remaining frame-relay configuration is the same as for non-multilink interfaces
Assign an Interface to an MFR Bundle
To assign an interface to a multilink bundle, use the following commands in interface configuration mode:
Step 1 Select the serial interface using the form of the interface serial command that is appropriate to your configuration context:
Router(config)# interface serial slot/port.number
Step 2 Associate a serial interface with the MFR bundle:
Router(config)#
encapsulation frame-relay MFR1
Link Fragmentation Reassembly Configuration
Link Fragmentation Reassembly (LFI) allows the router to send large, low priority packets and small, high priority packets on the same DLCI while minimizing the latency of high priority packets. The low priority packets are fragmented and high-priority packets are inserted between the fragments of the low priority packets. The configuration must include the following steps:
Step 1 Identify high priority traffic:
Router(config)#
class-map match-all voice-ip
Router(config-cmap)#
match ip dscp 63
Router(config-cmap)#
match ip precendence 7
Step 2 Mark high priority traffic
Router(config)#
policy-map LFI-policy
Router(config-pmap)#
class voice-ip
Router(config-pmap-c)#
priority
Step 3 Specify the fragmentation and policy:
Router(config)#
map-class frame-relay LFI
Router(config-map-class)#
service policy output LFI-policy
Router(config-map-class)#
frame-relay fragment 128
Step 4 Create frame-relay interface/sub-interface:
Router(config)#
interface serial2/0.1/1:0
Router(config-if)#
no ip address
Router(config-if)#
encapsulation frame-relay
Router(config)#
interface Serial2/0.1/1:0.1 point-to-point
Router(config-subif)#
ip address 2.1.1.1 255.255.255.0
Router(config-subif)#
frame-relay interface-dlci 16
Router(config-fr-dlci)#
class LFI
How to Configure Layer 3 Features
The 1-Port CHOC-12 ISE line card supports all Cisco 12000 Series Router Internet Service Engine 3 (ISE 3) software features. Additional information can be found in the following documents:
Cross-Platform Release Notes for Cisco IOS Release 12.0 S, Part 2: New Features and Important Notes
http://www.cisco.com/univercd/cc/td/doc/product/software/ios120/relnote/xprn120s/120snewf.htm#32 390
Cisco IOS Release 12.0S Features for Cisco 12000 Series Internet Router
http://www.cisco.com/univercd/cc/td/doc/product/core/cis12000/12_0s/index.htm
Verifying and Monitoring Configurations with Show Commands
After installing the 1-Port CHOC-12 ISE line card, use show commands to display the status of the SONET controller, T1 channel-groups, and the 1-Port CHOC-12 ISE line card serial interfaces. Following are descriptions and examples of the show commands you can use to check the configuration. Descriptions are limited to fields that are relevant for verifying the configuration of the 1-Port CHOC-12 ISE line card.
Discovering the Slot Number of the Line Cards—show gsr
To ascertain the correct slot number with which to configure the SONET controller, use the show gsr EXEC command. The following example indicates that the 1-Port CHOC-12 ISE line card is in slot 2:
Slot 0 type = Route Processor
state = ACTV RP IOS Running ACTIVE
Slot 1 type = 2 Ports OC3 Channelized to DS1/E1
state = RTRYWAIT Waiting to retry download after persistent failures
Slot 2 type = 1 Port ISE OC12 Channelized to DS1/E1
state = IOS RUN Line Card Enabled
Slot 3 type = 1 port SONET OC12 channelized to DS3
state = ADMNDOWN Administratively Down, Powered
Slot 16 type = Clock Scheduler Card(8)
Slot 17 type = Clock Scheduler Card(8)
state = Card Powered PRIMARY CLOCK
Slot 18 type = Switch Fabric Card(8)
Slot 19 type = Switch Fabric Card(8)
Slot 20 type = Switch Fabric Card(8)
Slot 26 type = AC Power Supply(8)
Discovering the Version of the Current Software and Hardware—show version
The show version command displays the configuration of the system hardware (the channel of each line card installed), the software release currently operating, the names and sources of configuration files, and the boot images. The following example lists the 1-Port CHOC-12 ISE line card interface as an active line card.
Cisco Internetwork Operating System Software
IOS (tm) GS Software (GSR-P-M), Version 12.0(27)S1, SOFTWARE
Copyright (c) 1986-2003 by cisco Systems, Inc.
Compiled Tue 14-Feb-04 16:58 by nmasa
Image text-base: 0x50010C60, data-base: 0x5314A000
ROM: System Bootstrap, Version 11.2(20030116:225008) [rarcher-pre_lci_throttle 184], DEVELOPMENT SOFTWARE
BOOTLDR: GS Software (GSR-BOOT-M), Version 12.0(8)S, EARLY DEPLOYMENT RELEASE SOFTWARE (fc1)
lab1 uptime is 1 week, 3 days, 23 minutes
System returned to ROM by reload
System image file is "tftp://225.255.255.254//tftpboot/gsr-p-mz.120-26.3.S"
cisco 12008/GRP (R5000) processor (revision 0x05) with 262144K bytes of memory.
R5000 CPU at 200Mhz, Implementation 35, Rev 2.1, 512KB L2 Cache
1 One-port Channelized OC-12 controller (1 OC12s)
1 Ethernet/IEEE 802.3 interface(s)
10 Serial network interface(s)
507K bytes of non-volatile configuration memory.
20480K bytes of Flash PCMCIA card at slot 0 (Sector size 128K).
8192K bytes of Flash internal SIMM (Sector size 256K).
Configuration register is 0x0
Discovering Current Status of the SONET Controller—show controllers sonet
To display information about the SONET port, including information on all of the configured channels, use the following form of the show controllers sonet command:
show controllers sonet slot/port [brief | tabular]
When framing is SDH and AUG mapping is AU-4, the form of the show controllers command is as follows:
show controllers sonet slot/port.au-4-number/tug-3-number/tug-2-number/e1-line-number [brief | tabular]
When framing is SDH and AUG mapping is au-3, the form of the show controllers command is as follows:
show controllers sonet slot/port.au-3-number/tug-2-number/t1-number [brief | tabular]
When framing is SONET and the mode is ct3, the form of the show controllers command is as follows:
show controllers sonet slot/port.sts1-number/t1-number [brief | tabular]
When framing is SONET and the mode is vt-15, the form of the show controllers command is as follows:
show controllers sonet slot/port.sts1-number/vtg-number/t1-number [brief | tabular]
where:
- slot refers to the chassis slot where the 1-Port CHOC-12 ISE line card is installed.
- port refers to the physical port on the 1-Port CHOC-12 ISE line card and is always 0.
- au-4-number is always 1 for this line card.
- tug-3-number is a number in the range from 1 to 3.
- au-3-number is a number in the range from 1 to 12.
- tug-2-number is a number in the range from 1 to 7.
- e1-line-number is a number in the range from 1 to 3.
- t1-number is a number in the range from 1 to 4 (in ct3 mode, where a channelized T-3 is mapped into the STS-1, t1-number is a number in the range from 1 to 28).
- sts1-number is a number in the range from 1 to 3.
- vtg-number is a number in the range from 1 to 7.
Router#
show controllers sonet 2/0
SONET 2/0 is up. (Configured for Locally Looped) Hardware is GSR 1 port ISE OC12 (channelized)
Applique type is Channelized OCx interface
Type: Sonet, Line Coding: NRZ, Line Type: IR SM
LOF = 9 LOS = 9 BIP(B1) = 79233
AIS = 13 RDI = 6 REI = 711 BIP(B2) = 3921
Active Defects: SLOF SLOS LAIS
Alarm reporting enabled for: SF SLOS SLOF B1-TCA B2-TCA
BER thresholds: SF = 10e-3 SD = 10e-6
TCA thresholds: B1 = 10e-6 B2 = 10e-6 B3 = 10e-6
State: PSBF_state = FALSE
Alarm reporting enabled for: LOP LOM B3-TCA
AIS = 90 RDI = 93 REI = 415790 BIP(B3) = 1477868
LOP = 12 PSE = 0 NSE = 0 NEWPTR = 10
LOM = 79 PLM = 253888 UNEQ = 44
Active Defects: AIS RDI PLM
PATH TRACE BUFFER : STABLE
FF FF FF FF FF FF FF FF FF FF FF FF FF FF FF FF ................
FF FF FF FF FF FF FF FF FF FF FF FF FF FF FF FF ................
FF FF FF FF FF FF FF FF FF FF FF FF FF FF FF FF ................
FF FF FF FF FF FF FF FF FF FF FF FF FF FF FF FF ................
AIS = 92 RDI = 94 REI = 141 BIP(B3) = 343
LOP = 12 PSE = 0 NSE = 0 NEWPTR = 87
LOM = 80 PLM = 258542 UNEQ = 44
Active Defects: AIS RDI PLM
PATH TRACE BUFFER : STABLE
FF FF FF FF FF FF FF FF FF FF FF FF FF FF FF FF ................
FF FF FF FF FF FF FF FF FF FF FF FF FF FF FF FF ................
FF FF FF FF FF FF FF FF FF FF FF FF FF FF FF FF ................
FF FF FF FF FF FF FF FF FF FF FF FF FF FF FF FF ................
AIS = 92 RDI = 94 REI = 98 BIP(B3) = 235
LOP = 12 PSE = 4 NSE = 0 NEWPTR = 12
LOM = 80 PLM = 258542 UNEQ = 44
Active Defects: AIS RDI PLM
PATH TRACE BUFFER : STABLE
FF FF FF FF FF FF FF FF FF FF FF FF FF FF FF FF ................
FF FF FF FF FF FF FF FF FF FF FF FF FF FF FF FF ................
FF FF FF FF FF FF FF FF FF FF FF FF FF FF FF FF ................
FF FF FF FF FF FF FF FF FF FF FF FF FF FF FF FF ................
OC12.CT3 2/0.1 is down. Hardware is GSR 1 port ISE OC12 (channelized)
Applique type is Channelized T3 in STS-1
Transmitter is sending RAI.
Receiver has loss of frame.
Framing is M23, Clock Source is Internal
Equipment customer loopback
Data in current interval (687 seconds elapsed):
0 Line Code Violations, 122142 P-bit Coding Violation
0 C-bit Coding Violation, 0 P-bit Err Secs
0 P-bit Severely Err Secs, 0 Severely Err Framing Secs
687 Unavailable Secs, 0 Line Errored Secs
0 C-bit Errored Secs, 0 C-bit Severely Errored Secs
0 Line Code Violations, 159915 P-bit Coding Violation
0 C-bit Coding Violation, 0 P-bit Err Secs
0 P-bit Severely Err Secs, 0 Severely Err Framing Secs
900 Unavailable Secs, 0 Line Errored Secs
0 C-bit Errored Secs, 0 C-bit Severely Errored Secs
Total Data (last 1 15 minute intervals):
0 Line Code Violations, 159915 P-bit Coding Violation,
0 C-bit Coding Violation, 0 P-bit Err Secs,
0 P-bit Severely Err Secs, 0 Severely Err Framing Secs,
900 Unavailable Secs, 0 Line Errored Secs,
0 C-bit Errored Secs, 0 C-bit Severely Errored Secs
STS-1 1, T1 1 (CT3 1/1) is down
Receiver has loss of signal.
Framing is ESF, Clock Source is Internal
Data in current interval (0 seconds elapsed):
0 Line Code Violations, 0 Path Code Violations
0 Slip Secs, 0 Fr Loss Secs, 0 Line Err Secs, 0 Degraded Mins
0 Errored Secs, 0 Bursty Err Secs, 0 Severely Err Secs
0 Unavail Secs, 0 Stuffed Secs
STS-1 1, T1 2 (CT3 1/2) is down
Receiver has loss of signal.
Framing is ESF, Clock Source is Internal
Data in current interval (0 seconds elapsed):
0 Line Code Violations, 0 Path Code Violations
0 Slip Secs, 0 Fr Loss Secs, 0 Line Err Secs, 0 Degraded Mins
0 Errored Secs, 0 Bursty Err Secs, 0 Severely Err Secs
0 Unavail Secs, 0 Stuffed Secs
STS-1 1, T1 3 (CT3 1/3) is down
Receiver has loss of signal.
Framing is ESF, Clock Source is Internal
Data in current interval (0 seconds elapsed):
0 Line Code Violations, 0 Path Code Violations
0 Slip Secs, 0 Fr Loss Secs, 0 Line Err Secs, 0 Degraded Mins
0 Errored Secs, 0 Bursty Err Secs, 0 Severely Err Secs
0 Unavail Secs, 0 Stuffed Secs
STS-1 1, T1 10 (CT3 1/10)
STS-1 1, T1 11 (CT3 1/11)
STS-1 1, T1 12 (CT3 1/12)
STS-1 1, T1 13 (CT3 1/13)
STS-1 1, T1 14 (CT3 1/14)
STS-1 1, T1 15 (CT3 1/15)
STS-1 1, T1 16 (CT3 1/16)
STS-1 1, T1 17 (CT3 1/17)
STS-1 1, T1 18 (CT3 1/18)
STS-1 1, T1 19 (CT3 1/19)
STS-1 1, T1 20 (CT3 1/20)
STS-1 1, T1 21 (CT3 1/21)
STS-1 1, T1 22 (CT3 1/22)
STS-1 1, T1 23 (CT3 1/23)
STS-1 1, T1 24 (CT3 1/24)
STS-1 1, T1 25 (CT3 1/25)
STS-1 1, T1 26 (CT3 1/26)
STS-1 1, T1 27 (CT3 1/27)
STS-1 1, T1 28 (CT3 1/28)
(Additional display text is not shown.)
The show controllers sonet slot/port brief command shows limited information for a SONET port.
Router#
show controllers sonet 2/0 brief
SONET 2/0 is up. (Configured for Locally Looped) Hardware is GSR 1 port ISE OC12 (channelized)
Applique type is Channelized OCx interface
Clock Source is Line, AUG mapping is AU4.
Type: SDH, Line Coding: NRZ, Line Type: Short SM
LOF = 0 LOS = 0 BIP(B1) = 0
AIS = 0 RDI = 0 REI = 0 BIP(B2) = 0
Alarm reporting enabled for: SF SLOS SLOF B1-TCA B2-TCA B3-TCA
BER thresholds: SF = 10e-3 SD = 10e-6
TCA thresholds: B1 = 10e-6 B2 = 10e-6 B3 = 10e-6
AIS = 0 RDI = 0 REI = 15 BIP(B3) = 11
LOP = 0 PSE = 4 NSE = 0 NEWPTR = 1
PATH TRACE BUFFER : STABLE
52 6F 75 74 65 72 33 2F 30 2F 31 00 00 00 00 Router3/0/1....
STM1.AU4 3/0.1 is up. Hardware is GSR 1 port ISE OC12 (channelized)
Applique type is C12 in TUG-3 in AU-4
AU-4 1, TUG-3 1, TUG-2 1, E1 1 (C-12 1/1/1/1) is up
Framing is crc4, Clock Source is Internal
BERT test result (running)
Test Pattern : 2^15, Status : Sync, Sync Detected : 1
Interval : 5 minute(s), Time Remain : 2 minute(s)
Bit Errors (since BERT started): 0 bits,
Bits Received (since BERT started): 311 Mbits
Bit Errors (since last sync): 0 bits
Bits Received (since last sync): 311 Mbits
AU-4 1, TUG-3 1, TUG-2 1, E1 2 (C-12 1/1/1/2) is up
Framing is crc4, Clock Source is Internal
AU-4 1, TUG-3 1, TUG-2 1, E1 3 (C-12 1/1/1/3) is up
Framing is crc4, Clock Source is Internal
AU-4 1, TUG-3 1, TUG-2 2, E1 1 (C-12 1/1/2/1) is up
Framing is crc4, Clock Source is Internal
AU-4 1, TUG-3 1, TUG-2 2, E1 2 (C-12 1/1/2/2) is up
Framing is crc4, Clock Source is Internal
AU-4 1, TUG-3 1, TUG-2 2, E1 3 (C-12 1/1/2/3) is up
Framing is crc4, Clock Source is Internal
AU-4 1, TUG-3 2, TUG-2 7, E1 1 (C-12 1/2/7/1) is up
Framing is crc4, Clock Source is Internal
AU-4 1, TUG-3 2, TUG-2 7, E1 2 (C-12 1/2/7/2) is up
Framing is crc4, Clock Source is Internal
AU-4 1, TUG-3 2, TUG-2 7, E1 3 (C-12 1/2/7/3) is up
Framing is crc4, Clock Source is Internal
AU-4 1, TUG-3 3, TUG-2 1, E1 1 (C-12 1/3/1/1) is up
Framing is crc4, Clock Source is Internal
AU-4 1, TUG-3 3, TUG-2 1, E1 2 (C-12 1/3/1/2) is up
Framing is crc4, Clock Source is Internal
AU-4 1, TUG-3 3, TUG-2 1, E1 3 (C-12 1/3/1/3) is up
Framing is crc4, Clock Source is Internal
AU-4 1, TUG-3 3, TUG-2 7, E1 1 (C-12 1/3/7/1) is up
Framing is crc4, Clock Source is Internal
AU-4 1, TUG-3 3, TUG-2 7, E1 2 (C-12 1/3/7/2) is up
Framing is crc4, Clock Source is Internal
AU-4 1, TUG-3 3, TUG-2 7, E1 3 (C-12 1/3/7/3) is up
Framing is crc4, Clock Source is Internal
(Additional display text is not shown.)
By adding specific T1 or E1 line information to the preceding show controllers sonet slot/port brief command, you can show limited output for the specific line that you specify.
Router#
show controllers sonet 2/0.1/1/1/1 brief
AU-4 1, TUG-3 1, TUG-2 1, E1 1 (C-12 1/1/1/1) is up
Framing is crc4, Clock Source is Internal
By adding specific T1 or E1 line information to the show controllers sonet slot/port tabular command, you can show output for the specific line that you specify in tabular format.
Router#
show controllers sonet 2/0.1/1/1/1 tabular
AU-4 1, TUG-3 1, TUG-2 1, E1 1 (C-12 1/1/1/1) is up
Framing is crc4, Clock Source is Internal
INTERVAL LCV PCV CSS SELS LES DM ES BES SES UAS SS
01:01-01:03 0 0 0 0 0 0 0 0 0 0 0
00:46-01:01 0 0 0 0 0 0 0 0 0 0 0
00:31-00:46 0 0 0 0 0 0 0 0 0 0 0
00:16-00:31 0 0 0 0 0 0 0 0 0 0 0
00:01-00:16 0 0 0 0 0 0 0 0 0 0 0
Total 0 0 0 0 0 0 0 0 0 0 0
Discovering the Operational Status of Line Protocols on All Interfaces—show protocols
The show protocols EXEC command displays the protocols configured for the entire system and specific interfaces. If necessary, return to configuration mode to add or remove protocol routing on the system or specific interfaces.
Internet Protocol routing is enabled
Serial2/0.1/1/1/1:0 is up, line protocol is up
Serial2/0.1/1/2/1:0 is up, line protocol is up
Serial2/0.1/1/3/1:0 is up, line protocol is up
Serial2/0.1/3/7/1:0 is up, line protocol is up
Serial2/0.1/3/1/2:0 is up, line protocol is up
Serial2/0.1/3/7/3:0 is up, line protocol is up
POS5/0 is up, line protocol is down
Internet address is 12.3.2.2/24
Multilink1 is up, line protocol is up
Internet address is 12.1.1.2/24
Multilink2 is up, line protocol is up
Internet address is 12.1.2.2/24
Multilink3 is up, line protocol is up
Internet address is 12.1.3.2/24
Multilink7 is up, line protocol is up
Internet address is 12.1.7.2/24
Ethernet0 is up, line protocol is up
Internet address is 1.2.14.2/16
Discovering Multilink Bundle and Group Status—show ppp multilink
Use the show ppp multilink command to display information about the newly created multilink bundle:
Router#
show ppp multilink
Multilink37, bundle name is group37
0 lost fragments, 0 reordered, 0 unassigned
0 discarded, 0 lost received
0x0 received sequence, 0x0 sent sequence
Member links: 2 active, 0 inactive (max not set, min not set)
Multilink31, bundle name is group31
0 lost fragments, 0 reordered, 0 unassigned
0 discarded, 0 lost received
0x0 received sequence, 0x0 sent sequence
Member links: 2 active, 0 inactive (max not set, min not set)
Multilink34, bundle name is group34
0 lost fragments, 0 reordered, 0 unassigned
0 discarded, 0 lost received
0x0 received sequence, 0x0 sent sequence
Member links: 2 active, 0 inactive (max not set, min not set)
Multilink22, bundle name is group22
0 lost fragments, 0 reordered, 0 unassigned
0 discarded, 0 lost received
0x0 received sequence, 0x0 sent sequence
Member links: 2 active, 0 inactive (max not set, min not set)
Additional References
The following sections provide references related to the features of the 1-Port CHOC-12 ISE line card.
Related Documents
|
Related Topic |
Document Title |
Cumulative list of Cisco IOS features pertaining specifically to the Cisco 12000 Series Router
|
Cisco IOS Release 12.0S Features for Cisco 12000 Series Internet Router
http://www.cisco.com/univercd/cc/td/doc/product/core/cis12000/12 _0s/index.htm
|
Cumulative list of features added to Cisco IOS 12.0 (S) release
|
Cross-Platform Release Notes for Cisco IOS Release 12.0 S, Part 2: New Features and Important Notes
http://www.cisco.com/univercd/cc/td/doc/product/software/ios120/ relnote/xprn120s/120snewf.htm
|
Physical installation and diagnostic procedures for the 1-Port CHOC-12 ISE line card.
|
Cisco 12000 Series 1-Port Channelized OC-12/STM-4 (DS1/E1) ISE Line Card Installation and Configuration at the following URL:
http://www.cisco.com/univercd/cc/td/doc/product/core/cis12000/li necard/lc_chan/13921c12.htm
|
ACLs, EACLs and Turbo ACLs
|
Implementing Access Lists on Cisco 12000 Series Internet Routers
http://www.cisco.com/en/US/products/hw/routers/ps167/products_t ech_note09186a008015a057.shtml
Access List Performance Improvements for Cisco 12000 Gigabit Switch Routers
http://www.cisco.com/univercd/cc/td/doc/product/software/ios120/ 120newft/120limit/120s/120s10/hw_acl.htm
Turbo Access Control Lists
http://www.cisco.com/univercd/cc/td/doc/product/software/ios120/ 120newft/120limit/120s/120s6/turboacl.htm
|
APS and SONET commands: complete command syntax, command mode, defaults, usage guidelines, and examples
|
Cisco IOS Interface Command Reference, Release 12.0
|
APS and SONET configuration
|
Cisco IOS Interface Configuration Guide, Release 12.0
|
APS on the Cisco 7500 and Cisco 12000 series routers
|
Automatic Protection Switching of Packet-over-SONET Circuits feature document, Release 11.2 P
http://www.cisco.com/univercd/cc/td/doc/product/software/ios112/i os112p/gsr/posapsgs.htm
|
Configuring Multilink PPP
|
Configuring Media-Independent PPP and Multilink PPP
http://www.cisco.com/univercd/cc/td/doc/product/software/ios120/ 12cgcr/dial_c/dcppp.htm
|
Committed Access Rate (CAR)
|
Committed Access Rate
http://www.cisco.com/univercd/cc/td/doc/product/software/ios111/ cc111/car.htm
|
Modular Quality of Service (MQC)
|
Modular Quality of Service Command-Line Interface
http://www.cisco.com/univercd/cc/td/doc/product/software/ios120/ 120newft/120limit/120xe/120xe5/mqc/mcli.htm
|
MPLS Quality of Service feature module
|
MPLS Quality of Service (QoS)
http://www.cisco.com/univercd/cc/td/doc/product/software/ios120/ 120newft/120limit/120s/120s22/fs22cos.htm
|
MPLS Traffic Engineering feature module
|
MPLS Traffic Engineering (TE)—Link and Node Protection, with RSVP Hellos Support Feature Overview
http://www.cisco.com/univercd/cc/td/doc/product/software/ios120/ 120newft/120limit/120s/120s23/fs_frrnd.htm
|
Sampled Netflow feature module
|
Sampled NetFlow
http://www.cisco.com/univercd/cc/td/doc/product/software/ios120/ 120newft/120limit/120s/120s11/12s_sanf.htm
|
Weighted Random Early Detection (WRED)
|
Weighted Random Early Detection on the Cisco 12000 Series Router
http://www.cisco.com/univercd/cc/td/doc/product/software/ios112/i os112p/gsr/wred_gs.htm
|
|
Standards
|
Standards |
Title |
GR-253-CORE
|
SONET Transport Systems:Common Generic Criteria
|
ITU-T G.783 and Annex B of ITU-T G.783
|
Characteristics of SDH equipment functional blocks
|
FRF.12
|
Frame Relay Fragmentation Implementation Agreement
|
FRF.16
|
Multilink Frame Relay UNI/NNI Implementation Agreement
|
|
MIBs
|
MIBs |
MIBs Link |
- All MIBs support both the European SDH and the USA SONET standards
- SONET (RFC 2558)
- DS1 (RFC 1406)
- DS3 (RFC 1407)
- MIB II, including interface extensions
- BGP-4 MIB
- CAR MIB
- Cisco CAR MIB
- Cisco CDP MIB
|
To locate and download MIBs for selected platforms, Cisco IOS releases, and feature sets, use Cisco MIB Locator found at the following URL:
http://www.cisco.com/go/mibs
|
|
RFCs
|
RFCs |
Title |
RFC 1990
|
The PPP Multilink Protocol (MP)
|
RFC 1661
|
The Point-to-Point Protocol (PPP)
|
RFC 1662
|
PPP in HDLC-like Framing
|
RFC 1406
|
Definitions of Managed Objects for the DS1 and E1 Interface Types
|
RFC 1407
|
Definitions of Managed Objects for the DS3/E3 Interface Type
|
RFC 2558
|
Definitions of Managed Objects for the SONET/SDH Interface Type
|
|
Technical Assistance
|
Description |
Link |
Technical Assistance Center (TAC) home page, containing 30,000 pages of searchable technical content, including links to products, technologies, solutions, technical tips, and tools. Registered Cisco.com users can log in from this page to access even more content.
|
http://www.cisco.com/public/support/tac/home.shtml
|
|

Copyright © 2003 Cisco Systems, Inc. All rights reserved.


Posted: Tue Feb 24 20:29:51 PST 2004
All contents are Copyright © 1992--2004 Cisco Systems, Inc. All rights reserved.
Important Notices and Privacy Statement.
