|
|

This chapter describes how to install the access server and includes the following sections:
 | Warning Only trained and qualified personnel should be allowed to install or replace this equipment. |
 | Warning This equipment is intended to be grounded. Ensure that the host is connected to earth ground during normal use. |
The following items are included with the access server:
You might need the following equipment, which is not included:
You can set the chassis on a desktop or other flat surface, or install it in a rack. Proceed to the procedure in this section that best meets the needs of your network.
Take these steps:
Step 1 Locate the rubber feet on the black adhesive strip that shipped with the chassis.
Step 2 Place the access server upside-down on a smooth, flat surface.
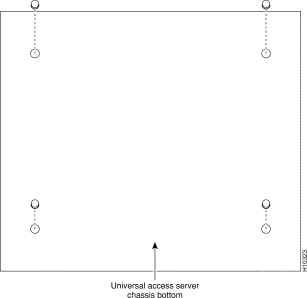
Step 3 Peel off the rubber feet from the black adhesive strip and place them adhesive-side down at each corner of the chassis bottom. (See Figure 3-1.)
Step 4 Place the access server right-side up on a flat, smooth, secure surface.
 | Caution Do not place anything on top of the access server that weighs more than 10 lbs (4.5 kg). Excessive weight could damage the chassis. |
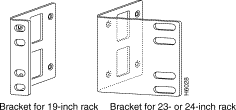
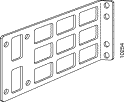
This section describes how to rack-mount the chassis. The access server comes with 19-inch rack-mount brackets and larger brackets for use with a 23- or 24-inch rack. (See Figure 3-2 and Figure 3-3). You can also order telco rack-mount brackets (Figure 3-3) from Cisco. The part number for telco brackets is AS52/3RM-TELCO-19"=.
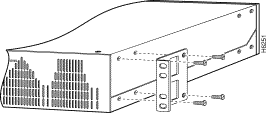
To install the chassis in a rack, attach the brackets in one of the following ways:
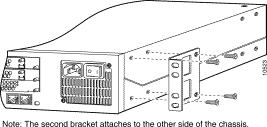
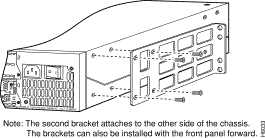
After the brackets are secured to the chassis, you can rack-mount the access server. Using the screws that you provide, attach the chassis to the rack as shown in Figure 3-7 or Figure 3-8.


This section describes how to connect the access server to your network.
The cables required to connect the access server to a network are not provided. For ordering information, refer to the section "Getting Help" in the appendix "Troubleshooting the Universal Access Server." Or if you prefer to make your own cables, refer the appendix "Cabling Specifications for the Universal Access Server" for cable and port pinouts.
 | Warning Do not work on the system or connect or disconnect cables during periods of lightning activity. |
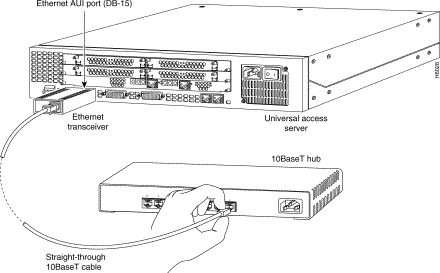
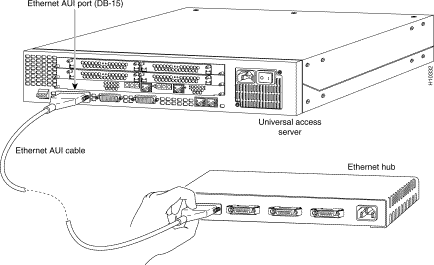
You can connect the access server to an Ethernet network in one of the following ways:
If your Ethernet connection requires jackscrews, remove the slide-latch connector from the AUI connector and attach the jackscrews provided.
You can connect the access server to a WAN in the following ways:
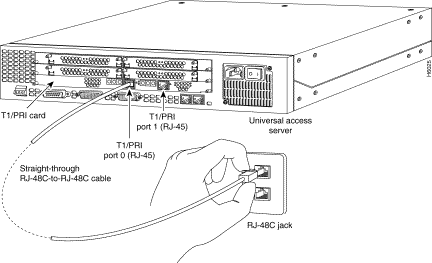
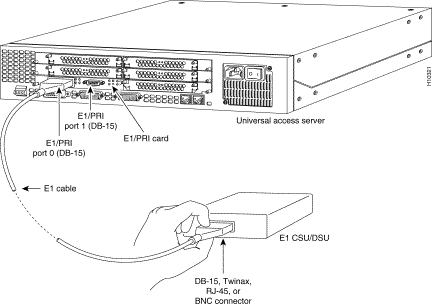
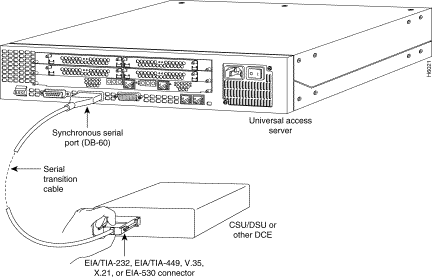
 | Caution If the access server is configured with fewer than three feature cards or modules, install a blank slot cover over all unused slots to ensure proper airflow within the chassis. |
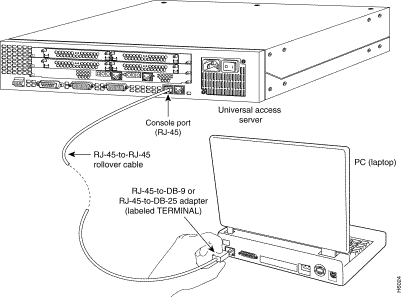
Use the console terminal for local administrative access to the access server. You can only connect a terminal to the console port. Use the auxiliary port to connect a terminal or a modem for remote access.
Take these steps:
Step 1 Connect the terminal using an RJ-45-to-RJ-45 rollover cable and an RJ-45-to-DB-9 or RJ-45-to-DB-25 adapter. The adapters provided are labeled Terminal. Other types of adapters are not included. (See Figure 3-14.)
For additional information about rollover cable pinouts, see the appendix "Cabling Specifications for the Universal Access Server."
Step 2 Configure your terminal or PC terminal emulation software for 9600 baud, 8 data bits, no parity, and 2 stop bits.
Take these steps:
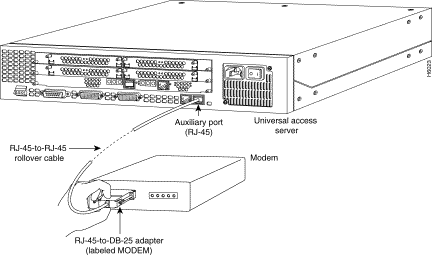
Step 1 Connect a modem to the auxiliary port using an RJ-45-to-RJ-45 rollover cable with an RJ-45-to-DB-25 adapter. The adapter provided is labeled Modem. (See Figure 3-15.)
Step 2 Make sure that your modem and the auxiliary port on the access server are configured for the same transmission speed (38400 baud is typical) and hardware flow control with Data Carrier Detect (DCD) and Data Terminal Ready (DTR) operations.
If you ordered the access server with a DC power supply, follow the procedure in this section to wire the terminal block.
 | Warning Before performing any of the following procedures, ensure that power is removed from the DC circuit. To ensure that all power is OFF, locate the circuit breaker on the panel board that services the DC circuit, switch the circuit breaker to the OFF position, and tape the switch handle of the circuit breaker in the OFF position. |
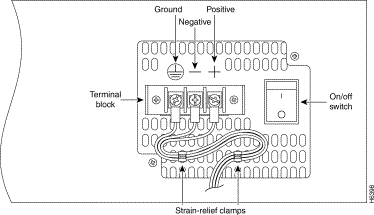
Refer to Figure 3-16 and take these steps:
Step 1 Remove the terminal block cover plate.
Step 2 Attach the appropriate lugs at the wire end of the power supply cord.
Step 3 Wire the DC power supply cord to the terminal block.
Step 4 Secure the power supply cord to the cable strain-relief clamps on the DC power supply with cable ties.
Step 5 Install the terminal block cover plate.
 | Warning The illustration shows the DC power supply terminal block. Wire the DC power supply using the appropriate lugs at the wiring end, as illustrated. The proper wiring sequence is ground to ground, positive to positive (line to L), and negative to negative (neutral to N). Note that the ground wire should always be connected first and disconnected last. |
 | Warning When stranded wiring is required, use approved wiring terminations, such as closed-loop or spade-type with upturned lugs. These terminations should be the appropriate size for the wires and should clamp both the insulation and conductor. |
 | Caution Do not overtorque the terminal block captive thumbscrew or terminal block contact screws. The recommended torque is 8.2 ± 0.4 inch-lb. |
 | Warning After wiring the DC power supply, remove the tape from the circuit breaker switch handle and reinstate power by moving the handle of the circuit breaker to the ON position. |
|
|