
10.3. Creating your own MIDI files
Although it's easy to select your favorite MIDI files from the Internet and post them on your site without the use of a MIDI editor or a sequencer, there are situations where editing is needed. Downloaded MIDI files often are too large (50 KB to 90 KB or more) or are crammed with too many instrument sounds, making the music sound cluttered on poorer-quality computer systems. For example, you may download a file that tries to replicate an exact MIDI version of a Top 40 hit down to the ear-numbing MIDI guitar riff. MIDI files also are uploaded to the Internet by music aficionados who include every note and subtle phrase of a piece. This is overkill if you just want 30 seconds of classical music on your welcome page. Such MIDI files are candidates for a MIDI editor.
10.3.1. MIDI editors
A MIDI editor allows you to remove unnecessary sections or notes and tone down certain instrument sounds. MIDI editors also let you build your own MIDI file from scratch with your own musical ideas or with sections borrowed from another MIDI file. The first step is to select a MIDI file via the Web or from other music-related sources, and build from there.
Once you have selected a MIDI file, you can alter the sound to fit your needs or tastes. Most MIDI files are called standard MIDI files, or SMFs. SMFs come in two basic formats: single-track (type 0) and multitrack (type 1). In a single-track SMF, all the musical parts are merged into one track. In a multitrack file, each part or instrument sound is assigned to a separate track. Multitrack is the more common MIDI file and is preferable to work with because it is easier to edit the music when the instrument notes are on separate tracks.
MIDI editors are often referred to as sequencers and are similar to working with word processors. The difference is you are working with musical notes instead of text characters. If you work in time-based animation or with video programs, your skill sets transfer well to MIDI sequencers because MIDI sequencers are time-based and have similar functions.
10.3.2. Editing a pre-existing MIDI file
A MIDI editor has certain functions you can apply to alter an existing MIDI file or to create one of your own, including removing instruments, pitch shifting, changing notes, inserting regions, and creating your own tunes.
10.3.2.1. Removing instruments
Most MIDI files you download from the Web have several separate music tracks. They may have a drum track, a bass track, a piano track, and several other instruments, including strings, horns, and guitar, as well as special sounds or sound effects programmed as part of the file. If you want to use only the piano or the drum track, you extract only the parts you need and remove the others.
First, select the track by clicking on the track name, and then choose the Copy command from the Edit menu. If you want to change the assignment of a particular track to any of the 16 General MIDI instruments using a MIDI editor, click and hold on the Instruments column of the desired track, as shown in Figure 10-2. This changes the output channel of that track at playback. Each channel has an instrument assigned to it. If you want to allow the information on track 1 (where the instrument is piano, for example) to play through track 10 (where the drums are assigned), you make that alteration here.

Figure 10-2. To change a track so it is played by another channel/instrument, use a MIDI editor and then click and hold on the "Instrument" column.
10.3.2.2. Pitch-shifting
If the MIDI file you downloaded is in the wrong musical key, you can change to the appropriate key and shift the overall pitch up or down using a MIDI editor or sequencer. You could also select one particular sound such as a high-pitched flute and lower it an octave, or choose any note and change its pitch to alter the melody or harmony of the music.
10.3.2.3. Changing notes
You may want to change specific notes. It is possible to change the note's duration, pitch, velocity (e.g., how hard the key of the piano is struck), vibrato, pan, volume, or a whole host of other controller functions that control the way each note is recorded and played back with MIDI. Each one of these controllers can add a certain amount of expression to a MIDI file that gives it more "live" characteristics.
10.3.2.4. Inserting regions
You may want to add a new section of your own, such as an intro or an ending to a pre-existing MIDI file. Or you may want to create a longer bridge in the middle of the track. With a MIDI editor, you can copy, paste, and insert entirely new sections of music anywhere in the MIDI file that you want.
10.3.2.5. Creating your own tunes
Finally, you may want to create your very own jingle or tune to accompany your web page. Making your own tunes with a sequencer is much like sitting in front of the word processor and writing a story. You start by typing in or playing different "notes," and when you have a section you like, you go back over and edit your work and prepare it to be played for others. Remember to test any piece of music with friends or colleagues first before placing it up on the Web.
10.3.3. MIDI file editing tutorial
We used Vision from Opcode Systems (http://www.opcode.com) for this tutorial. Make certain you take the time to properly install and set up Vision. The instructions for the 30-day trial package are available at http://www.designingwebaudio.com.
We will walk through the steps involved in enhancing or altering a MIDI file using Vision. Vision is a cross-platform sequencer. Other sequencers, such as Cakewalk and Performer, can also achieve the same results since each sequencer has the same basic functions. Vision offers an easy-to-use interface and many extended features, such as digital audio recording and editing, audio-to-MIDI functions, and several effects and capabilities helpful to desktop musicians and composers.
10.3.3.1. Initial steps
To work with a MIDI file in Vision, import your file into Vision by
choosing File ![]() Open. If the MIDI file is a multitrack (type 1)
file, it will show up in the sequencer as several tracks, instead of
all instruments in one track, which would be the case with
single-track (type 0) files. We used Beethoven's 5th Symphony
for our sample MIDI file. From within your sequencer, choose File
Open. If the MIDI file is a multitrack (type 1)
file, it will show up in the sequencer as several tracks, instead of
all instruments in one track, which would be the case with
single-track (type 0) files. We used Beethoven's 5th Symphony
for our sample MIDI file. From within your sequencer, choose File
![]() Open and select CD-ROM
Open and select CD-ROM ![]() Beethoven's 5th.
Beethoven's 5th.
10.3.3.2. Extracting parts
We decided to use just the piano part, so the first step is to extract that part from the MIDI file:
-
Select notes. Select all of the notes in the piano track by clicking on the bullet to the far left of the music track and name; the bullet will turn to a triangle and the track will highlight. Once the track becomes highlighted, as shown in Figure 10-3, the entire track is selected. This should give you a selection of all of the track data as well as individual notes and their duration, attack velocities, and so on, for the piano track.
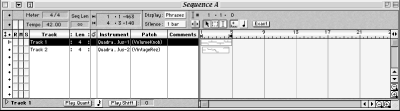
Figure 10-3. By selecting the bullet to the far left of a track name, you effectively select all data in that track.
-
Copy selected notes. Just as in a word processing document, you want to copy this section of the MIDI data by selecting Edit
 Copy.
Copy.
-
Create a new file. Now create a new file by selecting File
New.
-
Select a new track. When the new file appears on your desktop, select the first track by double-clicking next to the title in the track 1 (generally "untitled") or within the first measure of the sequence where notes already exist.
-
Paste the selection. Now paste the data into the new MIDI file by selecting Edit
Paste. You now
have a file with just the piano track from the original file.
-
Repeat this process for each part you want to extract from the original MIDI.
You can use these same steps to extract particular sections, measures, or notes from a MIDI file. Simply click or shift-click on the part you select, then copy and paste into a new file. Much like a text editor, you may cut, copy, paste, and edit MIDI notes and events to suit your needs. Think of a MIDI file as a template. Simply use the pieces you want, discard the rest, and build your personalized file from the pre-existing template.
10.3.3.3. Transposing pitch
To alter a particular instrument track or musical phrase that is too high or low in pitch, use the transpose command. For example, you may want to fix a bass guitar sound that is too low in pitch, or lower a flute that sounds too high. Transpose is the term used by musicians to change an entire section of music by a fixed amount, such as a half note (one semitone), a whole note (two semitones), or an entire octave (12 semitones). To use the transpose command, follow these steps:
-
Select parts. First select the part(s) or track(s) that you want to transpose by clicking or shift-clicking on the part(s) or track(s).
-
Transpose. Select Do
Transpose. When the Transpose window appears, the defaults will be
"up," "0 semitones," and "0
octaves," as shown in Figure 10-4. To
transpose the selection up a half note, enter "1
semitone" or "1 half step." To transpose the
selection up an octave, choose "1 octave." In this case,
try "up," "0 semitones," and "1
octave." This moves your entire selection up one octave. Now
click the Transpose button.
-
Audition the result. When ready, audition your results. You should find that the notes are the same, only one octave (8 whole notes or 12 semitones) higher. If you are unhappy with the result, simply select Edit
Undo and start over.
You can use this method to change any section of a MIDI file, from one note to the entire track. You can change the selection from one semitone to several octaves.

Figure 10-4. Select Transpose up, no semitones, and one octave to transpose the entire selection up one octave
10.3.3.4. Changing notes
You may want to do more than just change the pitch of a note. For example, you may also want to change a note's duration, velocity, or vibrato -- the functions that control the way each note sounds, and give the notes a "human" feel. Using a sequencer, it is easy to select and change any one note or selection of notes:
-
Alter the pitch higher or lower. To change the pitch of one particular note, just click on the center of the note, and drag the note up or down, thus changing its pitch, as shown in Figure 10-5.
-
Alter the time placement. Similarly, click and drag the far left of the note to move the note forward or backward in time. For example, if the note currently began at beat 3 of measure 4, and you want to move it so that the beginning was at beat 4 of measure 4, click the left-hand side of the note and drag the note until it aligned with beat 4.
-
Alter the note length. Finally, if you want to lengthen or shorten the note's duration, click to the far right of the note and drag to the right to lengthen and to the left to shorten the duration of the note.
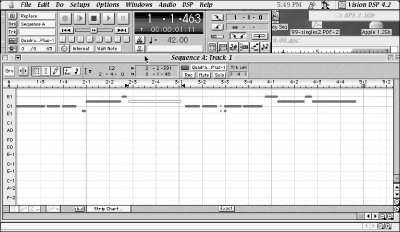
Figure 10-5. Clicking and moving a particular note lets you change pitch, move the note forward or backward in time, and make the note longer or shorter.
10.3.3.5. Using the strip chart
You may want to add vibrato or pitch bend to a group of notes to imitate a more "life-like" sound. To alter key velocity or pitch bend values of a MIDI note, selection, or file, use the strip chart. The strip chart is a chart that contains other MIDI information, besides note value, pitch, duration, and so on, and is found in the main Edit window. To use the strip chart:
-
Access the strip chart. To access the strip chart, first double-click the colored notation box that contains the sequence you want to change in the main Edit window (for example, the colored box on the righthand side of the piano track). Similarly, to open the track for editing, you may double-click the bullet to the far left of the track. A window will appear, with the title "Sequences -- Your file." At the bottom left, there will be a small box that says "Strip chart," as shown in Figure 10-6.
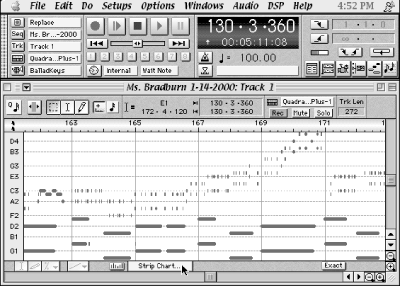
Figure 10-6. By clicking and holding the strip chart column, you can effectively select the desired controller in which you want to add or alter information.
-
Select a strip chart controller. Click and hold the strip chart button and a pop-up list of the available controllers will appear.
By clicking and holding on the box that displays the controller value (the default is No strip chart), you may select any of the controller values associated with that MIDI file. Examples of a controller include velocity, pan, pitch bend, breath control, sustain, after touch, and so on. Each one of these controller names has a particular function, and you may want to experiment with them. However, for this tutorial, we need be concerned with only a few. For our purposes, we want to alter the pitch bend controller, so select pitch bend from the Strip Chart window. Now, in the box just to the left of the controller box, click and hold and then select Free from the pop-up options.
-
Draw pitch bend values. Now click on the pencil icon located two boxes to the left, so you can use the cursor as a pencil to draw in pitch bend changes.
To create a realistic vibrato effect, zoom in until you are looking at the notes you want to alter, then draw a line up and down in short patterns as shown in Figure 10-7, just barely crossing over the center line each time.

Figure 10-7. Using the pencil tool, you can draw any controller information in the strip chart. In this case, we have attempted to simulate a vibrato sound by drawing small up and down pitch bend movements.
-
Audition the changes. After drawing pitch bend values for a few notes, select the notes in the main sequence window. Make this selection by clicking and dragging over the notes you altered (you must drag over the beginning of each note you want to select). Audition them by pressing play on the main controller (the play button to the right of the controller palette, instead of the "play from beginning" button on the left of the controller palette). If you have made changes in the strip chart that you want to erase, drag over the changes and hit Delete.
The process of adding, editing, or deleting any other controller information is the same. Simply select the controller you want to alter in the strip chart and then perform your edits. Saving your file will automatically incorporate those changes into the file the next time you play the file.
Achieving consistent MIDI playback on the Web
Jeff Essex of Audiosyncrasy (http://www.audiosync.com) has spent the past eight years in the trenches of multimedia sound design, juggling MIDI and audio to create award-winning projects for clients that include Disney Online, Nickelodeon Online, Red Sky Interactive, and many others. Below are some of his tips for creating MIDI for the Web. (Portions of this section are derived from Jeff Essex's articles originally written for the Apple Worldwide Developer Relations Group).
MIDI is great for its small file sizes, but getting consistent playback, considering the different sound cards and unique user sound systems, is practically impossible. Here are some of the strategies used by professionals to get the best results.
- Initializing
A MIDI file usually plays multiple instruments at the same time. Each is on a discrete channel, somewhat like a multitrack tape recorder. Each of these channels must be initialized with the proper settings for instrument assignment (program changes), volume level (controller #7 ), placement in the stereo field (pan, or controller #10), and effects level (reverb depth, controller #91). These instructions must be placed before any music note data, so that setup is complete before the music starts.
If your music has to loop, see the "Looping" section below for initialization ideas. If your music is a linear one-shot piece, insert a blank measure before the music and place these commands in the blank measure. Change either the tempo or the meter of the initialization measure to reduce the length of silence before the music starts. For example, set the first measure to a tempo of 500, then reset the tempo to the desired setting in the second measure where the notes start. Or set the first measure to a meter of 1/4, so it's only one measure, then change the tempo to 4/4 (or your desired meter) on the second measure.
- Looping
You never know how long the viewer will remain on a particular page, so most of the music Jeff created has to loop seamlessly. But achieving a seamless loop while also initializing the data is quite a trick. If Jeff tells the synth to play the first note while also telling it "change from a piano sound to a guitar sound," there may be a glitch in the rhythm of the piece while the command is executed. Jeff offers three solutions to this problem:
Start with just drums or piano.
The drum sound is always the same, and piano is the default sound that's played if no program change is sent. You can sneak the initialization info for the other instruments in while the piano or drums are playing.
Start with any one instrument by itself.
For example, one piece starts with a harp. The program data is placed just after the first note, so the first time users hear it, they'll hear one note of piano before the rest of the harp notes. But on successive passes through the loop, the harp will play the first note, since its instrument assignment was set on the first run through the loop.
Start with one tiny section of silence.
This process is a bit more complex and requires taking advantage of some musical math. Say a piece is in 4/4 time. It's often possible to go to the last measure of the piece and see if there's a tiny bit of silence at the end (for example, a 16th note rest). We can define the last measure as 16/16 instead of 4/4, then take the silence during the last 16th note rest and stick it at the beginning of the piece. We end up with a piece that starts with one measure in 1/16, then lots of 4/4, and a last measure of 15/16. Now there's a 1/16 measure of silence at the beginning where we can initialize the file.
- Volume levels
There's a wide variety in velocity response between various synthesizers. Try "normalizing" your key velocities to get more consistent results. Jeff scales the velocities so that they fall between the range of 60-127. Also, set channel volume levels to a maximum of 100. It's quite possible that distortion will occur if you have several channels playing notes struck at velocities of 127, while the channel volume is also set to 127.
- Reducing data
Sure, MIDI files are small, but you can make them gigantic if you're not careful. You may want to strip out after-touch data, and thin the data on continuous controllers like pitch bend and mod wheel. If you're tweaking the bender or mod wheel prior to playing a note (like bending down before the note is struck, then bending back up to normal), strip out all the pitch bend data except for the last one that sets the actual value before the note event.
- Testing
Know the enemy. Jeff authors on a Mac with a Roland Sound Canvas, the "Rosetta Stone" of General MIDI composition. If you're serious about web MIDI, try to get a real sound canvas. But after a piece is finished, check it on a PC through a Creative Labs SoundBlaster AWE32, a basic SoundBlaster 16 with FM synthesis, and on a Mac through the QuickTime Musical Instruments. Most of Jeff 's pieces go through several revisions to balance the instrument levels between the different players.
- Pray for deliverance
DLS, Beatnik, QuickTime, and DirectMusic are putting the responsibility for synthesizer performance back into the composer's hands. Let's hope these technologies are broadly adopted in the new millennium.
10.3.4. Making your MIDI music from scratch
You may want to compose and record your own MIDI music file. With almost 1,000 separate MIDI recording tracks and all the editing features you need to fine-tune every little note, you could become the next Mozart or at least the next Britney Spears. The Vision sequencer offers MIDI as well as digital audio recording, editing, and effects processing for adding audio tracks to your MIDI tracks. But since you cannot upload a MIDI file with digitized audio, we will not discuss the range of audio recording options. For more information about a digital audio editor, read Chapter 4, "Optimizing Your Sound Files".
10.3.4.1. Creating your own MIDI file
Creating your own file from scratch is a bit complicated. Here's how to do it in Vision:
-
Open a new sequence/MIDI file. To create your own MIDI file, first choose File
New. A window
entitled "Sequence A" will appear and automatically be
record-enabled (the red R will be highlighted at
the far left of the track as shown in Figure 10-8).
You are ready to go.
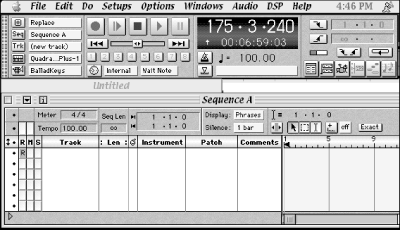
Figure 10-8. Choosing File
New creates an untitled sequence window that is record enabled and ready for your new composition. -
Connect your MIDI keyboard. If you have a MIDI keyboard or other controller like a wind or guitar controller, you may connect it to Vision via a MIDI interface. Refer to the Vision documentation or your MIDI sequencer for the exact specification for setting up your MIDI controller and the accompanying studio setup. For the setup, all you need is a MIDI interface, a MIDI keyboard, and a few connections within a secondary program such as Open Music System. (OMS is supplied by Opcode with the Vision package and is also available for download at http://www.opcode.com.). Once you have your MIDI keyboard or controller connected and transmitting MIDI information to your sequencer, you are ready to record.
Expert MIDI files: Twiddly Bits
One promising product for creating music with MIDI is called Twiddly Bits, from Keyfax Software (http://www.keyfax.com). Twiddly Bits are collections of MIDI samples recorded by world-class musicians and stored as MIDI files onto floppy disks. The musicians recorded licks, runs, motifs, and patterns that are typical of a particular instrument or style of music. You can load these files into your sequencer and have access to MIDI parts that can be pasted in any file or pattern. Because the music was recorded by world-class musicians (Bill Bruford of King Crimson, Steve Hackett of Genesis, John Bundrick of The Who, and Bob Marley, to name a few), the MIDI files sound almost authentic, with good feel and playability.
You can choose from a variety of styles in the Keyfax collection, including drums and percussion, MIDI breakbeats, guitar grooves, jazz piano, bass and drums, country, funk, world series Brazilian beats, Bill Bruford drums, and a host of others. The "Twids" come in standard MIDI files (SMFs) and can be played on Macs or PCs. We have included a group of 10 Twiddly Bits at http://www.designingwebaudio.com for you to use and experiment with. After you have opened a Twiddly Bit in Vision, press Play and audition them. Then choose places where you can use them in your own compositions or in other existing MIDI files. Try one of the following tips and tricks offered by Twiddly Bits creator Julian Colbeck:
-
If your sequencer can play in reverse, you can create different patterns such as changing an "up" guitar strum into a "down" strum.
-
Most of the Twids are designed to be looped in two-, four-, or eight-bar patterns. If you want to play four bars and have the fourth bar change chords, simply copy four bars, then transpose the fourth bar. For example, transposing +5 half steps or semitones will change a C minor chord into an F minor chord. Experiment with different patterns and transpositions.
-
Try playing back the track at half-speed or double-speed to get an interesting variation. This is good for ringing the changes on a strumming pattern.
-
You don't have to choose between a Twid part and something you have played yourself. You can mix and match. Do this by loading both parts next to one another on two separate tracks. Then mute the Twid part and as you play your part, unmute the Twid part at varying places until you find a good balance between the two. To complete the exercise, snip out the section of your part where you want the Twid and then merge the two. Think of it as sewing a patch onto your favorite pair of jeans.
-
-
Record your MIDI file. Click the Record button and begin playing notes on the keyboard. The default recording function in Vision is "Wait for Note," which means that Vision holds in record mode until you press your first key, at which time it will begin recording and capture all key, velocity, and controller data you send to it during the recording.
-
Select your tempo. The recording follows at the tempo specified in the tempo box, as shown in Figure 10-9. This value may be changed by clicking in the box and entering a new tempo. You may either enter the tempo manually using the numeric keys on your keyboard, or, if you hold the pointer inside the tempo box, it turns into an up or down arrow. Clicking the mouse button will move the tempo accordingly, in the direction of the arrow.
Figure 10-9. You may change the tempo of your MIDI file by clicking in the tempo box and entering the desired tempo or speed of your file.
-
Choose a click track. You can request Vision play a click track while you are recording to indicate the beat value and relative speed. This allows you to keep proper time during your recording. The option "Click in Record" is enabled by default and may be toggled by choosing Options
Click in Record. Also in the Options menu, you may select Click in
Play, which causes the click track to play during playback as well.
If you want to change the notes of the click track, select Options
Metronome Sound and change the values of the notes in the
boxes provided, as shown in Figure 10-10.
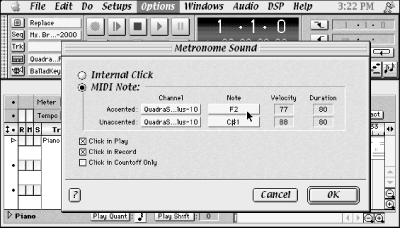
Figure 10-10. Choose your own metronome sounds by selecting an instrument (generally Instrument 10 for drums) and then two notes to represent the accented and unaccented beats.
-
Click the Record and Play buttons. To record your MIDI music, first click Record, then Play (or hit the spacebar) to begin recording. Now listen to the metronome count off and begin playing notes when you are ready. Play as much as you want, as there are no time limits and disk space is not a factor with MIDI files. You have approximately 100 hours of recording before you begin to run out of disk space on the average hard drive.
-
Click the Stop button. When you are finished, click the stop button or hit the spacebar. Your newly created MIDI file will now appear in the "Sequence A" window.
-
Audition your recording. You may hit the Play from Beginning button (the play button to the left of the stop button on the control palette, shown in Figure 10-11) to audition your recording. When you are finished auditioning, you may want to make some changes. To do the entire recording over again, select Undo.
Figure 10-11. There are two Play buttons on the control palette. The Play button to the left of the Stop button is called the Play from Beginning button, and it commences playback from the start of the piece. The Play button to the right of the Stop button continues playback from the point of the time marker.
-
Minor edits. If you want to fix a few notes that may have incorrect pitches or may fall at incorrect times, simply use your mouse to make these edits. Do this by double-clicking the part of the window where the MIDI notes appear or the left-most edge of the track, where the track selection bullet exists (the bullet will appear as a triangle if the track is currently selected). A new window will appear, in which you may edit and change the MIDI information, as described earlier in this chapter in the Section 10.3.3.5, "Using the strip chart". You can change notes by clicking on them and then altering them to your specifications. Again, if you want to change the duration of a note, click the right side of the note and drag. If you want to change the pitch, click the center and drag the note up or down. If you want to change the space in time that the note occupies, click the far left side of the note and drag the note to the new desired location.
10.3.4.2. Adding notes without using a keyboard
Finally, you may want to add notes to your MIDI file without entering them via the keyboard, or even create an entire file without using a keyboard at all. You can accomplish this in two ways: by cutting and pasting or by drawing a note.
First, you could copy and paste notes from another file. Simply
select a note or group of notes by clicking and dragging over the
desired selection area. Then choose Edit ![]() Copy, from one file,
perhaps a previously existing file of a piece of music you like. Now,
use the cursor to select an insert point of where you want the new
notes to enter. Then choose Edit
Copy, from one file,
perhaps a previously existing file of a piece of music you like. Now,
use the cursor to select an insert point of where you want the new
notes to enter. Then choose Edit ![]() Paste, and the new notes will
become part of the new track.
Paste, and the new notes will
become part of the new track.
Figure 10-12 shows a MIDI file before and after an edit insertion of notes. You may even choose to copy notes from other MIDI files such as the Twiddly Bits files. These files, described in the sidebar "Expert MIDI files: Twiddly Bits", are collections of professionally recorded MIDI files that are made to be copied and pasted into your own MIDI files. This sort of resource can add extra complexity and depth to your existing MIDI files.
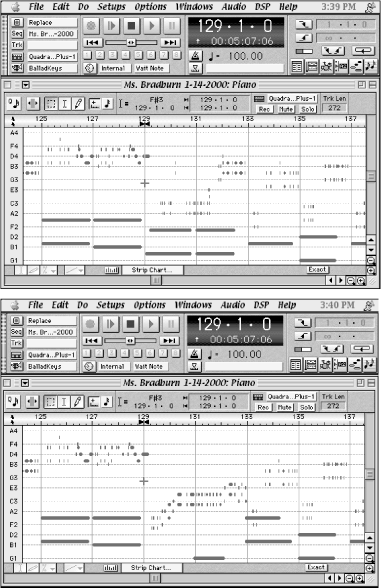
Figure 10-12. A MIDI file before pasting in new notes (top), and after pasting in new notes (bottom)
The second way to add notes without using a keyboard or other controller is simply to draw them into the file. Heres how to draw new notes into the file:
-
Select the file track that you want to draw the notes into. Double-click the bullet to the far left of the track name to open the edit window for that track as shown in Figure 10-13.

Figure 10-13. To open a track for editing, double-click the small bullet to the far left of the Track name.
-
Select the pencil tool. After the file is open, click on the pencil tool located at the top left of the Edit window. With the pencil tool selected, begin clicking anywhere in the Edit window. Anywhere you click, a new note will appear, as shown in Figure 10-14. The note will have a specific value and have the pitch associated with the exact place you clicked in the window. To see which pitch it corresponds to, look at the list at the far right of the window. You will see note names and numbers, indicting the octave of that note. C3 corresponds to middle C on the piano or keyboard. The default duration of the note is set to 1/4 note. You can also change this by clicking the pencil tool again, until the Settings window appears. When it does, you may click and hold on the icon of the 1/4 note; simply select the note value you desire, ranging from a dotted whole note to a triplet 32nd note.
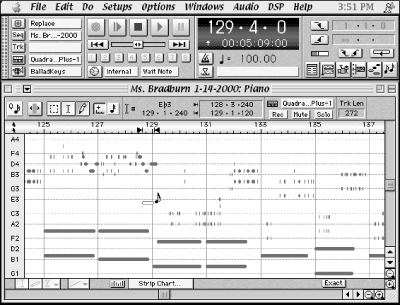
Figure 10-14. After you select the pencil tool, the cursor turns into a note. A new note appears anywhere you click in the Edit window.
-
Draw more notes. After you draw your first note, start drawing away until you have a section that you are relatively pleased with.
-
Audition the new notes. Select the newly drawn notes and choose Play from the controller.
-
Edit the new notes. Click back onto the cursor tool and begin editing the pitch values and duration of the notes to meet your needs.
Clearly, these techniques would be too cumbersome to create 100 measures or several minutes worth of music, but they are ideal for creating small, specific sections where you need pinpoint accuracy and don't have time or access to a keyboard controller. Try creating two-, four-, or eight-bar patterns this way. Then, use the copy and paste commands to make longer sections. If you go in and alter the pitch of few notes in every other section, you will achieve enough variation so that listeners won't know that you simply cut and pasted the same section multiple times, and they will be more likely to stay interested in the music. This is a great technique for creating looped sequences that repeat a certain section over and over, while giving a relative appearance of never repeating exactly or at least not boring the listening audience.
 |  |  |
| 10.2. Adding MIDI to your web pages |  | 10.4. Summary |

Copyright © 2002 O'Reilly & Associates. All rights reserved.