
16.2. Electronic Mail
Electronic mail (email) is one of the most desirable features of a computer system. You can send and receive email on your Linux system locally between users on the host and between hosts on a network. You have to set up three classes of software to provide email service. These are the mail user agent or mailer, the mail transport agent (MTA), and the transport protocol.
The mailer provides the user interface for displaying mail, writing new messages, and filing messages. Linux offers you many choices for mailers. They are always being improved, and a particular mailer may provide certain features, such as the ability to serve as a newsreader or to serve as a web browser.
The mailer relies on the MTA to route mail from one user to another, whether locally or across systems. The MTA in turn uses a transport protocol, usually either UUCP (Unix-to-Unix Copy) or Simple Mail Transport Protocol (SMTP), to provide the medium for mail transfer.
There are a number of possible scenarios when using email on a Linux system, and depending on those scenarios, you will have to install a different set of software packages. However, no matter which option you choose, you will always need a mailer.
The first scenario applies to dial-up access to the Internet via an Internet Service Provider (ISP). In this scenario, there is often only one user on the Linux machine, even though this is not a requirement. The ISP accepts your mail from then Internet and stores it for you on its hard disks. You can then retrieve the mail whenever you want by using the common POP3 (Post Office Protocol) protocol or the newer protocol IMAP. Outgoing mail in this scenario is almost exclusively sent via the protocol SMTP (Simple Mail Transfer Protocol) that is generally used to transport mail over the Internet.
In the easiest case, you use your mailer both to retrieve the mail via POP3 or IMAP and to send it back via SMTP. When you do this, you do not even need to set up an MTA, because the mailer handles everything. This is not terribly flexible, but if all you want is to access your mail easily, this might be an option for you. Mailers that support this include Netscape Messenger (see later) and KMail from KDE.
If you want more flexibility (which comes at the price of more configuration and maintenance work), you can install an MTA (like smail, described in the next section). You will need a program that transports the mail from your provider's POP3 or IMAP server. This program fetches your mail when you ask it to and passes the messages on to the MTA running on your system, which then distributed the mail to the recipients' mail folders. One program that does exactly that is fetchmail, which we will cover later in this chapter. Outgoing mail is again sent via SMTP, but with an MTA running on your machine, you can choose not to send the outgoing messages directly to your provider's SMTP server, but rather to your own server, which is provided by the MTA. The MTA then forwards the mail to your provider, which in turn sends it to the recipients. With this setup, you can instruct your MTA to send outgoing mails at certain intervals only, so that you do not always have to make a dial-up connection.
The third scenario is meant for machines that have a permanent connection to the Internet, either because they are in a network that has a gateway with a permanent connection, or because your machine is using a leased line to your Internet provider. In this case, you might want to receive mail messages as soon as they arrive at your provider and not have them stored there. This also requires setting up an MTA. Incoming mails will be directed to your SMTP server (i.e., your MTA). Your provider will have to set things up accordingly for this to work.
Of course, there are many more scenarios how to get your mail, and mixtures between the three mentioned are possible as well. If you are going to set up a mail service for a whole network, you will most certainly want to read the Linux Network Administrator's Guide as well as sendmail.
You have a number of software choices for setting up email on a Linux host. We can't describe all the available email solutions, but we do describe some packages that are often used and quite suitable for their respective tasks. We document what we think is the most popular Linux solution at this time: the Elm mailer (Version 2.4 at the time of this writing), the Netscape Messenger (Version 4.5), the smail (smail3.1.29) mail transport agent, and the fetchmail implementation of the POP3 and IMAP protocols. These are relatively simple to configure but provide all the features most users need. In addition, with these tools, you can cover all the scenarios described earlier.
16.2.1. The smail Mail Transport Agent
There are two major MTAs available on Linux: smail and sendmail. They both support the SMTP and UUCP protocols for handling mail. The sendmail package has been around for a long time. It is generally considered somewhat more difficult to use than smail, but it is thoroughly documented in the book sendmail, by Costales, Allman, and Rickert. The smail package is reportedly easier to configure and manage than sendmail and is perhaps more robust on systems with limited memory. It is very popular on Linux. We've decided to go with the most popular Linux MTA, smail, and describe its essential configuration and use here. However, if you need to configure a mail host that has many connections and handles lots of mail, you really need sendmail. Recently, other mail transport agents like qmail, exim, and zmailer have become popular as well, but smail (for its easy installation) and sendmail (for demanding requirements) should cover about everything you need.
smail can be invoked in many modes by a specific invocation name that establishes its special uses. For example, smail can be invoked as rmail, and it replaces the original rmail in that function. It also can be invoked as a daemon process (smtpd or in.smtpd ) and replaces other mail utilities, such as mailq. smail is compatible with the sendmail MTA and interfaces satisfactorily with it.
Olaf Kirch's Linux Network Administrator's Guide provides information specific to installing smail on Linux hosts. Also, the smail3 package has an excellent guide to installing and maintaining smail, entitled Smail--Installation and Administration Guide by Karr and Noll. Finally, you should also print out the manual pages for smail, which describe in detail all the configuration files and directories that smail uses.
The smail package is bundled with some Linux distributions. On the distributions that bundle smail, most use the Linux installation script to perform basic configuration of smail as well. One problem with this approach is that you need to periodically update your smail installation, and there is no convenient script to do this unless you reinstall Linux at the same time. Another problem is that some major Linux distributions seem to miss some detail or another in configuring the smail utilities, so that you need to go in and add a file link, edit a resource file, or something of the kind.
But take heart: even though patches are applied and features are added, your same old smail configuration files almost always continue to work just fine. You usually only need to update your binaries to stay up to date.
That's the good news. The bad news is that different distributions of smail install the files in different places. If you grab a set of binaries from an FTP site and install it over your obsolete installation, you might find that you have one version of smail installed in /usr/bin and another in /sbin. Because smail functions, as a number of mail utilities do, through the use of file links, this kind of inconsistency can cause real problems with your installation.
If you build a distribution from scratch, though, you may find that it is a generic installation not tailored for Linux. (However, a generic Unix FTP site is likely to have the full set of documentation that seems to be missing from some of the Linux sites we've checked.)
What can you do? Well, if you take a distribution from a particular FTP site, it might help to stick with that site, even if it means you don't get the latest and greatest update at the earliest possible moment. This works particularly well if the site is a binary distribution site--your configuration files will be left untouched. Or you can just jump in and install updated files and then use find or whereis to sort out tangled up links and duplicated files. In any case, you will likely find that even if your Linux installation script installed and configured smail correctly on your system, you don't like all the selected behaviors. If this is the case, often your best bet is to simply edit the smail configuration file for your system.
16.2.1.1. Getting and installing smail
An excellent FTP site that contains an up-to-date Linux binary distribution (at the time of this writing) is ftp://metalab.unc.edu. The smail package can be found in /pub/Linux/system/mail/mta/smail-linuxbin-3.1.29.1.tar.gz. The specific filename will presumably change with each update to the source files, but the path will probably remain the same.
We should perhaps add that nobody seems to be currently working on smail. It works as it is, but you shouldn't hold your breath waiting for enhancements or bug fixes.
You can also get smail as a source package to compile yourself from the same location. In this case, get the file smail-3.1.29.1.tar.gz.
To install the binary Linux distribution:
FTP the file in binary mode.
Move the file to the Linux root directory as /smail.tar.gz.
Run gunzip on the file, which results in a file named smail.tar.
Execute tar -xvf smail.tar on the file in the root directory. The smail.tar unpacks into a directory tree.
The section "Section 7.1, "Archive and Compression Utilities"" in Chapter 7, "Upgrading Software and the Kernel", tells you all you need to know about gunzip and tar.
If you should run across a package called smailcfg when browsing an FTP site, you might think it is a configuration utility for smail. It isn't; it's a configuration utility for sendmail.
16.2.1.2. Configuring a Linux-installed smail package
Some Linux distributions come with smail already packaged, and smail is installed when you run the Linux installation program. Linux systems typically install the various parts of the smail package to the following directories: /bin, /usr/bin, /usr/lib/smail, and /usr/man/man?. The smail configuration may be stored in /var/lib/smail/config.
Many of the variables smail uses are assigned based on information collected from the Linux configuration. If you installed Linux with TCP/IP, for example, smail will be configured to use SMTP with it. There are some smail variables you still need to set, however. These include:
- postmaster
This variable supplies a user ID to serve as postmaster on the local system. The mail administrator on the system is normally the designated postmaster. It is almost a moral obligation of a system on an open network (with links beyond a LAN) to have a designated postmaster. If there is a problem with email on a system, any user (anywhere) should be able to send a message to postmaster@hostname to have it investigated. In the most rudimentary system, the postmaster can be the root user, but it is preferable for the postmaster to be assigned to an ordinary user ID. (Some systems set up a "phony" account for the postmaster, so the duties can be rotated.)
- smart_path
This is an important variable to set, especially when you are a fledgling mail host. smart_path should be the name of the "smart host" to which your system routes all mail that it doesn't already know how to deliver. In the simplest setup, anything that isn't local mail is routed to the smart_path host you specify. If you have a connection to an Internet host, it should be your smart host.
- visible_name
This variable specifies a name smail uses as the return address for all mail sent by your host. For example, if your full hostname is deus.x-machina.org, you might prefer the visible name to be x-machina.org. A user on the host deus would have her From address set to user@x-machina.org instead of user@deus.x-machina.org. This is especially useful if there are several hosts that users on the local network have accounts on, or if names of specific host systems in the domain change.
- smart_user
The smart_user isn't necessarily a user. You can leave smart_user with no value assigned, in which case any mail that cannot be delivered will be bounced (returned to sender). If you assign a user ID to smart_user, improperly addressed mail sent to your system will be forwarded to the smart_user. Often, smart_user is the same user as postmaster, but for a small system, it is probably best to bounce the mail. smart_user is intended to allow manual rerouting of mail when a user moves, loses an account, and so on. It has little use on a system with few users.
There are additional variables that you can set. The online manual page describes them all in its discussion of the config file. Your distribution might not contain the documents in printable form, but you should print your own if you need to, by entering one of the following commands. (The first generates plain text for every printer; the second assumes you have configured ghostscript to drive your specific printer by default):
$ man 5 smail | col -b | lpr
$ gtroff -man /usr/man/man5/smail.5 | ghostscript | lpr
There has been a configuration script floating around some distributions (look for /usr/lib/smail/tools.linux/config ), but on the other hand, all you really need is smail(5) and your trusty ASCII editor to fix up your smail configuration files. (Though we would also use the Linux Network Administrator's Guide and the Smail--Installation and Administration Guide.)
16.2.1.3. Configuring smail
Fortunately, smail default values for the Linux smail distribution are decent, and the mkconfig script largely automates the remaining smail installation issues. With any luck you can accept all default values and just run smail "out of the box."
Look for a README text file in the current distribution. You should begin by reading this file if it exists. On a typical Linux distribution of smail, the README file is found in /usr/lib/smail/linux.tools/README. The README file describes the release and provides any special notes and general instructions for installing and configuring the current version of the software. If your distribution does not have a README file for smail, you will have to make do with the manual pages, which should give you all the information you need.
16.2.1.4. smail EDITME file
The first step in configuring smail from a Linux distribution is to go to the /usr/lib/smail/linux.tools directory (or wherever your distribution stores the smail configuration files) and copy the EDITME-dist file to EDITME. There are some distributions out there in netland where even the EDITME file is missing. These distributions typically contain only the binary files needed, but no configuration files whatsoever. If this is case, look again at the place where you downloaded your smail package; sometimes you can find another package that contains configuration files. If all else fails, download the source package and take the EDITME-dist file you find there.
Once you are the lucky owner of an EDITME file, edit it to alter any variables you need to. Some of the values you can assign in EDITME are better handled in a later step, when you run /usr/lib/smail/linux.tools/mkconfig to complete the smail installation. Variable assignments in the EDITME file are in the form of variable=value. The following are variables to which you might wish to give special attention to in the EDITME file:
- OS_TYPE=linux
The OS_TYPE should already have a value of linux if you are using a standard Linux distribution of smail. Check this just in case.
- HAVE=HDB_UUCP
If you've installed some other UUCP package than the usual Taylor UUCP, you should study the comments about the HAVE variable. For Taylor UUCP, you don't want to set a value for HAVE.
- UUCP_ZONE
If you are on a UUCP network, and you are not going to be on the Internet, look at the comments on the UUCP_ZONE variable. You may need to set UUCP_ZONE=true to achieve the address-handling behavior you want for certain UUCP networks.
- DOMAINS
You may need to set DOMAINS to a domain name if you did not perform a standard Linux installation and configuration. If you did, however, you will probably want to omit setting DOMAINS in the EDITME file, and make any changes you need when you run mkconfig.
- SMAIL_BIN_DIR
Linux normally sets /usr/bin as the SMAIL_BIN_DIR value. This variable establishes the path to the primary mailer on the system. If you've put your primary mailer somewhere else, you'll have to change this variable's value.
- LIB_DIR
Linux normally sets /usr/lib/smail as the LIB_DIR path. If you put smail files somewhere other than /usr/lib/smail, you need either to change LIB_DIR to reflect this or to link the directory you use to /usr/lib/smail.
- NEWALIASES
The mkaliases command functions as the newaliases utility if you set this variable; otherwise you must invoke the utility as mkaliases. The default behavior is the latter. If you want to enable invocation as newaliases, the argument to NEWALIASES should be set to the path of the newaliases command.
- UUCP_SYSTEM_FILE
If you are using a UUCP package other than Taylor UUCP, you may need to set this variable to something different from its current value. Currently, it is set as UUCP_SYSTEM_FILE=/usr/lib/UUCP/Systems, which is typical for a BNU or HoneyDanBer UUCP distribution.
- SPOOL_DIRS
By default, SPOOL_DIRS is set to /var/spool/smail, but you may want more than one spool directory available if you think you will need more inodes to handle the volume of pending mail or if you change the directory specified. To specify more than one spooling directory, enter each spooling directory's path, separated by a colon. If you have set aside a fast disk drive for spooling operations, you may need to change the path in order to place the primary spooling directory in that mounted path. For example, if your fast disk drive is mounted as /var/spool, you might have something like:
SPOOL_DIRS=/var/spool/smail:/usr/spool/smail
- NEWS_SPOOL_DIR
This is normally set to /var/spool/news; considerations are similar to SPOOL_DIRS variable, except, of course, that Netnews volume is getting huge, so you really might need more spooling directories.
16.2.1.5. The mkconfig file
After you are satisfied with the state of your EDITME file (and in fact, you may have determined that you need not set any special values in an EDITME file), you are ready to run /usr/lib/smail/tools.linux/mkconfig. This utility creates a supplementary file that overrides or supplements other smail variables; the file is /usr/lib/smail/tools.linux/config.state. We'll provide responses to a few of these questions and show you the resulting output file. These are the considerations you should be ready to resolve when mkconfig is run:
- Extra hostnames
mkconfig already knows a hostname if you installed Linux using one of the standard distributions or if you gave a value in the EDITME file. Now you are asked if you want your host to be known by multiple hostnames. This is useful if the host is on more than one network, for example. For our configuration run, the host value was already set to pond.walden.com (composed from the hostname value of pond and from the domain name value of walden.com). We answered the query by entering an additional hostname of pond.conserve.org, because we'd like to be known to some correspondents on the outside by that domain name.
- System's visible name
You can set the visible name to something other than the actual hostname. The purpose of this is to provide a single visible mailing address for mail coming from a cluster of machines. You should specify the machine that all mail coming from outside the local network will be sent to. If the visible name value isn't set, the primary host and domain names form the name used.
- Smart host
This is a very important consideration; you should have a smart host, which is a host to which you route all mail you can't deliver. If you don't answer this question when you run mkconfig, you should edit the /usr/lib/smail/config file to provide this data when you are ready to designate a smart host. We responded to this query with Netscape Messenger window ruby.ora.com, because we are using it as our connection to the outside world.
- Smart transport
This specifies the preferred mail-transport medium; the default is TCP.
- Smart user
This is for email wizards who can figure out forwarding addresses for misrouted mail. You should probably leave it unset, so mail that is routed to an unknown user on the local host is bounced back to the sender.
- Postmaster
Someone should take responsibility for email. If you are performing mkconfig, you are probably "it" and should provide your own user ID in response. If the postmaster isn't designated, all mail sent to postmaster goes to the root user. We supplied lark as the user ID for postmaster.
- Primary mailer
Basically, mkconfig checks to see if /bin/mail exists, and if it does (as it does on most Linux systems), it regretfully accepts this as the primary mailer. You can edit your customization file to use another mailer, like Elm.
The file that results from the interactive mkconfig procedure looks like this:
more_hostnames=pond.walden.com:pond.conserve.org
visible_name=
smart_path=ruby.ora.com
smart_user=
postmaster=lark
16.2.1.6. Final smail installation notes
When your smail installation is complete, make sure you remove or rename any existing rmail, sendmail, or other commands that smail is intended to replace. (The smail installation script probably already has created these links, but you need to verify the situation; if you had existing utilities before installing smail, they may not have been replaced with links to smail.) Create the smail links that are needed to carry out all of its many roles, so programs that depend on these utilities can find them:
# ln /usr/bin/smail /usr/bin/mailq
# ln /usr/bin/smail /usr/bin/rmail
# ln /usr/bin/smail /usr/bin/rsmtp

# ln /usr/bin/smail /usr/bin/runq
# ln /usr/bin/smail /usr/sbin/sendmail
# ln /usr/bin/smail /usr/bin/smtpd
# ln /usr/bin/smail /usr/bin/mkaliases
When you have established these links, the utilities that rely on them can be configured for full network operation. For good instructions on that process, refer to (of course) the Linux Network Administrator's Guide.
If smail is configured correctly on your system, there is a line in the /etc/services file that says:
There is also a line in the /etc/services file that says:smtp 25/tcp mail
SMTP stream tcp nowait root /usr/sbin/tcpd /usr/bin/rSMTP -bs
16.2.1.7. smail runtime configuration files
The smail binary is preconfigured and needs only minor tuning. Usually the changes can be made through the EDITME script, the linux.tools/config script, or directly to the /var/lib/smail/config (/etc/smail/config on Debian 1.3) file. Normally, you need no other configuration, but there are some other files smail uses to alter configuration at runtime. If you should ever need any of these, build them according to "Setting Up Runtime Configuration Files" in Smail--Installation and Administration Guide. Also use smail(5) to provide information about the meanings of the variables you set.
A second host configuration file, /private/usr/lib/smail/config, redefines mailer behavior on a local workstation. This is intended for use on a LAN, in cases where your local system might need to behave differently from the central smail configuration file that controls the site as a whole.
The directors, routers, and transports files redefine attributes of the smail director, router, or transport MTA functions. Again, these normally apply to LAN and multipathed network connections.
A methods file is used in conjunction with runtime configuration files to assign different transport protocols to use with different hosts. This isn't necessary for mixed UUCP and TCP/IP use, but it can be employed when you want to do something unusual, such as using an SMTP protocol over UUCP or a UUCP batch protocol over TCP/IP. The technique is useful, but is not for the novice mail administrator.
A qualify file tells a host the domain to route mail to if a bare hostname is given as a mail address. This is an easily abused feature and should normally be avoided. However, it can define UUCP mail routing to a UUCP system that keeps full and accurate UUCP maps (with the cooperation of that host's mail administrator).
A retry file modifies retry and timeout behavior of smail. This file sets minimum delivery intervals, maximum durations, and the number of attempts separately for each target domain that the mail host connects to. Its use is beyond the scope of this book, but you may need to use this file at some point.
16.2.2. Getting the Mail to Your Computer with Fetchmail
If your provider stores your mail for you until you fetch it, and you do not want to use your mailer to download the mail, you need a program that retrieves the mail from your provider's computer. There are a lot of programs for doing this; we will discuss fetchmail here briefly, because it is both robust and flexible and can handle both POP3 and IMAP.
You can get fetchmail from your friendly Linux archive; chances are that your distribution carries it, too. In case you download a source distribution of fetchmail, unpack, build, and install it according to the installation instructions.
You can control fetchmail 's behavior both via command-line options or by a configuration file. It is a good idea to first try to fetch your mail by passing the necessary information on the command line, and when this works, to write the configuration file.
As an example, let's assume that my provider is running the POP3 protocol, that my username there is joeuser and that my password is secret. The hostname of the machine where the POP3 server is running is mail.isp.com. I can then retrieve my mail with the following command:
fetchmail --protocol POP3 --username joeuser mail.isp.com
fetchmail then asks me for my password, and after I specify it correctly, retrieves the mail waiting for me and passes it on to my MTA for further delivery. This assumes that a SMTP server is running on port 25 of my machine, but this should be the case if I have set up my MTA correctly.
While you are experimenting with fetchmail, it might be a good idea to also specify the option --keep. This prevents fetchmail from deleting the messages from your POP3 account. Normally, all messages are deleted from your provider's hard disk once they are safely stored on your own machine. This is a good thing, because most providers limit the amount of mail you can store on their machines before retrieving them, and if you don't delete the messages after fetching them, you might reach this limit quite soon. On the other hand, while testing, it is a good idea to be on the safe side and use --keep so as not to lose any mail.
With the options just shown to fetchmail, you should already be able to get your mail in most cases. For example, if your provider uses the newer IMAP protocol, simply specify IMAP in the command line instead of POP3. If your provider has some unusual setup, you might need one of the other options that the fetchmail manual page tells you about.
Once you are satisfied with the download process, you can write a fetchmail configuration file in order not to have to enter all the options each time you use the command. This configuration file is called .fetchmailrc and should reside in your home directory. Once you are done editing it, make sure it has the permission value 0600 so that nobody except yourself can read it, because this file might contain your password:
chmod 0600 ~/.fetchmailrc
The full syntax of the configuration file is detailed in the fetchmail man page, but in general you need only very simple lines that start with poll. To specify the same data as on the command line in the previous example, but this time include the password, put the following line into your configuration file:
poll mail.isp.com protocol pop3 username joeuser password secret
Now you can run fetchmail without any parameters. Since fetchmail already knows about your password from the configuration file, it will not prompt you for it this time. If you want to play safe while testing, add the word keep to the poll line.
Using fetchmail with a configuration file has one additional advantage: You can fetch mail from as many mailboxes as you want. Just add more poll lines to your .fetchmailrc, and fetchmail happily retrieves your mail from one server after the other.
When and how you run fetchmail depends on what kind of connection to the Internet you have. If you have a permanent connection or a cheap, flat rate, you might want to have fetchmail invoked by cron at a suitable interval (like once an hour). However, if your Internet connection is nonpermanent (dial-up) and costly, you might want to choose to run fetchmail by hand whenever you actually want to fetch and read your mail so as to minimize your Internet connection time. Finally, if you are using PPP for dialing in to your Internet service provider, you might want to invoke fetchmail from the ip-up script, which is invoked as soon as an Internet connection is made. With this setup, when you browse a web page and your computer dials up your provider, your mail is fetched automatically.
16.2.3. Other Email Administrative Issues
In this section we describe tasks, services, and some additional utilities involved in managing your electronic mail system.
You should normally use only one Internet host to get all your mail. It is possible to use a more complex arrangement, but this is frowned upon because of the possibility of setting up loops--virtual Sargasso Seas of lost network information. Loops can route mail in circles, passing over and over through the same machines until they "time out" by exceeding the limit on the number of machines they can pass through.
16.2.3.1. Registering an address
If you want to get your mail directly from the Internet, you need to register an Internet domain name for your system. You may have the domain name of your Internet connecting host, but you could have some other domain name entirely. It doesn't matter; the Domain Name System (DNS) database routes mail for your domain to your Internet host connection. We call this host your gateway connection. (If your system routes all mail back only to this gateway connection, your system is called a leaf system.)
In turn, the gateway host that connects you to the Internet normally holds your MX (mail exchanger) record. A host that holds an MX record for a system acts as the mail forwarder to that system. It must know the exact paths to deliver mail to all the machines in your domain, if you use more than one host as a mail host. The gateway host connects directly to your system, generally either by Ethernet or by UUCP connection over a switched telephone line.
Your own mail host should be configured so that all email not sent to the local host, or not otherwise sent directly to a host you connect to, is routed to your Internet mail gateway--your smart host.
The Linux Network Administrator's Guide tells how to register domain names, fill out MX records, and configure both sides of the gateway-leaf mail connection. Two other books that can help you manage your Internet connection are TCP/IP Network Administration and DNS and BIND.
It should be noted that registering a domain does not automatically imply that you'll be doing all the mail handling yourself. Many Internet service providers offer the service of registering a domain of your choice and then do all the mail handling for you, that is, you still get the mail in your mailbox.
16.2.3.2. Mail system maintenance
You should set up a cron task to occasionally check the mail queue (usually /var/spool/smail ) and force an attempt to deliver mail that wasn't previously delivered for some reason. Mail can be queued because a host is temporarily unreachable, or a filesystem is full, or for myriad other little reasons. cron is discussed in the section "Section 8.2, "Scheduling Jobs Using cron"" in Chapter 8, "Other Administrative Tasks".
The mail administrator also should occasionally check the mail queue and make sure there are no messages "stuck" there:
This command generates a report on any mail in the queue, along with log information that informs you if there is a persistent mail-delivery problem.$ mailq -v
16.2.4. Installing Elm
Now you can get mail to your system, and it is sitting in a spool directory waiting to be read. Your last job is to install a mailer that provides a convenient interface for reading, composing, and filing mail messages.
The Elm mailer was created by Dave Taylor, of the Elm Development Group, and continues to be developed through the Usenet Community Trust. Copyrights on Elm are held by Dave Taylor and the Usenet Community Trust.
Elm isn't the most powerful mailer available, but it is robust and suits the needs of most users. It has a simple user interface with menus and built-in help. Most other screen-oriented mailers available on Linux support much the same basic mailer features, using a similar display interface. Once you know Elm, you can easily switch to another mailer if you find one more to your taste. Other popular text-mode mailers are pine and mutt; the supporters of the different mailers can start arguments that are no less violent than those between Emacs supporters and vi lovers. In addition, there are now also a great number of X-based GUI mailers that are often easier to set up and use than the traditional text-mode mailers like Elm. We will cover one of them, Netscape Messenger, later in this chapter.
In this discussion, we mention different directories and files that Elm uses. These are defaults; the mail administrator can set up some different locations, and each Elm user can change the setup of files and directories.
16.2.4.1. Preparing for installation
Before you install Elm, you should already have set up communications links to any UUCP and TCP/IP hosts with which you exchange mail directly. If these connections change, you may have to reinstall Elm or edit some files. During installation, you need to supply the Elm configuration program with essential data about the host domain name and system name, about the routing of mail, and so on. Specific information you need includes:
- Domain name
If you are on the Internet, you need to register a domain name, or (more commonly) become part of an established domain--probably the domain of the host that will provide you with mail service and hold your MX record.
- Hostname
- Absolute name
This is the complete hostname, including the domain.
- Locking methods
Elm uses mail spool files, and sometimes it needs to lock files. Elm supports UUCP "dotlock," locking, BSD flock locking, and System V fcntl locking. Linux possesses both fcntl and flock functions. If you are also using UUCP on your system, you need dotlock and you should also enable fcntl locking. Elm will ask you interactively when you run Configure what forms of locking to support.
- Content-length control
MTAs can now transmit binary messages embedded in email. However, to do so, they cannot tolerate changes in message content by mailers. A Content-Length: header is used to specify the message length, and you should allow this header to be used. However, honoring Content-Length: headers requires that the mailer not insert escapes or buffering characters in front of instances of the text string From occurring at the start of a line.
- Dot-message termination
By default, Elm turns off dot-termination of mail (where a line containing only a . causes the mailer to end the message). You don't want to enable dot termination if you enable content-length control, which you probably want to allow in the brave new multimedia world.
Before using Configure to install Elm, read the Elm Configuration Guide to make sure you have the answers you need to complete the process successfully. There are a number of lesser issues to decide in addition to the issues just mentioned. Some of them require knowledge of your Linux file tree, so you should investigate these first to avoid having to abort or reinstall later. You may also find it useful to refer to the chapter in the Linux Network Administrator's Guide that gives an introduction to electronic mail, for a broader view of electronic mail issues, including mail addressing and routing and use of UUCP as a mail-routing agent.
If you reinstall Elm, you may need to replace system alias files and have all the users replace their alias files. A newalias command is provided for the purpose and should be run by each Elm user.
16.2.4.2. Installation Procedure
First, get the latest released sources for Elm and put the source files in a build directory, such as /usr/local/bin/elm2.4. Elm may have been included with your Linux distribution and could have been built when installing or reinstalling the Linux package. If this is the case, you should test the installation to make sure it is complete and up to date.
At least one major distribution of Linux that includes the Elm package includes only the executable and omits example configuration files and installation instructions. You can get the rest of the package (including documentation) through FTP sites that have the full package. These are not necessarily Linux source sites.
The Elm package contains a Configure shell script you should run to install Elm. A file named Instruct contains fundamental directions for installing the current version of Elm on your system, but it probably doesn't tell you the information you should have on hand when you run Configure. We'll try to tell you the needed key information, but if we miss something, reinstalling Elm is as easy as running Configure again. From your Elm build directory, as the root user, execute Configure:
# sh Configure
Configure installs localized configuration files after asking you some questions.
Next, you need to build the Elm document set:
# make documentation
Then run a full make process, building a log file and showing messages in case of make errors:
# make all > MAKELOG 2>&1 &
# tail -f MAKELOG
This assumes you are using the bash shell. If you use csh or tcsh, enter the make command this way:
% make all >& MAKELOG &
This process takes a while. On successful completion, you should find most of these commands in /usr/bin: answer, checkalias, elm, fastmail, filter, frm, listalias, messages, newalias, newmail, printmail, and readmsg. There should also be equivalent online reference pages in /usr/man/man1 and /usr/man/man8.
Next, install your software on the system:
# make install
 As of the time of this writing (Elm Version 2.4), there is a
known security risk with arepdaemon and
autoreply. These should be removed from your
system. The manual pages for these utilities should also be removed
before you update your whatis database by running
makewhatis. If you are using Elm 2.4 PL 24 or
later, these programs have already been removed from the ELM distribution.
As of the time of this writing (Elm Version 2.4), there is a
known security risk with arepdaemon and
autoreply. These should be removed from your
system. The manual pages for these utilities should also be removed
before you update your whatis database by running
makewhatis. If you are using Elm 2.4 PL 24 or
later, these programs have already been removed from the ELM distribution.
Before running Elm, read and dispose of any queued mail for the root user. You will be testing the Elm configuration as root, and you don't want to lose any pending messages.
Now test your installation by running Elm. First, check that Elm correctly detects that you have no existing mail (still as the root user):
# elm -z
Elm should display the message no mail and exit. (If there is mail for root, Elm will come up in interactive mode and list the messages at the Index screen.)
Next, check for correct mailbox handling. (Elm creates a test mail folder when it installs):
# elm -f test/test.mail
Exit without marking any messages for deletion. Elm should prompt you for correct handling of the messages.
Assume a nonprivileged user identity and run elm -z. Elm should not load unless there is pending mail. If there is pending mail and you have not previously had Elm installed (don't have a $HOME/.elm directory), Elm should prompt you to create the directory. You need to edit the SYSTEM_ALIASES file to set up at least one alias, defining the identity of the system postmaster so that mail sent to the postmaster at your site is handled correctly. Then, the newaliases command must be run to set up the aliases table. The procedure is described in the Elm Configuration Guide for your version of Elm.
Once you are satisfied that Elm is configured and installed properly, you can propagate the installation of Elm on your whole LAN, if you maintain mail services on more than one host. The directions for the make process are included in the Instruct file of the Elm distribution.
16.2.4.3. Elm documentation
There is a set of documents for Elm that may be useful for tuning Elm or building scripts for advanced mail management. The Elm document set on your system most likely matches the version of Elm you are running, which is a critical advantage. These are the guides available in the Elm document set:
- Elm User's Guide
Provides some history of Elm, fundamental usage, and credits for contributors to the continued development of Elm. This guide provides basic usage information but is thin on concepts, some of which are described in the Elm Reference Guide or in other guides. Unless your version of Elm is later than Version 2.4, you probably won't need this except to satisfy your curiosity.
- Elm Reference Guide
Discusses Elm and the options within the Elm environment, Elm advanced features and debugging, elmrc options file customization, and more. This guide provides some of the conceptual information that the Elm User's Guide omits as well as useful practical and conceptual information on various Elm features and utilities. This volume can be handy when configuring Elm, and it contains some information of interest only to mail administrators.
- Elm Alias User's Guide
Tells how to set up and maintain mail aliases in Elm and the related files.
- Elm Filter System User's Guide
Tells how to use Elm mail-filter utilities to automate some mail handling.
- Elm Configuration Guide
Discusses all the available options of the current version of Elm to help you fine-tune your configuration. You can get into trouble if you rely only on this volume, so if you decide to tinker with some of the more arcane options, we recommend you change them one by one and test the results rather than make wholesale changes. This volume is of practical interest to mail administrators, though, who should use it in conjunction with a printout of a complete elmrc file and the sysdefs.h file on the system.
- Elm Forms Mode Guide
Describes the use of AT&T Mail Forms, which Elm supports. This feature isn't useful to most Elm mail users, but if you need the feature, you need this guide as well.
- Elm reference pages
Elm has online reference pages you can access using the man command for each utility that you can invoke from the command line and a reference page that describes files that Elm creates and uses in mail management. These are always useful, and you should use them generously at any time. They describe the command-line options for each command and provide technical detail that may not be available anywhere else. Some sites may keep these files in a printable format as well--in PostScript, text, or another format--so you can have them at hand for personal reference.
Elm also contains internal help, which is stored in a set of files you can print for convenient hardcopy reference. These files are:
- elm-help.0
Help for Elm Actions (internal commands) available from the Index screen
- elm-help.1
Help for Elm Options (user customization) menu
- elm-help.2
Help for the Elm Alias menu
- elm-help.3
Help for Elm Actions available from the message display screen
16.2.5. Using Netscape Messenger
Netscape Navigator, the web browser that you learned about at the beginning of this chapter, is accompanied by a suite of other programs. These include the mailer, Netscape Messenger. If you have downloaded (or installed from your distribution media) the full Netscape Communicator package, you already have Netscape Messenger. If not, get Netscape Communicator, because Messenger is currently not available standalone.
Many people criticize Netscape Messenger for being slow and for missing some features. But on the other hand, Messenger is easy to set up and has some nice features like hierarchical folders and tight integration with the web browser.
Once you have installed Netscape Communicator, you can run the web browser Netscape Navigator as usual and then open up the Messenger window by selecting Messenger from the Communicator menu or by pressing the key combination Alt-2.
The Messenger window (see Figure 16-13) is divided by default into three parts. On the left, you see the tree of folders (at first startup, you will have only the default folders, of course), the upper part of the right side shows a listing of mails in the currently selected folder, and the lower part of the right side shows the currently selected mail. You can change how the space is distributed between these parts by dragging on the knob on the separator line between them.
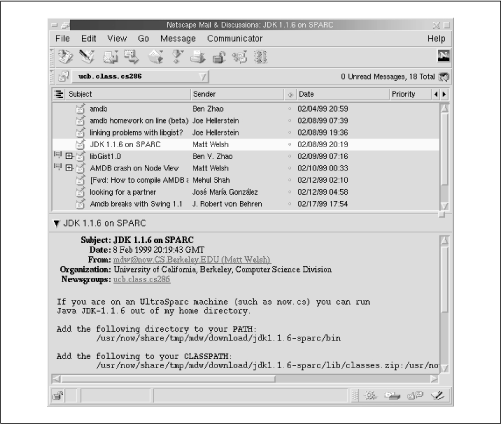
Figure 16-13. Netscape Messenger window
Before you can first use Messenger, you have to set up some things first. Select Edit from the Preferences menu and then open the configuration group Mail & Newsgroups by clicking on the little arrow next to it. You have to fill out at least the Identity and Mail Servers forms. First click on Identity and enter your name and email address as indicated in the dialog box.
Next, click on Mail Servers. The upper half of the dialog box shows a list of mail servers that Messenger should retrieve mail from. Unfortunately, even though there is a whole list provided here, you can have only one mail server unless you use the IMAP protocol.
To configure an Incoming Mail Server, click on the Add... button and fill out the form that appears. Your system administrator or your Internet provider will be able to give you all the data you need. Note that you can choose between three server types. For POP3 and IMAP, you will have to specify your username and password as they appear on your provider's server in addition to protocol-specific parameters. If you use one of those two server types, you do not need an MTA on your machine; Messenger automatically retrieves the mail and sorts the messages into your mail folders without any other programs intervening.
The option movemail, on the other hand, is used when you have set up other software like the MTA smail and the mail-fetching program fetchmail, both described earlier in this chapter. In this case, those programs will retrieve your mail and put them into your mail folder somewhere on your system, often /var/spool/mail/username. In this case, tell Messenger where movemail should pick up your mail from.
The next thing to set up is the outgoing mail server. If you have set up your own SMTP server because you have installed an MTA, enter either localhost (if the SMTP is running on the same machine as Messenger) or the hostname of the machine the SMTP server is running on. On the other hand, if you want to send outgoing mail directly to your provider, enter the hostname of your provider's SMTP server here. Depending on your provider, you might also need to specify your account name here again.
Once you are done with the configuration, you can tell Messenger to get your mail from wherever you specified and sort it into your folders. This is done by either clicking the Get Msg toolbar button or selecting File/Get New Messages from the File menu. If you get your mail from a POP3 or IMAP server, Messenger will first ask you for your password and then fetch your mail. All messages will be put into the Inbox folder where you can read them, store them into other folders, or simply delete them. How messages are dealt with is quite intuitive. You will be able to guess most of the functionality from the user interface. But when you are in doubt, you can always use the Help menu which, when you select an entry, opens a browser window (or reuses an already existing one) and shows the documentation on Netscape's web server.
To write a mail message, press Alt-M, click on the New Msg toolbar button, or select Message/New Message from the Message menu. Messenger opens a form where you can enter the recipients, the subject and, of course, the text of your mail.
Once you are done editing your mail you can press Alt-Enter, click on the Send toolbar button, or select Send Now from the File menu of the composition window. Messenger then directly contacts the SMTP server that you have configured and tries to send your mail. Of course, if you are using your provider's SMTP server, this requires that you are connected to your provider at that time or that you have configured your computer or gateway to dial out on demand.
If you have configured Messenger to use your provider's SMTP server and you have only a dial-up connection to the Internet, you might want to use another nifty feature of Messenger: if you send your mail by pressing Alt-Shift-Enter or selecting Send Later from the composition window's File menu, the message is not directly sent out, but instead stored in the Unsent Messages folder. You can collect your messages there until you have opened an Internet collection and then send them all at once by choosing Send Unsent Messages from the File menu. This is especially useful if dialing up to the Internet is costly where you live, because you can save yourself a lot of connection time.
We have only scratched the surface of what Messenger can do, and you might want to experiment further with it. A fairly basic thing to try out is to create new folders by selecting New Subfolder... from the File menu and then have Messenger sort your incoming messages automatically into the folders by subject, sender, or a number of other criteria. Sorting is accomplished by a feature called filters, which you can configure by selecting Message Filters... from the Edit menu.
 |
 |
 |
| 16. The World Wide Web and Electronic Mail |
 |
Appendix A: Sources of Linux Information |

Copyright © 2001 O'Reilly & Associates. All rights reserved.